
P.S. Did you find this post helpful or encouraging? If so, send it on ahead! Let others know with the share buttons below. I’d love to hear your comments. Thank you so much!

His name was Verlyn. He used to come by my house and he’d have his station wagon full of bread, bakery items and other things that he gave to people in the neighborhood as a ministry.
We developed a nice friendship along the way. His wife was ailing at the time and then sadly passed away. I did this portrait for him last year to help encourage him in his time of loss. He is still going strong, even in his 80’s and after everything, he’s taking care of a disabled man!

Here is the reference photo. I took the liberty to lighten up the background and change it to a more neutral color. Also, I brought the two of them a bit closer together, so I could give the portrait an aesthetically pleasing vertical orientation.
And now for the step-by-step process…
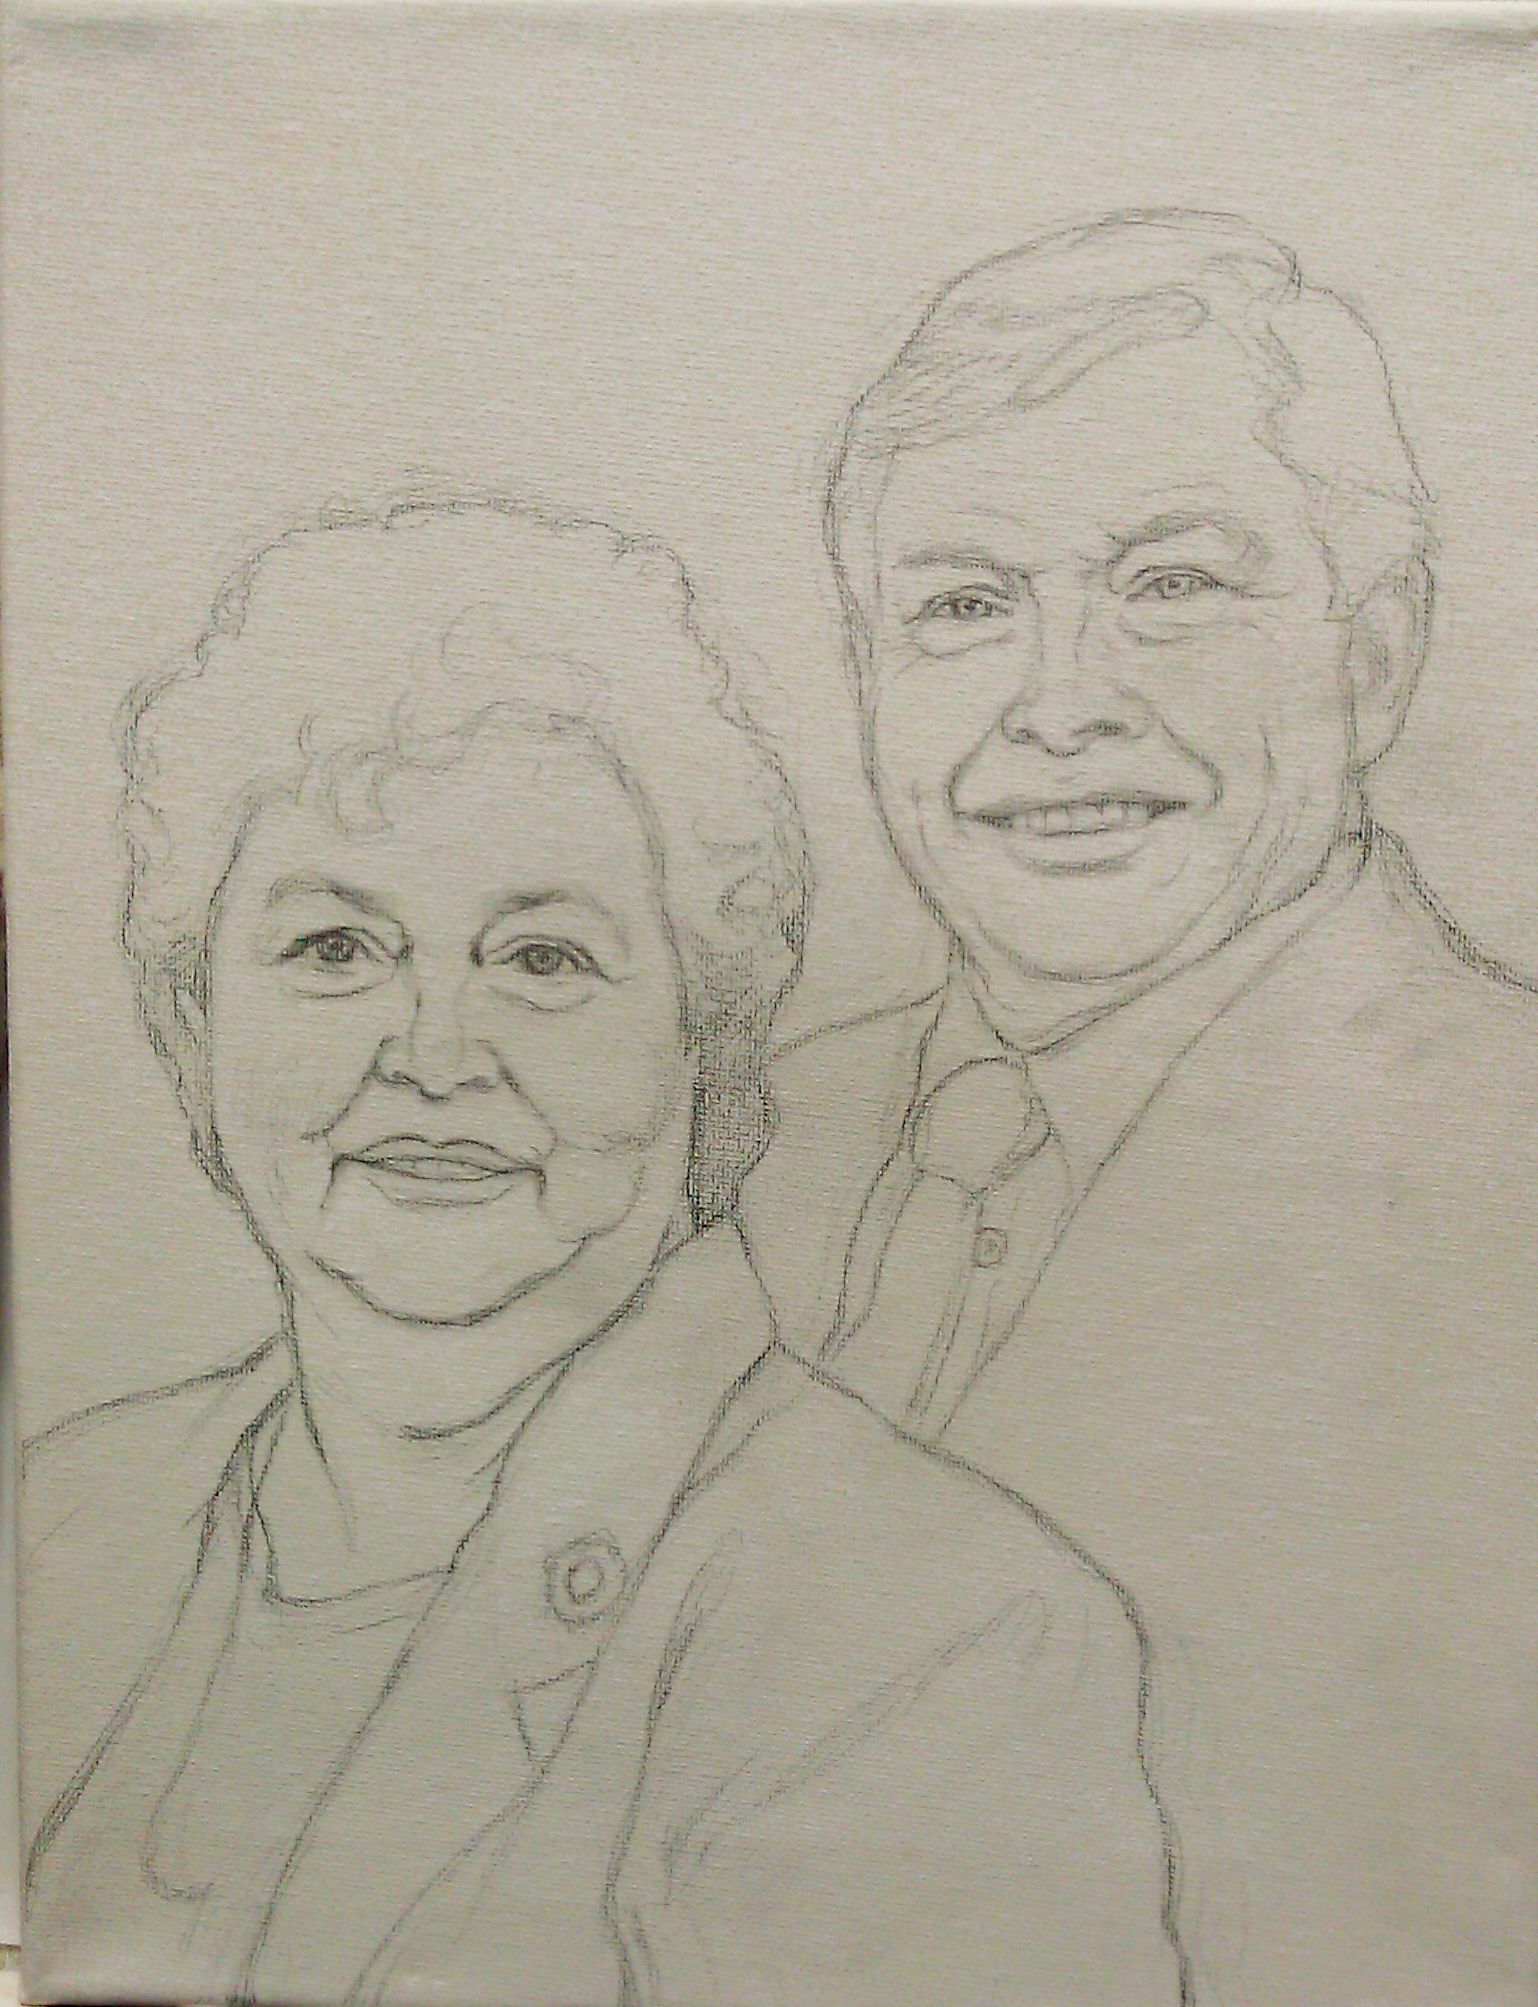
This was done freehand. In this stage, I try to get it as accurate as possible, so I have a good foundation to build my painting upon. But there are inevitably a few things that may be off, that have to be addressed in the painting stage. And that’s OK, because with paint it is easy to make corrections. Usually, I sketch in colored pencil, but I think, looking back, I might have run out of them and so used a graphite pencil, even though it is harder to work with.

In this stage, I start by adding some light layers of color: ultramarine blue mixed with raw umber dark, and a alizarine crimson. I like to start my paintings with just one or two different colors and then build from that. So, even though he has pink hair for now, I’m not going to worry about it! The goal is to quickly separate cool hues from warm, and get the values blocked in quickly to build up depth.

Meanwhile, I keep darkening the background with a mixture of raw umber dark and ultramarine blue to make grey. All of these layers, by the way, are thinned down with matte medium and applied with the glazing technique to give the painting richness and depth.
Would you like to learn how to do this technique? Get my free video lessons below…
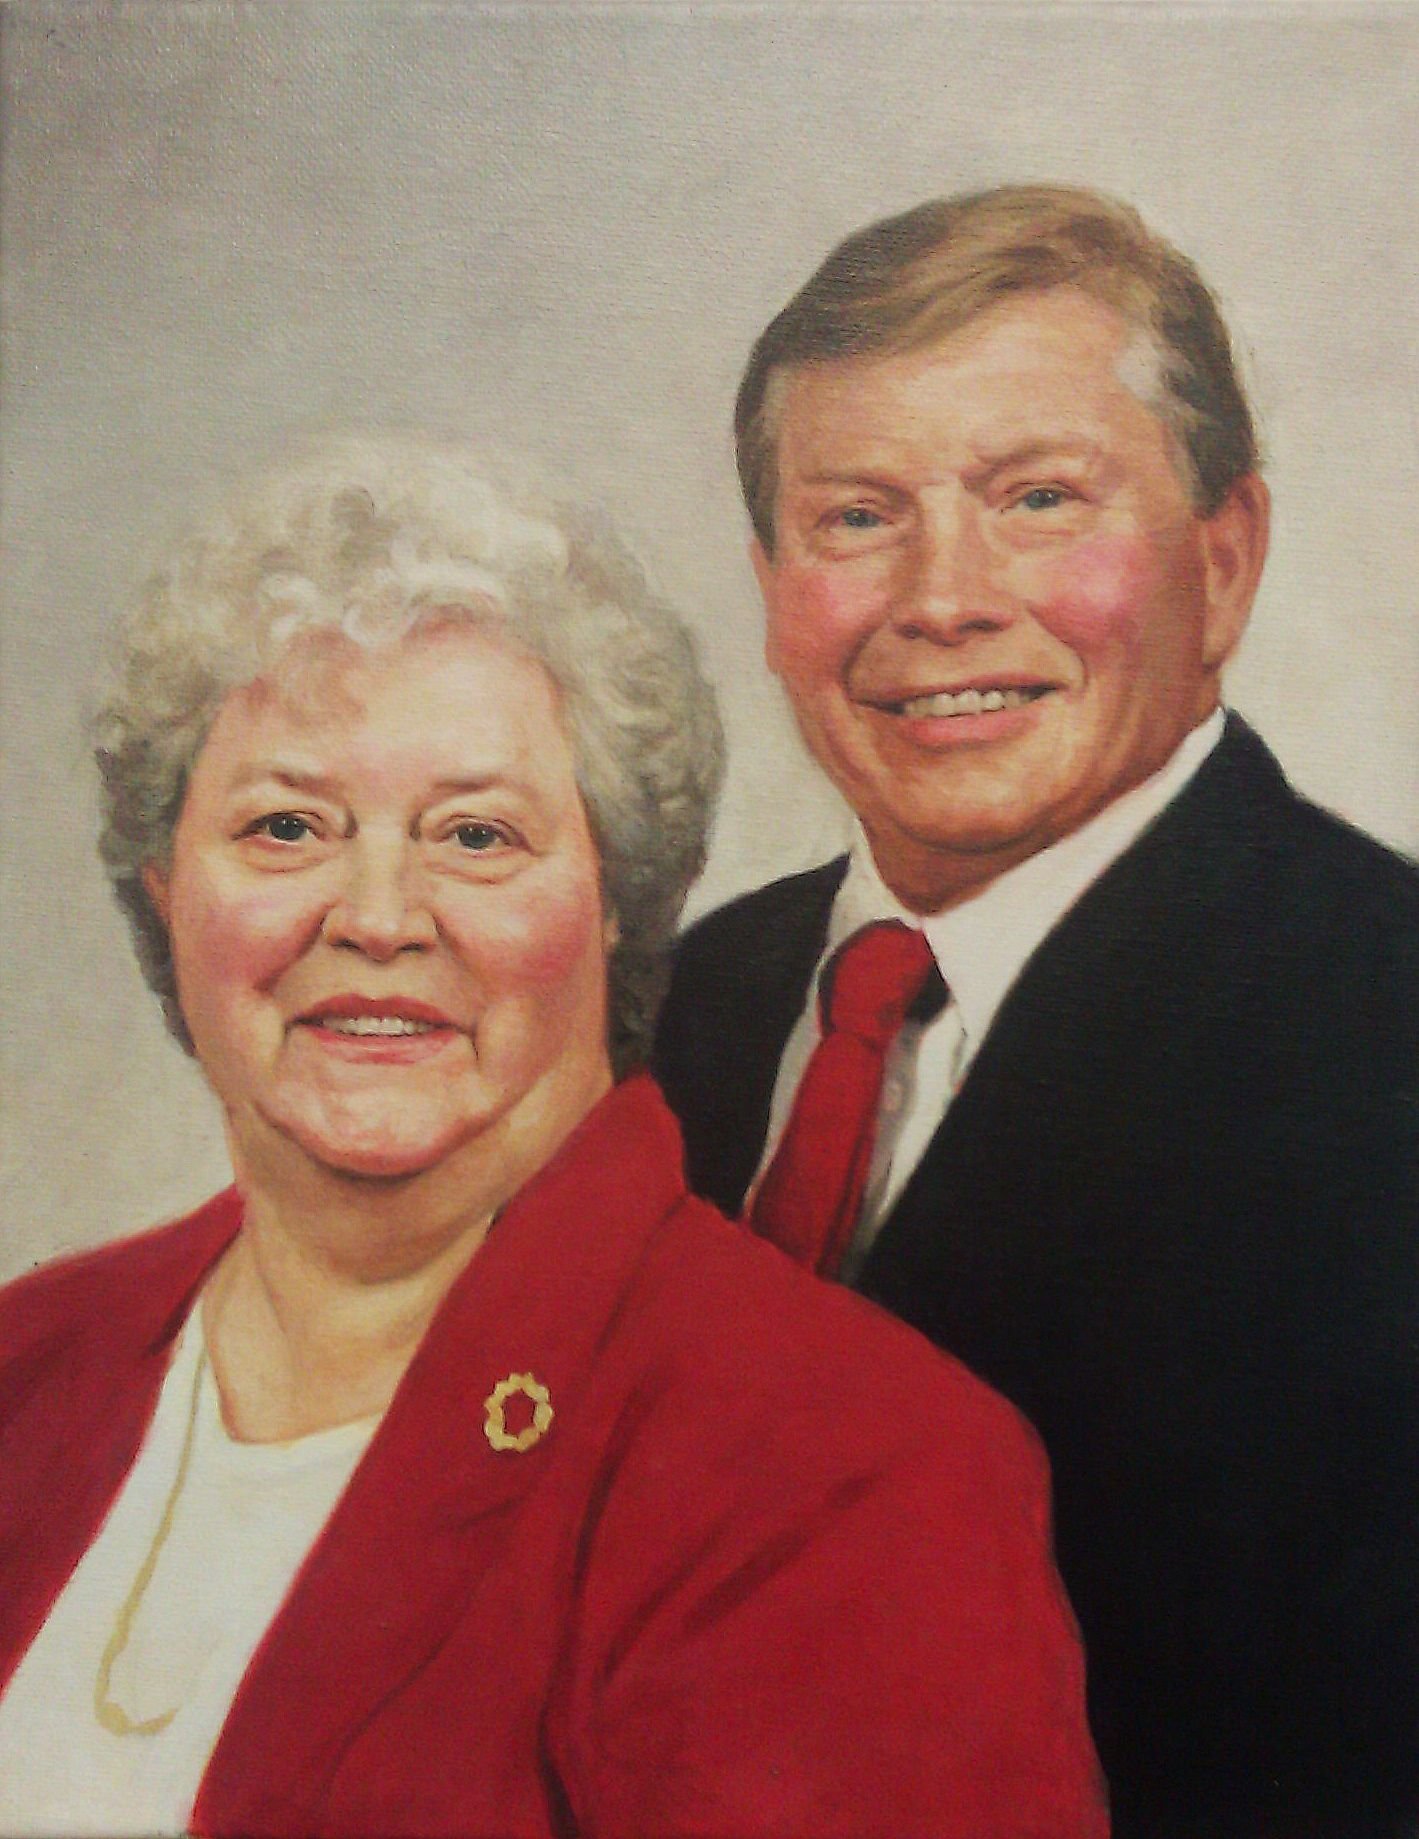
At this level, the colors are getting very intense, but there’s still a lot of nuances to add yet, to smooth out the major shaded areas of the face. It’s important to remember that your sketch can’t capture a likeness as precisely as a full-shaded in portrait. The subtleties of values sculpt the dimensions of the face.
So when you’re sketching, cut yourself a little slack if you haven’t captured the likeness perfectly. Just get it close.
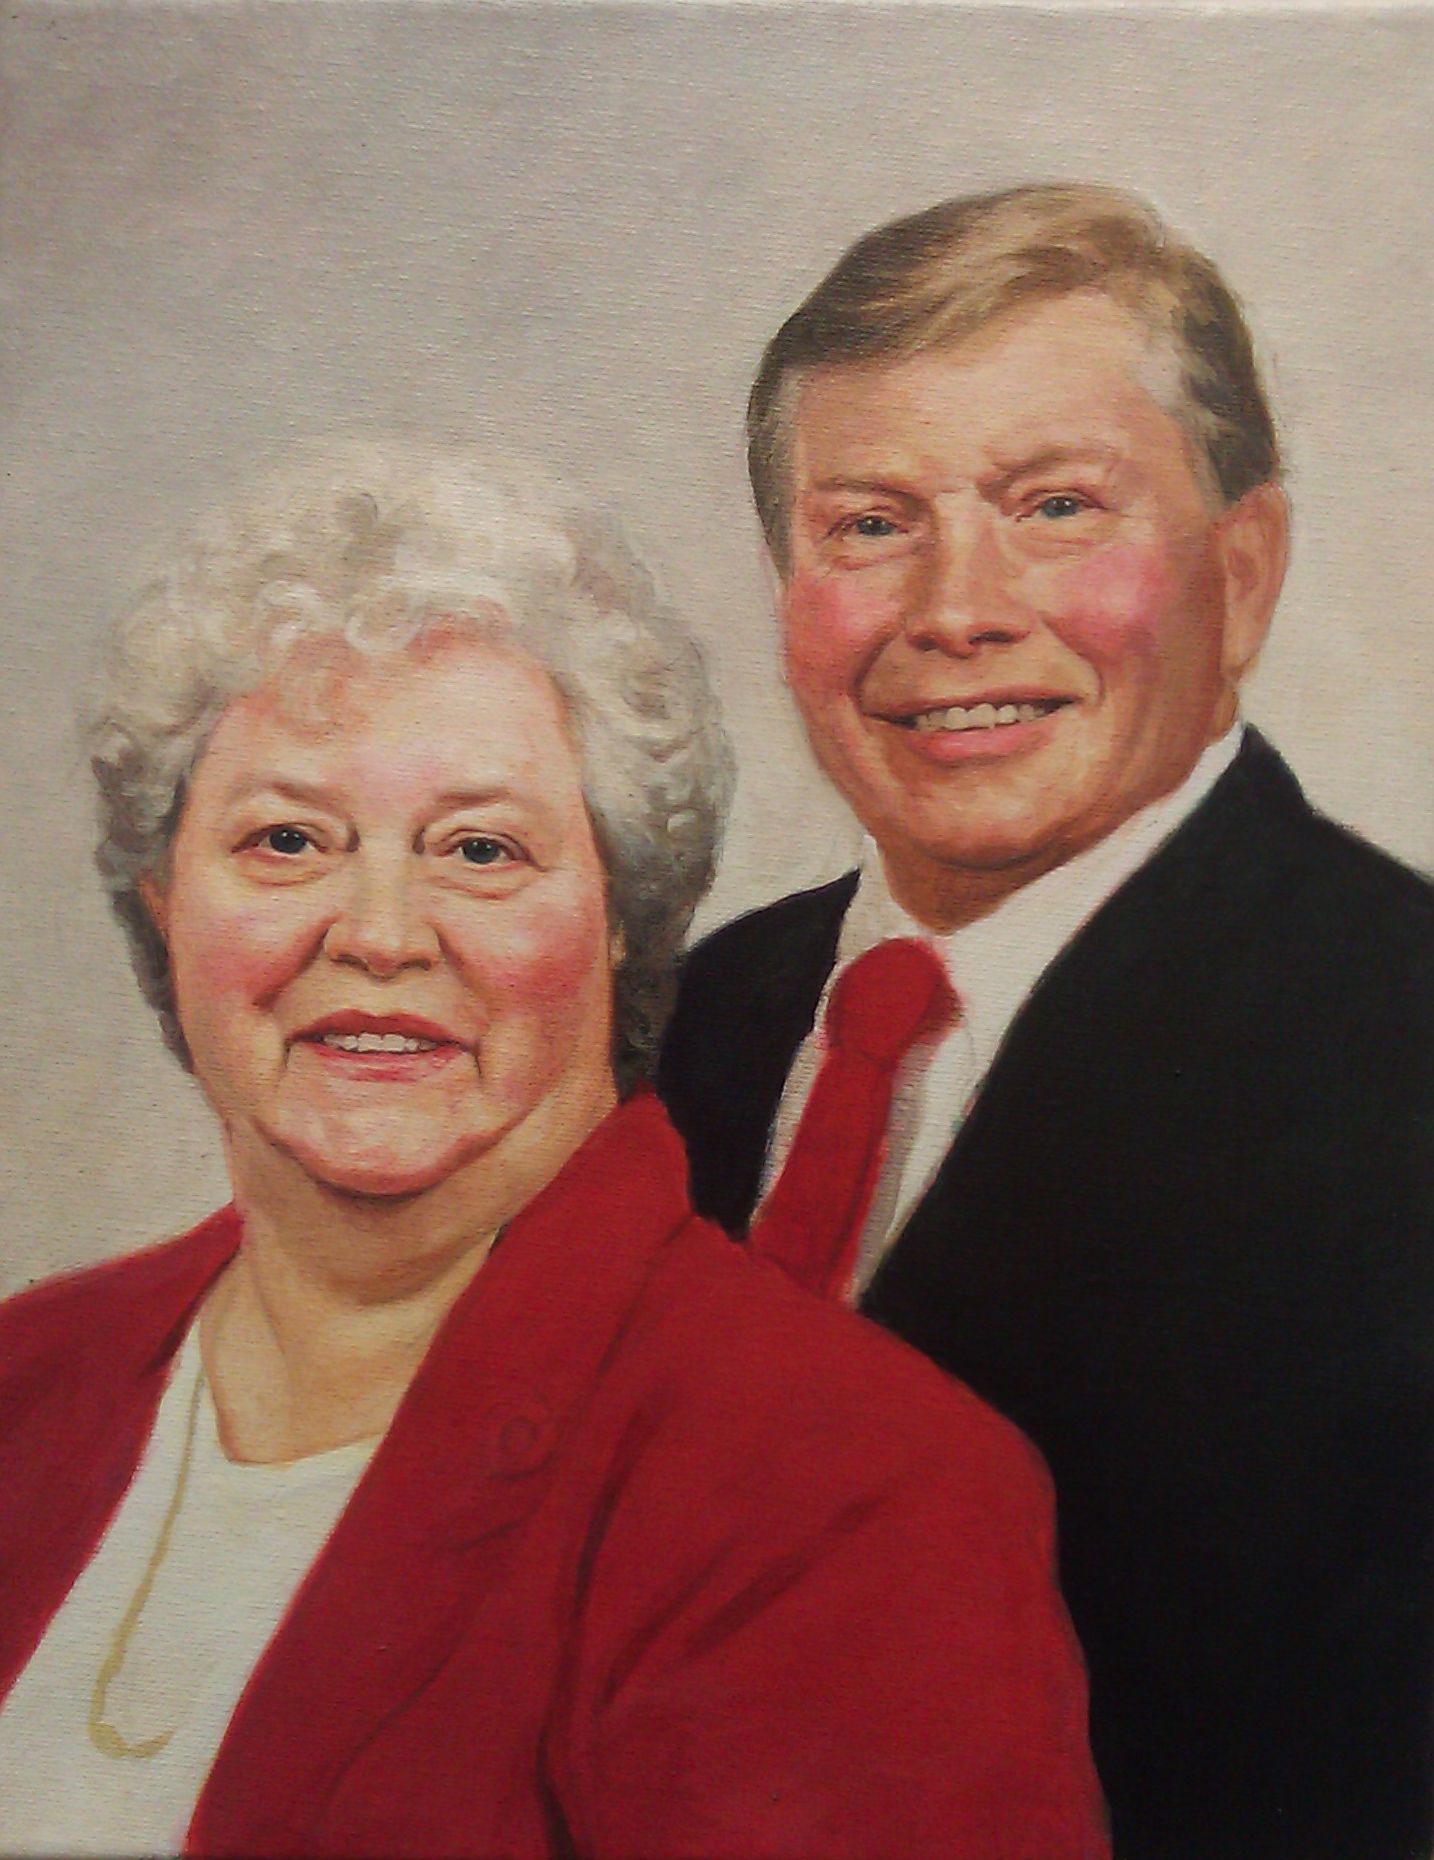
It’s starting to look closer, but there’s more details work to be done. As you can tell, the pin on the woman’s lapel can be seen, faintly under the glazes. It’s time to paint it in. And there’s more work to do on the man’s tie–shadows on the edges that will give it depth and make it look like it’s really there, resting on his shirt.
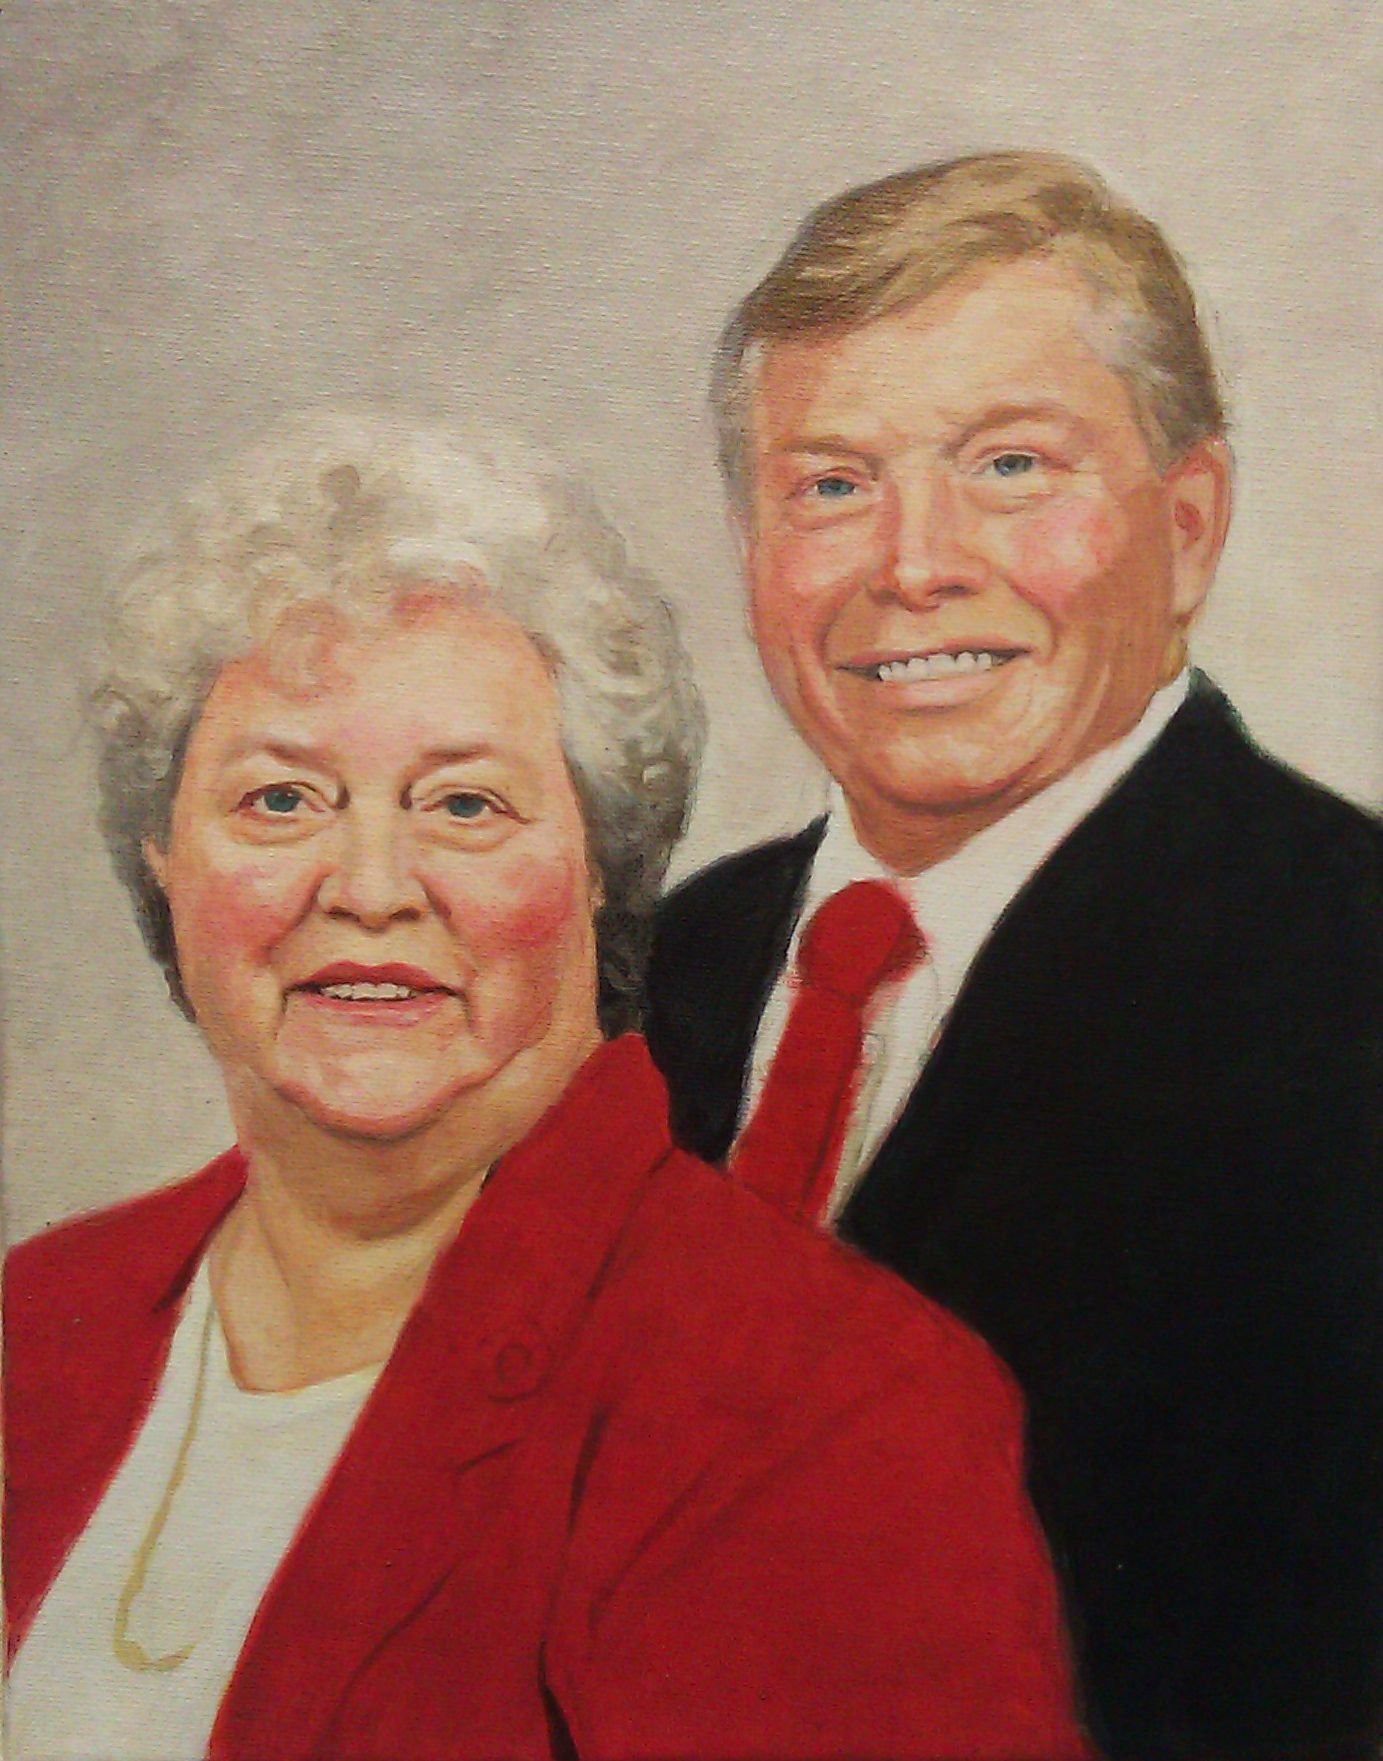
I feel like I’m in the home stretch at this stage, where I could call this finished, but there’s just a few final details yet: The details on the woman’s necklace, the tie-in values (where you take sharply defined shadows and merge them into smooth gradations) on the man’s tie. Highlights on the faces. And even just a few spots on his forehead to give him some character.
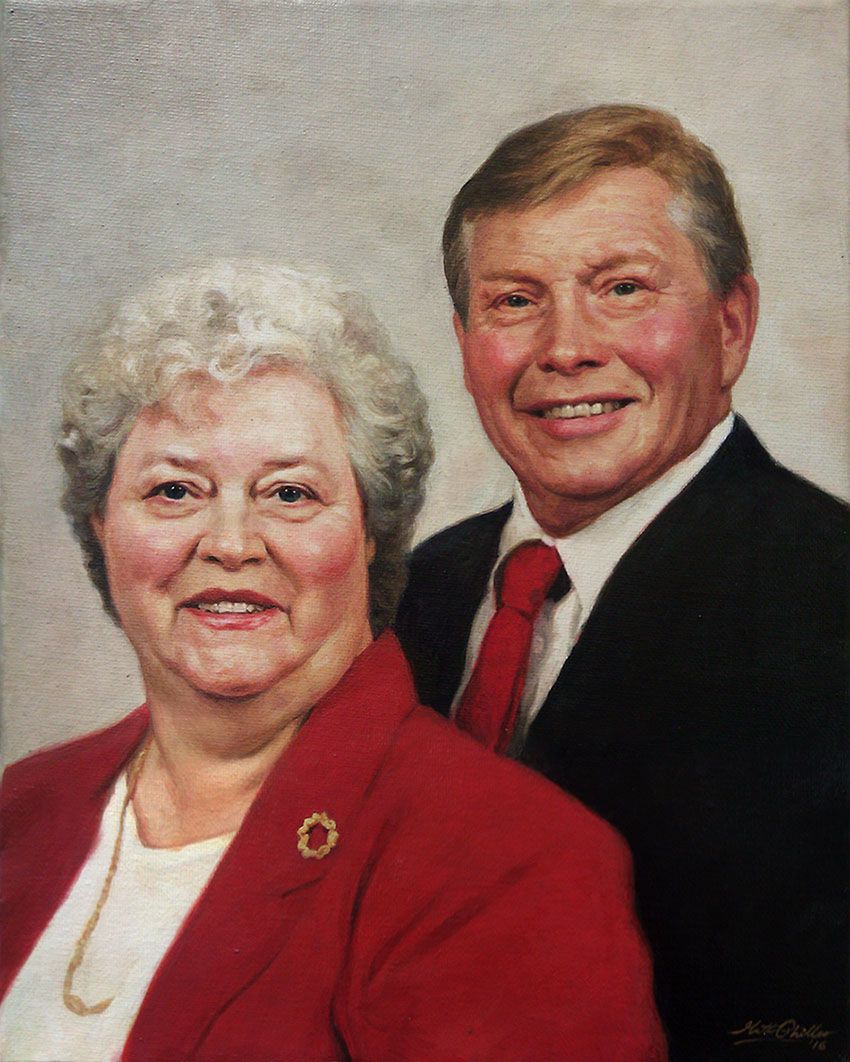
Done! All in all, this painting has dozens of layers of translucent paint and over 25 hours of work put into it. It was worth every minute. My friend really appreciated it, and it brought a lot of encouragement as it helped to keep this memory alive.
Let me know what you think of this mini-tutorial, and how I can improve these for you in the future. Share your paintings with me anytime and let me know how I can help you become a better artist.
Be blessed in your painting,
P.S. Did you find this post helpful or encouraging? If so, send it on ahead! Let others know with the share buttons below. I’d love to hear your comments. Thank you so much!