Category Archives for Blocking-In

[PORTRAIT CHALLENGE] Masterclass Lesson #3: Beginning Your Painting Lightly and Confidently
Masterclass Lesson #3 for the Acrylic Portrait Painting Challenge is open!
In this lesson, you will learn how to slowly transition out of the sketch process and into the painting with confidence.
Instead of the typical way of painting—dumping a bunch of paint onto the canvas and hoping something good comes out of it, you will strategically begin your portrait with light, translucent glazing layers.
If you follow the heart of my method, you will not feel like the painting is out of control. You will be guiding the painting to a successful finish, rather the painting taking you and your emotions for a roller-coaster ride.
It takes patience.
So please don’t jump ahead, even though it feels you’re starting so slowly.
You’ll find that once we get the painting moving in the right direction, it will begin to take off, just like a car as it goes into higher gear. Your layers and brushstrokes will get bolder as you hit the midpoint of your painting, like a climax in a good movie or book. You’ll be moving much faster then!
Finally, you’ll slow down again.
You’ll gently add nuances and final touches to bring the portrait home and make it a masterpiece.
In our previous step, I showed you how to sketch your canvas to create a firm foundation for your painting. Not perfect, but accurate.
Now, in this lesson, we will finally get to the painting!
Here’s how to do it:
- White-out the Grid Lines. Use pure titanium white paint, undiluted, to cover your grid lines, so you don’t see them in the final painting.
- Seal in the Sketch. Use pure matte medium to seal in your sketch so you can paint over it without messing up your detail work and muddying your paint.
- Mute the Sketch (Create a toning layer or “ground.”) Make your sketch lines softer and subdued so that you won’t have to work so hard to conceal them with more paint layers later.
- Prepare Your Palette. Arrange your palette colors for this painting as shown on your Palette Layout Guide (last page of the Welcome Kit) so that all the colors are arranged in such a way so that the ones you need most are closest to you and if they bleed into each other, they won’t muddy each other up.
- Add the First Glazing Layer. Start very simple with one basic color mixed into matte medium to make a VERY light glaze (semi-transparent/ translucent) concentrating on your darkest value and cool tones at the same time. This is the blocking-in, or underpainting layer, so it doesn’t need to be dark or complicated.
Ready to paint?
Now, before we begin (yes, I have to ask you again, just in case 🙂 )…
Are you registered for the challenge?
If not, register below for FREE and I’ll send you:
- a downloadable/ printable”Welcome Kit” with a Supplies List and a Palette Color Layout Guide.
- high-resolution images of the photo we’ll be painting from for this challenge.
- each new lesson that comes out in this Masterclass series.
- a link to my private Facebook group, where you can do this challenge with other artists, get feedback and help on your portrait, and not feel alone.
REGISTER TODAY. The challenge is ongoing, something you can do at your own pace. It’s not too late to enter!
Register for the Challenge!
Watch my in-depth Masterclass acrylic online tutorial below to see these steps in action.
After learning from this video, you’ll know exactly how to do it.
Make sure to watch the ENTIRE video first before diving into the painting. It will be worth it to do that. Then, I’d like you to go back and refer to whatever steps you need to as you paint. That way, you won’t miss any of the instruction and tips that will help you make this portrait your very best.
Here’s the video…
[PORTRAIT CHALLENGE] Masterclass Lesson #3: Beginning Your Portrait Painting Lightly and Confidently
Moving Forward…
The largest challenge of the glazing technique is overcoming the tendency to go dark and thick with your paint. But if you stick with this, even beyond this portrait, you’ll find the technique “clicking” and you’ll understand how it can help you to create a painting with incredible luminosity, smooth shading, depth, and detail.
In other words, a portrait that will “wow” others and you’ll feel proud to have created. And even more, a portrait you can give as a gift, hang on your wall (or someone else’s) and will be enjoyed for years to come.
There you have it! Now you know exactly how to begin your portrait lightly, and confidently. The next step is to build up depth with more glazes and see the amazing portrait fade in, slowly materialize before your eyes.
I’ll see you in our next class! Until then be blessed in your painting and may God guide your every brushstroke!
Yours for Better Portraits,
![]()
If you found this post helpful or encouraging, would you send it on ahead? Let others know with the share buttons below. I’d love to hear your comments. Thank you so much!
Let me know if you have any questions about the challenge that I didn’t answer. Leave your question in the comments below and I’ll get back to you!

5 Steps on How to Paint a Vibrant Acrylic Portrait
Learn the classical glazing technique for depth and luminosity
Acrylic painting is an exciting medium known for its versatility, but achieving the depth and vibrancy often associated with oil paintings can seem challenging. However, by employing the classical glazing technique, a method favored by old masters like Rembrandt, Titian, and Vermeer then you can produce rich, luminous results with acrylics. This blog post will guide you through 5 essential steps to create a vibrant acrylic portrait using this time-tested method.
This tutorial shows the entire process of painting a portrait. Here are the steps I show in this tutorial:
- Start with a Detailed Sketch.
- Apply the Initial Glaze Layers
- Layer and Build Gradation
- Introduce Vibrant Colors
- Focus on Nuances and Details
1. Start with a Detailed Sketch
Every masterpiece begins with a solid foundation, and in portrait painting, that foundation is the sketch. Before you start adding color to your canvas, take time to create a detailed and accurate sketch of your subject. For this project, an 11×14 portrait of three girls in a park serves as an example.
By using a sepia-tone prismacolor colored pencil, you can establish proportions and likeness. Accuracy in this stage helps set the stage for a calm and confident painting process. Once your sketch is ready, seal it with a clear matte medium. This acts as a protective layer, ensuring that the pencil lines remain intact as you begin adding paint.
- Tip: Use a flat brush (¾ inch to 1 inch wide) to apply the matte medium. Make sure the application is smooth and even, allowing it to dry thoroughly before proceeding to the next step.
2. Apply the Initial Glaze Layers
The heart of this painting method lies in glazing, where thin, transparent layers of paint are applied over one another to build depth and richness. Unlike traditional opaque acrylic painting, the classical glazing technique requires a mixture of 95% matte medium to 5% paint. This creates a very light wash that enables you to gradually build colors without overwhelming the canvas.
Begin by mixing raw umber dark with ultramarine blue to create lifelike skin tones and shadow areas. These first layers will be almost imperceptible, but they provide a strong base for the layers that follow.
- Tip: The first layers of glaze should be incredibly light. This allows for adjustments in color or value without the need to paint over mistakes. The glazing method helps avoid the common frustration of muddy colors often encountered in acrylic painting.
3. Layer and Build Gradation
Once the initial glaze is applied, it’s time to focus on layering. As you build up more layers, you’ll notice how the painting starts to take on a more vibrant and realistic appearance. The goal here is to create a seamless transition between light and dark values, blending tones smoothly to replicate the natural shading found in your reference photo.
In this step, more raw umber dark and ultramarine blue are used to deepen the shadows on the forehead and hair. This layering process helps achieve the subtle gradation required for realistic portraits.
- Technique: As you layer, ensure that each glaze is thin and transparent. Too much paint in a single layer can cause the painting to look heavy and lose the delicate transparency that glazing provides.
4. Introduce Vibrant Colors
To make your portrait truly vibrant, it’s essential to introduce bold colors into the glazing process. In this example, a dash of Liquitex hot pink was added to the dress to intensify the color and give it a glowing effect. The key is to use these bright colors sparingly, applying them in thin layers so that they blend harmoniously with the existing hues.
When applying glazes to areas like the clothing, make sure to leave the white areas exposed. This technique, known as “preserving the luminosity,” ensures that highlights remain bright and eye-catching, adding to the overall vibrancy of the portrait.
- Tip: When adding vibrant glazes, thin the paint with medium and apply it cautiously. This helps prevent overpowering the existing layers while enhancing the color saturation.
5. Focus on Nuances and Details
The final step in this process involves refining the smaller details and nuances that bring a portrait to life. For example, the highlights in the hair, shadows in the creases of clothing, and the subtle changes in skin tone around the eyes require careful attention.
In the final layers, you can also experiment with a semi-opaque mixture, using titanium white, raw umber dark, and organic red-orange to add warmth and depth to the skin tones. With each new layer, the portrait takes on more life, depth, and realism. At this stage, it’s important to use more opaque layers sparingly, as glazing is best suited for large areas, while more detailed parts, such as fingernails or eyes, may benefit from a slightly thicker application of paint.
- Technique: If you notice that certain areas appear too flat or lack depth, consider adding a dark glaze to emphasize the shadows. Because mixing ultramarine blue with raw umber dark creates a rich, deep tone perfect for refining these darker areas without relying on black paint.
Conclusion: Patience Is Key
As you add each layer of glaze, then always remember that patience is vital. Because acrylic glazing requires multiple layers, sometimes ten or more to achieve the desired depth and luminosity. Each layer builds upon the last, contributing to the portrait’s final vibrancy. While it may take time, the results are well worth the effort.
By following these five steps, you can create a stunning acrylic portrait with vibrant colors and lifelike depth, all while employing the classical glazing technique favored by the old masters.
For further resources and guides, visit realisticacrylic.com and check out my free courses to enhance your acrylic painting journey.
- How to Paint Foliage Using the Acrylic Glazing Technique
- How to Trace for an Accurate Portrait Sketch
- How to Paint Realistic Eyes in Your Acrylic Portrait
- How to Add Raw Umber Dark & Ultramarine Blue to Your Portrait
- How to Make Your Own Raw Umber Dark
- How to Paint Realistic Trees & Grass in Your Acrylic
- How to Block In Skin Tone Values Using Glazing Technique
- How to Paint Vibrant Reds in Your Acrylic Portrait
- How to Glaze Background Colors & More Acrylic Portrait
- How to Paint White Clothing in Your Acrylic Portrait
- How to Easily Transition from a Sketch to a Painting
- How to Block In Shading & Skin Tones in Your Acrylic
- How to Build Up Color on Acrylic Pet Portrait
- How to Build Up Form on Clothing with Acrylic
- How to Paint Dark Clothing Using Acrylic Glazing Technique
- How to Paint a 24 x 30 Acrylic With 30 People
- How to Do Smooth Shading with Acrylic
- How to Sketch an Acrylic Portrait with a Grid
Read more about how to paint a portrait that you can surely be proud of!
I’d love to hear your thoughts about this video. Please share it with your friends and family. Let me know if you have any further questions. I’ll greatly help you.
If you’d like to learn more, sign up for my free email tips and video class today.
Learn How to Paint Acrylic Portraits With My Free Mini-Video Course!
Thank you so much for taking the time to read this tutorial and watch the video. That means a lot to me. I hope you find it very helpful in your portrait painting.
Yours for Better Portraits,

P.S. Did you find this post helpful or encouraging? If so, send it on ahead! Let others know with the share buttons below. I’d love to hear your comments. Thank you so much! Also, do you have a question on acrylic portrait painting you’d like answered? Let me know, and I’d be happy to help!

How to Block-in Hair on Your Acrylic Portrait
The steps to block-in hair, adding depth and realism with layered glazing techniques.
When creating a realistic portrait, the process of blocking-in hair plays a crucial role in establishing depth and capturing lifelike textures. In this tutorial, you will learn step-by-step how to block in hair on an acrylic portrait . By following these essential techniques, you’ll discover how to mix tones, apply glazes, and build up layers to make your portrait more three-dimensional.
Understanding the Block-in Process for Hair
Before diving into the specifics, it’s essential to understand the “block-in” technique. Blocking-in refers to the initial stage where you establish basic shapes, values, and shadows before adding detailed layers. This foundational stage is critical for creating a structured framework for your portrait, ensuring that as you add more layers, the hair appears realistic, cohesive, and well-blended.
Step 1: Establishing the Background and Hair Boundaries
The first step in blocking-in hair is defining the broader sections of the portrait. In the video, I start by setting up a muted, cloudy background. Using colors like ultramarine blue and raw umber dark, blends these shades to create a smooth transition from cooler to warmer tones. Because this method can also apply to your portrait’s background, ensuring the hair and face blend seamlessly into the backdrop without looking disconnected.
Once your background is set, begin focusing on the hair. Start by identifying the boundaries and large sections of hair. At this stage, do not worry about small details like individual strands; instead, focus on the bigger shapes and how the hair flows around the face and neck.
Step 2: Darkening the Hair with Cool Tones
To create depth, it is essential to start with darker tones. I recommend that using a mixture of raw umber dark and ultramarine blue for the base layer. By adding the blue, you cool down the mix, which is vital when working with shadows. The darker, cooler tones help create the illusion of depth, mimicking the way light interacts with the hair in dimly lit areas.
As I explain, the cooler tones mimic the appearance of shadows when light is scarce. The mixture of ultramarine blue and raw umber dark serves as the ideal “Payne’s gray” substitute, but with more versatility since you can customize the shade based on your needs. Apply this mixture lightly over the larger sections of hair, focusing on the areas that will remain in shadow.
Step 3: Defining Local Values and Shapes
Once the darker base coat is applied, it’s time to define the local values. Local values refer to smaller, nuanced changes in light and shadow. Instead of focusing on the entire area, look for pockets of darker tones that indicate hair bends, waves, or areas where light is blocked.
For example, the hair under the chin or near the ear will often feature shadows. I use precise brushstrokes to form the shadowed sections, while leaving lighter areas untouched to create contrast. This helps in defining the unique shapes that hair takes on.
Use a fine-tipped brush to enhance the details and smaller sections. At this stage, you don’t need to be exact, but try to match the general direction and flow of the hair. Your initial layers are meant to be flexible, allowing you to adjust later.
Step 4: Gradation and Layering for Hair Striations
Acrylic portraiture thrives on the glazing technique, which involves building layers of translucent paint to achieve a gradual change in value. In this step, focus on blending your dark tones into lighter ones by applying thin layers of glaze. I use clear medium to thin his paint and slowly introduces gradation into the hair.
To add natural-looking striations (the small, subtle streaks of hair), use the tip of your brush and apply long, delicate strokes. These strokes should be thin and follow the natural grain of the hair. Remember to vary the pressure on your brush. For darker areas, apply more pressure, while lighter sections need less to avoid over-darkening.
Step 5: Highlighting Key Areas and Adding Definition
After laying down the foundational layers and working on the shadows, the next step involves highlighting. In the reference image, I notices that there’s a distinct highlight at the top of the hair. Using a slightly lighter mixture of raw umber dark, he begins to emphasize these sections.
To create highlights, focus on the areas where light naturally hits the hair such as the crown, or where the hair parts. A light touch with a fine brush can enhance these areas, bringing dimension and texture. Be careful not to overdo the highlights; subtlety is key.
For instance, adding a soft glaze using the clear medium allows you to leave some areas lighter. Later, you can apply a reddish glaze, which, as I take notes, will provide a ton of luminosity and help the hair “pop” out of the portrait with vibrant, warm tones.
Tips and Techniques for Effective Hair Block-in
- Use a Cool Base for Dark Hair: When blocking in darker hair, use cool tones mixed with raw umber and ultramarine blue. This ensures the shadowed areas appear more realistic and avoid a flat, monotone appearance.
- Vary Brush Strokes: For a natural hair texture, use different brush strokes long strokes for defining edges and shorter, dabbing strokes for blending. This combination will give your painting more depth and a smoother transition between light and shadow.
- Gradation is Key: Gradually build layers using the glazing technique. Thin out your paint with clear medium and apply transparent layers. This technique will allow you to adjust tones without overpowering the base layer.
- Pay Attention to the Reference Photo: Use the reference photo to determine where the highlights and shadows fall. Aligning shadows with landmarks like the lips, nose, or chin ensures proportional and accurate placement.
- Don’t Overdo Highlights: Highlights should be subtle. Too much highlighting can make the hair look unrealistic and take away from the depth created by the shadows.
Conclusion: Building Up for Realism
Blocking-in hair is all about establishing the basic framework before moving on to finer details. By using cool tones, creating gradation, and employing glazing techniques, you can achieve a realistic and lifelike portrayal of hair. Remember, the key is patience building up layers slowly ensures that the final result will have depth, texture, and vibrancy.
Whether you are a beginner or an experienced painter, mastering the block-in process is crucial for creating beautiful acrylic portraits that stand out. Start with the shadows, define the mid-tones, and finish with highlights for hair that looks three-dimensional and natural.
For more tutorials and painting tips, visit RealisticAcrylic.com and take your portrait painting skills to the next level!
Did you enjoy this video?
Share it with your artist friends if you think they will find it helpful! Also, if you need more help, hop onto courses.realisticacrylic.com where we concentrate on just acrylic portraits, and how to make yours the best it can be.
My goal is to make your life as acrylic portrait artist easier by giving you tips, lessons, and tutorials.
Yours for Better Portraits,

If you found this post helpful or encouraging, would you send it on ahead? Let others know with the share buttons below. I’d love to hear your comments. Thank you so much!

How to Do Initial Color Glazes in Acrylic Portrait
Transitioning from your sketch in an acrylic portrait can be difficult.
In this video tutorial, I want to show you how to set the stage for a painting with luminosity, by using light glazes.
Glazes are simply mixtures of paint and clear medium (matte medium) and usually at least 50% medium to paint ratio. By building them up slowly, you can steer the portrait in the right direction, incrementally.
You will see how color is applied to the entire painting, and it starts coming alive, even if slowly.
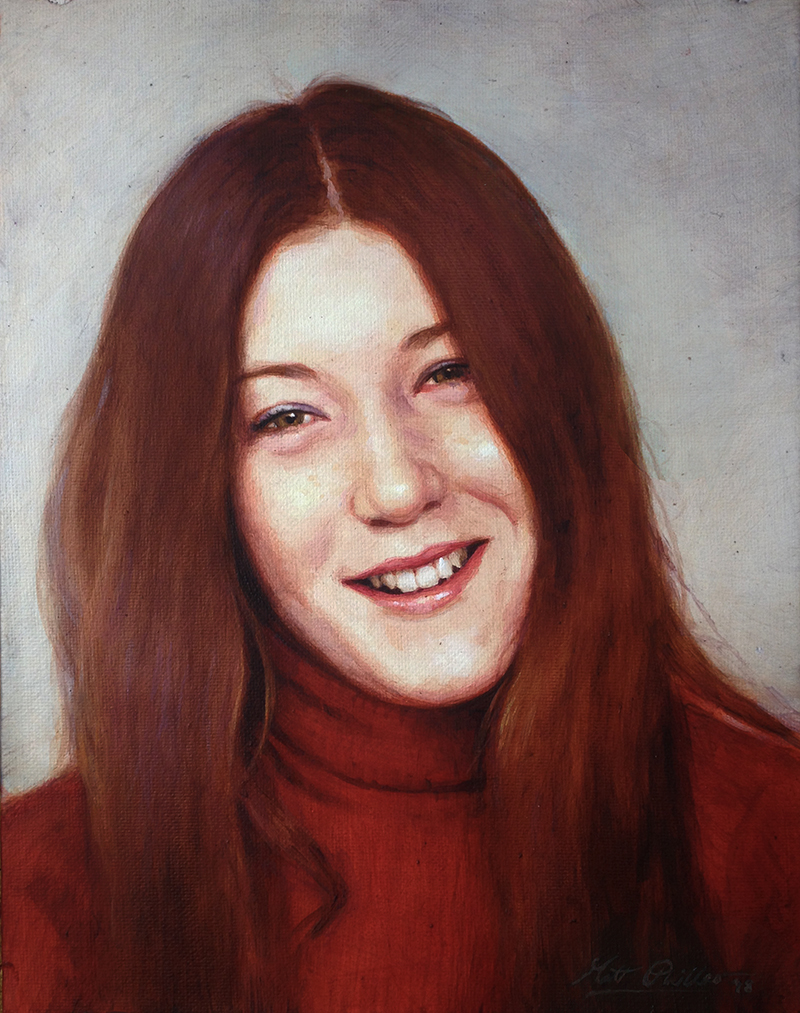
It’s a different way to look at painting. I’ll show you how I do it in this video, using this recent 8″ x 10″ commissioned portrait as an example…
The Video Tutorial…
LEARN MORE
- How to Paint Foliage Using the Acrylic Glazing Technique
- How to Trace for an Accurate Portrait Sketch
- How to Paint Realistic Eyes in Your Acrylic Portrait
- How to Add Raw Umber Dark & Ultramarine Blue to Your Portrait
- How to Make Your Own Raw Umber Dark
- How to Paint Realistic Trees & Grass in Your Acrylic
- How to Block In Skin Tone Values Using Glazing Technique
- How to Paint Vibrant Reds in Your Acrylic Portrait
- How to Glaze Background Colors & More Acrylic Portrait
- How to Paint White Clothing in Your Acrylic Portrait
- How to Easily Transition from a Sketch to a Painting
- How to Block In Shading & Skin Tones in Your Acrylic
- How to Build Up Color on Acrylic Pet Portrait
- How to Build Up Form on Clothing with Acrylic
- How to Paint Dark Clothing Using Acrylic Glazing Technique
- How to Paint a 24 x 30 Acrylic With 30 People
- How to Do Smooth Shading with Acrylic
- How to Sketch an Acrylic Portrait with a Grid
Read more about how to paint a portrait that you can surely be proud of!
Hope you enjoyed this tutorial and have a blessed day,
P.S. Did you find this post helpful or encouraging? If so, send it on ahead! Let others know with the share buttons below. I’d love to hear your comments. Thank you so much! Also, do you have a question on acrylic portrait painting you’d like answered? Let me know, and I’d be happy to help!