All posts by Matt Philleo

How to Price Your Finished Portrait Painting?
One question I’m asked again and again is, “How much should I charge for a portrait?”
I was asked this question twice in the last two days, so I figure it would be good to answer this in an article.
As a professional portrait painter, I know that what I charge for my portraits affects my bottom line. If I don’t charge enough, I don’t make enough money to keep painting. If I charge too much, I might price myself out of the market.
You may be asking the same thing? What should you do?
There are many factors in pricing.
It depends how long you have been in business, the level of quality of your work, and how much detail will be in your portrait. I charge by the square inch. I have a pricing formula that I came up with where the price increases exponentially as you increase the size of the painting and add more detail (subjects)
Here is what I charge (as of 2019). I can’t say that it will work for you. (Please, DO NOT copy my prices. I am showing it just as an example. )
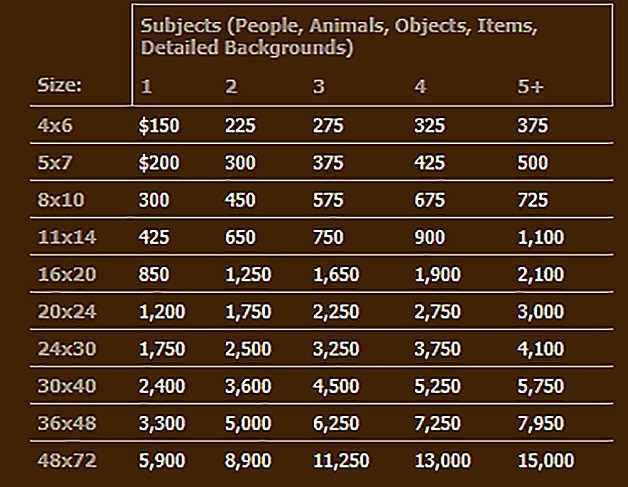
A 16 x 20 with one person—I charge $850 for that. If there are 5 or more subjects (people, objects, detailed backgrounds, etc. ) in the portrait I charge $2,100. The reason I charge more is that it will take longer to paint all the extra detail.
But I have been painting for many years and my prices were less than half this amount when I started out painting portraits full-time, in 2014. Here is my price chart for that year.
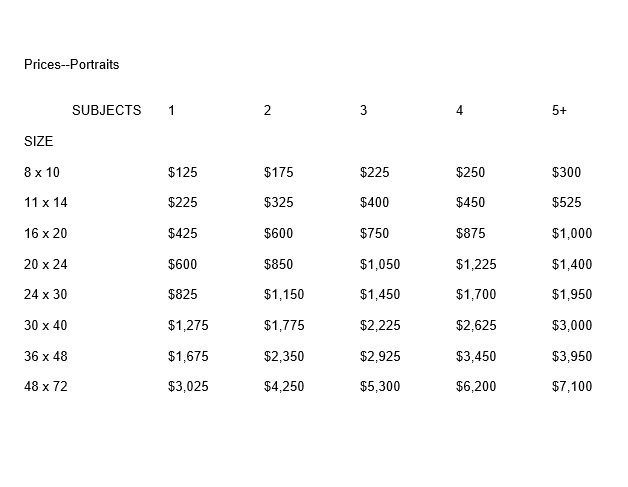
You can see my prices have almost doubled since 2014. And amazingly, at that time, I was struggling to get even one commission! I remember praying every day for a month for a commission, after doing all I knew to do to bring in some work. God did provide one eventually, but I need to learn to trust in Him and be patient. That’s a story for another day. 🙂
The point I’m trying to make is that charging less for your work does not equate to more sales. When I first started I thought I was going well to make minimum wage. That was foolish, because we aren’t painting 100% of the time and we have materials and marketing costs. My wife encouraged me to raise my prices. I was scared to, but it didn’t hurt my business at all. I have been raising them slowly, about 10-20% every year.
So, then, should you charge more at the onset and just watch the sales roll in?
No. It doesn’t work that way either. Charge a fair price for your work, be patient, keep doing portraits, don’t give up when it’s tough, and you will see the results. Raise your prices over time as you build up your clientele.
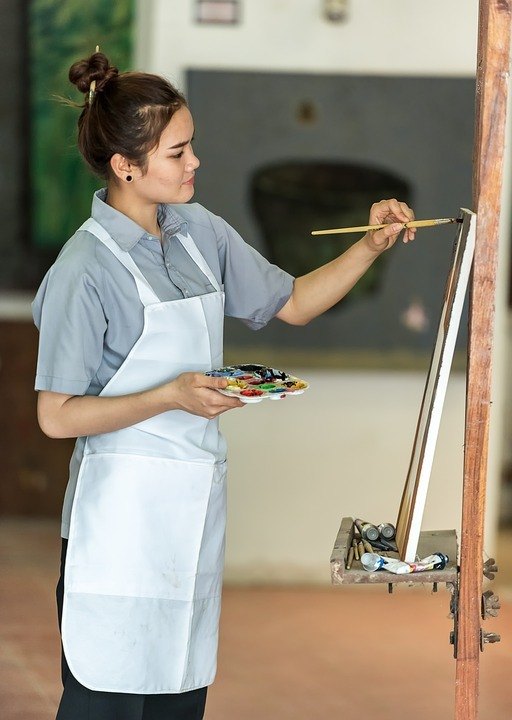
I try to get paid $50 an hour on my portraits. ( I don’t charge by the hour. This is what I average on my projects.)
Figure out what you’d like to get paid per hour. Then charge approximately 50% more because, as I mentioned earlier, you won’t be painting all the time (you’ve got other business-y things to do) and you have paint and brushes to buy.
Here are some more helpful tips in pricing your art.
1. First of all, create a price chart as I did. This is HUGE. Going to a client meeting to discuss a portrait without a price chart in hand is like going to a smorgasbord buffet line without a plate in hand. It’s going to be messy.
With a price chart all you need to do is ask your client what size they would like–roughly–and then show them a couple of options. You should know how many people will be in the portrait. You simply show them the chart and say, “an 16 x 20 with two subjects will be this much, and a 24 x 30 will be this.” You point to the prices and let the chart do the work.
Let them decide what they want.
There are no negotiations on the price. Because the client sees you have a precise criterion for what you charge—it makes sense—they will not quibble with your price. I can’t recall a time that’s ever happened to me.
Interestingly, I do remember a time when I negotiated my own price down. I offered my client a price that was lower than what I originally quoted. She took the lower price but looked at me strangely and the whole situation was awkward. And I needlessly lost money on the job. Ouch.
Don’t do what I did in that situation.
Quote your price and hold to it. Let them respond.

2. Then, once you have the client locked in on a price, encourage them to pay a down deposit on the spot. If you just give them a business card and let them walk away, chances are, you’ll lose the commission. Of course, if they need to discuss it with another decision maker, that’s fine. But get their phone number or email address so you can follow up with them.
Most of the time, however, they’ll be ready to make a decision if they indeed want a portrait, and not just merely curious.
You can tell them you need the deposit so that you’ll have them booked. That way you can get to their portrait faster.
A deposit is also very important because, with it, the client has “skin in the game.” They’re not as likely to back out of the project.
How much should you ask for a deposit? I ask for 25% up front. Some do 50. But I like 25, because it’s a little less risk for the client to take on, and it also gives me more incentive to finish the project. I get paid a larger amount at the end.
3. Never charge people more because you think they are rich, or less because you think they are poor. Just charge what you charge. Have a size for any budget. The price chart is your best friend. Then you can always point people to your price list and let it do the selling for you.
4. Don’t compete on price. It may be helpful to see what other artists are charging to gauge what you might be able to charge, but don’t make the mistake of thinking you have to beat other artists’ prices. You’re not Walmart. You’re an artist. People will purchase art from you, because they know, like and trust you. They appreciate your unique style, your experience, personality, your connection to them, and that’s a big part of why they will buy from you. So as long as they can technically afford your prices, they will pay them, even if Joe Artist down the street has prices 50% less than you.
5. Never deliver your painting without payment in hand. If you meet with the client personally to deliver the painting, let them know beforehand that you would like to exchange payment for the finished product on the spot. If you are shipping the painting, show them a proof image of the portrait. Once they approve it, ask for the balance to paid in full (along with shipping charges.) When they make payment, then promptly ship the artwork.
That’s it! Of course, there’s more nuances than this to pricing your work, but this article should give you some good information on how to do it, if you’re just starting out in acrylic portrait painting.
Let me know how this helps.
If you are an artist who does commissioned portraits, do you have any tips to share on how YOU price your work? Please share your thoughts in the comments below. 🙂
Yours for better portraits,

P.S. Did you find this post helpful or encouraging? If so, send it on ahead! Let others know with the share buttons below. I’d love to hear your comments. Thank you so much! Also, do you have a question on acrylic portrait painting you’d like answered? Let me know, and I’d be happy to help!
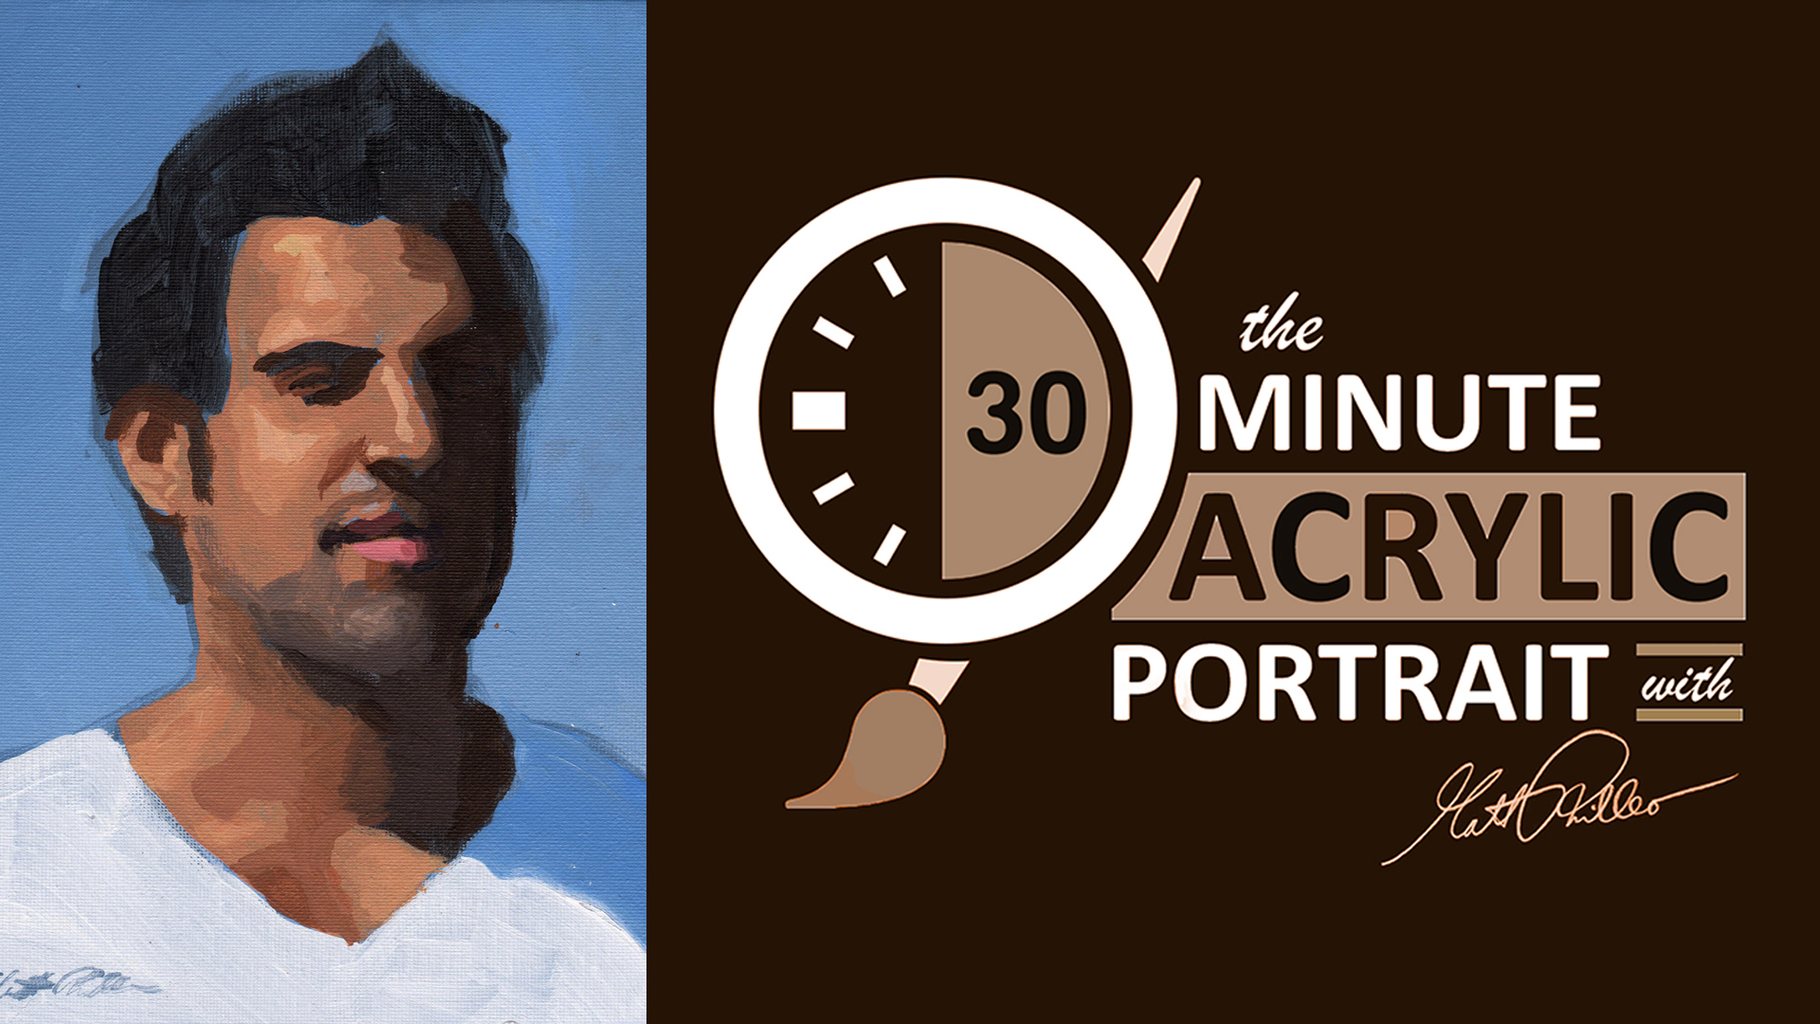
“How to Paint a Young Man in White” in 30 Minutes
Thank you to everyone who left encouraging comments and kind words on my first episode of the “30-Minute Acrylic Portrait.” Now, it’s on to Episode #2.
For today’s portrait, I’ll be painting a picture of a young man dressed in white, named Mohammed.

How did I come across this photo?
Well, I was looking for interesting reference images to paint from, scouring the internet and couldn’t find much. Even stock photo sites like Pexels and Pixabay came up short.
Then I recalled a YouTube channel that I frequently watch (or have playing in the background as I paint): Living Waters.
On this channel, there are literally hundreds of videos of people being interviewed by Ray Comfort, a Christian author, evangelist and short movie producer. Every person is different and unique. I noticed the lighting on several of these interesting characters was fantastic, and the video quality high enough that I could grab some screenshots of the footage and then paint from them.

Of course, I needed to get permission first.
So I contacted the ministry’s general email address, and got an expected automated response.
The next day, however, I got an unexpected call from Ray Comfort, granting me permission to paint portraits based on his videos. I was blown away by his generosity and thought this was also another confirmation from God to continue doing the series. I should have enough images to keep me busy for months, maybe even years. 🙂
So here we go.
Season 1, Episode 2 of the 30-Minute Acrylic Portrait…
As always, let me know what you think of this video. I encourage you to try this exercise for yourself. You don’t have to feel pressured to come up with a masterpiece. Just enjoy the process and see what you can do within half an hour.
Or you might just want to keep watching these videos for fun, sipping some coffee or tea. 🙂 Either way, thank you for watching, and I look forward to sharing more with you.
Yours for better portraits,

P.S. Did you find this post helpful or encouraging? If so, send it on ahead! Let others know with the share buttons below. I’d love to hear your comments. Thank you so much! Also, do you have a question on acrylic portrait painting you’d like answered? Let me know, and I’d be happy to help!
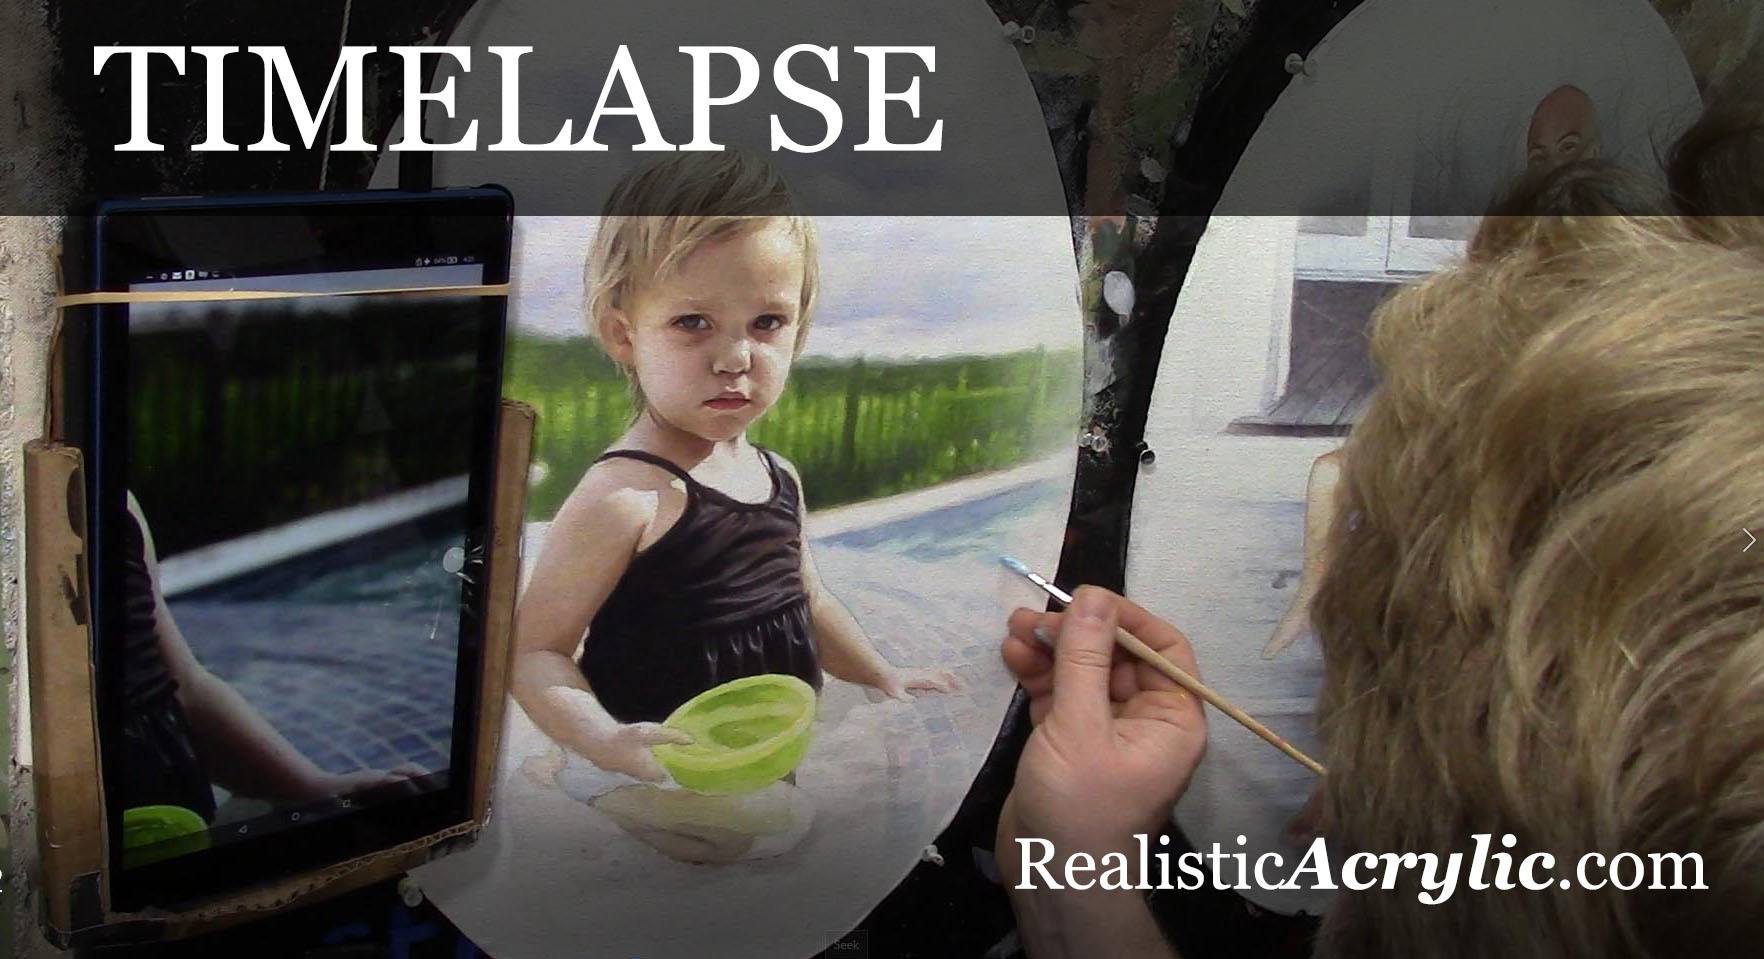
How to Paint Oval Vignette Acrylic Portrait Timelapse
Step-by-step techniques for an elegant oval vignette in acrylic portrait
Creating an acrylic portrait with an oval vignette style is an inspiring technique that allows your subject to stand out elegantly, adding focus and artistry. In this timelapse guide, I’ll walk you through how to achieve an oval vignette acrylic portrait using a unique glazing method. This technique helps you build depth, enhance color vibrancy, and create a finish that rivals the luminosity of oil paintings.
Understanding the Oval Vignette Technique
An oval vignette composition is a traditional approach that frames your subject in a subtle, softly blurred oval shape, gently drawing attention to the portrait’s focal point. This timeless style is ideal for achieving classic, professional results, whether you’re creating family portraits or a commissioned piece.
Step 1: Preparing Your Canvas with Initial Layers
To begin, prep the canvas with a light layer of matte medium and diluted paint. Use raw umber dark, ultramarine blue, and a dash of burnt sienna. This combination will set up foundational tones that help bring warmth and depth later on. Thin layers will be added progressively, each enhancing the portrait’s tonal structure.
Step 2: Blocking in Values and Colors
Blocking in your values provides a strong base for your portrait:
- Start Light: Use thin washes of paint to gradually build values, beginning with the mid-tones.
- Add Color with Glazing: Introduce alizarine crimson and phthalo green in thin layers for the skin, adding natural, warm undertones.
- Maintain Balance: Rather than finishing one section entirely, work across the canvas, applying each color to corresponding areas simultaneously. This approach keeps the portrait harmonious.
Step 3: Building Depth with Glazing Layers
The glazing technique is key to creating a portrait that radiates depth and realism:
- Multiple Layers: Up to 100 ultra-thin layers can be used to achieve a fully nuanced look.
- Lighting Effects: The translucent quality of these layers allows light to reflect off the canvas, creating a sense of depth and vibrancy.
- Oil-Like Finish: This glazing method adds a polish that can make acrylics resemble the look of oil paints, with soft transitions and a luminous finish.
Step 4: Enhancing Realism with Fine Details
As the portrait evolves, focus on adding detail:
- Nuances in Features: To make eyes, lips, and hair appear lifelike, add details like eyelash shadows, fine lines in the lips, and highlights in the irises.
- Gradual Shading: Build up shading in areas like the cheeks, nose, and forehead. A steady hand and attention to small value changes will achieve the realism you want.
- Background and Clothing: Layer in small color adjustments to enhance textures, like the folds of clothing or woodwork in the background.
Step 5: Adding Highlights and Final Touches
In the final stages, highlights and refined details bring the portrait to completion:
- Bright Highlights: Use titanium white mixed with matte medium to add precise highlights to areas like the nose, cheekbones, and chin.
- Softened Borders: To emphasize the oval vignette, blend the edges softly with a semi-dry brush, ensuring a smooth transition from the background to the portrait.
- Review Consistency: Check that all areas of the portrait have been equally developed. Avoid leaving any section overly detailed compared to others, maintaining a cohesive finish.
Tips and Techniques for Glazing Success
- Patience is Key: Building 50-100 layers takes time, but this patience will bring richness and realism.
- Use Matte Medium: It helps dilute the paint to the desired transparency, preserving color vibrancy without compromising texture.
- Rotate Colors: Alternate between colors like raw umber, burnt sienna, and ultramarine blue to create depth and dimension.
- Light Source Consideration: Adjust shading to reflect your portrait’s light source, helping facial features feel three-dimensional.
- Avoid Overworking: While glazing layers add depth, too much reworking can muddy colors. Stick to thin, controlled applications.
Why Glazing Works for Acrylic Portraits
Glazing layers allow light to pass through, reflecting back and adding dimension. Each transparent layer builds on the one before, creating complex color variations. This effect gives the portrait an oil-like appearance, a finish that’s often praised for acrylics. The difference in visual depth between these layers keeps the painting from looking flat and enhances the vignette effect around your subject.
Common Challenges and Solutions
- Colors Look Flat: This can happen if the layers are too thick. Thin out each layer with matte medium and add layers patiently to avoid oversaturation.
- Difficulty with Vignette Edges: Keep edges soft by blending them with a nearly dry brush, creating that gentle fade that defines a vignette style.
- Struggle with Skin Tones: Experiment with a mix of warm and cool shades like raw sienna, burnt sienna, and phthalo green, adjusting layers until the desired tone is achieved.
Final Thoughts
Creating an oval vignette acrylic portrait is a wonderful way to highlight your subject and create a stunning effect that draws the viewer’s eye. With glazing, you can achieve depth and richness that elevate your work and add a touch of timeless beauty. Try this technique on your next portrait to experience the difference it makes in achieving realism and sophistication.
For more tips on acrylic portrait painting, glazing methods, and tutorials on creating depth and realism, visit my site at realisticacrylic.com. This technique, along with many others, will enhance your skills and add a professional touch to your portraits.
Let me know how you enjoyed this video, and if you have any questions on acrylic portrait painting, I’ll be happy to help.
LEARN MORE
- How to Paint Foliage Using the Acrylic Glazing Technique
- How to Trace for an Accurate Portrait Sketch
- How to Paint Realistic Eyes in Your Acrylic Portrait
- How to Add Raw Umber Dark & Ultramarine Blue to Your Portrait
- How to Make Your Own Raw Umber Dark
- How to Paint Realistic Trees & Grass in Your Acrylic
- How to Block In Skin Tone Values Using Glazing Technique
- How to Paint Vibrant Reds in Your Acrylic Portrait
- How to Glaze Background Colors & More Acrylic Portrait
- How to Paint White Clothing in Your Acrylic Portrait
- How to Easily Transition from a Sketch to a Painting
- How to Block In Shading & Skin Tones in Your Acrylic
- How to Build Up Color on Acrylic Pet Portrait
- How to Build Up Form on Clothing with Acrylic
- How to Paint Dark Clothing Using Acrylic Glazing Technique
- How to Paint a 24 x 30 Acrylic With 30 People
- How to Do Smooth Shading with Acrylic
- How to Sketch an Acrylic Portrait with a Grid
Read more about how to paint a portrait that you can surely be proud of!
Let me know how you enjoyed this video and if you have any questions on acrylic portrait painting, I’ll be happy to help.
Yours for better portraits,

P.S. Did you find this post helpful or encouraging? If so, send it on ahead! Let others know with the share buttons below. I’d love to hear your comments. Thank you so much! Also, do you have a question on acrylic portrait painting you’d like answered? Let me know, and I’d be happy to help!
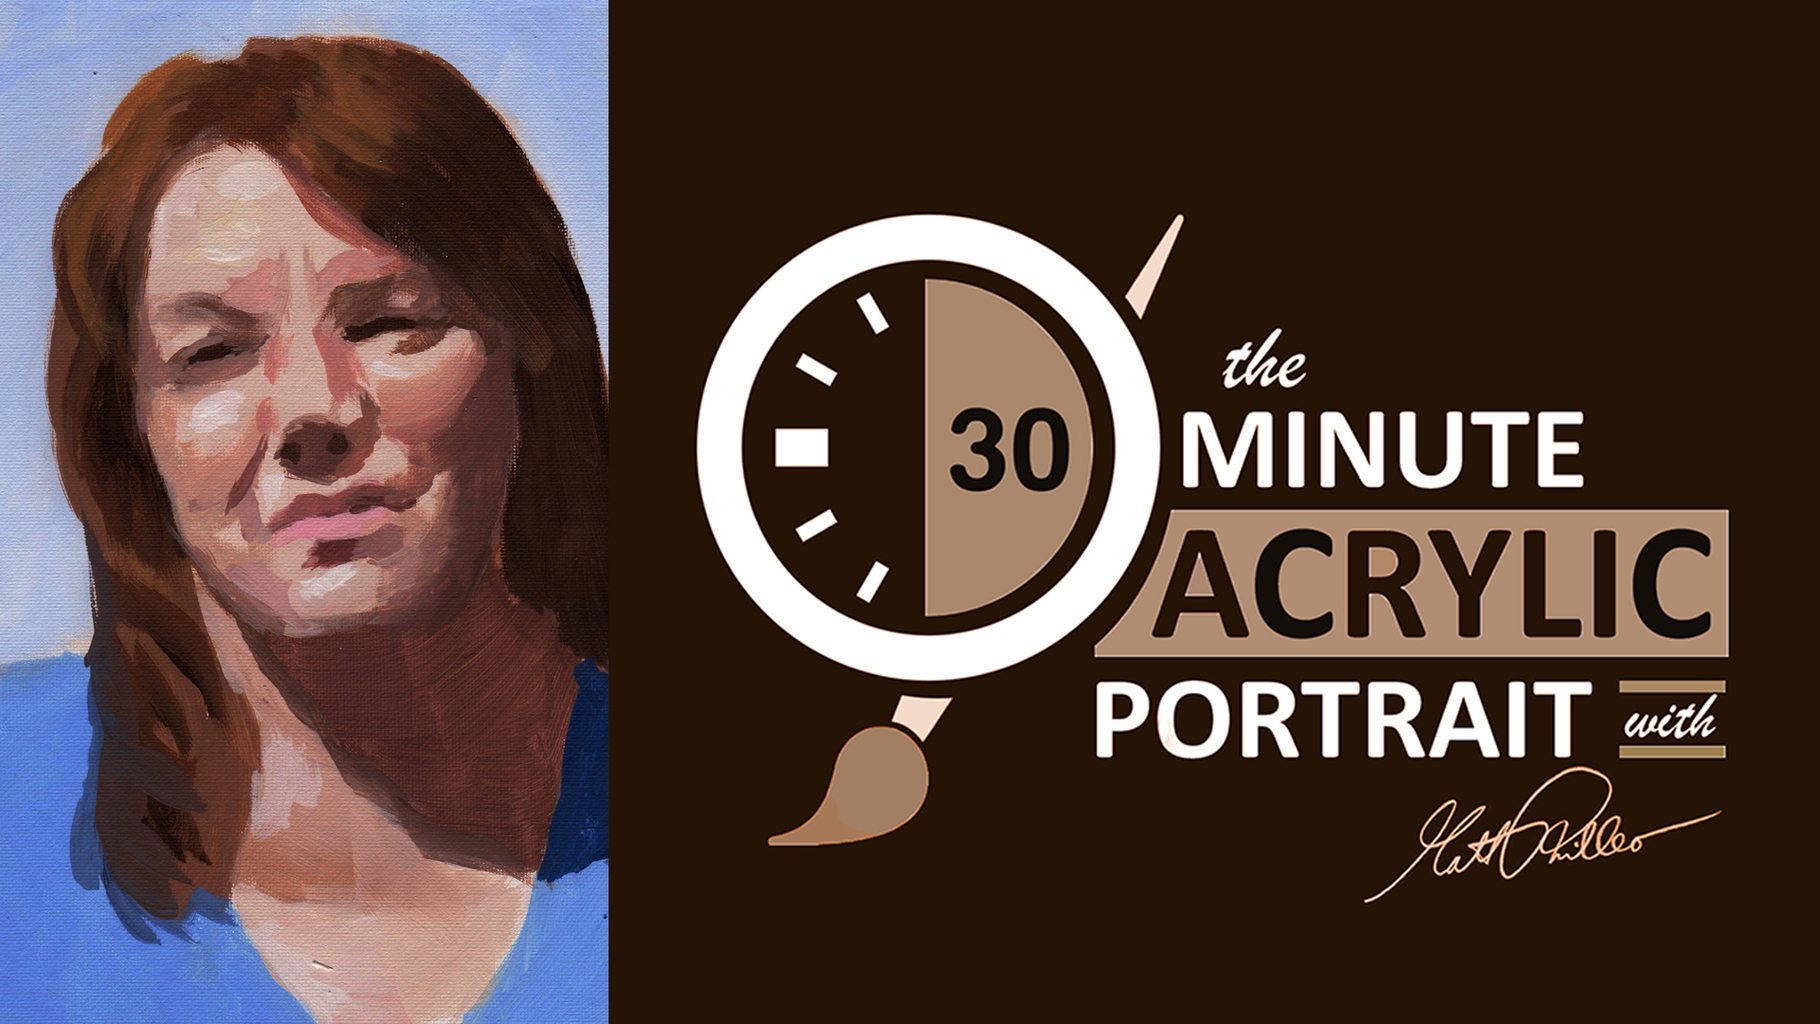
How to Paint an Acrylic Portrait in 30 Minutes
Discover the quick and simple method to capture portraits with speed and precision
As a child, I was amazed as I watched “The Joy of Painting” host Bob Ross paint a beautiful landscape in less than 30 minutes. I was captivated by his gentle touch, his fast wet-on-wet technique, and the way he could totally put you at ease.
I can’t say I wanted to be just like Bob when I grew up, but he did help inspire me to paint.
Later on, I learned the more methodical glazing technique from Norbert Kox, where you apply layer after layer of translucent paint. It’s very time consuming, but it creates fantastic realistic effects. This is the style I have become known for.
But sometimes I just want to knock out a quick painting, have fun with it, and yet push myself.
Can I paint a somewhat respectable looking painting in half an hour?
If I do it often, will I get faster?
Could it help me paint faster, and more confidently in my “typical” more detailed portraits?
Could an exercise like this help YOU to do the same?
There’s only one way to find out.
So, with that, I’m launching a new series of videos, or something like a show called, “The 30-Minute Acrylic Portrait” Season One, Episode 1…
Tips for Success in Fast-Paced Portrait Painting
- Set a Timer: Keep yourself on track by setting a timer. This helps maintain focus and prevents overworking areas.
- Keep Your Palette Organized: Lay out your colors clearly, so you can mix shades quickly without delay.
- Use a Limited Palette: Working with fewer colors will simplify the process and give the portrait a harmonious look.
- Practice Blocking and Simplifying: Learn to capture shapes and shadows quickly by focusing on big-picture composition.
Common Mistakes to Avoid
- Focusing Too Much on Detail: With only 30 minutes, try to avoid getting caught up in minute details.
- Using Too Many Colors: Stick with a few main colors for consistency and ease.
- Overthinking the Process: Embrace a relaxed approach, letting the process unfold naturally.
Conclusion
Creating a 30-minute acrylic portrait requires simplifying techniques, focusing on essential shapes, and mastering the art of blocking in shadows and highlights. This method allows for creative expression while enhancing your confidence and ability to capture a portrait quickly. Practice makes perfect, so keep experimenting with colors, tones, and brush techniques.
Read more about my additional resources, tutorials, to learn more and check out my free courses here. . Whether you’re a beginner or an experienced artist, there’s always something new to learn and apply to your paintings. Happy painting!
Let me know what you think of this video. Is it helpful? Interesting? Would you like to see more?
I’d love to hear back from you with your honest thoughts.
LEARN MORE
- How to Paint Foliage Using the Acrylic Glazing Technique
- How to Trace for an Accurate Portrait Sketch
- How to Paint Realistic Eyes in Your Acrylic Portrait
- How to Add Raw Umber Dark & Ultramarine Blue to Your Portrait
- How to Make Your Own Raw Umber Dark
- How to Paint Realistic Trees & Grass in Your Acrylic
- How to Block In Skin Tone Values Using Glazing Technique
- How to Paint Vibrant Reds in Your Acrylic Portrait
- How to Glaze Background Colors & More Acrylic Portrait
- How to Paint White Clothing in Your Acrylic Portrait
- How to Easily Transition from a Sketch to a Painting
- How to Block In Shading & Skin Tones in Your Acrylic
- How to Build Up Color on Acrylic Pet Portrait
- How to Build Up Form on Clothing with Acrylic
- How to Paint Dark Clothing Using Acrylic Glazing Technique
- How to Paint a 24 x 30 Acrylic With 30 People
- How to Do Smooth Shading with Acrylic
- How to Sketch an Acrylic Portrait with a Grid
Read more about how to paint a portrait that you can surely be proud of!
Yours for better portraits,

P.S. Did you find this post helpful or encouraging? If so, send it on ahead! Let others know with the share buttons below. I’d love to hear your comments. Thank you so much! Also, do you have a question on acrylic portrait painting you’d like answered? Let me know, and I’d be happy to help!
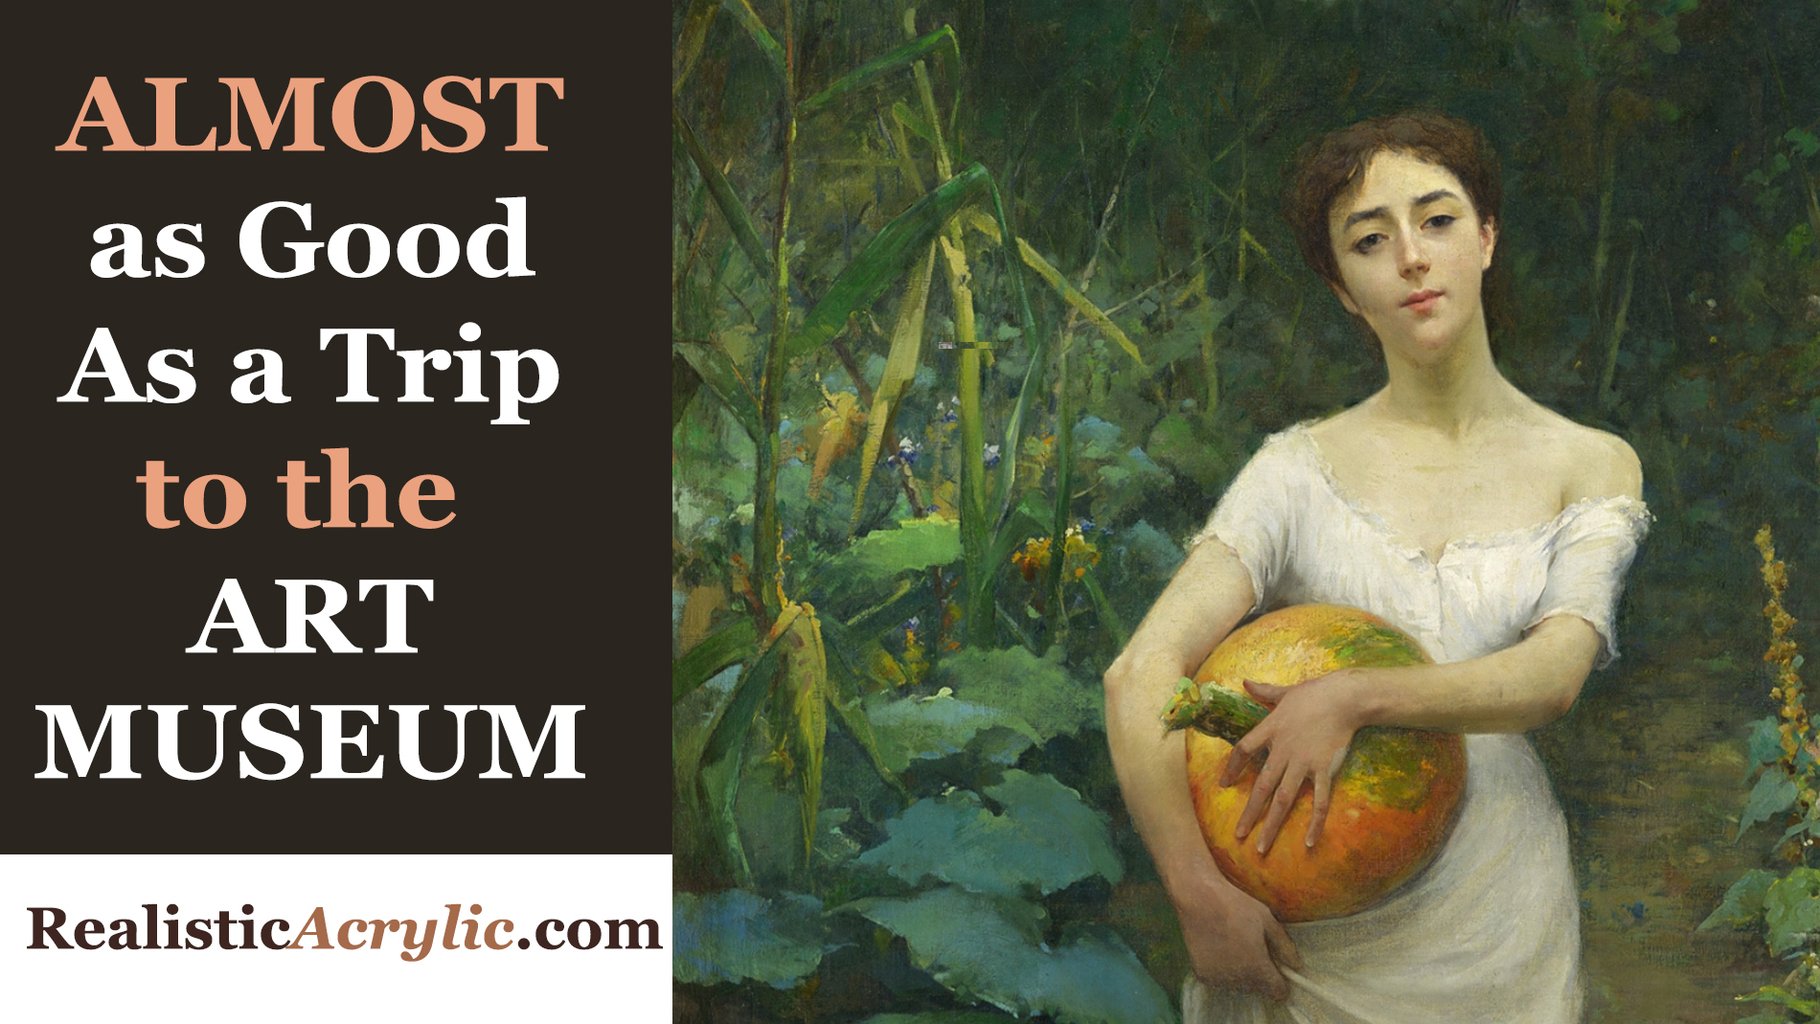
Almost as Good as a Trip to the Art Museum
Recently, I was browsing a couple of my favorite YouTube channels, and a fellow portrait painter that I look up to, Mark Carder, mentioned this amazing free resource for artists on his vlog.
I checked it out and was excited.
I’m not sure if you live near an art museum or gallery, but in my opinion, nothing fuels inspiration more for realistic portrait painting than studying the works of the masters–like Rembrandt, Caravaggio, or Sargent. Seeing how they composed their paintings, chose their colors, applied their brushstrokes can encourage you to go higher with your own realistic painting skills. But most of us, even if we do have access to the museum, don’t have time to take the trip.
However, you can virtually take a trip to the museum with this free collection of high-resolution art images online.
I’ll tell you about it (and show it to you) in this video…
Let me know if you find this helpful!
LEARN MORE
- How to Paint Foliage Using the Acrylic Glazing Technique
- How to Trace for an Accurate Portrait Sketch
- How to Paint Realistic Eyes in Your Acrylic Portrait
- How to Add Raw Umber Dark & Ultramarine Blue to Your Portrait
- How to Make Your Own Raw Umber Dark
- How to Paint Realistic Trees & Grass in Your Acrylic
- How to Block In Skin Tone Values Using Glazing Technique
- How to Paint Vibrant Reds in Your Acrylic Portrait
- How to Glaze Background Colors & More Acrylic Portrait
- How to Paint White Clothing in Your Acrylic Portrait
- How to Easily Transition from a Sketch to a Painting
- How to Block In Shading & Skin Tones in Your Acrylic
- How to Build Up Color on Acrylic Pet Portrait
- How to Build Up Form on Clothing with Acrylic
- How to Paint Dark Clothing Using Acrylic Glazing Technique
- How to Paint a 24 x 30 Acrylic With 30 People
- How to Do Smooth Shading with Acrylic
- How to Sketch an Acrylic Portrait with a Grid
Read more about how to paint a portrait that you can surely be proud of!
Yours for better portraits,

P.S. Did you find this post helpful or encouraging? If so, send it on ahead! Let others know with the share buttons below. I’d love to hear your comments. Thank you so much! Also, do you have a question on acrylic portrait painting you’d like answered? Let me know, and I’d be happy to help!
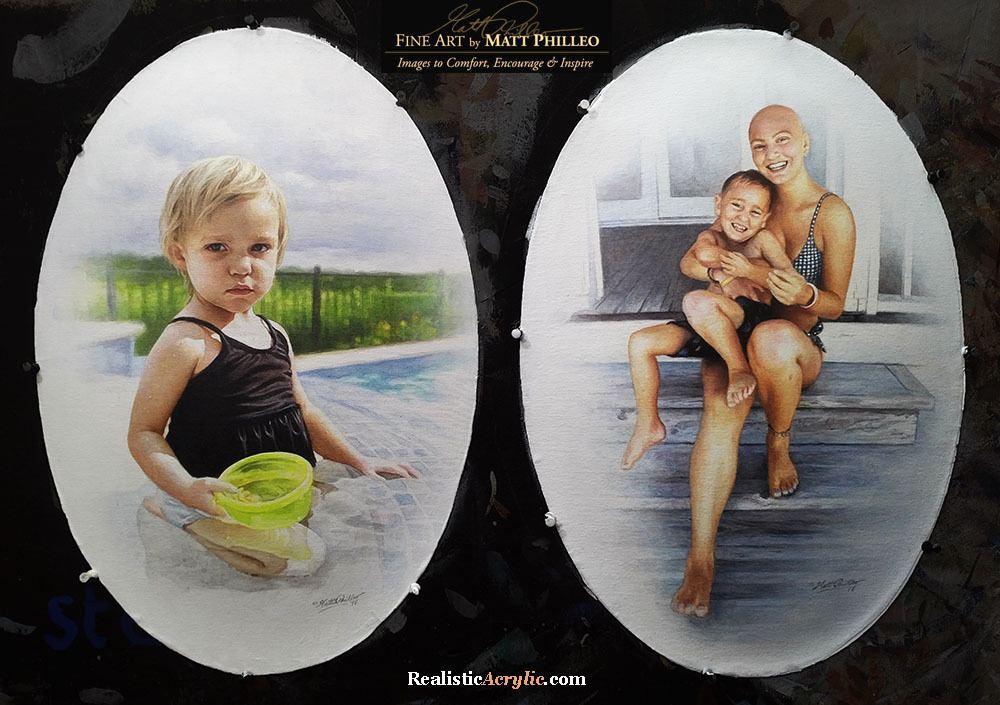
How to Paint Two Bubble Frame Oval Acrylic Portraits
Unlock the secrets to creating captivating two bubble frame oval acrylic portraits
Painting two bubble frame oval acrylic portraits offers a unique opportunity to explore creativity and technique while crafting eye-catching artwork. In this guide, you’ll discover the essential steps to create stunning portraits that showcase not only your artistic skills but also the charming oval frames that elevate your paintings. Whether you’re a beginner or an experienced artist, you’ll learn how to blend colors effectively, capture realistic features, and compose your portraits for maximum impact. Let’s dive into the world of acrylic painting and bring your two bubble frame oval acrylic portraits to life!
How is my portrait project coming along?
“Um, I haven’t even started it yet.”
“Oh. Could you do another one and get it done for me by Christmas?”
“Let me check. Sure.”
This is kind of how the conversation went when a client called me on a portrait project that I had scheduled out for a few months. I was backed up with commissions, and it was already well into December.
Do another portrait when I was already behind? Why not? I thrive on a little deadline pressure. I’ve got an extra reserve of midnight oil 🙂
So here are the portraits I created, two convex-oval 14″ x 20″ acrylic on canvas paintings. I decided to work on both at once. And I got them both done in time, too, by God’s grace!

And now I want to show you how I painted them. I’ll take you through the process from the colors I select for the palette, the first few layers, all the way to the completed painting.
How I Painted These Oval Vintage Acrylic Portraits
This tutorial is a work in progress, so I’ll be adding more videos in the future!
Keep in touch and I’ll let you know when I post the next one!
Let me know how this tutorial helps!
Have you ever painted on an oval canvas or unusual surface before? If so, leave a comment and tell me about it. Have a blessed day!
LEARN MORE
- How to Paint Foliage Using the Acrylic Glazing Technique
- How to Trace for an Accurate Portrait Sketch
- How to Paint Realistic Eyes in Your Acrylic Portrait
- How to Add Raw Umber Dark & Ultramarine Blue to Your Portrait
- How to Make Your Own Raw Umber Dark
- How to Paint Realistic Trees & Grass in Your Acrylic
- How to Block In Skin Tone Values Using Glazing Technique
- How to Paint Vibrant Reds in Your Acrylic Portrait
- How to Glaze Background Colors & More Acrylic Portrait
- How to Paint White Clothing in Your Acrylic Portrait
- How to Easily Transition from a Sketch to a Painting
- How to Block In Shading & Skin Tones in Your Acrylic
- How to Build Up Color on Acrylic Pet Portrait
- How to Build Up Form on Clothing with Acrylic
- How to Paint Dark Clothing Using Acrylic Glazing Technique
- How to Paint a 24 x 30 Acrylic With 30 People
- How to Do Smooth Shading with Acrylic
- How to Sketch an Acrylic Portrait with a Grid
Read more about how to paint a portrait that you can surely be proud of!
Yours for better portraits,

P.S. Did you find this post helpful or encouraging? If so, send it on ahead! Let others know with the share buttons below. I’d love to hear your comments. Thank you so much! Also, do you have a question on acrylic portrait painting you’d like answered? Let me know, and I’d be happy to help!
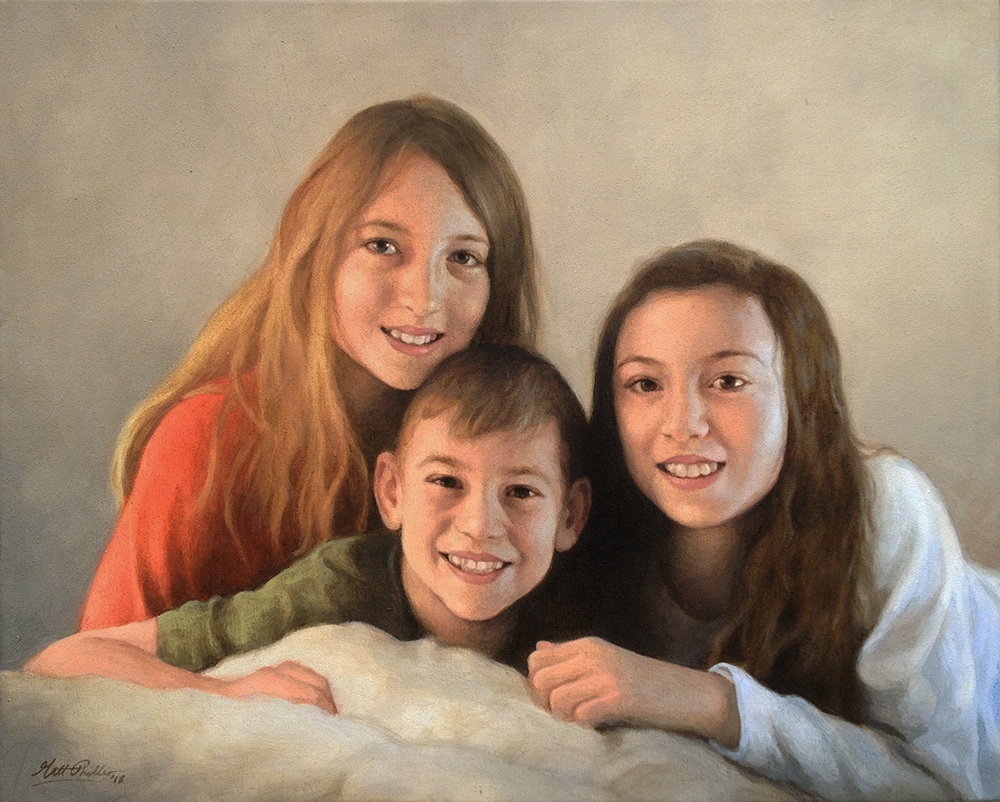
How to Build Depth in Your Acrylic Portrait Backgrounds
Learn the art of layering to create stunning backgrounds
Creating depth in your acrylic portrait backgrounds can transform your artwork from flat and uninviting to vibrant and lifelike. This comprehensive guide will explore techniques and tips that can be utilized to effectively build depth in your acrylic paintings. Through careful layering, color mixing, and thoughtful brushwork, your backgrounds will not only enhance your portraits but also engage viewers and add emotional resonance.

Understanding Depth in Art
Depth in art refers to the illusion of three-dimensionality on a two-dimensional surface. It involves creating a sense of space, distance, and perspective. In acrylic portrait painting, the background plays a crucial role in establishing depth and can significantly influence the viewer’s perception of the subject.
Techniques for Building Depth
1. Layering with Glazes
Layering is one of the most effective techniques for creating depth. It involves applying transparent layers of paint over one another, allowing underlying colors and textures to show through.
- Start with a Base Layer: Begin with a solid background color that will serve as your foundation. A mid-tone color can be effective for this purpose.
- Apply Transparent Glazes: Use a mix of acrylic paint and a glazing medium to create transparent layers. Ultramarine blue and raw umber dark can be mixed to achieve subtle variations.
By layering these glazes, different values can be developed. The key is to allow each layer to dry before applying the next, which helps to create a sense of depth through the transparency and complexity of the colors.
2. Creating Gradation
Gradation can be used to suggest distance and atmosphere in your backgrounds. This can be achieved through both blending and glazing techniques.
- Segmented Areas: Instead of blending wet colors, use segmented areas of glazing to create smooth transitions. By touching certain areas while leaving others untouched, a subtle blend can be achieved. This method provides a more natural appearance and enhances the depth of the painting.
- Use of Color Temperature: Varying color temperature can add to the perception of depth. Cool colors, such as blues and greens, can recede in the background, while warmer tones tend to come forward. For instance, using a cooler ultramarine blue in the background while maintaining warmer tones in the foreground can create a compelling contrast.
3. Employing Contrast
Contrast is essential in making your subject stand out against the background. By darkening background areas, the foreground subjects will naturally become more pronounced.
- Darkening Techniques: When applying darker glazes, consider how the light interacts with your subject. By ensuring that the background is darker than the portrait, the subjects will appear more luminous.
This can be particularly effective when using glazes, as they dry quickly, allowing for rapid layering without mudding colors. As highlighted in the video, the layering properties of acrylics can be leveraged to achieve a depth that feels rich and engaging.
4. Incorporating Patterns and Textures
Adding textures or patterns can create interest in the background and contribute to the overall depth of the painting.
- Marble-like Backgrounds: A painterly, marble-like appearance can be achieved by varying brush strokes and layering colors. Short, diagonal strokes can create a textured effect that draws the viewer’s eye without overwhelming the portrait.
This not only enhances depth but also gives the background a dynamic quality that complements the portrait.
Tips for Effective Backgrounds
- Use a Limited Palette: A limited color palette can help maintain harmony in your painting. This also makes it easier to create depth, as the colors will blend and layer more cohesively.
- Experiment with Brush Techniques: Different brush types and strokes can create varying effects. Experimenting with short strokes, glazing, and layering will allow for discovering unique methods of adding depth.
- Balance Between Foreground and Background: Always consider the balance of colors and values between your foreground and background. This ensures that your subject remains the focal point while the background supports its presence.
- Stay Patient: Building depth takes time. Allow layers to dry completely between applications to achieve the best results.
Conclusion
Building depth in your acrylic portrait backgrounds is a rewarding endeavor that can significantly enhance your artwork. By employing layering techniques, creating gradation, utilizing contrast, and incorporating textures, your backgrounds will not only support your subjects but also engage viewers on a deeper level.
As you continue to practice and refine these techniques, your portraits will come to life, showcasing the beauty of depth in acrylic painting. The journey of learning and experimenting is essential for any artist, and through consistent practice, remarkable improvements will be evident in your work.
With these insights, you are now equipped to enhance your acrylic portrait backgrounds and bring your artistic vision to life. For further resources and guides, visit realisticacrylic.com and check out my free courses to enhance your acrylic painting journey. Happy painting!
The Video Lesson…
- How to Paint Foliage Using the Acrylic Glazing Technique
- How to Trace for an Accurate Portrait Sketch
- How to Paint Realistic Eyes in Your Acrylic Portrait
- How to Add Raw Umber Dark & Ultramarine Blue to Your Portrait
- How to Make Your Own Raw Umber Dark
- How to Paint Realistic Trees & Grass in Your Acrylic
- How to Block In Skin Tone Values Using Glazing Technique
- How to Paint Vibrant Reds in Your Acrylic Portrait
- How to Glaze Background Colors & More Acrylic Portrait
- How to Paint White Clothing in Your Acrylic Portrait
- How to Easily Transition from a Sketch to a Painting
- How to Block In Shading & Skin Tones in Your Acrylic
- How to Build Up Color on Acrylic Pet Portrait
- How to Build Up Form on Clothing with Acrylic
- How to Paint Dark Clothing Using Acrylic Glazing Technique
- How to Paint a 24 x 30 Acrylic With 30 People
- How to Do Smooth Shading with Acrylic
- How to Sketch an Acrylic Portrait with a Grid
Read more about how to paint a portrait that you can surely be proud of!
Let me know how this helps! If you have questions on your portrait painting, feel free to contact me ([email protected])
Yours for better portraits,

P.S. Did you find this post helpful or encouraging? If so, send it on ahead! Let others know with the share buttons below. I’d love to hear your comments. Thank you so much! Also, do you have a question on acrylic portrait painting you’d like answered? Let me know, and I’d be happy to help!
Would you like to learn portrait painting from me in person?
I’d like to let you know that I’ll be teaching at the Chippewa Valley Cultural Association (Heyde Center for the Arts, Chippewa Falls, WI) on March 12-13, 10:30am-3:30pm, a two-day intensive acrylic portrait painting workshop. The class size is limited to 10 people to make sure I can give each student feedback and individual instruction. For more details, visit my events page here…https://realisticacrylic.com/paint-an-acrylic-portrait-with-me-in-2019/
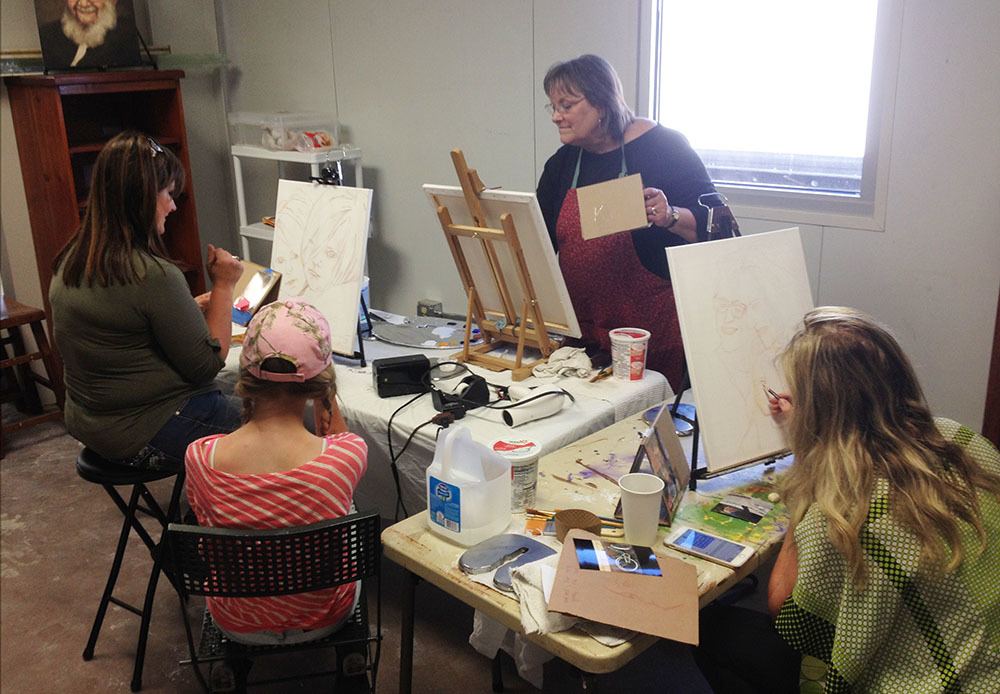
Paint an Acrylic Portrait With Me in 2019!
Would you like to learn portrait painting from me in person?
I’d like to let you know that I’ll be teaching at the Chippewa Valley Cultural Association (Heyde Center for the Arts, Chippewa Falls, WI) on March 12-13, 10:30am-3:30pm, a two-day intensive acrylic portrait painting workshop. The class size is limited to 10 people to make sure I can give each student feedback and individual instruction.
Learn more/ register by clicking the image below…
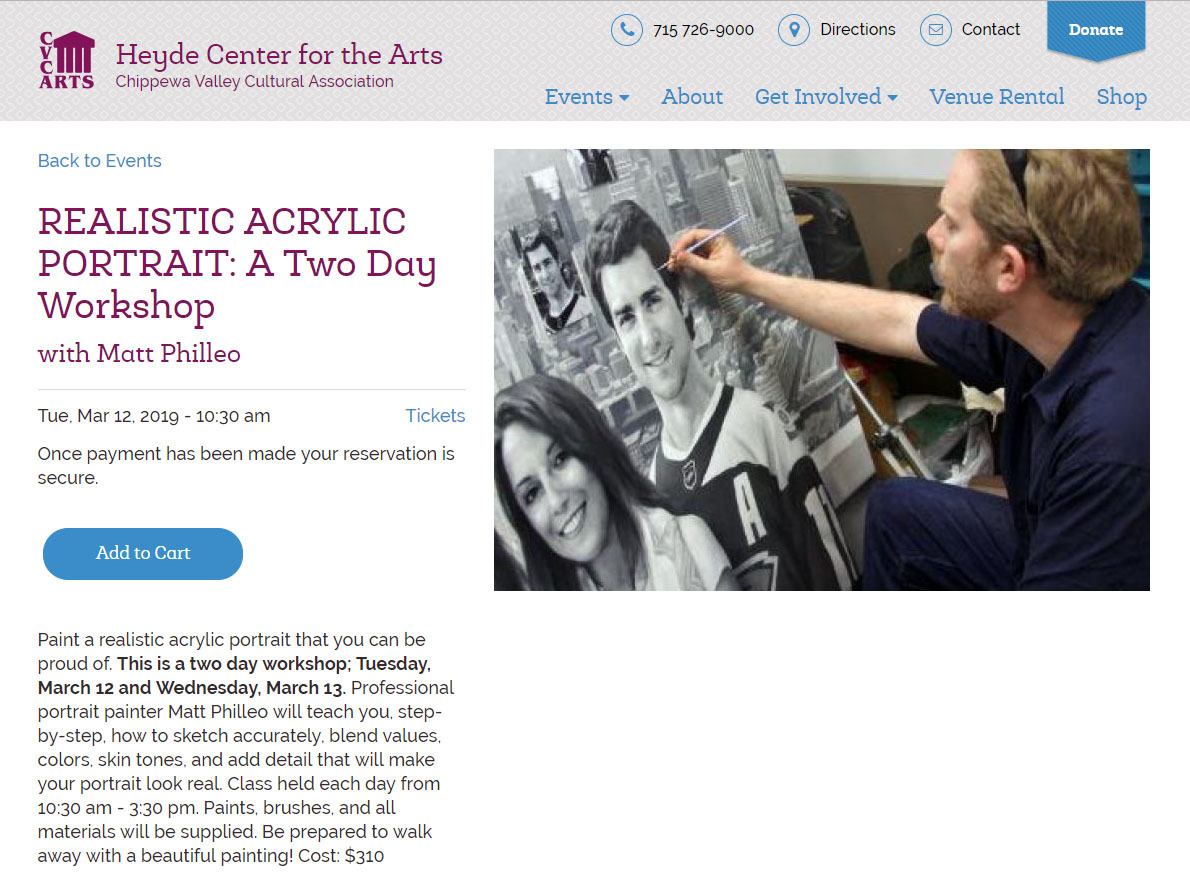
Learn how to paint realistic acrylic portraits with a two-day intensive , held at the Heyde Center in Chippewa Falls, WI workshop by artist Matt Philleo on March 12-13, 10:30-3:30pm
If you live or will be in the St. Paul/ Minneapolis-Eau Claire, WI area around that time and would like to learn how to paint with me, I would love to see you then!
Or maybe you know someone that may be interested. Could you please let them know about this? Thank you so much! Let me know if you have any questions.
Yours for better portraits,

P.S. Did you find this post helpful or encouraging? If so, send it on ahead! Let others know with the share buttons below. I’d love to hear your comments. Thank you so much! Also, do you have a question on acrylic portrait painting you’d like answered? Let me know, and I’d be happy to help!
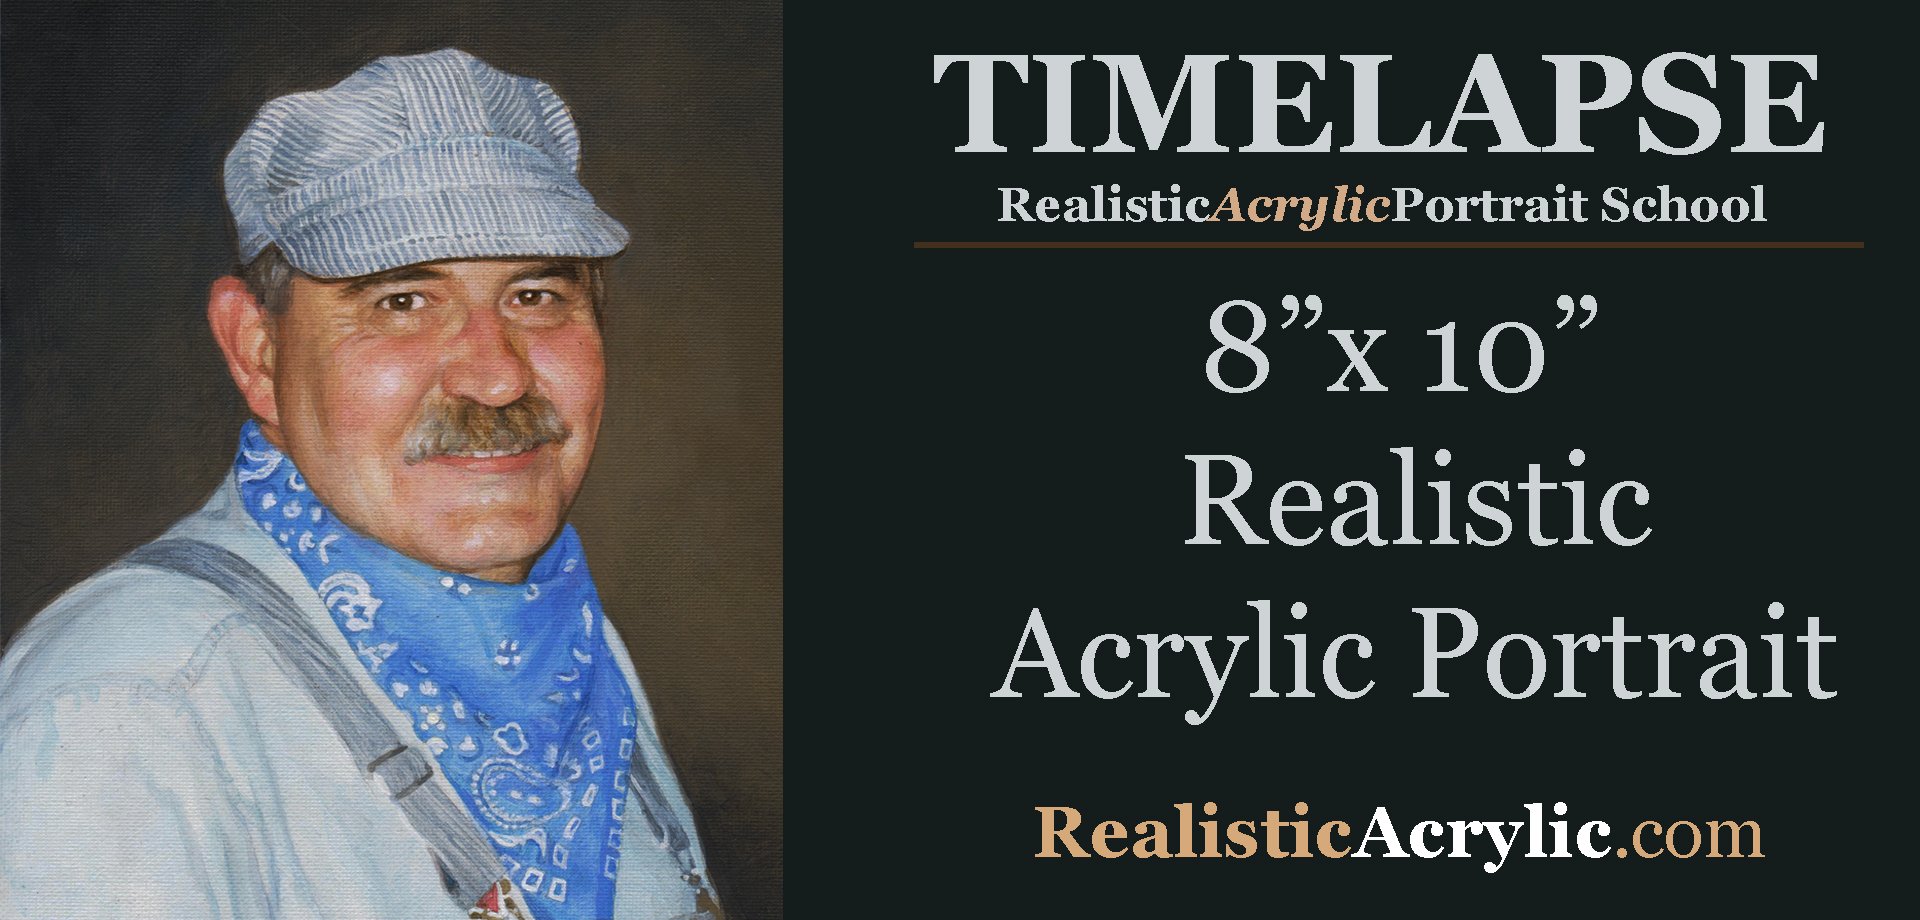
How to Paint 8 x 10 Realistic Acrylic Portrait Timelapse
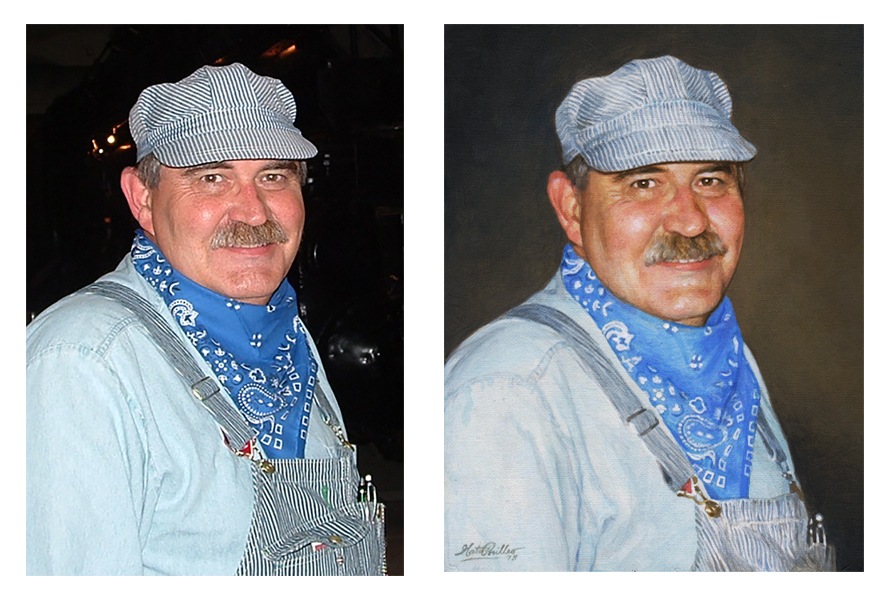
Just prior to Christmas, I finished this portrait of a local engineer.
Creating a realistic acrylic portrait can be a rewarding experience, especially when utilizing the glazing technique. This method involves layering transparent paints to build depth and luminosity in your artwork. In this tutorial, a step-by-step guide is provided to help artists of all levels achieve impressive results in an 8 x 10 portrait.
Understanding the Glazing Technique
The glazing technique is foundational in creating depth and realism in acrylic painting. It is characterized by the application of thin, transparent layers of color, allowing the underlying layers to shine through. This method is often compared to photography, where an image starts light and gradually gains depth.
Materials Required
Before beginning, ensure that the following materials are prepared:
- Acrylic paints: Ultramarine blue, brownish tone (raw umber or dark), and skin tones
- Clear acrylic matte medium
- Brushes: Small round brushes, flat brushes, and a small detail brush
- Palette for mixing colors
- Canvas (8 x 10 inches recommended)
- Water for rinsing brushes
Step-by-Step Process
Step 1: Preparing the Background
To commence, a light glaze is applied to the background using clear acrylic matte medium. This initial layer serves as a foundation for subsequent colors and adds a soft, ethereal quality to the painting.
Step 2: Adding Foreground Details
Once the background is set, the first layer of details can be added. Ultramarine blue is used to paint the hat, while the brownish tone is applied to create depth in the background. Care is taken to let these layers dry before continuing with additional details.
Step 3: Building Up Layers
The glazing technique thrives on layering. After the initial foreground details have dried, the focus shifts to the face and scarf. By layering thin glazes, the desired colors are built up gradually, allowing the light to penetrate through the layers.
- Tip: Work from foreground to background to maintain focus on the subject. This approach helps keep details sharp and defined.
Step 4: Detailing the Features
Attention is drawn to the finer details in the face, such as the eyes and lips. Using various skin tones, nuances are added to create dimension. This is achieved by carefully layering pinkish tones on the cheeks and around the eyes, emphasizing features like eyebrows and the mustache with darker shades.
- Technique: When applying glazes, it is essential to work thinly. The use of a clear acrylic medium mixed with paint ensures translucency, allowing for subtle color variations.
Step 5: Refining and Smoothing
As the painting progresses, the need to refine details becomes evident. Skip around the canvas, working on different sections to ensure balance and harmony in the overall composition. Smoothing out areas with a gentle hand helps in creating a realistic appearance.
- Tip: Varying brush sizes and techniques can significantly enhance texture. Larger brushes are suitable for broader areas, while smaller brushes are ideal for intricate details.
Step 6: Enhancing Realism
To achieve a realistic finish, darker tones are added under the chin and in shadowed areas, enhancing the sense of depth. Highlights are strategically placed to simulate the effect of light on the face and clothing.
- Technique: As the final layers are applied, incorporating more opaque white paint helps achieve smoother transitions between colors.
Step 7: Final Touches
At the later stages of the painting, I continue to add details and shading. Varying line thickness and texture are key components to realism. Then moves back and forth between different areas of the portrait, ensuring that the final touches are cohesive and enhance the overall image.
Step 8: Signing the Artwork
After all the details have been finalized, the painting is signed. This not only signifies the completion of the work but also adds a personal touch to the artwork.
Conclusion
This step-by-step guide on painting a realistic acrylic portrait using the glazing technique showcases how layered approaches can bring an image to life. By utilizing transparency and careful detailing, you can create stunning, lifelike portraits that capture the essence of their subjects.
Whether you are an experienced artist or just starting, mastering the glazing technique will enhance your acrylic painting skills.
Additional Tips and Techniques
- Experiment with Colors: Don’t hesitate to mix different colors to achieve unique skin tones and shades.
- Practice Patience: Building up layers takes time, but the results are worth the effort.
- Use Reference Images: Having a clear reference will guide your color choices and proportions, making the process smoother.
By following these steps, you can enhance your painting techniques and create stunning, realistic portraits. Embrace the glazing method and enjoy the process of bringing your artistic visions to life!
For further resources and guides, visit realisticacrylic.com and check out my free courses to enhance your acrylic painting journey
Would you like to learn how to paint like this, with individual lessons broken down and explained?
Learn How to Paint Acrylic Portraits With My Free Mini-Video Course!(The lessons show me painting a different picture, but the technique is the same. Enjoy! 🙂
LEARN MORE
- How to Paint Foliage Using the Acrylic Glazing Technique
- How to Trace for an Accurate Portrait Sketch
- How to Paint Realistic Eyes in Your Acrylic Portrait
- How to Add Raw Umber Dark & Ultramarine Blue to Your Portrait
- How to Make Your Own Raw Umber Dark
- How to Paint Realistic Trees & Grass in Your Acrylic
- How to Block In Skin Tone Values Using Glazing Technique
- How to Paint Vibrant Reds in Your Acrylic Portrait
- How to Glaze Background Colors & More Acrylic Portrait
- How to Paint White Clothing in Your Acrylic Portrait
- How to Easily Transition from a Sketch to a Painting
- How to Block In Shading & Skin Tones in Your Acrylic
- How to Build Up Color on Acrylic Pet Portrait
- How to Build Up Form on Clothing with Acrylic
- How to Paint Dark Clothing Using Acrylic Glazing Technique
- How to Paint a 24 x 30 Acrylic With 30 People
- How to Do Smooth Shading with Acrylic
- How to Sketch an Acrylic Portrait with a Grid
Read more about how to paint a portrait that you can surely be proud of!
Let me know how this helps.
Yours for better portraits,

P.S. Did you find this post helpful or encouraging? If so, send it on ahead! Let others know with the share buttons below. I’d love to hear your comments. Thank you so much! Also, do you have a question on acrylic portrait painting you’d like answered? Let me know, and I’d be happy to help!
Why These Portraits Won the Contest
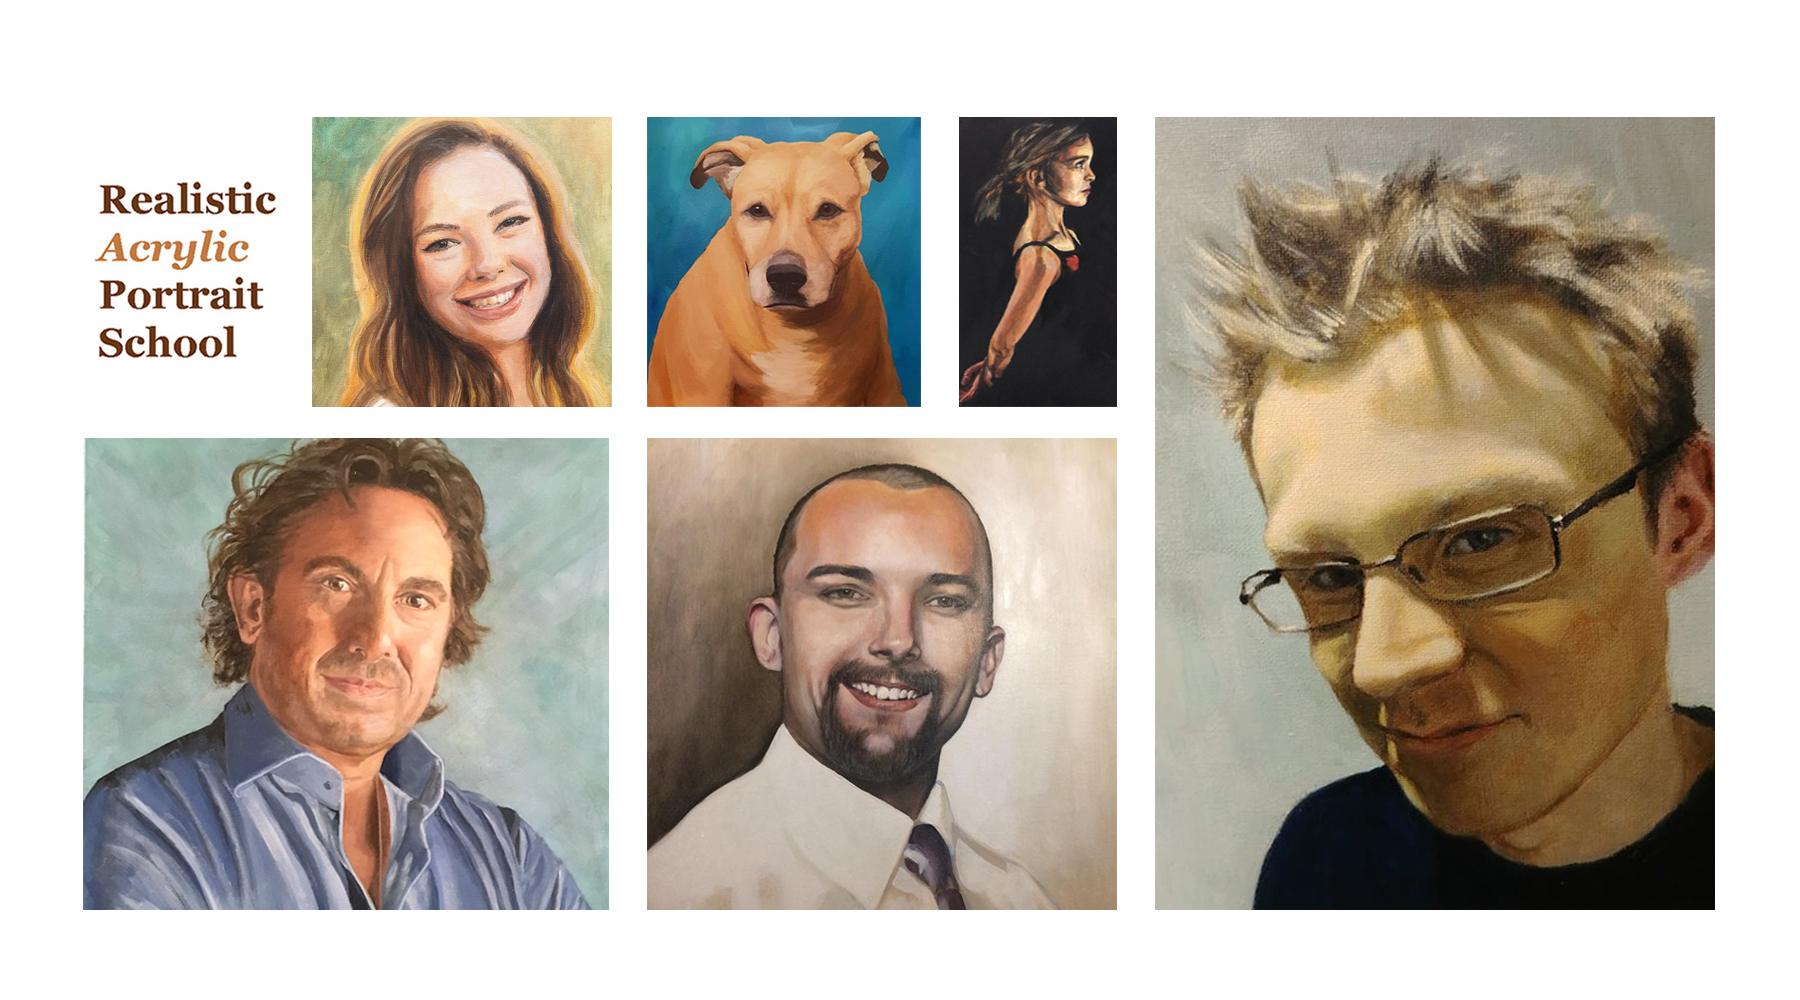
It is my privilege every week to judge entries for the Realistic Acrylic Portrait School Facebook Contest.
The best 5-6 images get chosen to be included on the Header Image of our 6,000+ member group. But why do I choose the portraits that make it to the top?
In this brief video, I’ll go over the reasons why I awarded these portraits the prizes they received. I also discuss what could be done to improve them.
You can learn from these tips on what makes for a good portrait and how to improve your own.
Also, if you aren’t currently a member of the Realistic Acrylic Portrait School Facebook group (it’s free to join), you should be! Here’s why…
- Get help on your portrait from myself and fellow artists when you feel stuck.
- Share your artwork with others and get inspired to paint more, by seeing what your fellow artists are doing.
- Enter a portrait into the weekly contest, get your work featured, and win a prize!
Join the Realistic Acrylic Portrait School Facebook Group
See you inside the group! Let me know how these tips help, and of course, if you have any questions.
Yours for better portraits,

P.S. Did you find this post helpful or encouraging? If so, send it on ahead! Let others know with the share buttons below. I’d love to hear your comments. Thank you so much! Also, do you have a question on acrylic portrait painting you’d like answered? Let me know, and I’d be happy to help!

