All posts by Matt Philleo

How to Block-in Hair on Your Acrylic Portrait
The steps to block-in hair, adding depth and realism with layered glazing techniques.
When creating a realistic portrait, the process of blocking-in hair plays a crucial role in establishing depth and capturing lifelike textures. In this tutorial, you will learn step-by-step how to block in hair on an acrylic portrait . By following these essential techniques, you’ll discover how to mix tones, apply glazes, and build up layers to make your portrait more three-dimensional.
Understanding the Block-in Process for Hair
Before diving into the specifics, it’s essential to understand the “block-in” technique. Blocking-in refers to the initial stage where you establish basic shapes, values, and shadows before adding detailed layers. This foundational stage is critical for creating a structured framework for your portrait, ensuring that as you add more layers, the hair appears realistic, cohesive, and well-blended.
Step 1: Establishing the Background and Hair Boundaries
The first step in blocking-in hair is defining the broader sections of the portrait. In the video, I start by setting up a muted, cloudy background. Using colors like ultramarine blue and raw umber dark, blends these shades to create a smooth transition from cooler to warmer tones. Because this method can also apply to your portrait’s background, ensuring the hair and face blend seamlessly into the backdrop without looking disconnected.
Once your background is set, begin focusing on the hair. Start by identifying the boundaries and large sections of hair. At this stage, do not worry about small details like individual strands; instead, focus on the bigger shapes and how the hair flows around the face and neck.
Step 2: Darkening the Hair with Cool Tones
To create depth, it is essential to start with darker tones. I recommend that using a mixture of raw umber dark and ultramarine blue for the base layer. By adding the blue, you cool down the mix, which is vital when working with shadows. The darker, cooler tones help create the illusion of depth, mimicking the way light interacts with the hair in dimly lit areas.
As I explain, the cooler tones mimic the appearance of shadows when light is scarce. The mixture of ultramarine blue and raw umber dark serves as the ideal “Payne’s gray” substitute, but with more versatility since you can customize the shade based on your needs. Apply this mixture lightly over the larger sections of hair, focusing on the areas that will remain in shadow.
Step 3: Defining Local Values and Shapes
Once the darker base coat is applied, it’s time to define the local values. Local values refer to smaller, nuanced changes in light and shadow. Instead of focusing on the entire area, look for pockets of darker tones that indicate hair bends, waves, or areas where light is blocked.
For example, the hair under the chin or near the ear will often feature shadows. I use precise brushstrokes to form the shadowed sections, while leaving lighter areas untouched to create contrast. This helps in defining the unique shapes that hair takes on.
Use a fine-tipped brush to enhance the details and smaller sections. At this stage, you don’t need to be exact, but try to match the general direction and flow of the hair. Your initial layers are meant to be flexible, allowing you to adjust later.
Step 4: Gradation and Layering for Hair Striations
Acrylic portraiture thrives on the glazing technique, which involves building layers of translucent paint to achieve a gradual change in value. In this step, focus on blending your dark tones into lighter ones by applying thin layers of glaze. I use clear medium to thin his paint and slowly introduces gradation into the hair.
To add natural-looking striations (the small, subtle streaks of hair), use the tip of your brush and apply long, delicate strokes. These strokes should be thin and follow the natural grain of the hair. Remember to vary the pressure on your brush. For darker areas, apply more pressure, while lighter sections need less to avoid over-darkening.
Step 5: Highlighting Key Areas and Adding Definition
After laying down the foundational layers and working on the shadows, the next step involves highlighting. In the reference image, I notices that there’s a distinct highlight at the top of the hair. Using a slightly lighter mixture of raw umber dark, he begins to emphasize these sections.
To create highlights, focus on the areas where light naturally hits the hair such as the crown, or where the hair parts. A light touch with a fine brush can enhance these areas, bringing dimension and texture. Be careful not to overdo the highlights; subtlety is key.
For instance, adding a soft glaze using the clear medium allows you to leave some areas lighter. Later, you can apply a reddish glaze, which, as I take notes, will provide a ton of luminosity and help the hair “pop” out of the portrait with vibrant, warm tones.
Tips and Techniques for Effective Hair Block-in
- Use a Cool Base for Dark Hair: When blocking in darker hair, use cool tones mixed with raw umber and ultramarine blue. This ensures the shadowed areas appear more realistic and avoid a flat, monotone appearance.
- Vary Brush Strokes: For a natural hair texture, use different brush strokes long strokes for defining edges and shorter, dabbing strokes for blending. This combination will give your painting more depth and a smoother transition between light and shadow.
- Gradation is Key: Gradually build layers using the glazing technique. Thin out your paint with clear medium and apply transparent layers. This technique will allow you to adjust tones without overpowering the base layer.
- Pay Attention to the Reference Photo: Use the reference photo to determine where the highlights and shadows fall. Aligning shadows with landmarks like the lips, nose, or chin ensures proportional and accurate placement.
- Don’t Overdo Highlights: Highlights should be subtle. Too much highlighting can make the hair look unrealistic and take away from the depth created by the shadows.
Conclusion: Building Up for Realism
Blocking-in hair is all about establishing the basic framework before moving on to finer details. By using cool tones, creating gradation, and employing glazing techniques, you can achieve a realistic and lifelike portrayal of hair. Remember, the key is patience building up layers slowly ensures that the final result will have depth, texture, and vibrancy.
Whether you are a beginner or an experienced painter, mastering the block-in process is crucial for creating beautiful acrylic portraits that stand out. Start with the shadows, define the mid-tones, and finish with highlights for hair that looks three-dimensional and natural.
For more tutorials and painting tips, visit RealisticAcrylic.com and take your portrait painting skills to the next level!
Did you enjoy this video?
Share it with your artist friends if you think they will find it helpful! Also, if you need more help, hop onto courses.realisticacrylic.com where we concentrate on just acrylic portraits, and how to make yours the best it can be.
My goal is to make your life as acrylic portrait artist easier by giving you tips, lessons, and tutorials.
Yours for Better Portraits,

If you found this post helpful or encouraging, would you send it on ahead? Let others know with the share buttons below. I’d love to hear your comments. Thank you so much!

The 30-Minute Acrylic Portrait: “Happy Man in Black”
Transform your painting skills: Create a striking 30-minute acrylic portrait with ease!
Let me show you how in the latest episode of the 30-Minute Acrylic Portrait. I’ll demonstrate on an 11″ x 14″ commissioned portrait of a pastor (“the happy man in black”) painting quickly with no sketch underneath.

Although this more opaque, painterly style is not as precise as the glazing technique that most people know me for, it’s fun to loosen up and push yourself to see what you can accomplish in a half an hour.
By the way, I will be adding more to this portrait after the show is done (maybe an hour or two of video), and I plan on including it here as bonus videos in the classes section, here at Realistic Acrylic Portrait School.
You will learn how to:
- refine any proportions that were off
- adjust the original blocked-in values
- smooth out your shading.
- enhance contrast between the subject and background
- add detail
Interested? Sign up here and I’ll let you know when I post those lessons…
Learn How to Paint Acrylic Portraits With My Free Mini-Video Course!Okay, without further ado…here is Season 2, Episode 1 of the “30-Minute Acrylic Portrait.”
Let me know what your thoughts—have you ever tried doing a portrait like this and would it help you paint faster?
Also, I’m thinking of doing a 30-minute acrylic portrait show with my usual glazing technique, complete with a sketch underneath, rather than this more aggressive opaque style. I’m curious what we could accomplish in a half an hour with that technique, though we certainly wouldn’t be able to complete a painting. But the 30-minute challenge may push us to create the foundation a little faster, hopefully without sacrificing quality.
Is that something you would be interested in seeing?
Yours for Better Portraits,
If you found this post helpful or encouraging, would you send it on ahead? Let others know with the share buttons below. I’d love to hear your comments. Thank you so much!

4 Ways on How to Tell Your Acrylic Portrait is Done
Master the signs of completion: Ensure your acrylic portrait is perfectly finished!
Is it time to “call it quits?” on your painting? How can you tell?
You don’t want to overdo it, but neither do you want to leave the portrait looking unfinished. You want to amaze people with that picture, give a great gift or get paid, and have the satisfaction of a job well done.
But how?
Here are 5 ways to know your painting is done. In this article, I’m going to use a little tough love, artist-to-artist. Ok with that? Alright, here we go…
1. You’re not adding any value to it.
If you’ve been working on a one-subject 16″ x 20″ portrait for say, 50 hours, it’s time to say enough is enough.
Test: get an “innocent bystander” (in my case, usually it’s my wife) to look at your painting from a distance of six feet away, and then come back into your studio a couple of hours later. If they can’t tell the difference, you’re done.
By continuing on, you’re not adding anything significant to the bottom line of the painting.
You’re not adding any value.
Nobody will notice the little details you’re adding if they don’t make an impact from six feet away. Most of the time, as artists, we fuss over some small portion of the painting that has us stumped. It’s like the kid who takes all his time on one question in the timed exam and then fails the test because he should have skipped the question, completed the rest of the test, and then come back and finish that one problem.
Don’t get me wrong, I’m not saying details aren’t important. I love detail and it makes an acrylic portrait look fantastic. But if you’re struggling with one square inch of your painting, leave it alone and come back to it if you need to. But chances are, you don’t.
2. You’re making it worse.
Yes, it’s possible to make a painting worse, the more you work on it.
I’ve done that.
I’ve had some paintings where I should have left well enough alone. That little dimple on the persons’ face was so good, I thought I should make it perfect.
But then I messed it up. So I had to try to restore what I had before, and then leave it alone. Then I found myself messing up another area.
Pretty soon, I realized, the painting is done. Time to sign it!
3. You just hit the unforgiving end of a deadline.
If you are a professional or semi-professional artist, doing portraits on commission, you know what I’m talking about when I say you hit the end of a deadline. Or you might be doing it as a hobby, but you have an occasion, like a birthday or Christmas, that dictates the painting must be done and wrapped by a certain time.
You know that a portrait must get in the client’s hands today, or at the very least, you have to email a proof image for the client to approve. You put in as many hours as you can. You bring out the coffee and energy drinks if you have to (have you ever tried coffee with a couple of black tea bags thrown in?...that will keep you up!) and you pull an all-nighter if need be.
But eventually, you run out of hours, and you just have to call the painting done, out of necessity.
This, by the way, is why I advocate the glazing technique. You can work your entire painting at once, and even if you feel like it is 80% done, oftentimes, it’s done enough to please the client.
If you’re like those artists who have a white canvas and work it like a drawing, from left to right, making everything detailed and finished section-by-section, then you’ll always have a white section of canvas that’s undone until the very end.
And there’s no way you can pass off that portrait as finished.
Now, that’s not to say we don’t strive for our best work. Don’t turn in a painting to a client that’s not representative of your style, that’s not finished well. But the 80%-100% level of completion in a painting is a very grey area, a very thin line. It’s where you may not be adding much value to the portrait.
There’s a saying: “your work will expand to fill the time you allot for it.”
That holds true with paintings as well. If you have a tight deadline to meet, if you value your reputation as an artist, you’ll find a way to get the artwork done.
Unless the client is able to give you some wiggle room on the deadline, better to turn in a painting that doesn’t look perfect to you, than say, “Sorry, it’s not done,” when they absolutely needed it by a certain time.
4. Your client approves the portrait.
Again, let’s say you are a professional artist and you email your client a proof image. They love it. They are ready to pay you.
Don’t you dare add one more drop of paint to that canvas! It’s done.
“But I just noticed an eyelash that’s missing,” you say. “I’ve got to paint it in there.”
No. Leave it. Your client approved this version of the painting, and if you add more paint, it’s a different version. When they come to pick it up, they might say, “it doesn’t look like the proof. Something’s different.”
Then you’d have to try and restore it to what it was. What a nightmare! You’d waste the client’s time, your time, and possibly even lose the commission.
Not worth the gamble.
They approve it=you’re done.
If you think the painting could be improved, save that sentiment for your next painting.
Now, with all these points, it’s good to remember that sometimes a painting is not done and needs more work. Some artists give up on a painting too early. Don’t do that. If you stick with a painting that’s causing you frustration, it will build your endurance as an artist, and you will be able to paint better the next time. It’s just like working out at a gym. Finish your reps, and you will be stronger the next week.
As an example of how to finish a painting successfully, here is a portrait I did not too long ago of a pastor, a memoriam portrait. It’s one of my favorites. I posted some videos of it in the past, but here I want to show you how I finish and sign it.
Let me know how this article helps! It’s been a while since I’ve last posted, but I hope to get back into the swing of things again!
If you have any questions or comments for me, please leave them below. May God bless you in your painting!
Yours for Better Portraits,
If you found this post helpful or encouraging, would you send it on ahead? Let others know with the share buttons below. I’d love to hear your comments. Thank you so much!

Portrait Painting of a Veteran at the Yurt
Is it possible to do portrait painting while you’re away from your home, your usual studio area?
This was something I’ve always wanted to do: create art while camping. And for all the years I’ve gone camping, I’ve never been able to successfully do it.
But finally, at the end of June, my brother and I decided to go camping at a rustic yurt up in Cable, WI. Where is that? Let’s just say, it’s “way up north.” 🙂 And what is a yurt? It’s a round tent-like house, a permanent structure made of lattice wood, bound together with steel cable, and covered with fabric. We rented it through Airbnb for two days.
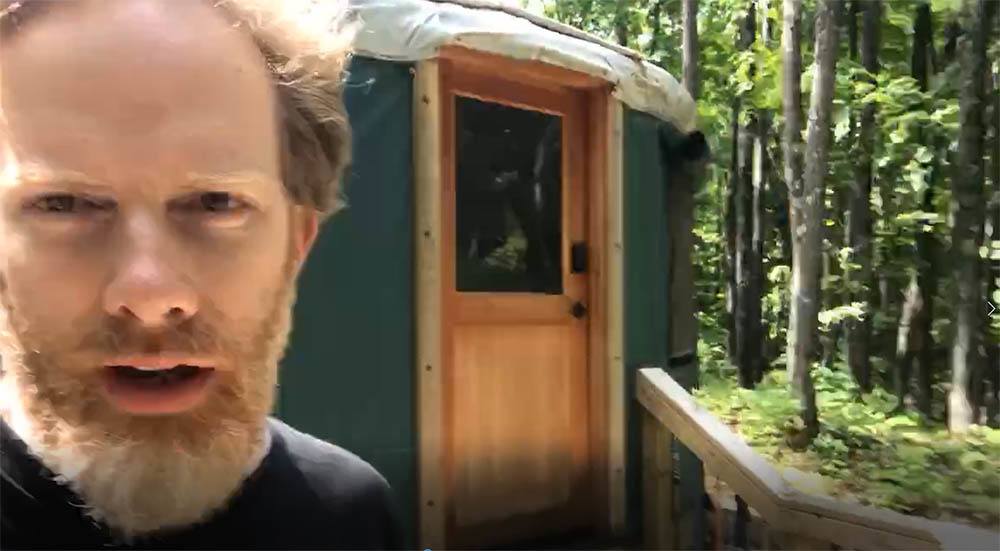
Acrylic portrait artist Matt Philleo ready to paint at a yurt in Cable, Wisconsin
We parked at the bottom of the hill and carried our gear up about a mile. We realized how out of shape we were! I also had my painting supplies: easel, palette, and brushes with me. In the middle of hiking and cooking, we decided to both do a little work: my brother wrote (he’s an author) and I painted.
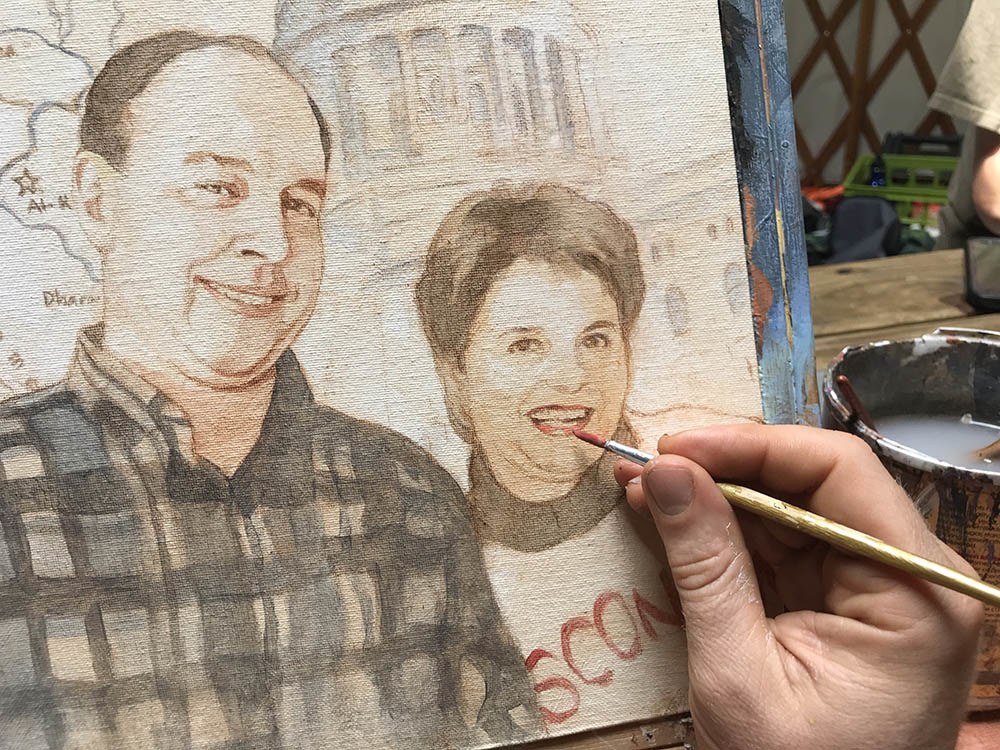
Painting an acrylic portrait from photo inside a yurt while camping, 11 x 14 acrylic on canvas ©2019 by Eau Claire area portrait artist Matt Philleo
I know. You’re probably thinking I should have painted the scenery up there, and yes, it was beautiful. But I had a commissioned portrait from a photo to get done: a painting of a veteran that served in the gulf war. And I love painting people, so it hardly seemed like work.
After bacon, eggs, and oatmeal for breakfast, it was time for painting.
Here is a video showing the beginning part of the process. In this video, I am basically blocking in the values with just raw umber dark and ultramarine blue. Of course, it’s all thinned out and made translucent with matte medium.
And then, here’s the next video in the process. Here I’m adding some color with burnt sienna, alizarine crimson and a few other colors. We’re starting to build up some skin tones. Also working on the flannel shirt. It takes a lot of layers to get it dark enough to look realistic!
After lunch, we hiked, and then came back and did more work: refining the shadows and making sure the likeness is accurate.
Sometimes your sketch just won’t cut it. It will get you about 80% of the way there, and you do the remaining 20% with paint. As you apply the paint, you can change the shape of the nose, the distance between the eyelids, lengthen the smile, etc., to adjust whatever might have been off during your sketch.
Of course, there is more to go on the painting. I’ll share the rest with you soon. I wasn’t able to finish it at the yurt, but I put in several hours. So, not only did I get to spend some great quality time with my brother, but I got to do some enjoyable work as well. After the big move, I finally feel like I’m getting into a regular groove of painting and posting tutorials. Thanks so much for your patience.
UPDATE: Here is the final video of this portrait, painted at my regular studio…
And a photo of it…
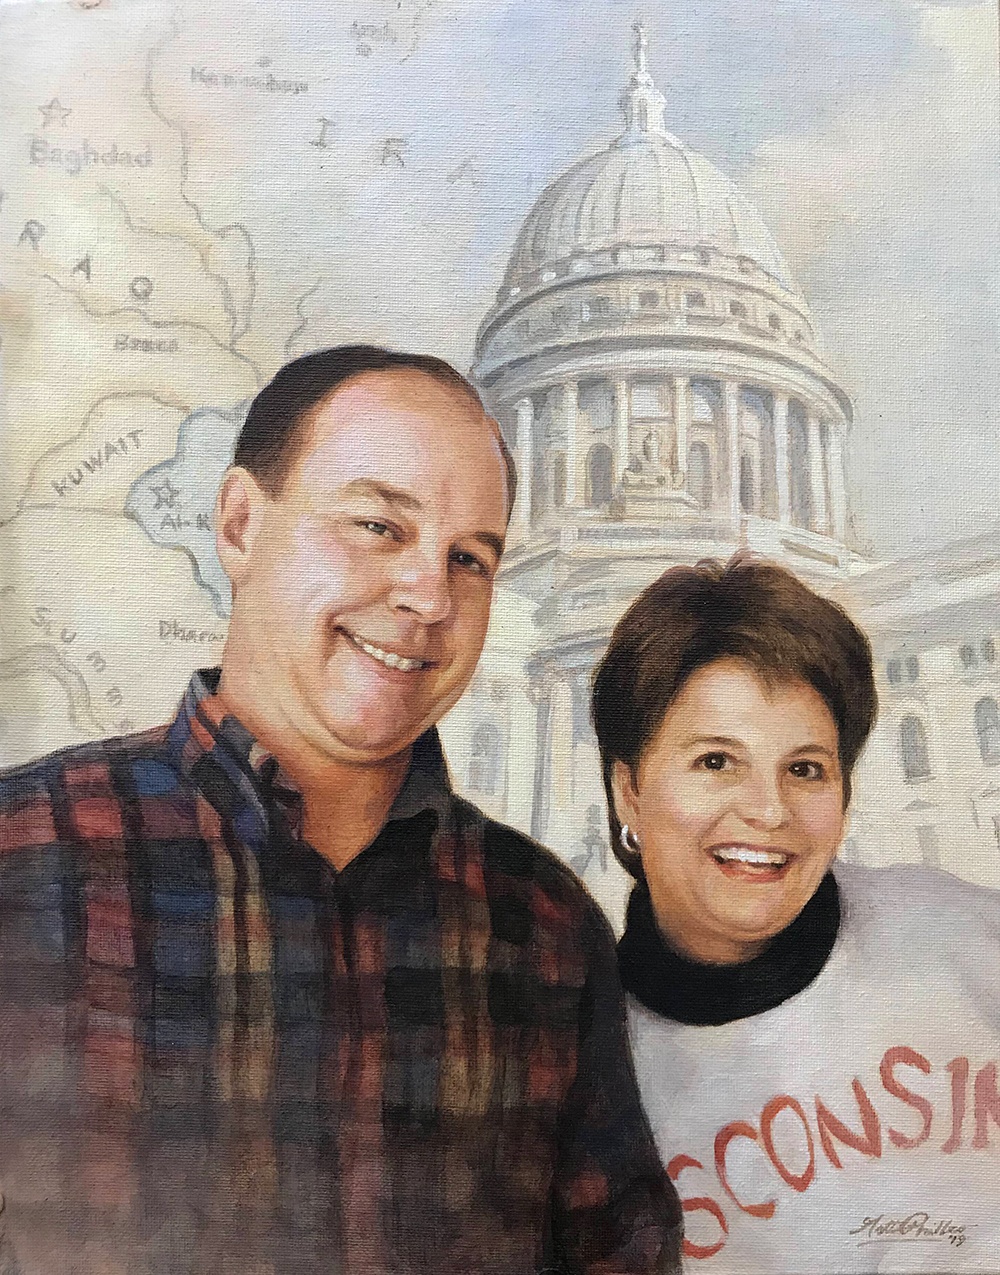
Custom realistic acrylic portrait of a veteran and his wife painted by Eau Claire area portrait artist Matt Philleo, 11 x 14, acrylic on canvas, ©2019 by Matt Philleo
I really enjoyed painting this for the client, putting all the elements–the map of Iraq, the capitol building, and the people together into one cohesive portrait that I hope will be a cherished keepsake for the family for years to come.
I hope this painting has encouraged you and given you some ideas to use in your own portrait painting. I would love to help you learn to paint portraits your very best. Let me know if I can be of more help to you in any way.
Yours for better portraits,

P.S. Did you find this post helpful or encouraging? If so, send it on ahead! Let others know with the share buttons below. I’d love to hear your comments. Thank you so much! Also, do you have a question on acrylic portrait painting you’d like answered? Let me know, and I’d be happy to help!

Quick Tip to Set Up a Canvas in Your Easel
Have you ever been frustrated trying to paint the edges of your canvas on an acrylic portrait, because the easel clamps are in the way?
You try to paint the background smoothly, with gestural strokes that flow off the edge of the painting but are inhibited by the easel itself. Let me show you a quick tip to overcome that problem.
How do YOU keep your paintings in place on your easel, and yet make it possible to paint all edges easily? Let me know. Always on the lookout for good ideas. 🙂
P.S. Did you find this post helpful or encouraging? If so, send it on ahead! Let others know with the share buttons below. I’d love to hear your comments. Thank you so much! Also, do you have a question on acrylic portrait painting you’d like answered? Let me know, and I’d be happy to help!

Value vs. Color in an Acrylic Painting
One of the trickiest things about acrylic portrait painting, especially when using the glazing technique, is knowing how to achieve color. How many layers do you use?
I’ve said it before, and I’ll say it again. There is something more important than color, even skin tones in a portrait.
Here is a recent question from a subscriber:
Currently, I am working on a portrait of my friend’s grandfather. My reference photo is of him as a young man in his dress greens from his younger days in the Army. I really want to capture his likeness and be proud to present this to her as it is a gift for her mother but I’m finding myself “stuck” in a sense. From watching your videos and using the matte medium as a glazing technique, I am having trouble building up the layers of his uniform to the correct tone and shade of green. I find the medium lightens the acrylic paint. I’ve only applied one layer so I still have time to correct it before making a mess of it. Should I have painted in the dark value of his uniform before going in with a glaze to help it along or just keep applying layer after layer until the desired color is achieved?
Regarding your question–yes, you can keep building up the green glazes for his uniform. However, it’s best to think of values before color. What I mean is, you are right to think that you should have done the dark value of the uniform first. That’s exactly right.
The reason is, value is more important than color. Value (light and dark and the difference between them) describes all the contours and three dimensions of a face or body. If it weren’t for the strategic placement of those values, we wouldn’t know whether it was a person, animal, rock or tree that we painted.
Theoretically, you could have a person whose skin tone or clothing was a bit too red, or greenish–whatever–but it the values were accurate, it would still look human, and would look like a pretty good portrait. You can see in this painting I did, the colors are a bit too red. (I also intensified them on Photoshop, exaggerating them a bit to make a point.)
Acrylic portrait from photo by Matt Philleo, Eau Claire area portrait artist and instructor
But flip that around: make the skin tone or coloring right on, and the values completely off, and you will have a terrible portrait.
So, when I instruct my students in painting, I teach them to see the value structure first. We start off simple, using one or two colors, and then add as we go along. Much more important is seeing the overall lighting in the portrait–where the light source is, the darkest values (whether clothing, hair or just deep shadows, it makes no difference) and the mid-tones and capturing them faithfully. Of course, this assumes that you have the form correct. That is, that the proportions of the face and anatomy are accurate.
So, is your painting ruined? No, not at all. Just keep building up layers. But it helps to build up the darkest values first. Don’t neglect them. Think of your painting as an old polaroid photo. The print shoots out of the camera and fades in slowly, all together. You don’t get eyes, then hair, then a mouth, then the body. No. You get everything at once, but it’s all light. Then, in about 30 seconds, you have a print.
(Wow! Imagine that. I’m old enough to remember how cool it was to have an instant photo before digital cameras.) 🙂
So, you want to paint your painting like a polaroid. All at once, just fade everything in. As much as possible. That means that you hit those dark values first, and then work your way into the lighter ones.
As an example, let me show you this. Here is an image of how I did “Smoldering Wick,” an acrylic portrait illustrating a time when I struggled, and found encouragement in the scriptures.
All of these many layers is how you make an acrylic look like an oil. I learned this glazing technique several years ago from Norbert Kox, a university art professor. It made all the difference for me in my portrait painting with acrylic. Learning this technique and applying it will make the difference for you too.
If you’d like to learn more, sign up for my free email tips and videos today.
Learn How to Paint Acrylic Portraits With My Free Mini-Video Course!
And of course, let me know if you have any questions or comments. I’ll be happy to help!
Yours for Better Portraits,
P.S. Did you find this post helpful or encouraging? If so, send it on ahead! Let others know with the share buttons below. I’d love to hear your comments. Thank you so much! Also, do you have a question on acrylic portrait painting you’d like answered? Let me know, and I’d be happy to help!

4 Questions About Acrylic Portrait Painting, Answered
Recently, I was asked some questions about acrylic portrait painting. I hope the answers I shared with this artist can be of help to you as well.
1. How do you prepare your canvas panel for painting with Acrylics?
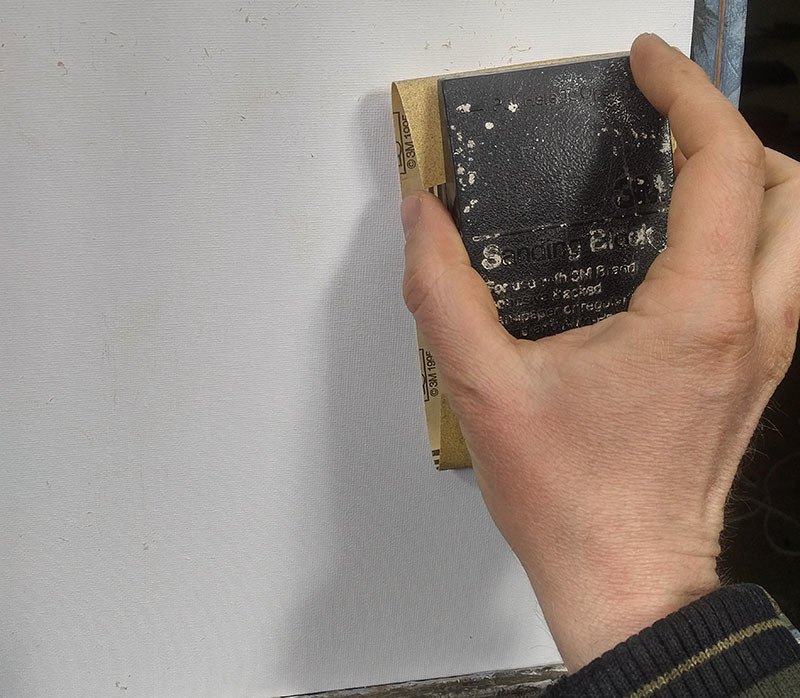
Sanding a canvas panel in preparation for painting an acrylic portrait
2. You spoke of layering your paint when composing a portrait. Please briefly explain.
I use the glazing technique to slowly bring the portrait from a white canvas to completion. The glazing technique is achieved by mixing your paint with clear acrylic medium (usually matte medium) to disperse the pigment, thus allowing light to pass through.
Although you could use water, it’s not recommended, because it breaks down the acrylic resin binder, causing a rough visual texture and possible poor adhesion. For a smoother look, you want to use clear acrylic medium.
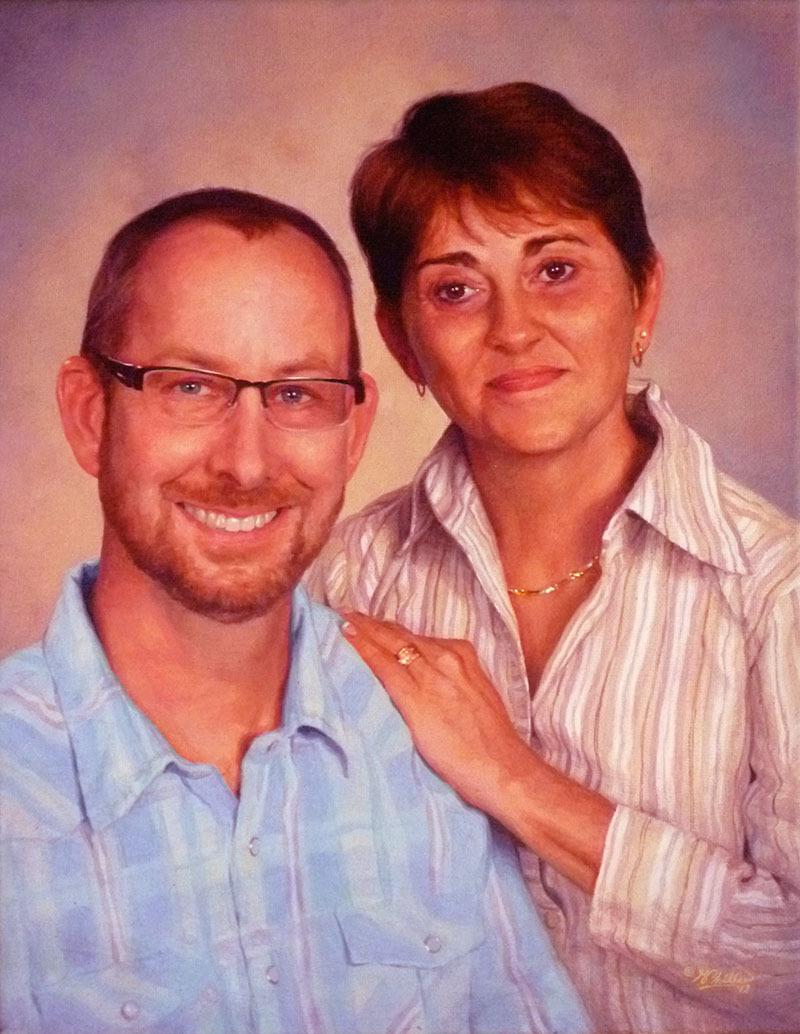
Custom commissioned realistic acrylic portrait from a photo painted by Eau Claire area artist Matt Philleo, ©2019 Fine Art by Matt Philleo
3. You mentioned using a Prismacolor pencil for making your diagram. What color do you recommend?
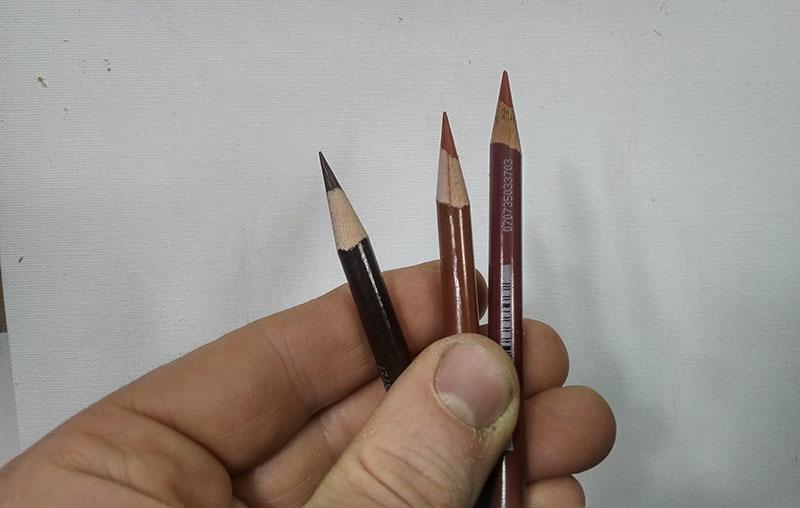
Using colored pencil for your acrylic portrait sketch makes things a lot easier. Technique discovered and developed by Matt Philleo.
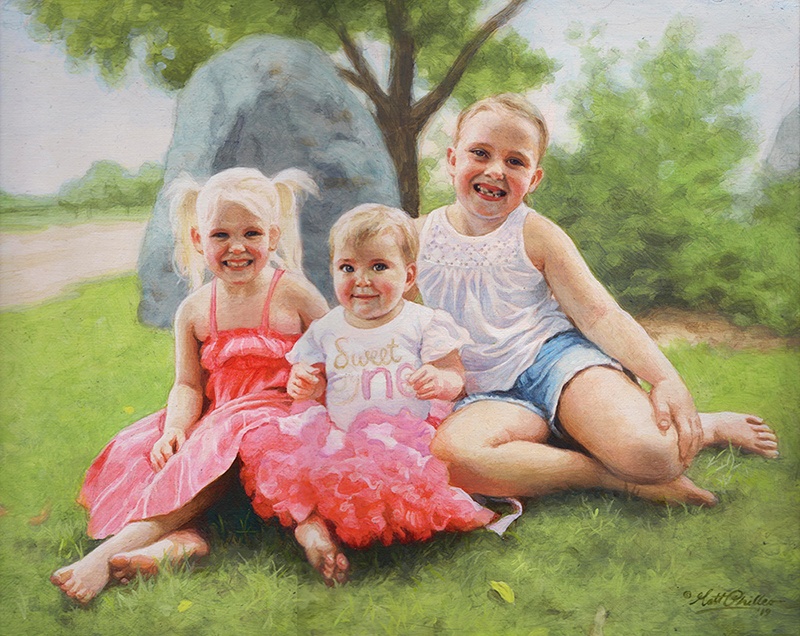
4. Do you do the painting from start to finish in one setting?
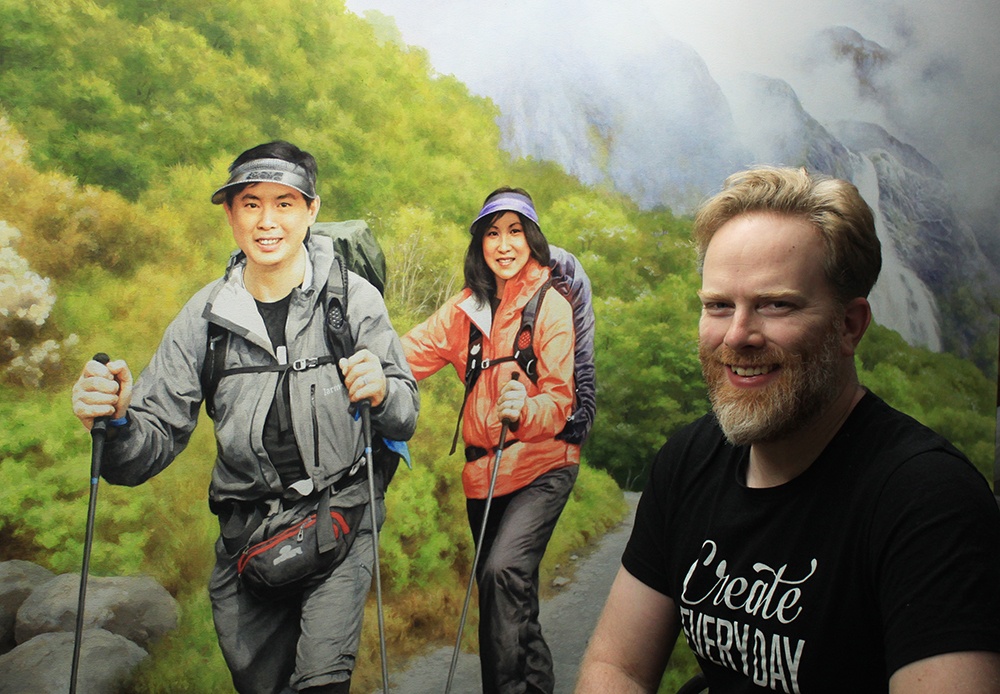
Acrylic portrait artist Matt Philleo posing in front of a 48″ x 72″ commission painting for a client in Brunei
I hope these questions and answers were helpful to you as well. I know some of this stuff seems pretty basic, but it’s good for all of us to pause and think about why we do what we do. It then makes the doing that much more significant.
Let me know if you have any questions of your own about acrylic portrait painting and I’ll do my best to help!
P.S. Did you find this post helpful or encouraging? If so, send it on ahead! Let others know with the share buttons below. I’d love to hear your comments. Thank you so much! Also, do you have a question on acrylic portrait painting you’d like answered? Let me know, and I’d be happy to help!

My New Studio Set-up and Latest Art
It’s been a while since I’ve posted to this blog! As you may already be aware, my family purchased a home about a month ago (April 2019) and moved in a couple of weeks ago.
God has blessed us with a beautiful home in the country, and a separate building for a studio after renting and working out of a small apartment for 16 years. You can read more about that here…http://mattphilleo.com/2019/04/19/telling-the-easter-story-through-a-big-painting/
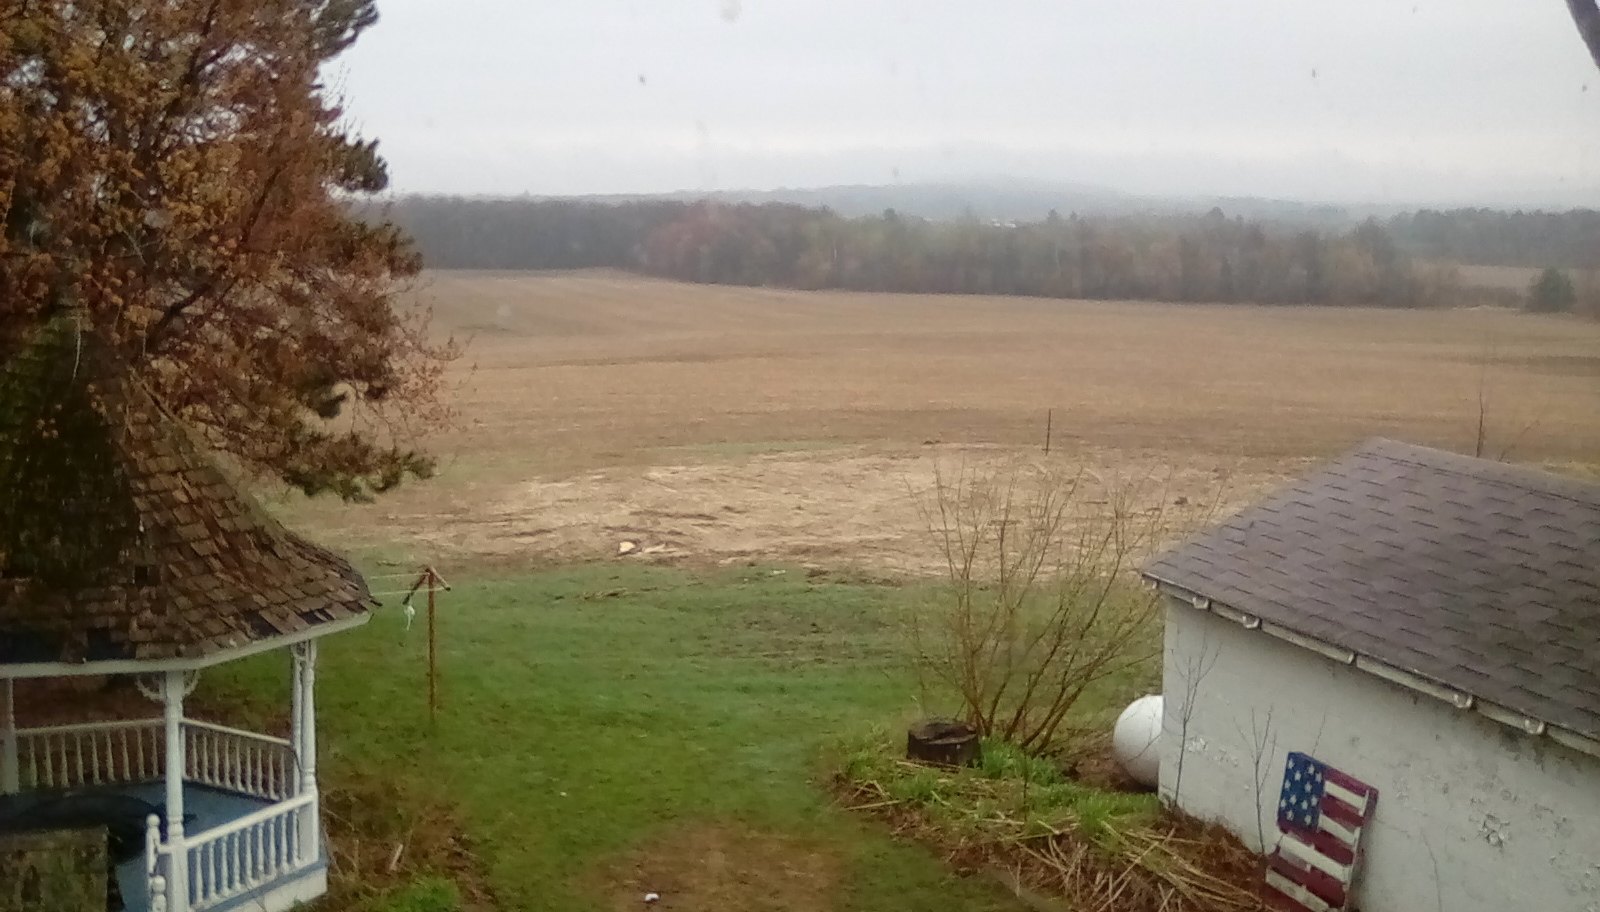
Fine Art by Matt Philleo studio, Town of Lafayette, Chippewa Falls, WI backyard
It was challenging to get internet access out in the country, but I found a solution through a wireless hotspot. I am finally connected!
This past week, I moved out my easel, art supplies, lighting, and computer and set it up in the new studio. I’m now at a place where I can paint and produce video tutorials again!
Acrylic portrait painter Matt Philleo in his new studio in Chippewa Falls WI, Eau Claire area by Autumn Harvest Winery and Orchard
Here is a mini-tour of the studio and a sneak peek at what I’m currently working on.
My new studio address is:
20109 30th Ave, Chippewa Falls, WI 54729 (about 1/2 mile past Autumn Harvest Winery & Orchard on County Rd. J / 30th Ave)
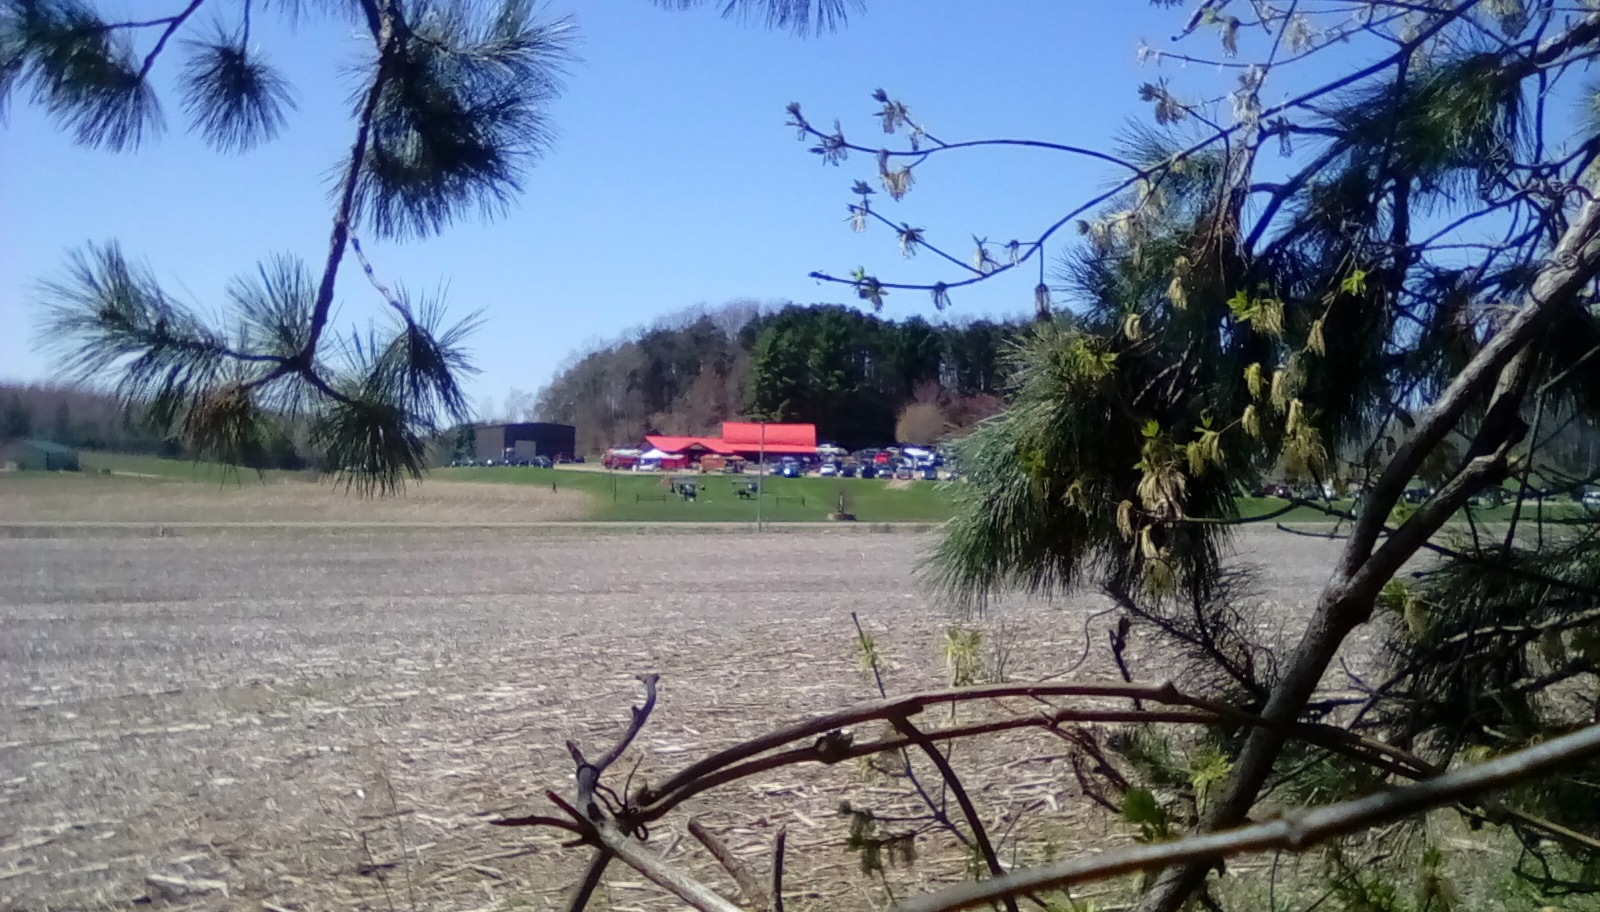
View of Autumn Harvest Winery and Orchard from Fine Art by Matt Philleo studio during their May 4, 2019 Season Opening Event
Have a blessed day as always and I’ll be in touch with my latest art and tutorials!
P.S. Did you find this post helpful or encouraging? If so, send it on ahead! Let others know with the share buttons below. I’d love to hear your comments. Thank you so much! Also, do you have a question on acrylic portrait painting you’d like answered? Let me know, and I’d be happy to help!

How to Paint Realistic Reflections on Eyeglasses in Acrylic Portrait
It’s tricky to paint reflections on eyeglasses.
Creating realistic reflections on eyeglasses can significantly enhance the depth and authenticity of an acrylic portrait. In this blog post, you will learn how to paint realistic reflections on eyeglasses in acrylic portrait and then along with tips for mixing colors, layering, and applying highlights. Because these methods will help elevate your acrylic painting skills and bring your portraits to life.
Understanding Reflections in Eyeglasses
Reflections in eyeglasses are not just simple overlays; yet they play a crucial role in conveying the personality and emotion of your subject. Of course, observing how light interacts with surfaces is essential. Hence, it is vital to capture the subtle nuances of reflections to create a convincing portrayal.
Preparing Your Workspace
Before beginning, ensure your workspace is organized. Then have your reference photo at hand, and gather all necessary materials:
- Acrylic paints: Titanium white, raw umber dark, ivory black, burnt sienna, and alizarin crimson
- Brushes: A round size 8 brush for detail work
- Matte medium for thinning paint
- Palette for mixing colors
- A clean rag for touch-ups
Step-by-Step Techniques
Setting Up the Reference Photo
Zoom in on your reference photo to clearly see the reflections in the glasses. Then identify key areas where reflections appear and note their shape and color.
Mixing the Initial Color
Begin with a mixture of titanium white and raw umber dark to create a toned-down white. Because this will avoid stark brightness that can look unnatural, thin this mixture with matte medium to achieve fluidity.
Painting the Reflections
In this case, use the round brush to carefully apply the mixed color to the upper corners of the glasses. This is where the most pronounced reflections typically occur.
Just observe the shape of the reflections in your reference photo and replicate that shape on your canvas and then using different angles of strokes will help smooth out the paint.
Adding Depth with Multiple Layers
Allow the initial layer to dry before adding more highlights. While layering is essential for creating depth.
Mix a slightly lighter shade then by adding more titanium white to your previous mixture. Apply this lighter color to the same areas, focusing on the edges where the light hits most.
Incorporating Background Elements
To make the reflections believable, you need to incorporate faint outlines of elements visible in the background. This adds realism without overwhelming the portrait.
So use a diluted version of your mixture to achieve this effect, ensuring that the reflections do not detract from the subject’s features.
Enhancing the Frame of the Glasses
The frame should also reflect light. And then apply highlights using the same mixture to the inner edges of the frame.
Gradually build up the highlight by layering, allowing each layer to dry before adding the next.
Adding Shadows for Realism
Shadows are critical for grounding the glasses. When mixing burnt sienna and alizarine crimson, you can create a warm shadow color.
Apply this color underneath the glasses and around the frames to suggest depth and interaction with the face.
Refining the Details
After allowing the previous layers to dry, return with titanium white mixed with raw umber dark for the final highlights.
Focus on adding subtle highlights on the corners of the reflections. Use a very light touch to maintain the transparency of the glass.
Final Touches
Once all elements have dried, step back to evaluate your painting. Then adjust any areas that may need further highlights or shadows to ensure balance and realism. Because this reflective interplay between light and dark is what ultimately gives your portrait a lifelike quality.
Conclusion
Painting realistic reflections on eyeglasses requires patience and practice. So by following these techniques, artists can enhance their acrylic portraits with depth and clarity. Remember also that observation is key; study how light interacts with different surfaces to improve your skill. With dedication, anyone can learn how to paint realistic reflections that bring their acrylic portraits to life.
Tips for Painting Reflections:
- Layering is Key: Always allow layers to dry before adding more to achieve depth.
- Use a Light Touch: When applying highlights, a gentle hand creates a more realistic effect.
- Study Real Life: Observe real eyeglasses in different lighting conditions to understand how reflections work.
For further resources and guides, visit realisticacrylic.com and check out my free courses to enhance your acrylic painting journey.
This is a 16 x 20 acrylic on canvas commissioned portrait, and I just delivered it to the client today. She loved it. It was a memoriam portrait, so I pray it will bring comfort to all who see it.
Have a blessed day, and may God use your artistic gifts to bless people far and wide.
- How to Paint Foliage Using the Acrylic Glazing Technique
- How to Trace for an Accurate Portrait Sketch
- How to Paint Realistic Eyes in Your Acrylic Portrait
- How to Add Raw Umber Dark & Ultramarine Blue to Your Portrait
- How to Make Your Own Raw Umber Dark
- How to Paint Realistic Trees & Grass in Your Acrylic
- How to Block In Skin Tone Values Using Glazing Technique
- How to Paint Vibrant Reds in Your Acrylic Portrait
- How to Glaze Background Colors & More Acrylic Portrait
- How to Paint White Clothing in Your Acrylic Portrait
- How to Easily Transition from a Sketch to a Painting
- How to Block In Shading & Skin Tones in Your Acrylic
- How to Build Up Color on Acrylic Pet Portrait
- How to Build Up Form on Clothing with Acrylic
- How to Paint Dark Clothing Using Acrylic Glazing Technique
- How to Paint a 24 x 30 Acrylic With 30 People
- How to Do Smooth Shading with Acrylic
- How to Sketch an Acrylic Portrait with a Grid
Read more about how to paint a portrait that you can surely be proud of!
I’d love to hear your thoughts about this video. Please share it with your friends and family. Let me know if you have any further questions. I’ll greatly help you.
If you’d like to learn more, sign up for my free email tips and video class today.
Learn How to Paint Acrylic Portraits With My Free Mini-Video Course!
Thank you so much for taking the time to read this tutorial and watch the video. That means a lot to me. I hope you find it very helpful in your portrait painting.
Yours for Better Portraits,
P.S. Did you find this post helpful or encouraging? If so, send it on ahead! Let others know with the share buttons below. I’d love to hear your comments. Thank you so much! Also, do you have a question on acrylic portrait painting you’d like answered? Let me know, and I’d be happy to help!
How to Paint Smiling Girl in Yellow: 30-Minute Acrylic Portrait
Create a stunning 30-minute acrylic portrait of a smiling girl in yellow with easy-to-follow techniques
Creating a captivating 30-Minute Acrylic Portrait of a smiling girl in yellow can be a fulfilling and enjoyable artistic endeavor. In just half an hour, you can capture the essence of joy and vibrancy, making this project perfect for artists of all skill levels. Whether you’re a seasoned painter looking for a quick challenge or a beginner eager to experiment with color and expression, this guide will provide you with step-by-step instructions to bring your vision to life on canvas. Let’s dive into the techniques and tips that will help you create a stunning portrait that radiates happiness!
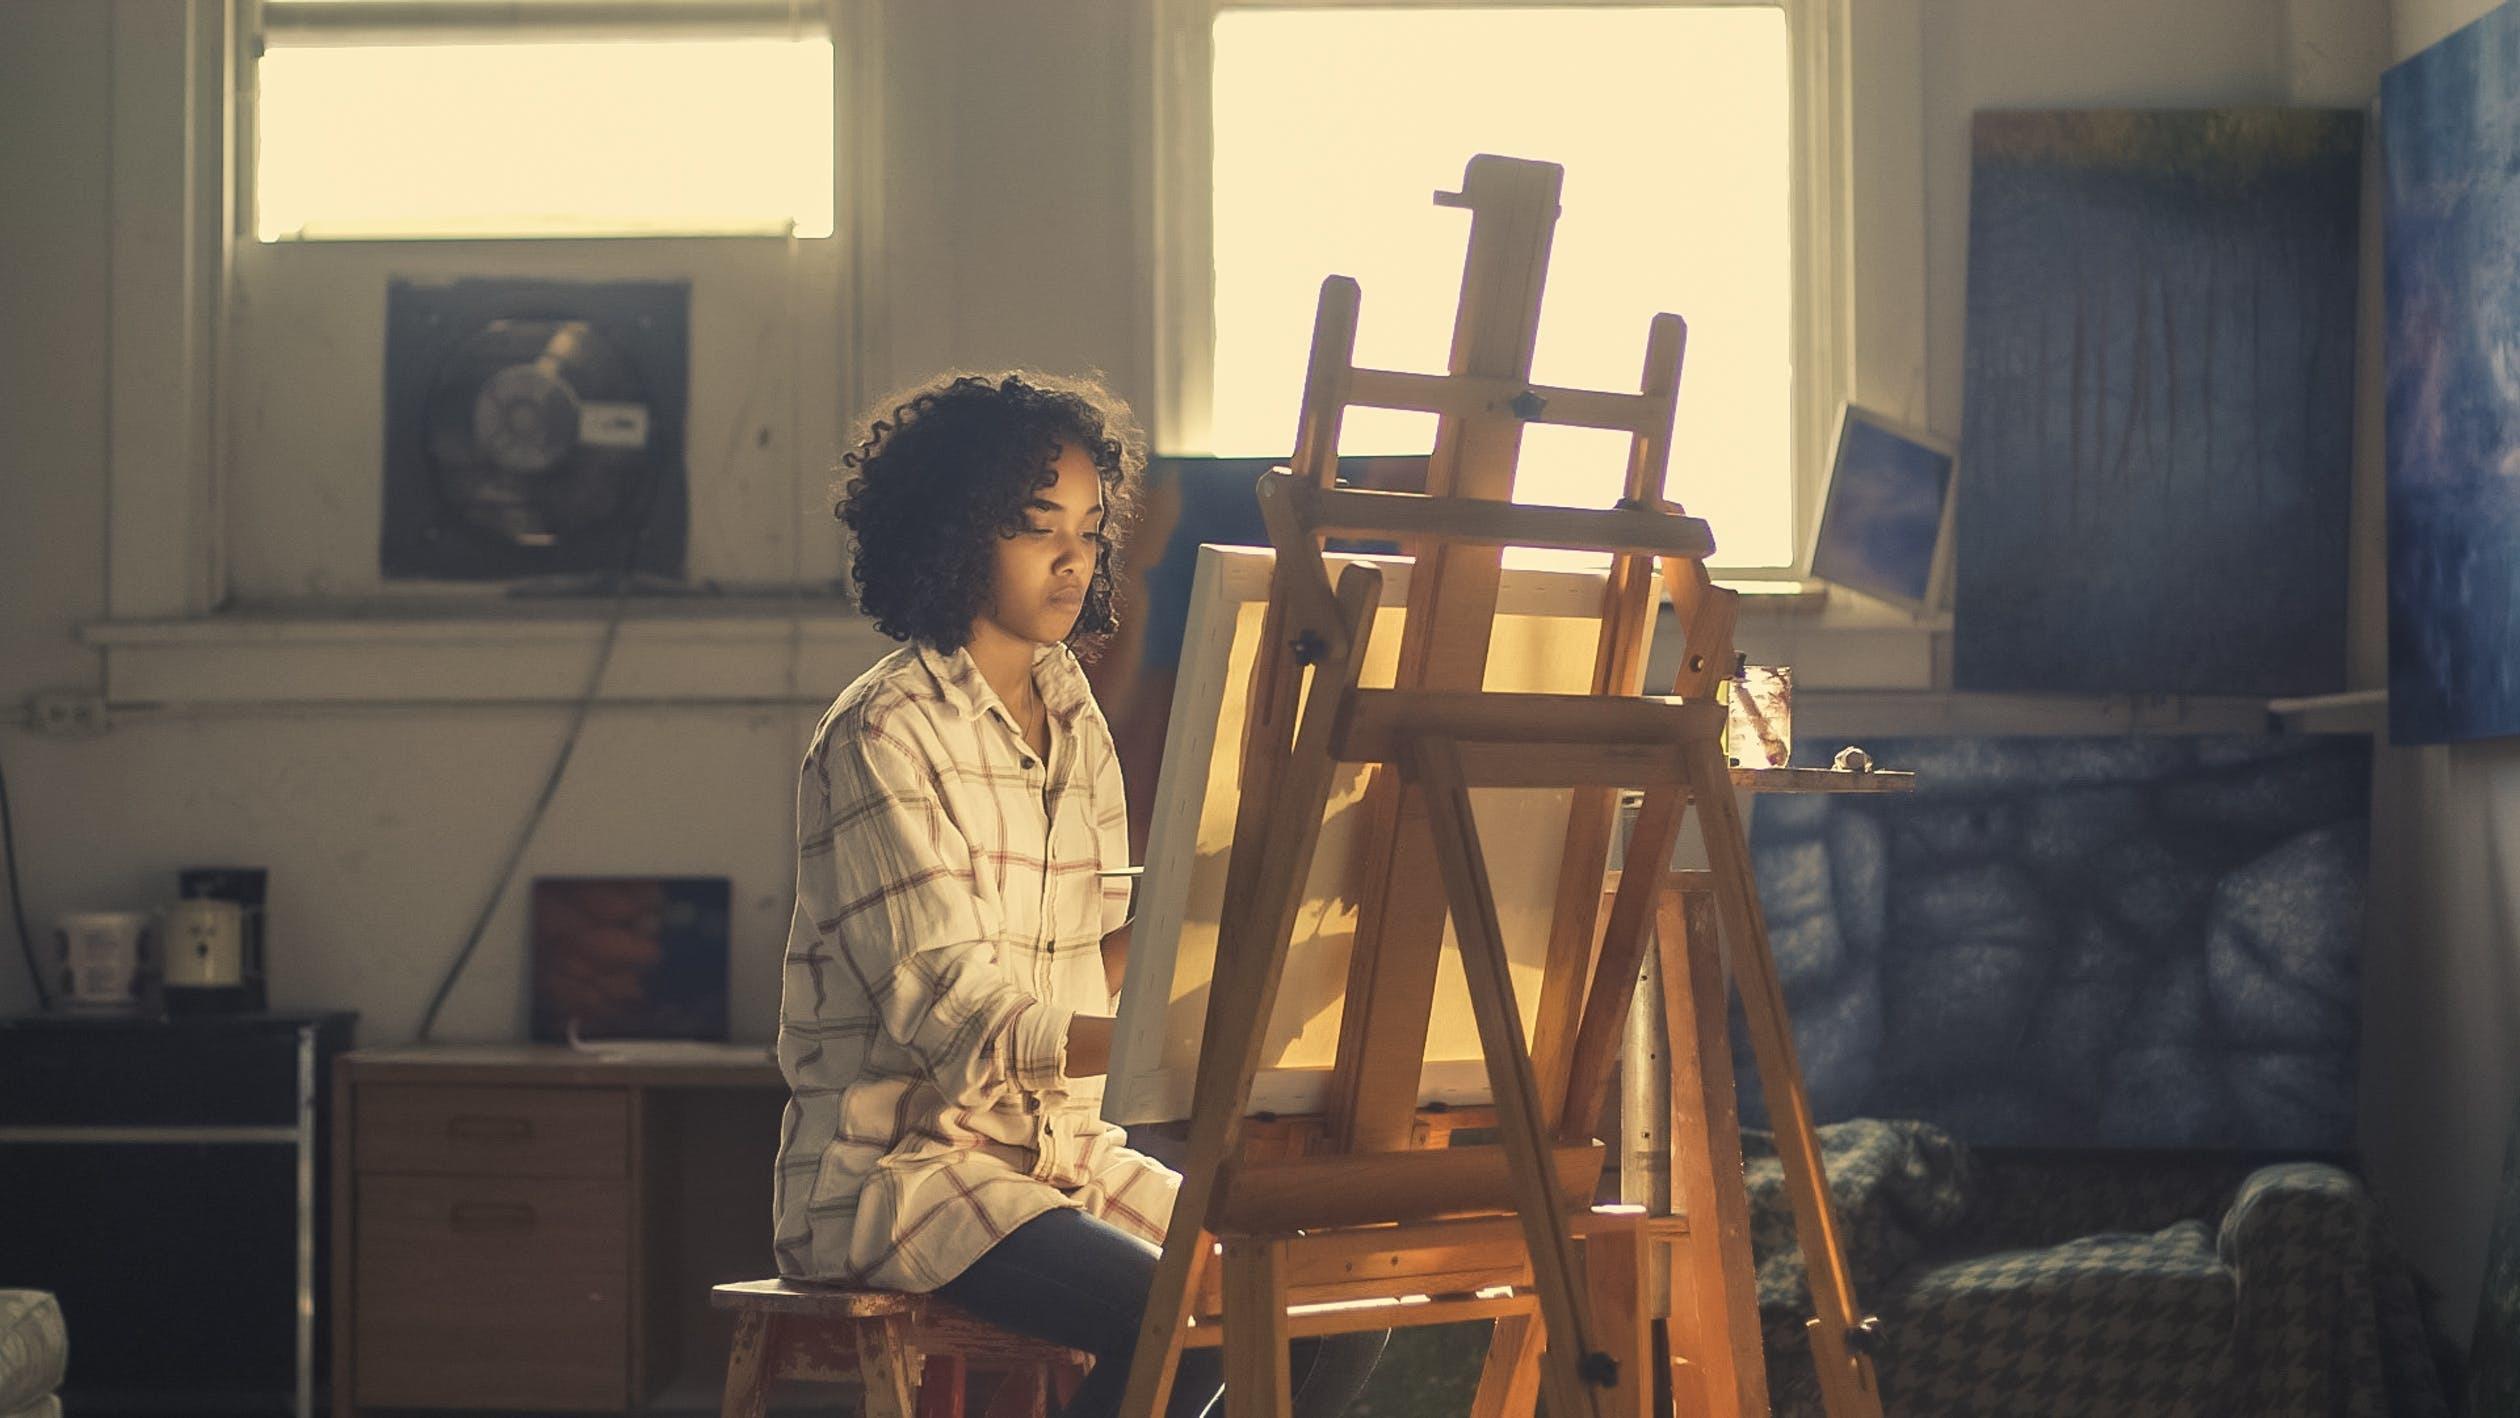
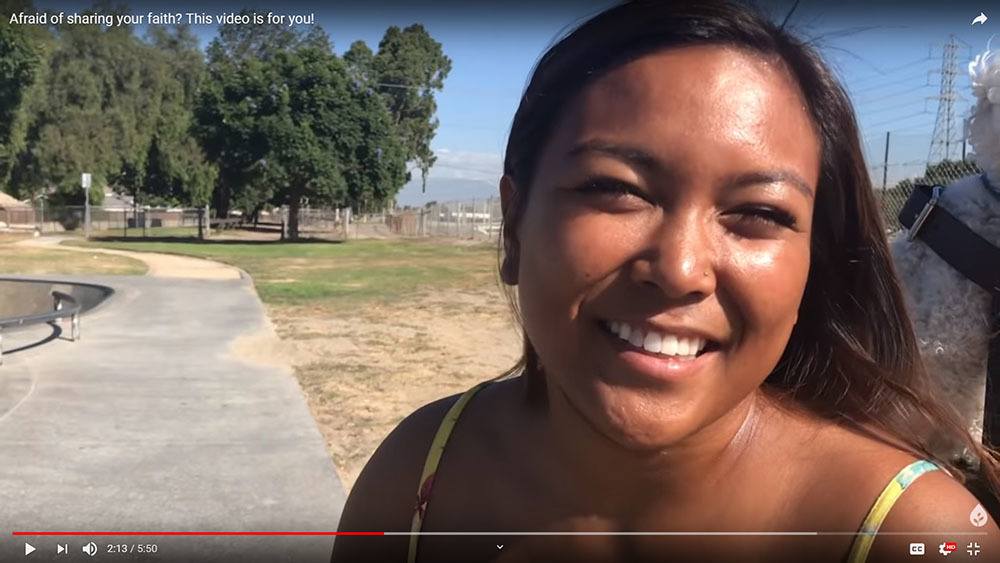
For today’s portrait, I’ll be painting a picture of a young woman ( a still shot image from Ray Comfort’s video interviews ) with a beautiful dark complexion and attractive smile. I like the dark shadows and forms within her face and hair, and I thought it would make for a fantastic little portrait.
This will be an 8 x 10, acrylic on canvas board.
I’ll demonstrate how you can paint a quick portrait study with an aggressive opaque, alla prima technique. The idea is to see what you can accomplish within 30 minutes. It will force you to think quickly, and find out what the most important aspects are that will convey the subject’s likeness and just paint them without fuss.
At the same time, I encourage you to enjoy the process and don’t fret over whether the painting looks good or not. Of course it won’t look as good as a painting you’ve spent hours on! But it’s OK. Just enjoy the process.
Later on, you can always add more layers to the painting and give it a finished look.
Ready to dive in?
Season 1, Episode 3 of the 30-Minute Acrylic Portrait…
After watching it, leave me a comment here below. I really look forward to reading and answering your thoughts and questions. Let me know how I can help and have a blessed and productive day!
Yours for better portraits,
P.S. Did you find this post helpful or encouraging? If so, send it on ahead! Let others know with the share buttons below. I’d love to hear your comments. Thank you so much! Also, do you have a question on acrylic portrait painting you’d like answered? Let me know, and I’d be happy to help!