- You are here:
- Home »
- Blog »
- Student Feedback »
- Top 7 Powerful Techniques for Starting Out in Acrylic Portraits

Top 7 Powerful Techniques for Starting Out in Acrylic Portraits
Begin your portrait painting journey with confidence using these essential acrylic techniques
Are you just starting your journey into acrylic portrait painting? With so many techniques to learn, it’s easy to feel overwhelmed. That’s why I am covering the essential techniques for starting out in acrylic portraits, from choosing the right colors and brushes to creating smooth blends and more. In this post, you’ll find answers to common beginner questions, giving you the tools to bring your portraits to life with ease and confidence! Let’s dive in and explore these foundational techniques together.
Today, I’m going to answer seven fantastic questions from a follower of mine named Andrea. The questions deal with everything from what colors and brushes to use, to blending, to some advanced techniques.
Read below to find out if one of your questions gets answered…
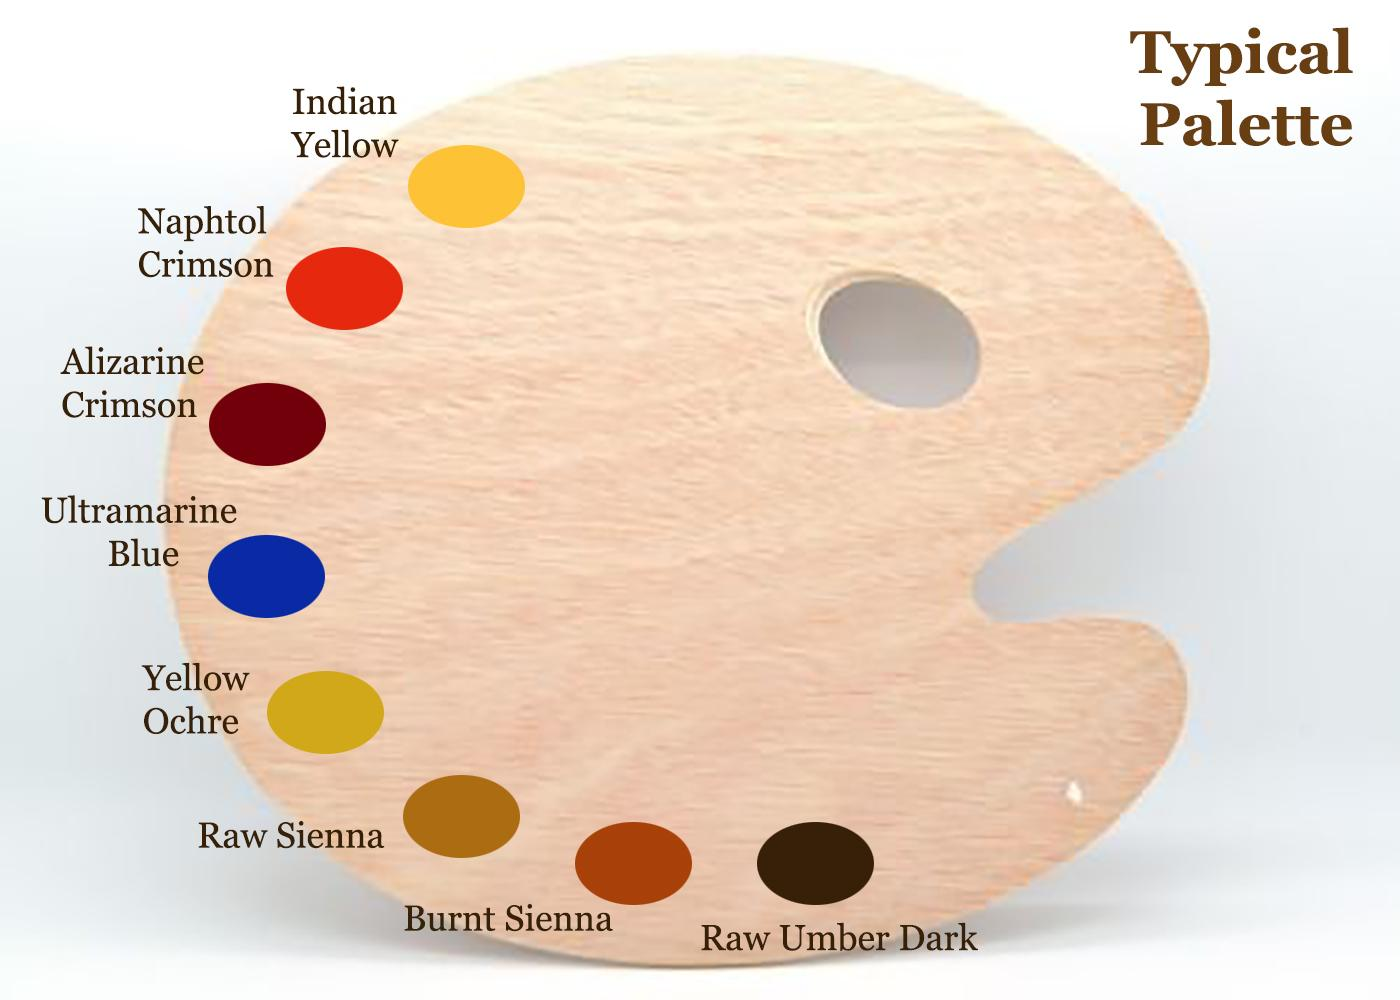
Q #1: What should be my basic color palette for portraits, and mixes for shading?
A: This is my basic palette for painting portraits. I would also have titanium white on it in the upper corner, by the indian yellow. Typically, I start out with raw umber dark and ultramarine blue thinned down with clear matte medium to block in the darker values. I make them into a very translucent glaze of 90% or more medium to 10% or less pigment. Eventually, I work my way into the warmer tones with burnt sienna, raw sienna, and alizarine crimson. The raw umber dark is used to counter-balance those glazes so they don’t get too warm/ orangish.
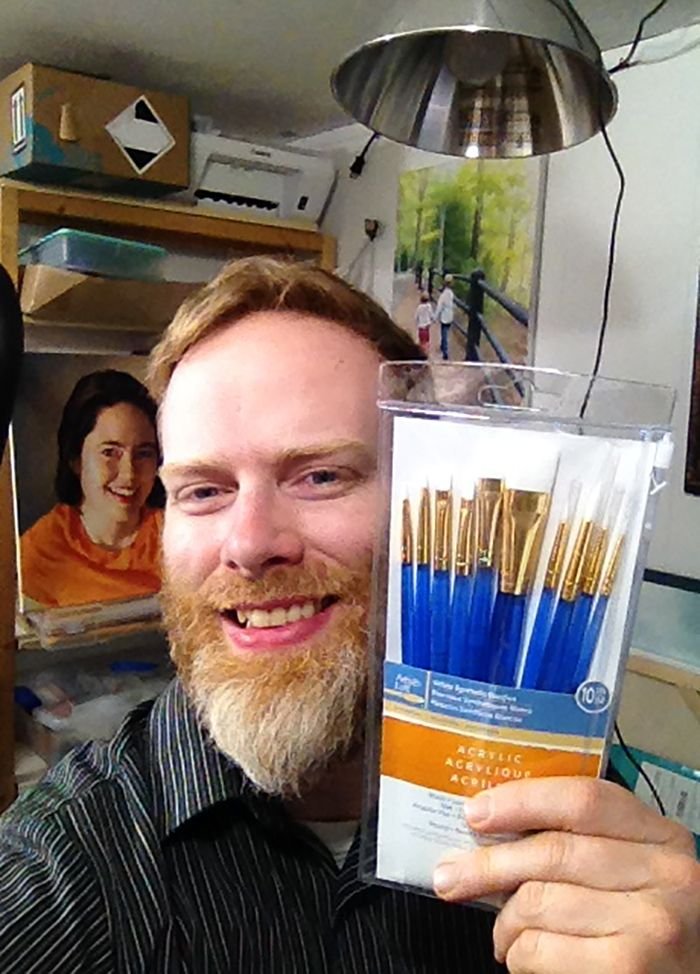
Q #2: What sort of brushes should I be using?
A: I don’t use anything fancy. Just brushes you can buy at your local art store in a multi-pack, ranging from 1″ flat/ 1/2″ flat, 3/8, flat, and a varied assortment of rounds from size 4 to 3/0. I go through a lot of brushes, so I don’t get anything expensive. But I do have a few nice ones for surface shading and the final varnish coat.
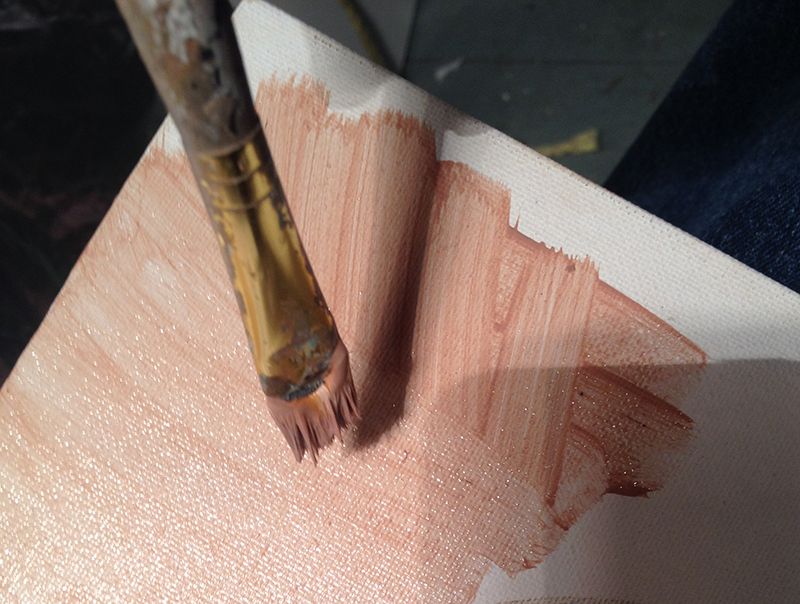
Q #3: How do I keep my paints from drying up, or drying immediately they are applied before I have chance to blend them? I do have retarder but should I be adding this to every color on my palette before I start?
A: No, I don’t recommend a retarder. Some artists like it, but for the classical glazing technique that I use, the faster the paint dries, the better (within reason). Basically, I love the quick drying glazes. It means I can be ready for another coat in about 10-15 minutes. I work various parts of the painting, cycling from the background to the foreground, from the hair to the face, from the clothing, the eyes–whatever. That way, when I move to another part of the portrait, it’s already dry and ready to work on.
Q #4: How do I shade?
A: I have five different ways to blend. Check out my latest blog post here for more info on these techniques…
How I Painted the Portrait of My Pastor and His Wife
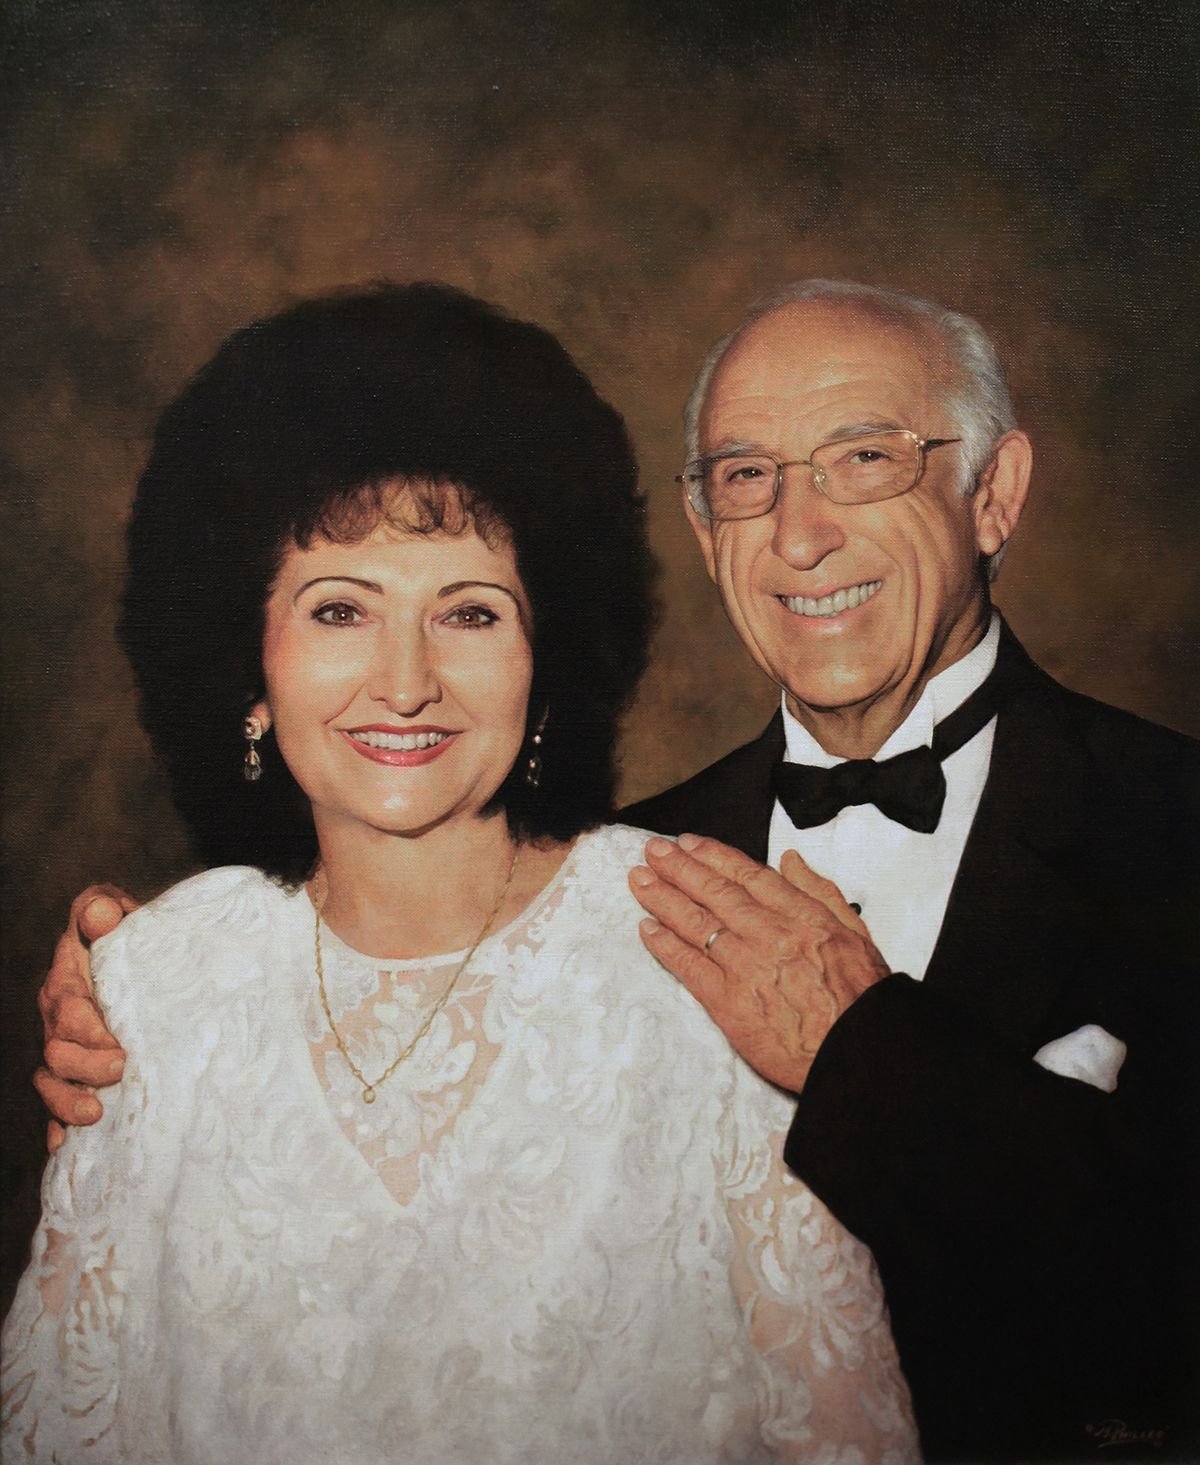
How I Painted the Portrait of My Pastor and His Wife
If you’d like to delve further into how to shade, I created a course on it: “Shade With Acrylic Like a Master.”
Q #5: In what order should I paint? I started with the background.
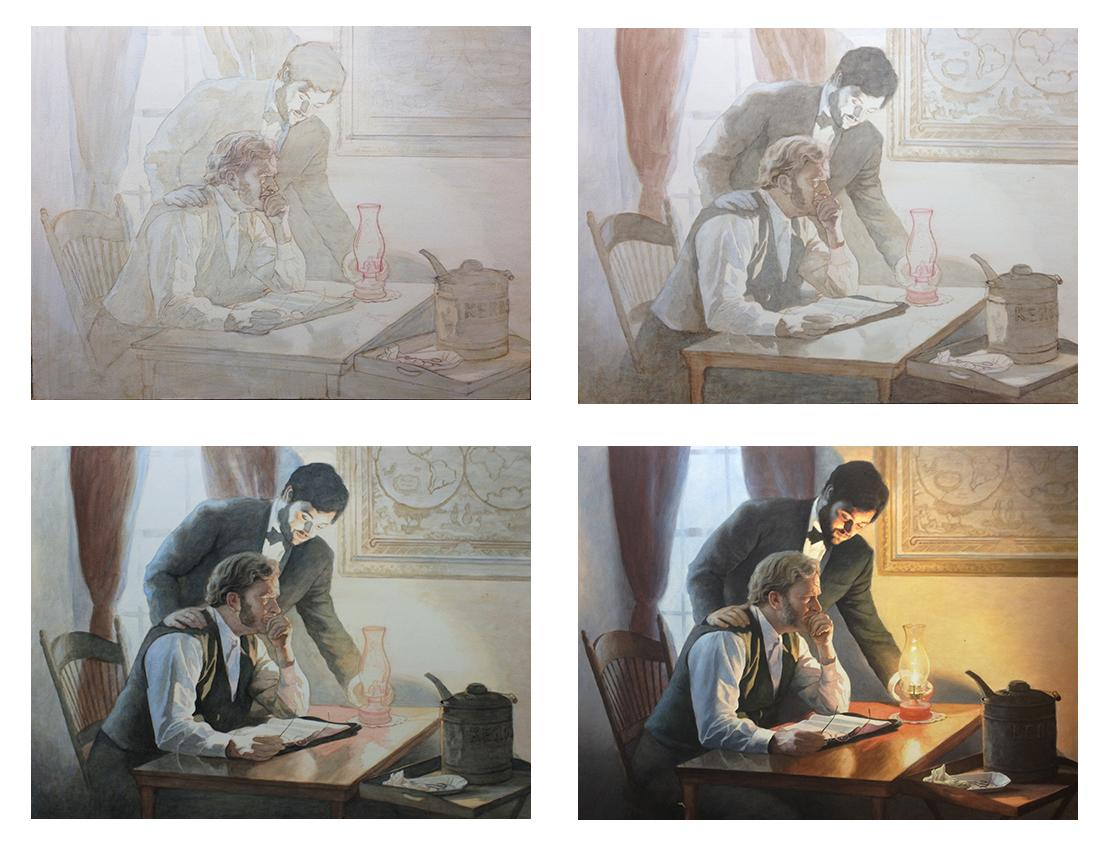
A: I sometimes start with the background, but not always. I want to establish contrast as soon as possible. So I try to fill in the darkest values first. It may be the background, but not necessarily. You can see the progression of how I work below on this example painting, “Smoldering Wick” (30″ x 40″ acrylic on canvas).
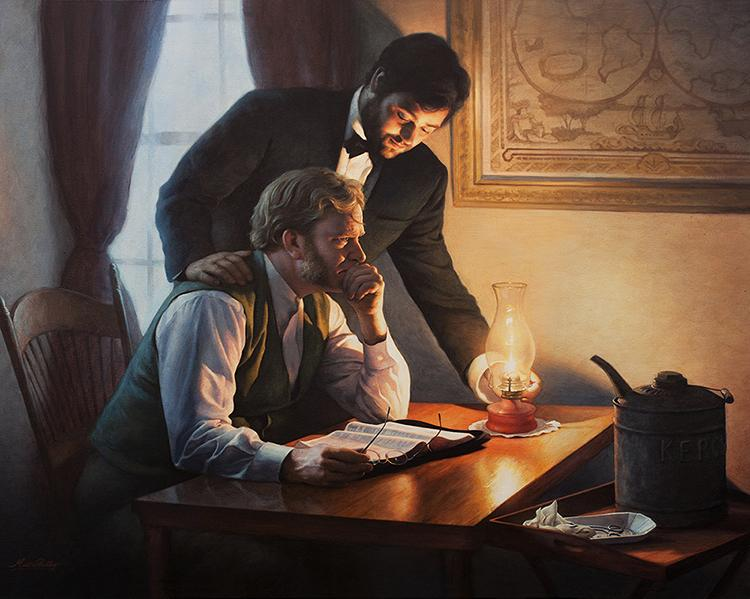
Notice, I filled in the darkest values first, and then moved to the lighter areas last…
Q #6: How do I tackle difficult aspects, such as deep creases from the nose to the mouth, the sides of the mouth and wrinkles?
A: I need to do a course on this. Others have chimed in as well, saying they really would like to see how it’s done. I’ll probably start out with a couple videos on the topic and then move into a longer course. But to answer your question, I’ll say this: look for the shadow first. Notice where the light source is at, and then the crease will be shaded on the opposite side. On the side facing the light, there will be a highlight.
Here’s how you do it:
- You paint the shadow of the crease in first, with a thin that’s fairly faint, and that’s one layer.
- Next, you go over that with another layer, that darkens just a few spots within that crease. In any crease or wrinkle, there will always be some areas that are deeper than others, and those need to be darker.
- You paint a thicker line on top of the first line. This line should be even more faint than the existing line, and the color should be slightly warmer.
- You paint a highlight on the opposite side. It should be about the same color as the flesh tone surrounding the crease, but a couple shades lighter and warmer too.
- You may need to add a couple more layers to both the shadow and the highlight to blend it in appropriately.
One quick tip: start out faint and go progressively darker. This is the number one mistake I see in portraits. Artists notice creases and wrinkles, but they paint way too prominently.
Would you like to learn more about how to paint wrinkles? If so, let me know by clicking the button below, and I’ll create a video tutorial/ course for you!
Q #7: What colors should I use for each area, especially the top eyelid, the mouth and the shadows under the eye?
A: This depends on the person. You need to really pay attention to the colors in the picture you’re working from. Generally under the eye, the colors are a bit cooler, because the skin is thinner there and you see the blood vessels on the surface. So, use some ultramarine blue, alizarine crimson, and raw umber dark mixed together and thinned out into a very light glaze. Then go over the area under the eyes with that.
For the mouth, you’ll need alizarine crimson, and napthol red, but it depends on the person. Obviously, a woman with lipstick will need more red on her lips. But even some men have lips that are more red than others.
Let me know how this post helps in your portrait painting. (If you’re not an artist, but you found this interesting, I’d love to hear about it. )
May God bless your painting,

P.S. Is there a question YOU have that wasn’t covered in this post? Just ask! I’d love to help.
If you found this post helpful or encouraging, would you send it on ahead? Let others know with the share buttons below. I’d love to hear your comments. Thank you so much!