Tag Archives for " learn painting "

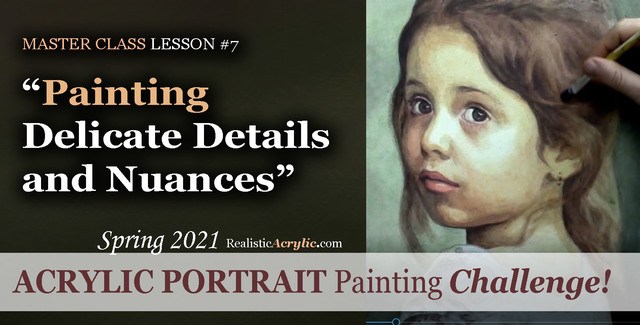
Spring 2021 Acrylic Portrait Painting Challenge: Painting Delicate Details and Nuances
After building the foundation with several layers of value, form, and color, we can then start to “dial in” the detail and nuances.
In this master class lesson (7 of 8), I’ll demonstrate how to add specific detail shapes to “Cora’s” hair. I’ll also add some additional shading to her forehead with a very translucent glaze. Next, I darken the left side of her face while smoothing out some of the rough application of previous glazes with a semi-opaque layer that’s cooler in tone. Finally, I add nuances to her eyes, lips and chin.
But even though we are well along in this portrait painting, it’s not too late to join in the fun!
YOU, too, can paint a portrait!
Take the Acrylic Portrait Painting Challenge (it’s FREE!) and paint along with us!
REGISTER TODAY. The challenge is ongoing, something you can do at your own pace. It’s not too late to enter! After you join, I’ll send you the supplies list and reference photos to paint from.
Register for the Challenge!WATCH NOW…
Lesson #7: Painting Delicate Details and Nuances
Learn how to do smooth shading, skin tones, details, and nuances in this FREE online portrait painting class by Matt Philleo at Realistic Acrylic Portrait School
Would like to paint this portrait with me and hundreds of other artists?
Take the 2021 Spring Portrait Painting Challenge!
You can register below and get started. It is completely FREE to join the challenge and participate. When you join, I’ll send you the “Welcome Kit” which includes:
- The Supplies List (so you know what you need to paint with us, your shopping list. 🙂 )
- The Reference Photo with and without the grid, high resolution, that you can download ready to print out or display on your tablet. You’ll be able to create an accurate portrait this way.
- The Palette Layout Guide showing you how to arrange your colors so they don’t get muddy on your palette
- The Master Class Lesson Schedule
- the Lessons emailed to you
- A private Facebook group to cheer you and help answer your questions
- And a few “bonuses” like opportunities to win my paid online classes
REGISTER TODAY. The challenge is ongoing, something you can do at your own pace. It’s not too late to enter!
Register for the Challenge!Let me know if you have any questions and I look forward to teaching you more!
—Matt
Questions? Suggestions? Thoughts? Let me know, below in the comments. Please share your sketches in our Facebook group and share this post with your friends!
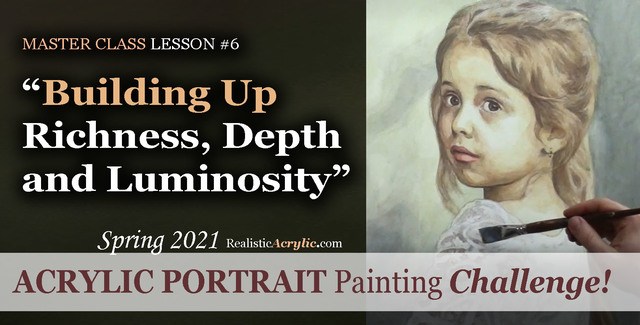
Spring 2021 Acrylic Portrait Painting Challenge: Building Up Richness, Depth and Luminosity
Acrylic is a fantastic medium for portrait painting, but it can be so challenging to use! That is why I am teaching you the glazing technique to open a lot of possibilities and ease your frustration.
Historically, the Old Masters used small amounts of pigment dispersed in larger amounts of linseed oil or mineral spirits to create a sense of volume and depth in their paintings. Light shines through and you can see a bit of each layer beneath the ones on top.
We can use that technique to our advantage with acrylic. By applying several translucent layers, there is an increased sense of depth, shading, contrast and color saturation and luminosity.
In this particular lesson, I’ll demonstrate how to add richness to the mid-tones of the girl’s face and hair. We will also add more contrast to the image with a couple of layers to the background, and turn the form of her figure with a precisely placed glaze on her clothing.
But even though we are well along in this portrait painting, it’s not too late to join in the fun!
Take the Acrylic Portrait Painting Challenge (it’s FREE!) and paint along with us!
REGISTER TODAY. The challenge is ongoing, something you can do at your own pace. It’s not too late to enter! After you join, I’ll send you the supplies list and reference photos to paint from.
Register for the Challenge!WATCH NOW…
Lesson #6: Building Up Richness, Depth, and Luminosity
Learn how to create a vibrant acrylic portrait where the colors are not flat or muddy. In this FREE step by step master class, I’ll show you how!
Would like to paint this portrait with me and hundreds of other artists?
Take the 2021 Spring Portrait Painting Challenge!
You can register below and get started. It is completely FREE to join the challenge and participate. When you join, I’ll send you the “Welcome Kit” which includes:
- The Supplies List (so you know what you need to paint with us, your shopping list. 🙂 )
- The Reference Photo with and without the grid, high resolution, that you can download ready to print out or display on your tablet. You’ll be able to create an accurate portrait this way.
- The Palette Layout Guide showing you how to arrange your colors so they don’t get muddy on your palette
- The Master Class Lesson Schedule
- the Lessons emailed to you
- A private Facebook group to cheer you and help answer your questions
- And a few “bonuses” like opportunities to win my paid online classes
REGISTER TODAY. The challenge is ongoing, something you can do at your own pace. It’s not too late to enter!
Register for the Challenge!Let me know if you have any questions and I look forward to teaching you more!
—Matt
Questions? Suggestions? Thoughts? Let me know, below in the comments. Please share your sketches in our Facebook group and share this post with your friends!

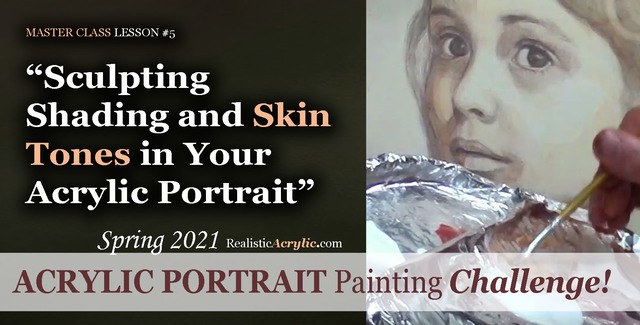
Spring 2021 Acrylic Portrait Painting Challenge: Sculpting Shading and Skin Tones in Your Acrylic Portrait
Acrylic portrait painting, in many ways, is like creating a sculpture. We want to truly make our faces look realistic and three-dimensional. In this master class video lesson, I show you how to do exactly that.
We’re breaking a fine art portrait painting down into bite-size steps that YOU can do.
Specifically, in this video lesson, I demonstrate how darkening your background can really make the face stand out in a lifelike way.
What colors should we use for the shadows? I’ll show you how to mix them, what brushes to use to apply them, and HOW to do it. Get the shadows right, and 80% of the battle is won, so to speak in your portrait.
What colors for the skin tones?
In this video, you’ll learn the correct color to mix, how to create glazes with matte medium and apply it to the face smoothly.
This is still very much the beginning. More lessons to come.
Take the Acrylic Portrait Painting Challenge (it’s FREE!) and paint along with us!
REGISTER TODAY. The challenge is ongoing, something you can do at your own pace. It’s not too late to enter! After you join, I’ll send you the supplies list and reference photos to paint from.
Register for the Challenge!
WATCH NOW…
Lesson #5: Sculpting Shading and Skin Tones in Your Acrylic Portrait
Acrylic Portrait Painting Challenge Lesson #5: Sculpting Shading and Skin Tones in Your Acrylic Portrait
Would like to paint this portrait with me and hundreds of other artists?
Take the 2021 Spring Portrait Painting Challenge!
You can register below and get started. It is completely FREE to join the challenge and participate. When you join, I’ll send you the “Welcome Kit” which includes:
- The Supplies List (so you know what you need to paint with us, your shopping list. 🙂 )
- The Reference Photo with and without the grid, high resolution, that you can download ready to print out or display on your tablet. You’ll be able to create an accurate portrait this way.
- The Palette Layout Guide showing you how to arrange your colors so they don’t get muddy on your palette
- The Master Class Lesson Schedule
- the Lessons emailed to you
- A private Facebook group to cheer you and help answer your questions
- And a few “bonuses” like opportunities to win my paid online classes
REGISTER TODAY. The challenge is ongoing, something you can do at your own pace. It’s not too late to enter!
Register for the Challenge!What’s coming up in the next lesson? More shading, more skin tones, and the start of some detail work. Follow the lessons and you will be able to create a portrait you can be proud of…even if you’re a complete beginner!
Let me know if you have any questions and I look forward to teaching you more!
—Matt
Questions? Suggestions? Thoughts? Let me know, below in the comments. Please share your sketches in our Facebook group and share this post with your friends!

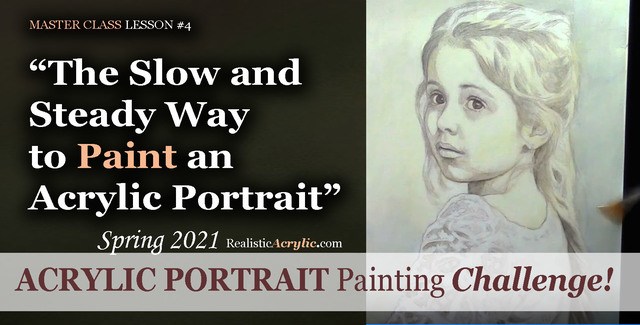
Spring 2021 Acrylic Portrait Painting Challenge: The Slow and Steady Way to Paint an Acrylic Portrait
If you remember the childhood story, “The Tortoise and the Hare,” you recall that the hare started out really fast and put the tortoise to shame. But then the rabbit took a nap, while the slow, while the turtle, with his slow methodical steps, passed him up and won the race!
Sometimes slow is better for painting an acrylic portrait.
Likewise, in an acrylic portrait, we often want to see quick results. But if we take our time, and just add one layer on top of another, even though it looks like hardly anything is happening, eventually, we will end up with a great painting!
I’d like to show you how to slow down a bit, take your time, and paint your acrylic portrait layer by layer, using the acrylic glazing technique.
Take the Acrylic Portrait Painting Challenge (it’s FREE!) and paint along with us!
REGISTER TODAY. The challenge is ongoing, something you can do at your own pace. It’s not too late to enter! After you join, I’ll send you the supplies list and reference photos to paint from.
Register for the Challenge!
WATCH NOW…
Lesson #4: The Slow and Steady Way to Paint an Acrylic Portrait
In this master class lesson #4, I demonstrate how to continue darkening your darkest values on the face and background, and then work in some warmer glazes to set up the skin tones on her face. We’re going very light, using a large amount of matte medium (95%) to a small amount of paint (5%)
Watch how to do it here…
Learn how to paint an acrylic portrait slowly and correctly, step-by-step in this FREE master class lesson by Matt Philleo at Realistic Acrylic Portrait School!
Would like to paint this portrait with me and hundreds of other artists?
Take the 2021 Spring Portrait Painting Challenge!
You can register below and get started. It is completely FREE to join the challenge and participate. When you join, I’ll send you the “Welcome Kit” which includes:
- The Supplies List (so you know what you need to paint with us, your shopping list. 🙂 )
- The Reference Photo with and without the grid, high resolution, that you can download ready to print out or display on your tablet. You’ll be able to create an accurate portrait this way.
- The Palette Layout Guide showing you how to arrange your colors so they don’t get muddy on your palette
- The Master Class Lesson Schedule
- the Lessons emailed to you
- A private Facebook group to cheer you and help answer your questions
- And a few “bonuses” like opportunities to win my paid online classes
REGISTER TODAY. The challenge is ongoing, something you can do at your own pace. It’s not too late to enter!
Register for the Challenge!Let me know if you have any questions and I look forward to teaching you more!
—Matt
Questions? Suggestions? Thoughts? Let me know, below in the comments. Please share your sketches in our Facebook group and share this post with your friends!

Spring 2021 Acrylic Portrait Painting Challenge: Applying Your First Glazes
Think of the acrylic glazing technique as a Polaroid camera print.
Remember those? You would load up the small film sheets, snap a picture and out popped the print. Back in those days (yes, I’m old enough to remember them) this was amazing. You wouldn’t have to drop off your film and wait 3 days (or even an hour!) for it to process.
But even then, it wasn’t immediate. The image would slowly fade in, and you’d watch a vague outline of your scene start to materialize. Finally, after a minute, you’d have a beautiful print!
In the same way, instead of painting our portrait one section at a time, with thick, opaque applications of paint, we slowly fade it in, covering the entire canvas at once, in stages. We use the classical acrylic glazing technique, just like Da Vinci, Titian and Vermeer used during the Renaissance to achieve smooth, subtle nuances of color and value, vibrant colors, and incredible depth.
I’ll show you how to do it!
But first, make sure you’re registered for the challenge!
REGISTER TODAY. The challenge is ongoing, something you can do at your own pace. It’s not too late to enter! After you join, I’ll send you the supplies list and reference photos to paint from.
Register for the Challenge!
WATCH NOW…
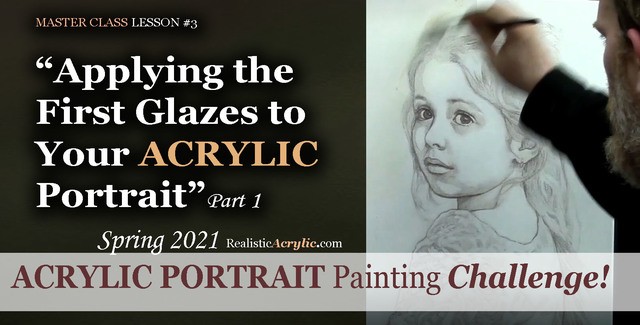
Applying the First Glazes to Your Acrylic Portrait, Part 1
Before we can begin the painting, first we must seal in the sketch, so it doesn’t smear or muddy up our paint. Next, we need to white-out the grid lines so they don’t distract from our final painting presentation. Lastly, we mute the sketch and tone the canvas in one step, so that we don’t have a white canvas staring us in the face, and so that the sketch is softened—easier to convert to a painting.
Watch how to do it here…
Learn to paint a realistic acrylic portrait using the classical glazing technique in this free online class. Lesson 3: Beginning the painting process–sealing in the sketch, whiting
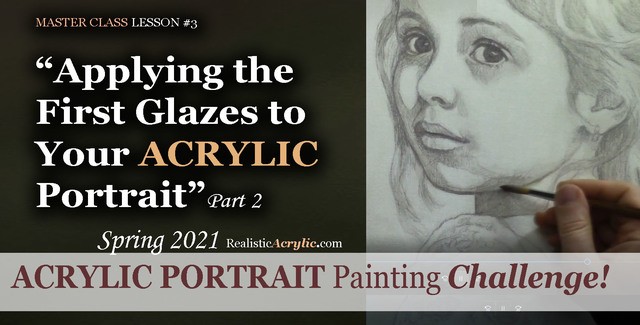
Applying the First Glazes to Your Acrylic Portrait, Part 2
Let’s begin the actual painting process! I’ll show you what colors we are using, how to block in the value structure simply with just two colors and matte medium. We’re going to go light and leave room to correct any mistakes. This will be the foundation we’ll build off of from here on out…
Learn to paint a realistic acrylic portrait using the classical glazing technique in this free online class. Lesson 3: Beginning the painting process
Would like to paint this portrait with me and hundreds of other artists?
Take the 2021 Spring Portrait Painting Challenge!
You can register below and get started. It is completely FREE to join the challenge and participate. When you join, I’ll send you the “Welcome Kit” which includes:
- The Supplies List (so you know what you need to paint with us, your shopping list. 🙂 )
- The Reference Photo with and without the grid, high resolution, that you can download ready to print out or display on your tablet. You’ll be able to create an accurate portrait this way.
- The Palette Layout Guide showing you how to arrange your colors so they don’t get muddy on your palette
- The Master Class Lesson Schedule
- the Lessons emailed to you
- A private Facebook group to cheer you and help answer your questions
- And a few “bonuses” like opportunities to win my paid online classes
REGISTER TODAY. The challenge is ongoing, something you can do at your own pace. It’s not too late to enter!
Register for the Challenge!Let me know if you have any questions and I look forward to teaching you more!
—Matt
Questions? Suggestions? Thoughts? Let me know, below in the comments. Please share your sketches in our Facebook group and share this post with your friends!

Spring 2021 Acrylic Portrait Painting Challenge: Sketching Your Portrait with Accuracy
Just like a contractor would never dream of building a home without a sure foundation, we shouldn’t try to paint an acrylic portrait without the same.
A sketch serves as an excellent foundation to build upon. I will show you in this series of Master Class Lessons how to sketch your portrait accurately.
With an accurate sketch, you are already halfway there to a beautiful painting.
I’ll show you how to do it, step-by-step, using the grid method.
With the grid method, even a beginner can create a realistic sketch. With that in place, I can help you build on top, layer by layer using the glazing technique to create smooth transitions of value and lifelike skin tones. You can do this. I’ll be here to help.
Ready? Let’s get started!
I’ll show you exactly how to do it in the lessons below. But first, make sure you’re registered for the challenge!
REGISTER TODAY. The challenge is ongoing, something you can do at your own pace. It’s not too late to enter! After you join, I’ll send you the supplies list and reference photos to paint from.
Register for the Challenge!
WATCH NOW…
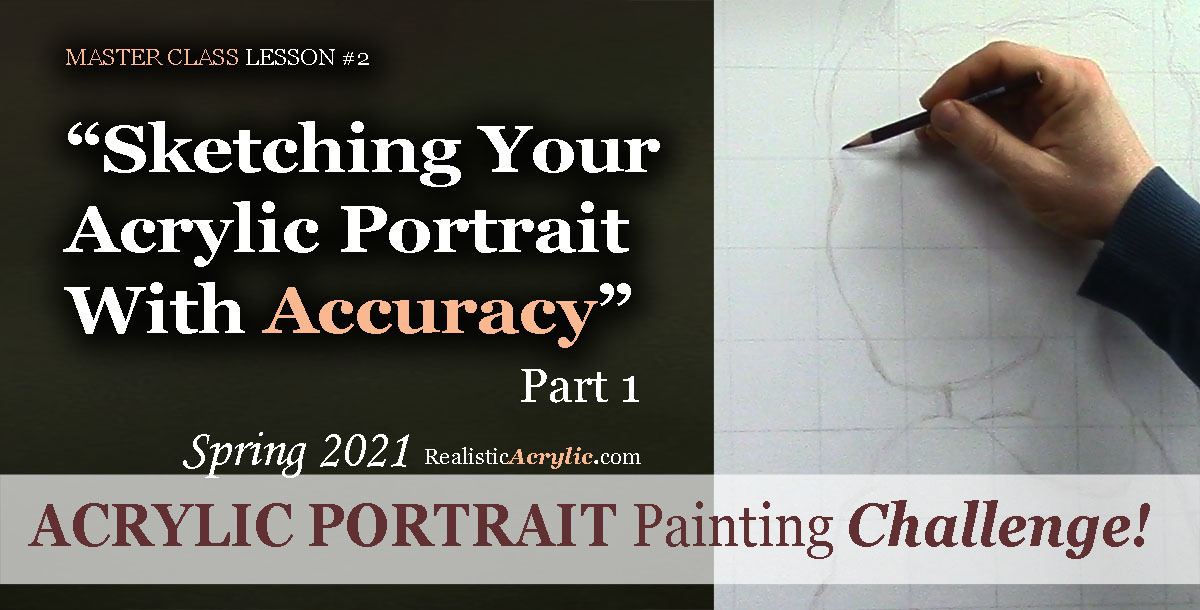
Sketching Your Portrait With Accuracy, Part 1
Let’s begin the sketch! Get out your colored pencil and start making some simple marks. Look at the squares and see where the lines fall. All we need to do at this stage is loosely capture the outline of the subject—the girl—and later on, we will fill in the details. “What if I make a mistake?” No problem. That’s what erasers are for!
Learn how to sketch a portrait accurately with Realistic Acrylic Portrait School’s FREE Challenge Master Class Lessons!
Sketching Your Portrait With Accuracy, Part 2
Learn how to paint a realistic acrylic portrait by creating a solid sketch. In this in-depth video lesson, I’ll show you how to refine the facial features on your portrait drawing. After watching, you’ll be able to capture a better likeness and also plot out where your shadows and highlights will be.
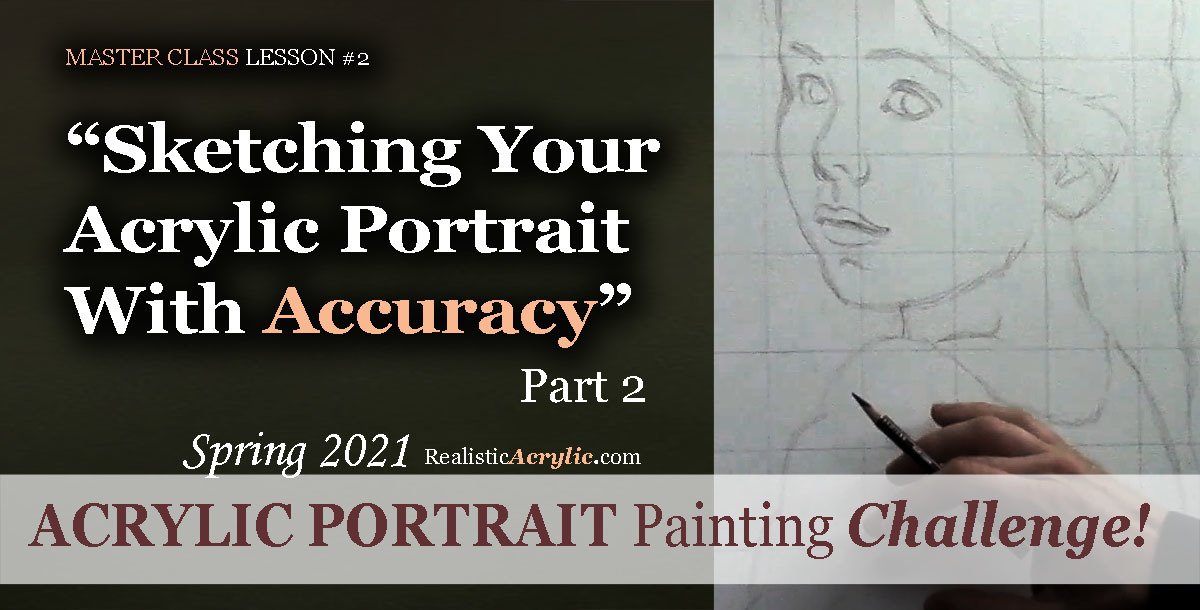
Learn how to sketch a portrait accurately with Realistic Acrylic Portrait School’s FREE Challenge Master Class Lessons!
Sketching Your Portrait With Accuracy, Part 3
We’re going further in this sketch for the Acrylic Portrait Painting Challenge! I show you how to add detail to the girl’s hair. It’s important to break down the complex shapes into something simple, and then add the complexity back in again, to make it realistic. I’ll show you how to do it.
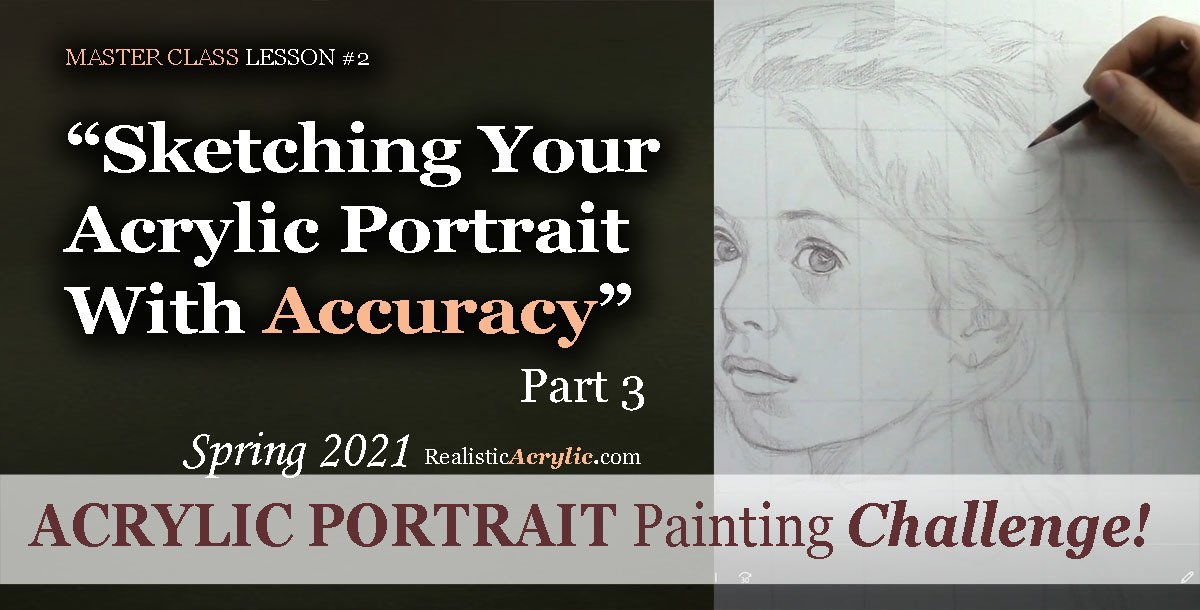
Learn how to sketch a portrait accurately with Realistic Acrylic Portrait School’s FREE Challenge Master Class Lessons!
Sketching Your Portrait With Accuracy, Part 4
In this Master Class Lesson, I will be teaching you how to sketch the lace for the girl’s dress top. It is an extremely detailed portion of the photo, but again, we will follow the method of breaking the complex into simple. That way, we don’t spend all day sketching this portrait and it will be easier to block in during the painting process.
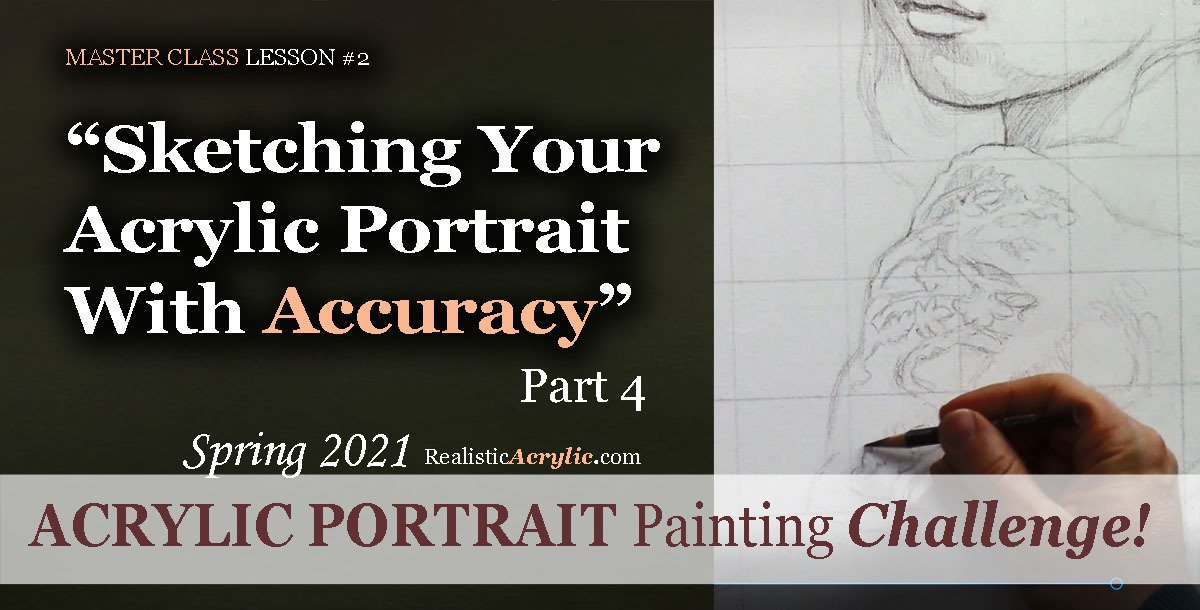
Learn to paint a realistic acrylic portrait successfully by first doing an accurate sketch, as taught by professional artist and instructor, Matt Philleo of Realistic Acrylic Portrait School
Sketching Your Portrait With Accuracy, Part 5
Let’s finish this sketch up! In this lesson, I’ll show you how to add the final touches to the lace, the girl’s face, and some additional details to make this drawing as realistic as possible. Then, we can dive into the painting process with confidence!
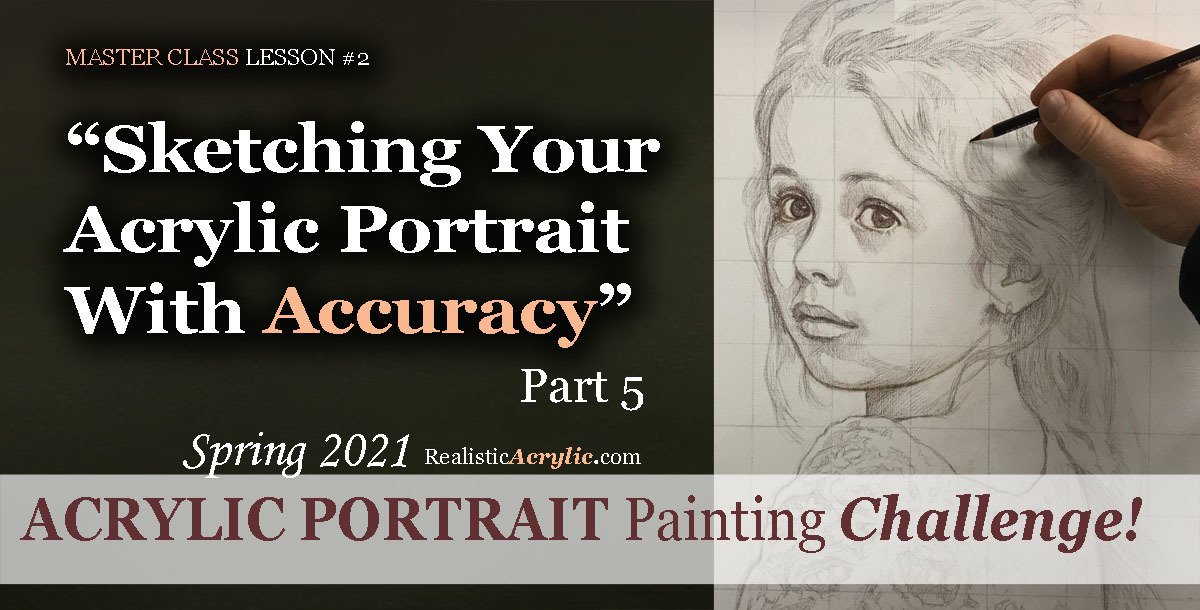
Learn to paint a realistic acrylic portrait successfully by first doing an accurate sketch, as taught by professional artist and instructor, Matt Philleo of Realistic Acrylic Portrait School
Would like to paint this portrait with me and hundreds of other artists?
Take the 2021 Spring Portrait Painting Challenge!
You can register below and get started. It is completely FREE to join the challenge and participate. When you join, I’ll send you the “Welcome Kit” which includes:
- The Supplies List (so you know what you need to paint with us, your shopping list. 🙂 )
- The Reference Photo with and without the grid, high resolution, that you can download ready to print out or display on your tablet. You’ll be able to create an accurate portrait this way.
- The Palette Layout Guide showing you how to arrange your colors so they don’t get muddy on your palette
- The Master Class Lesson Schedule
- the Lessons emailed to you
- A private Facebook group to cheer you and help answer your questions
- And a few “bonuses” like opportunities to win my paid online classes
REGISTER TODAY. The challenge is ongoing, something you can do at your own pace. It’s not too late to enter!
Register for the Challenge!Let me know if you have any questions and I look forward to teaching you more!
—Matt
Questions? Suggestions? Thoughts? Let me know, below in the comments. Please share your sketches in our Facebook group and share this post with your friends!

[PORTRAIT CHALLENGE] Masterclass Lesson #1: Gridding Your Canvas for an Accurate Sketch
I’m so excited to be teaching you the first Masterclass Lesson for the Acrylic Portrait Painting Challenge!
Again, if you are taking the challenge, I commend you. It’s not easy to paint a portrait. Many artists desire to do it, but never actually begin, because it’s difficult to paint a fellow human being accurately. It’s my goal to show you how to do it, so you can paint an amazing portrait from a photo you’ll be proud to show others.
Now, you might feel like rushing this step, but I encourage you to start slowly and build a good foundation for your portrait. You’ll be glad you did.
Before we begin…
Are you registered for the challenge?
If not, register below for FREE and I’ll send you a “Welcome Kit” with a Supplies List and a Palette Color Layout Guide. I’ll also send you high-resolution images of the photo we’ll be painting from for this challenge. (It’s not too late to enter!)
Register for the Challenge!In this video lesson and tutorial, you will learn how to create a grid for your canvas. If you have several years of freehand drawing experience, you could skip this step and start sketching right away, but from my experience in teaching, most artists are not ready to do an accurate sketch for their portrait.
So, most likely, the grid method will be best for you. It allows you to create accurate proportions while still compelling you to use your hand-eye coordination and spatial perception to draw shapes and detailed forms. And that’s how I will be teaching this portrait demonstration for you.
There’s three steps to creating the grid in preparation for sketching:
- Draw it.
- Seal it.
- Mute it.
I’ll show you how, step-by-step, in this video lesson…
And now you know how to create a grid on your canvas, and you’re ready for the next step: sketching the subject! I look forward to being your guide for the rest of this adventure.
I’ll see you in our next class! Until then…
Yours for Better Portraits,
![]()
If you found this post helpful or encouraging, would you send it on ahead? Let others know with the share buttons below. I’d love to hear your comments. Thank you so much!
Let me know if you have any questions about the challenge that I didn’t answer. Leave your question in the comments below and I’ll get back to you!

3 Reasons to take the Acrylic Portrait Painting Challenge!
As I type this, we’re in the middle of the COVID-19 crisis. You know that.
Every challenge presents opportunities. This is one of those occasions. Many of us have more time on our hands, so I decided to open up a portrait painting challenge!
Why not use this extra time to create something beautiful—an acrylic portrait we can be proud of. I want to give you three reasons why you should take the challenge…
- You’ll have the opportunity to walk away with a fantastic acrylic painting you can be proud to show others.
- You will sharpen your skills as a portrait painting artist that you can use for future portraits.
- You will be able to encourage other artists in a sense of community, and that will help you feel connected in a time of isolation.
This challenge is FREE to join and I also plan on teaching you step-by-step, with video instruction, precisely how to paint the portrait.
Would you like to join me and many other artists on this challenge?
Great! Watch this video…
Then, sign up for the challenge below.
I’m interested in the challenge!Look forward to seeing you in the challenge!
![]()
Matt
If you found this post helpful or encouraging, would you send it on ahead? Let others know with the share buttons below. I’d love to hear your comments. Thank you so much!

Why Teeth are Not White and How to Paint Them Realistically
Discover why teeth in portraits should not be painted white and learn how to achieve realistic results in acrylic painting
When painting portraits, especially in acrylics, artists often encounter a common misconception: that teeth should be painted pure white. However, this approach can lead to unrealistic and unnatural results. In this blog post, we’ll explore why teeth are not actually white and how to paint them realistically in your portraits. This guide will help you create a more lifelike appearance in your acrylic paintings by adjusting the way you depict teeth.
Why Are Teeth Not White in Portraits?
One of the biggest mistakes beginner artists make is painting teeth too white in their portraits. While it’s easy to assume that teeth are white, the reality is far from it. Teeth are not naturally as bright as we imagine them. When you compare a piece of white paper next to the teeth in your reference photo, you will notice a significant difference in value. Even in the best lighting conditions, teeth tend to appear darker due to various factors.
Light and Shadows Affect Teeth Color
A key reason why teeth are not as white as you think is because of the shadows cast by the mouth, lips, and other surrounding features. When you observe a person, you’ll notice that these shadows darken the teeth significantly. Even in bright lighting, the teeth may still appear off-white rather than pure white. For instance, mustaches or beards can further reduce the perceived brightness of teeth, making them look even darker.
How to Paint Teeth Realistically in Acrylic
When painting teeth in a portrait, it’s essential to capture this balance between light and shadow. Here’s a step-by-step guide to help you create a more natural depiction of teeth:
1. Analyze Your Reference Photo
Before applying any paint, take a close look at your reference photo. Hold a piece of white paper up to the teeth and notice the difference in value. This will give you a clear idea of how much darker the teeth are compared to pure white. Observing this contrast will help you determine the right shades to use in your painting.
2. Use Off-White Tones
Instead of using pure white, opt for off-white tones to depict the teeth. Colors such as a soft ivory, light gray, or a pale beige are excellent choices. Mixing a touch of raw umber or burnt sienna into your white paint can help you achieve a more realistic tone for the teeth.
3. Add Shadows for Depth
The shadows cast by the lips and mouth should not be overlooked. Use darker tones around the edges of the teeth to emphasize the depth created by these shadows. You can blend a mix of dark brown or blue-gray tones to add subtle shadows, making the teeth recede naturally into the mouth.
4. Highlight Selectively
While teeth are not pure white, they do have highlights in certain areas where light directly hits them. These highlights can be painted with white, but should only be applied sparingly. Focus on small areas, such as the tips of the teeth or the spots where light reflects the most. By adding these highlights carefully, you’ll make the teeth appear shiny and dimensional without them looking unnaturally bright.
5. Blend for a Smooth Transition
Teeth have a smooth surface, so it’s important to blend the colors and shades gently. Avoid harsh lines or abrupt transitions between shadows and highlights. Use a soft brush to blend the darker tones into the lighter areas for a seamless finish.
Common Mistakes to Avoid
When it comes to painting teeth realistically, there are a few common pitfalls to watch out for:
- Avoid using pure white for the entire tooth surface. This can make the teeth appear flat and unnatural.
- Don’t ignore the shadows around the mouth and lips. These shadows are what give the teeth depth and realism.
- Don’t over-highlight the teeth. Applying too much white will make them stand out unnaturally. Only use highlights in select areas where light naturally hits.
Tips for Achieving Lifelike Results
Here are some additional tips to ensure your teeth look realistic in your acrylic portrait:
- Layer your colors: Start with darker tones for the base of the teeth and gradually layer lighter shades on top to build depth.
- Use small brushes: Precision is key when painting teeth, so opt for small, fine-tipped brushes to work on the details.
- Work with a reference: Always keep a reference photo handy to guide you in accurately capturing the teeth’s value and shading.
Conclusion
Teeth in a portrait should never be painted stark white. Understanding the role of light, shadows, and the natural off-white color of teeth is crucial for creating a realistic portrait. By following the techniques outlined in this post, using off white tones, incorporating shadows, and highlighting selectively, you can paint teeth that look natural and lifelike in your acrylic portraits.
For more tips and tutorials on painting realistic acrylic portraits, visit RealisticAcrylic.com and check out our other tutorials for more insights into mastering portrait painting.
As you can see, teeth are darker value, and you can often achieve it by using a mixture of raw umber and titanium white for the shadows, raw sienna-titanium white for the mid-tones and titanium white-slight bit of indian yellow only for the highlights.
It all comes down to painting correct tonal value–that is, the correct level of light and dark. If you’d like a tool to help you with that, then I have something for you…
I created a tool that you can use to measure the tonal value of any area of your portrait in question against your reference photo. I call it the “Value Checker.” Download and print a copy for yourself today and apply it to the portrait you are currently working on. And you will see an immediate improvement in the realism!
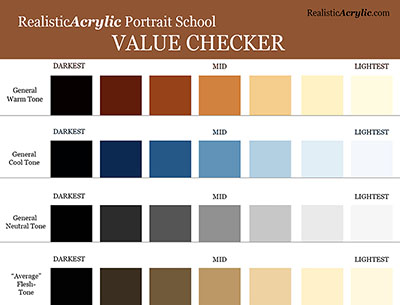
Get the full-resolution 8 1/2″ x 11″ version below…
Get the Value Checker ToolLet me know how this helps! What did you think of this tip on NOT painting teeth white? Did it surprise you?
I’d love to hear how your art journey is going. Shoot me an email and let me know. Or leave a comment. Be blessed in your portrait painting!
Yours for Better Portraits,

Matt
If you found this post helpful or encouraging, would you send it on ahead? Let others know with the share buttons below. I’d love to hear your comments. Thank you so much!

How to Paint Realistic Reflections on Eyeglasses in Acrylic Portrait
It’s tricky to paint reflections on eyeglasses.
Creating realistic reflections on eyeglasses can significantly enhance the depth and authenticity of an acrylic portrait. In this blog post, you will learn how to paint realistic reflections on eyeglasses in acrylic portrait and then along with tips for mixing colors, layering, and applying highlights. Because these methods will help elevate your acrylic painting skills and bring your portraits to life.
Understanding Reflections in Eyeglasses
Reflections in eyeglasses are not just simple overlays; yet they play a crucial role in conveying the personality and emotion of your subject. Of course, observing how light interacts with surfaces is essential. Hence, it is vital to capture the subtle nuances of reflections to create a convincing portrayal.
Preparing Your Workspace
Before beginning, ensure your workspace is organized. Then have your reference photo at hand, and gather all necessary materials:
- Acrylic paints: Titanium white, raw umber dark, ivory black, burnt sienna, and alizarin crimson
- Brushes: A round size 8 brush for detail work
- Matte medium for thinning paint
- Palette for mixing colors
- A clean rag for touch-ups
Step-by-Step Techniques
Setting Up the Reference Photo
Zoom in on your reference photo to clearly see the reflections in the glasses. Then identify key areas where reflections appear and note their shape and color.
Mixing the Initial Color
Begin with a mixture of titanium white and raw umber dark to create a toned-down white. Because this will avoid stark brightness that can look unnatural, thin this mixture with matte medium to achieve fluidity.
Painting the Reflections
In this case, use the round brush to carefully apply the mixed color to the upper corners of the glasses. This is where the most pronounced reflections typically occur.
Just observe the shape of the reflections in your reference photo and replicate that shape on your canvas and then using different angles of strokes will help smooth out the paint.
Adding Depth with Multiple Layers
Allow the initial layer to dry before adding more highlights. While layering is essential for creating depth.
Mix a slightly lighter shade then by adding more titanium white to your previous mixture. Apply this lighter color to the same areas, focusing on the edges where the light hits most.
Incorporating Background Elements
To make the reflections believable, you need to incorporate faint outlines of elements visible in the background. This adds realism without overwhelming the portrait.
So use a diluted version of your mixture to achieve this effect, ensuring that the reflections do not detract from the subject’s features.
Enhancing the Frame of the Glasses
The frame should also reflect light. And then apply highlights using the same mixture to the inner edges of the frame.
Gradually build up the highlight by layering, allowing each layer to dry before adding the next.
Adding Shadows for Realism
Shadows are critical for grounding the glasses. When mixing burnt sienna and alizarine crimson, you can create a warm shadow color.
Apply this color underneath the glasses and around the frames to suggest depth and interaction with the face.
Refining the Details
After allowing the previous layers to dry, return with titanium white mixed with raw umber dark for the final highlights.
Focus on adding subtle highlights on the corners of the reflections. Use a very light touch to maintain the transparency of the glass.
Final Touches
Once all elements have dried, step back to evaluate your painting. Then adjust any areas that may need further highlights or shadows to ensure balance and realism. Because this reflective interplay between light and dark is what ultimately gives your portrait a lifelike quality.
Conclusion
Painting realistic reflections on eyeglasses requires patience and practice. So by following these techniques, artists can enhance their acrylic portraits with depth and clarity. Remember also that observation is key; study how light interacts with different surfaces to improve your skill. With dedication, anyone can learn how to paint realistic reflections that bring their acrylic portraits to life.
Tips for Painting Reflections:
- Layering is Key: Always allow layers to dry before adding more to achieve depth.
- Use a Light Touch: When applying highlights, a gentle hand creates a more realistic effect.
- Study Real Life: Observe real eyeglasses in different lighting conditions to understand how reflections work.
For further resources and guides, visit realisticacrylic.com and check out my free courses to enhance your acrylic painting journey.
This is a 16 x 20 acrylic on canvas commissioned portrait, and I just delivered it to the client today. She loved it. It was a memoriam portrait, so I pray it will bring comfort to all who see it.
Have a blessed day, and may God use your artistic gifts to bless people far and wide.
- How to Paint Foliage Using the Acrylic Glazing Technique
- How to Trace for an Accurate Portrait Sketch
- How to Paint Realistic Eyes in Your Acrylic Portrait
- How to Add Raw Umber Dark & Ultramarine Blue to Your Portrait
- How to Make Your Own Raw Umber Dark
- How to Paint Realistic Trees & Grass in Your Acrylic
- How to Block In Skin Tone Values Using Glazing Technique
- How to Paint Vibrant Reds in Your Acrylic Portrait
- How to Glaze Background Colors & More Acrylic Portrait
- How to Paint White Clothing in Your Acrylic Portrait
- How to Easily Transition from a Sketch to a Painting
- How to Block In Shading & Skin Tones in Your Acrylic
- How to Build Up Color on Acrylic Pet Portrait
- How to Build Up Form on Clothing with Acrylic
- How to Paint Dark Clothing Using Acrylic Glazing Technique
- How to Paint a 24 x 30 Acrylic With 30 People
- How to Do Smooth Shading with Acrylic
- How to Sketch an Acrylic Portrait with a Grid
Read more about how to paint a portrait that you can surely be proud of!
I’d love to hear your thoughts about this video. Please share it with your friends and family. Let me know if you have any further questions. I’ll greatly help you.
If you’d like to learn more, sign up for my free email tips and video class today.
Learn How to Paint Acrylic Portraits With My Free Mini-Video Course!
Thank you so much for taking the time to read this tutorial and watch the video. That means a lot to me. I hope you find it very helpful in your portrait painting.
Yours for Better Portraits,

P.S. Did you find this post helpful or encouraging? If so, send it on ahead! Let others know with the share buttons below. I’d love to hear your comments. Thank you so much! Also, do you have a question on acrylic portrait painting you’d like answered? Let me know, and I’d be happy to help!