Category Archives for Step-by-Step Tutorial
")
How to Sketch a Portrait of a Couple FREEHAND
Bring your pencil sketches to life A guide to freehand couple portrait drawing
Sketching a portrait freehand is an art form that requires patience, precision, and a deep understanding of the subject’s features. In this tutorial, I’ll guide you through the process of sketching a couple’s portrait from start to finish. Whether you’re an experienced artist or a beginner, this step-by-step guide will help you develop your skills and create a realistic and captivating portrait.
Materials You’ll Need
- Pencils: A variety of pencils, including 2H, HB, 2B, and 8B
- Eraser: A white eraser, preferably one that fits on the end of a pencil
- Mechanical Pencil: For fine details
- Pencil Sharpener: An X-Acto brand or similar for maintaining sharp points
- Sketchpad or Paper: High-quality paper suitable for pencil sketching
Step 1: Blocking in the Forms
Begin by lightly sketching the basic outlines of the couple’s heads and faces. Use a 2H pencil for this initial step to keep the lines light and easy to adjust. Focus on the overall composition, ensuring that the heads are proportionally placed within the space. This is the foundation of your portrait, so take your time to get it right.
Step 2: Outlining Facial Features
Once you’ve blocked in the basic forms, start outlining the key facial features such as the eyes, nose, mouth, and ears. Keep the details simple at this stage, using an HB pencil to ensure you can easily erase and correct as needed. The goal is to position the features accurately before moving on to more detailed work.
Step 3: Adding Details and Shading
With the facial features in place, begin adding more details. Start with the eyes, focusing on the concentric eyelid folds and nasolabial folds (laugh lines). Use a combination of 2B and 8B pencils to create depth and dimension. The 8B pencil is ideal for the darkest values, while the 2B pencil is perfect for mid-tones.
Tip:
When shading, use a light touch with the 8B pencil to avoid making the lines too harsh. Gradually build up the darker values in layers, paying close attention to the reference photo.
Step 4: Sketching Hair and Facial Features
Next, move on to sketching the hair. Block in the major strokes of the hair with a 2B pencil, focusing on the direction and flow of the strands. Remember that the hair should complement the overall portrait, so don’t get too caught up in the details just yet.
Once the hair is in place, return to the face and begin adding more shading to the cheeks, jawline, and lips. Use the 2B pencil to fill in mid-tones and the 8B pencil for the darkest shadows. This layering technique will give your portrait a realistic and three-dimensional appearance.
Step 5: Working on the Second Subject
With the first subject’s face mostly complete, it’s time to start sketching the second subject. Follow the same process as before, beginning with the basic outlines and gradually adding details. Be mindful of the interaction between the two figures, particularly where their bodies overlap or cast shadows on one another.
Technique:
To ensure accuracy, you can measure the facial features using the edge of a piece of paper. This helps to maintain proportionality without the need for tools like a grid or proportional divider.
Step 6: Refining the Details
As you continue working on the second subject, refine the details using a mechanical pencil for added precision. Focus on the finer aspects of the facial features, such as the shape of the eyes, the contour of the nose, and the texture of the hair.
Step 7: Adding Final Touches and Shading
Once you’re satisfied with the overall composition, add the final touches. Darken the necessary areas, ensuring the contrast between light and shadow is well defined. Pay special attention to the nasolabial folds, eyelid folds, and other areas where shadows naturally fall.
Step 8: Review and Adjust
Before finishing, take a step back and review your portrait. Make any necessary adjustments to the shading, proportions, or details. It’s important to ensure that both subjects are cohesive and that the portrait as a whole feels balanced.
Sketching a couple’s portrait freehand is both challenging and rewarding. By following these steps, you’ll not only improve your technical skills but also gain a deeper appreciation for the art of portraiture. Remember, practice makes perfect, so don’t be discouraged if your first attempts aren’t flawless. Keep refining your technique, and over time, you’ll see significant improvements.
For more tips and tutorials on realistic portrait painting, drawing, and free courses, visit www.realisticacrylic.com. Happy sketching!
LEARN MORE
- Sketching Your Painting Accurately
- Beginning a Pet Portrait in Acrylic
- The Mystery of Realism in Painting
- Apply A Burnt Sienna Glaze to a Portrait
- Learn How to Sketch a Portrait Freehand in 45 Minutes
- Adding highlights to your acrylic painting
- 5 Excellent Reasons to Use Aluminum Foil
- Paint Realistic Wrinkles in Acrylic
- Painting Clothing in an Acrylic Portrait
- Paint a Cloudy Sky Acrylic
- How to add Semi-Opaque Highlights
- How to Enhance the Contrast in Your Acrylic
- How to Add Glaze to Your Acrylic Painting
- Paint Realistic Reflections on Eyeglasses in an Acrylic Portrait
- Build Up Depth on Your Acrylic Portrait Backgrounds
- How Do You Do Layers With the Glazing Technique?
- Learn How to Paint Wrinkles in Acrylic
Read more about how to paint a portrait that you can surely be proud of!
I’d love to hear your thoughts on this video. Please share it with your friends and family. Let me know if you have any further questions. I’ll greatly help you.
If you’d like to learn more, sign up for my free email tips and video class today.
Learn How to Paint Acrylic Portraits With My Free Mini-Video Course!
Thank you so much for taking the time to read this tutorial and watch the video. That means a lot to me. I hope you find it very helpful in your portrait painting.
Yours for Better Portraits,

P.S. Did you find this post helpful or encouraging? If so, send it on ahead! Let others know with the share buttons below. I’d love to hear your comments. Thank you so much! Also, do you have a question on acrylic portrait painting you’d like answered? Let me know, and I’d be happy to help!

How to Add Shadows and Sign Your Portrait Painting!
How do add shadow in your painting!
Creating a realistic and professional acrylic portrait involves more than just capturing the likeness of your subject. The final steps, including adding shadows and signing your painting, are crucial to achieving depth and a polished finish. In this blog post, we’ll walk you through how to add shadows and sign your portrait. And also, master these techniques to elevate your artwork to the next level.
The Role of Shadows in Portrait Painting
Shadows play a vital role in giving your portrait dimension and grounding your subjects in the scene. Without shadows, elements of your painting can appear to be floating or disconnected, breaking the realism you’ve worked so hard to create.
Tips and Techniques:
- Importance of Shadows:
- Shadows are crucial for adding depth and realism to your portraits. Without them, subjects can appear to be floating or disconnected from their environment.
- In this case, the shadows are diffused due to a partially cloudy day, which presents a challenge in achieving the right balance.
- Creating Shadows:
- Use a glaze of raw umber dark mixed with ultramarine blue to create subtle, realistic shadows. And, also a small round brush is ideal for applying these glazes close to the subject’s feet and other areas needing shadow.
- Pay attention to the light source in your reference photo. Even diffused light creates shadows that define the form and ground the subjects in the scene.
- For shadows on the legs or other body parts, adjust the value using a combination of raw umber dark and alizarine crimson. This deepens the shadows and enhances the three-dimensionality of the figure.
In the painting process described here, the light source is diffused due to a cloudy day, making the shadows softer and more challenging to depict accurately. However, even in these conditions, shadows are present and must be included to give the scene coherence.
The Value Checker Tool
One of the most challenging aspects of painting is ensuring your values—how light or dark an area is—are accurate. Inconsistent values can make a painting look flat or unrealistic. To help with this, consider using my free value checker tool and check it here.
This tool allows you to compare the values in your painting with those in your reference photo, ensuring they match up and contribute to a realistic portrayal. You can download the value checker tool for free .
Signing Your Painting: A Final Touch
Signing your painting is more than just adding your name; it’s a part of the composition. Traditionally, artists sign their work on the lower right-hand corner, but this isn’t a hard rule. If the composition of your painting is weighted more heavily on the right side, consider signing on the left to balance it out.
Choose a color that contrasts well with the background but isn’t too jarring. For example, in this portrait, a mixture of alizarine crimson, pyrrole orange, and raw sienna was used, applied with a script liner brush for precision.
The size of your signature should be modest—large enough to be seen but not so large that it distracts from the portrait itself. Once signed, review your painting to see if any last-minute tweaks are needed before you call it complete.
Tips
Adding shadows and signing your portrait may seem like small details, but they are essential steps in creating a finished, professional piece of art. By mastering these techniques, you can add depth to your portraits and leave your personal mark in a way that complements the overall composition.
Take your time with these final touches, and remember to step back and appreciate your work when it’s done. With these tips, your portraits will not only capture the likeness of your subjects but also exude professionalism and attention to detail.
Now that you’ve completed your portrait, it’s time to celebrate your achievement. Whether it’s your first or fiftieth painting, take pride in what you’ve created, knowing you’ve added the final flourishes that make it truly yours.
- Sketching Your Painting Accurately
- Beginning a Pet Portrait in Acrylic
- The Mystery of Realism in Painting
- Apply A Burnt Sienna Glaze to a Portrait
- Learn How to Sketch a Portrait Freehand in 45 Minutes
- Adding highlights to your acrylic painting
- 5 Excellent Reasons to Use Aluminum Foil
- Paint Realistic Wrinkles in Acrylic
- Painting Clothing in an Acrylic Portrait
- Paint a Cloudy Sky Acrylic
- How to add Semi-Opaque Highlights
- How to Enhance the Contrast in Your Acrylic
- How to Add Glaze to Your Acrylic Painting
- Paint Realistic Reflections on Eyeglasses in an Acrylic Portrait
- Build Up Depth on Your Acrylic Portrait Backgrounds
- How Do You Do Layers With the Glazing Technique?
- Learn How to Paint Wrinkles in Acrylic
Read more about how to paint a portrait that you can surely be proud of!
I’d love to hear your thoughts on this video. Please share it with your friends and family. Let me know if you have any further questions. I’ll greatly help you.
If you’d like to learn more, sign up for my free email tips and video class today.
Learn How to Paint Acrylic Portraits With My Free Mini-Video Course!
Thank you so much for taking the time to read this tutorial and watch the video. That means a lot to me. I hope you find it very helpful in your portrait painting.
Yours for Better Portraits,
P.S. Did you find this post helpful or encouraging? If so, send it on ahead! Let others know with the share buttons below. I’d love to hear your comments. Thank you so much! Also, do you have a question on acrylic portrait painting you’d like answered? Let me know, and I’d be happy to help!

How to Paint Trees in Your Acrylic Portrait
Create depth and texture: how to paint trees with acrylic glazing
Incorporating trees into your acrylic portrait can significantly enhance the depth and realism of your artwork. Whether you’re painting a detailed scene or a more abstract background, mastering the acrylic glazing technique is essential for achieving lifelike results. This guide will walk you through the process of how to paint trees in your acrylic portrait, from initial sketches to final details.
1. Preparation: Sketching and Blocking In
Start with a Simple Sketch
Begin by sketching a loose outline of the trees in your acrylic portrait. Use light pencil marks to outline the basic shapes and areas where the trees will be placed. Refer to your reference photo to capture the overall structure and major shapes of the trees.
Block in Basic Values
Once you have the basic outline, block in the primary shapes and values. This stage involves applying broad, simple color fields to represent the general areas of light and shadow. Focus on getting the overall composition and value relationships correct before adding intricate details.
2. Applying the Glazing Technique
Prepare Your Glazing Medium
For the glazing technique, you’ll need a clear matte medium to mix with your acrylic paints. This medium will help achieve the translucent effect typical of glazing. Mix a small amount of phthalo blue with Indian yellow to create a vibrant green. Adjust the color by adding ultramarine blue and raw sienna for subtle variations.
Apply the First Layer of Glaze
Using a soft brush, apply the glaze over the blocked-in areas. This first layer should be relatively thin and translucent. Focus on creating a base layer that enhances the color richness and adds depth to the trees.
Build Up Layers Gradually
Allow each layer to dry before applying the next one. This gradual buildup helps in achieving a rich, complex texture without overwhelming the canvas. Continue layering different glazes, adjusting the colors and values based on your reference photo and desired effect.
3. Adding Detail and Texture
Refine with Smaller Brushes
As the layers build up, switch to smaller brushes to add finer details. Use the edge of your brush to create texture and define specific areas, such as branches and leaves. This step is crucial for adding realism and depth to the trees.
Incorporate Color Variations
Introduce variations in color and value to mimic natural light and shadow. For instance, use a mix of ultramarine blue and raw sienna to depict darker areas or shadows. Ensure that these colors blend seamlessly with the underlying glazes.
Use Dry Brush Techniques
For additional texture, consider using dry brush techniques. This involves using a nearly dry brush to apply a thin layer of paint, creating a rough, textured effect that simulates the appearance of tree bark or leaf edges.
4. Final Touches
Add Highlights and Final Details
Once you are satisfied with the overall structure and depth of the trees, add highlights to bring out specific areas. Use a lighter, more opaque glaze or even pure white to highlight the sunlit parts of the trees.
Review and Adjust
Step back from your painting periodically to assess the overall effect. Make any necessary adjustments to color balance, value contrast, or detail level to ensure the trees integrate well into the portrait and enhance the overall composition.
Tips for Success
- Use Reference Photos: Always refer to high-quality photos or real-life observations to capture accurate details and colors.
- Patience is Key: Glazing is a time-consuming process, but patience will result in more vibrant and realistic colors.
- Experiment with Colors: Don’t be afraid to mix and experiment with different colors to achieve the desired effect. Each painting may require different color combinations.
By following these steps and utilizing the glazing technique effectively, you can achieve stunning results and bring a lifelike quality to the trees in your acrylic portrait.
Read more about my additional resources, tutorials, to learn more and check out my free courses here. . Whether you’re a beginner or an experienced artist, there’s always something new to learn and apply to your paintings. Happy painting!
- Sketching Your Painting Accurately
- Beginning a Pet Portrait in Acrylic
- The Mystery of Realism in Painting
- Apply A Burnt Sienna Glaze to a Portrait
- Learn How to Sketch a Portrait Freehand in 45 Minutes
- Adding highlights to your acrylic painting
- 5 Excellent Reasons to Use Aluminum Foil
- Paint Realistic Wrinkles in Acrylic
- Painting Clothing in an Acrylic Portrait
- Paint a Cloudy Sky Acrylic
- How to add Semi-Opaque Highlights
- How to Enhance the Contrast in Your Acrylic
- How to Add Glaze to Your Acrylic Painting
- Paint Realistic Reflections on Eyeglasses in an Acrylic Portrait
- Build Up Depth on Your Acrylic Portrait Backgrounds
- How Do You Do Layers With the Glazing Technique?
- Learn How to Paint Wrinkles in Acrylic
Read more about how to paint a portrait that you can surely be proud of!
I’d love to hear your thoughts on this video. Please share it with your friends and family. Let me know if you have any further questions. I’ll greatly help you.
If you’d like to learn more, sign up for my free email tips and video class today.
Learn How to Paint Acrylic Portraits With My Free Mini-Video Course!
Thank you so much for taking the time to read this tutorial and watch the video. That means a lot to me. I hope you find it very helpful in your portrait painting.
Yours for Better Portraits,
P.S. Did you find this post helpful or encouraging? If so, send it on ahead! Let others know with the share buttons below. I’d love to hear your comments. Thank you so much! Also, do you have a question on acrylic portrait painting you’d like answered? Let me know, and I’d be happy to help!

Weird Way How to Apply Gesso to Your Canvas
Most store-bought canvases are not primed very well and can benefit from another layer or two of gesso.
Introduction:
When it comes to preparing a canvas for painting, most artists stick to traditional methods. However, there’s an unconventional technique that can give you a smoother surface and enhance the detail in your work. In this tutorial, we’ll explore a unique way to apply gesso to your canvas using a drywall taping knife. This method not only helps in creating a finer texture but also saves you from extensive sanding later on. Let’s dive into this step-by-step guide.
The Tools You’ll Need:
Before starting, gather the necessary tools and materials. You’ll need:
- Gesso: The base primer for your canvas.
- Matte Medium: Helps to smooth out the gesso and make it more fluid.
- Drywall Taping Knife (6-inch): The star of this method for spreading the gesso evenly.
- Flat Edge Paintbrush: For initial application.
- Yogurt Container: To mix the gesso and matte medium.
- Gloves and Apron: To protect your hands and clothing.
Preparing the Gesso Mixture:
- Mixing the Gesso: Begin by pouring a small amount of gesso into a container—an empty yogurt cup works perfectly. Fill it about a quarter of the way.
- Adding Matte Medium: To ensure a smoother application, add a few squirts of matte medium into the gesso. This addition will make the mixture more fluid, helping it spread more easily across the canvas.
- Stirring: Use a palette knife to thoroughly mix the gesso and matte medium. Ensure the consistency is even, with no lumps or dry spots.
Applying the Gesso:
- Initial Application with a Brush: Dip your flat edge paintbrush into the gesso mixture, and apply it to the top left corner of your canvas. Brush downwards, covering the entire surface. Aim for a generous, even coat.
- Smoothing with the Drywall Taping Knife: After applying the gesso, grab your drywall taping knife. Starting at the top, use even pressure to smooth the gesso down the canvas. Work in long, continuous strokes to avoid leaving streaks or ridges.
- Feathering the Edges: As you work, you may notice ridges forming on the surface. To remove these, lightly graze the surface with the taping knife, using minimal pressure. This technique will help blend the gesso evenly across the canvas.
Troubleshooting Common Issues:
- Dealing with Ridges: If ridges persist, continue feathering them out with the knife. Adjust your pressure as needed, moving from firm to light strokes to achieve a smooth finish.
- Applying Additional Layers: If the first coat is too thin, allow it to dry and then apply a second coat using the same method. This additional layer can further enhance the smoothness of your canvas.
Final Touches:
After the gesso has dried, it’s time to inspect the canvas. Look for any remaining ridges or imperfections. If you find any, lightly sand the surface using a 250 or 300-grit sandpaper. This step will ensure an ultra-smooth finish, ready for painting.
Tips for Success:
- Work Quickly: Gesso can dry fast, especially in a warm environment. To prevent streaks, work swiftly when applying and smoothing the gesso.
- Use the Right Tools: While a larger drywall trowel can be used, a 6-inch taping knife offers better control and precision, especially on smaller canvases.
- Practice Makes Perfect: This technique may take some getting used to, but with practice, you’ll find it easier to achieve a smooth, professional-quality canvas.
Using a drywall taping knife to apply gesso might seem unusual, but it’s a powerful technique for artists seeking a smoother canvas surface. By following these steps, you can minimize brush strokes, reduce the need for sanding, and create a better foundation for your paintings.
Read more about my additional resources, tutorials, to learn more and check out my free courses here. . Whether you’re a beginner or an experienced artist, there’s always something new to learn and apply to your paintings. Happy painting!
- Sketching Your Painting Accurately
- Beginning a Pet Portrait in Acrylic
- The Mystery of Realism in Painting
- Apply A Burnt Sienna Glaze to a Portrait
- Learn How to Sketch a Portrait Freehand in 45 Minutes
- Adding highlights to your acrylic painting
- 5 Excellent Reasons to Use Aluminum Foil
- Paint Realistic Wrinkles in Acrylic
- Painting Clothing in an Acrylic Portrait
- Paint a Cloudy Sky Acrylic
- How to add Semi-Opaque Highlights
- How to Enhance the Contrast in Your Acrylic
- How to Add Glaze to Your Acrylic Painting
- Paint Realistic Reflections on Eyeglasses in an Acrylic Portrait
- Build Up Depth on Your Acrylic Portrait Backgrounds
- How Do You Do Layers With the Glazing Technique?
- Learn How to Paint Wrinkles in Acrylic
Read more about how to paint a portrait that you can surely be proud of!
I’d love to hear your thoughts on this video. Please share it with your friends and family. Let me know if you have any further questions. I’ll greatly help you.
If you’d like to learn more, sign up for my free email tips and video class today.
Learn How to Paint Acrylic Portraits With My Free Mini-Video Course!
Thank you so much for taking the time to read this tutorial and watch the video. That means a lot to me. I hope you find it very helpful in your portrait painting.
Yours for Better Portraits,
P.S. Did you find this post helpful or encouraging? If so, send it on ahead! Let others know with the share buttons below. I’d love to hear your comments. Thank you so much! Also, do you have a question on acrylic portrait painting you’d like answered? Let me know, and I’d be happy to help!

How to Refine a Traced Sketch Freehand
Learn the tips and techniques to enhance your traced sketch using freehand refinements for a more dynamic and detailed artwork.
Now what? Begin painting? Not so fast! 🙂 In this video, I’ll show you how to refine a traced sketch freehand and to make it ready to paint upon.
This is for the book of Isaiah by Russell Stendal and it’s an illustration based off this image here of a man in intercessory prayer. And originally, I did a video showing the tracing process, asking whether it’s ok to trace. And I think I answered that question, that it is—as long as you do freehand sketching and work with grids. But especially as you work with freehand sketching, which will help you to improve as an artist.
Now, I’m going to work in this sketch to show you the process of tightening up a sketch done by tracing initally and the tracing process does leave you with a lot of work left to be done. So, I’m going to show you how I’m going to add additional shading in detail and then have a sketch that I can paint on top of.
The Power of Freehand Refinements
Traced sketches are often used by artists to quickly capture the proportions and major features of a subject. However, relying solely on tracing can result in a flat, lifeless image. In this guide we will explore how to refine a traced sketch freehand, enhancing the details, adding depth, and preparing the sketch for the painting stage. By the end of this tutorial, you’ll understand how to transform a traced sketch into a dynamic, polished artwork ready for the next step.

The Importance of Freehand Refinement
When an artist traces an image, they capture the basic outlines but often miss out on critical details like shadows, textures, and fine forms. This is where freehand refinement comes into play. It allows you to go beyond the rigid lines of a traced image and add life to the drawing.
In this tutorial, I’ll demonstrate how to refine a traced sketch freehand based on my work on a sketch of Isaiah or Hezekiah, which was originally traced. The traced lines were helpful to get the basic structure down quickly, but the freehand refinements were crucial for adding the depth, shading, and detail needed for an intercessory prayer-themed illustration.
Step 1: Shading and Detailing the Hands
Hands are complex and full of intricate details like tendons, veins, and shadows, which are often missed in a simple traced sketch. To refine the hands in this illustration, start by adding shading to differentiate the forms. Pay attention to areas where light hits the fingers and where shadows fall.
- Tip: Focus on the fingertips and the blood vessels to give a realistic, textured appearance to the hands.
- Technique: Use a light pencil to gently shade in the forms and increase pressure in areas where darker shadows fall, especially around the tendons and between the fingers.
Step 2: Refining Facial Features
The face is another area that greatly benefits from freehand refinement. In this particular sketch, I had traced the basic lines of the face, but it still needed significant work to look convincing. I added texture to the beard and refined the nose’s shading to give it a more three-dimensional appearance.
- Tip: When refining facial features, focus on adding shadow to areas like the nose, cheekbones, and chin. This helps to convey depth and structure.
- Technique: Create subtle distinctions between the different parts of the nose (e.g., the wing and the ball) by gently shading around the contours. Don’t hesitate to erase and rework lines if they aren’t quite right. Precision is key in this step.
Step 3: Adjusting Proportions and Textures
One of the challenges with tracing is that it can sometimes lead to slightly distorted proportions. Freehand refinement allows you to adjust these proportions for greater accuracy. For instance, I changed the hairstyle in this sketch to make it look less like myself (since I modeled for it) and more like the character I intended to depict.
- Tip: Use freehand sketching to add texture to the hair and adjust any features that seem off.
- Technique: When drawing hair, follow the natural flow of the strands, adding texture by varying the direction of your pencil strokes. This adds realism to the hair, especially in areas where light and shadow interact.
Step 4: Refining Clothing and Drapery
Clothing, especially in historical or religious illustrations, requires careful attention to the way fabric drapes and folds. In the sketch of Isaiah/Hezekiah, I added shading to the clothing to give it volume and ensure it looked appropriate for the era being depicted.
- Tip: Study the way fabric falls on the body and add shadow in the deeper folds to create a sense of weight and movement.
- Technique: Use long, fluid strokes to indicate folds, and vary your shading to show where the light hits the fabric versus where it falls into shadow.
Step 5: Adding Final Touches to the Sketch
As you refine your traced sketch freehand, don’t be afraid to go back and rework certain areas that don’t feel quite right. For example, I added a scroll to the hands to illustrate a significant moment in the story of Hezekiah, when he spread a threatening letter before the Lord and prayed for deliverance.
- Tip: Small details, such as props or background elements, can enhance the narrative of your illustration.
- Technique: Incorporate these elements with care, ensuring that they integrate naturally into the composition without overshadowing the main subject.
Final Thoughts on Freehand Refinement
Refining a traced sketch freehand is an essential step for any artist who wants to create dynamic, realistic artwork. The tracing process can save time, but it’s the freehand refinement that brings the sketch to life. By focusing on shading, texture, and proportion, you can take a basic traced image and transform it into a detailed and accurate foundation for painting.
Just like building a house requires a solid foundation, a painting requires a well-executed sketch. The time and effort you put into refining your sketch freehand will set the stage for a more successful painting, allowing you to focus on color and brushwork rather than correcting mistakes.
Conclusion
Refining a traced sketch freehand involves improving proportions, adding textures, and sharpening details to ensure the sketch serves as a strong foundation for painting. This process is especially useful in achieving realistic, dynamic compositions. Remember that tracing is just the starting point; it’s the freehand refinement that makes the difference. Keep practicing your freehand sketching skills to improve your artistic abilities and bring more depth to your work.
If you’re looking for more instructional videos on how to improve your acrylic painting, visit www.realisticacrylic.com for more tutorials and check out my free courses here.
- How to Paint Foliage Using the Acrylic Glazing Technique
- How to Trace for an Accurate Portrait Sketch
- How to Paint Realistic Eyes in Your Acrylic Portrait
- How to Add Raw Umber Dark & Ultramarine Blue to Your Portrait
- How to Make Your Own Raw Umber Dark
- How to Paint Realistic Trees & Grass in Your Acrylic
- How to Block In Skin Tone Values Using Glazing Technique
- How to Paint Vibrant Reds in Your Acrylic Portrait
- How to Glaze Background Colors & More Acrylic Portrait
- How to Paint White Clothing in Your Acrylic Portrait
- How to Easily Transition from a Sketch to a Painting
- How to Block In Shading & Skin Tones in Your Acrylic
- How to Build Up Color on Acrylic Pet Portrait
- How to Build Up Form on Clothing with Acrylic
- How to Paint Dark Clothing Using Acrylic Glazing Technique
- How to Paint a 24 x 30 Acrylic With 30 People
- How to Do Smooth Shading with Acrylic
- How to Sketch an Acrylic Portrait with a Grid
Read more about how to paint a portrait that you can surely be proud of!
I’d love to hear your thoughts about this video. Please share it with your friends and family. Let me know if you have any further questions. I’ll greatly help you.
If you’d like to learn more, sign up for my free email tips and video class today.
Learn How to Paint Acrylic Portraits With My Free Mini-Video Course!
Thank you so much for taking the time to read this tutorial and watch the video. That means a lot to me. I hope you find it very helpful in your portrait painting.
Yours for Better Portraits,
P.S. Did you find this post helpful or encouraging? If so, send it on ahead! Let others know with the share buttons below. I’d love to hear your comments. Thank you so much! Also, do you have a question on acrylic portrait painting you’d like answered? Let me know, and I’d be happy to help!

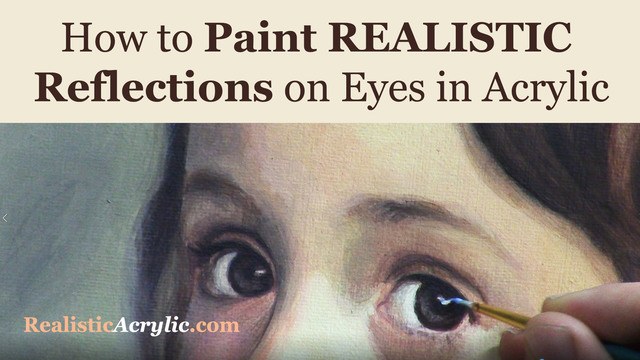
How to Paint Realistic Reflections on Eyes in Your Acrylic Portrait
Eyes are the most important feature of an acrylic portrait. When you paint the eyes correctly, everything else seems to fall into place so much easier.
In this video, I’ll show you how to paint realistic reflections, using two complementary colors in addition to white, and getting the shape of the reflection just right. Then this originally was a BONUS video in the Acrylic Portrait Painting Challenge Master Class, now available in the All-Access Membership at Realistic Acrylic Portrait School.
Even though it is technically over, you can take the Acrylic Portrait Painting Challenge (it’s FREE!) and paint along with us! 8 master class lessons are posted to help you paint a portrait you can be proud of!
REGISTER TODAY. The challenge is ongoing, something you can do at your own pace. It’s not too late to enter! After you join, I’ll send you the supplies list and reference photos to paint from.
Register for the Challenge!WATCH NOW…
Lesson #8: How to Paint Realistic Reflections on Eyes in Acrylic
Questions? Suggestions? Thoughts? Let me know, below in the comments. Please share your sketches in our Facebook group and share this post with your friends!
- How to Paint Foliage Using the Acrylic Glazing Technique
- How to Trace for an Accurate Portrait Sketch
- How to Paint Realistic Eyes in Your Acrylic Portrait
- How to Add Raw Umber Dark & Ultramarine Blue to Your Portrait
- How to Make Your Own Raw Umber Dark
- How to Paint Realistic Trees & Grass in Your Acrylic
- How to Block In Skin Tone Values Using Glazing Technique
- How to Paint Vibrant Reds in Your Acrylic Portrait
- How to Glaze Background Colors & More Acrylic Portrait
- How to Paint White Clothing in Your Acrylic Portrait
- How to Easily Transition from a Sketch to a Painting
- How to Block In Shading & Skin Tones in Your Acrylic
- How to Build Up Color on Acrylic Pet Portrait
- How to Build Up Form on Clothing with Acrylic
- How to Paint Dark Clothing Using Acrylic Glazing Technique
- How to Paint a 24 x 30 Acrylic With 30 People
- How to Do Smooth Shading with Acrylic
- How to Sketch an Acrylic Portrait with a Grid
Read more about how to paint a portrait that you can surely be proud of!
I’d love to hear your thoughts about this video. Please share it with your friends and family. Let me know if you have any further questions. I’ll greatly help you.
Thank you so much for taking the time to read this tutorial and watch the video. That means a lot to me. I hope you find it very helpful in your portrait painting.
P.S. Did you find this post helpful or encouraging? If so, send it on ahead! Let others know with the share buttons below. I’d love to hear your comments. Thank you so much! Also, do you have a question on acrylic portrait painting you’d like answered? Let me know, and I’d be happy to help!

Spring 2021 Acrylic Portrait Painting Challenge: Finishing Your Portrait With Confidence
Let’s help you finish your painting!
In this lesson, we will be wrapping up the Masterclass series for the challenge! I’ll show you how to add some more nuances and details to the portrait of “Cora.” First, we’ll add a glaze to her hair to enrich the overall color. Next, we will enhance some nuances on her eyebrows, dial in the color of the eyes, and paint in the reflections. Finally, we’ll add in the skin tone for her arm in the lower corner and follow up with some work on her lace.
But even though we are nearly done with this portrait painting, it’s not too late to join in the fun!
YOU, too, can paint a portrait!
Take the Acrylic Portrait Painting Challenge (it’s FREE!) and paint along with us!
REGISTER TODAY. The challenge is ongoing, something you can do at your own pace. It’s not too late to enter! After you join, I’ll send you the supplies list and reference photos to paint from.
WATCH NOW…
Lesson #8: Finishing Your Portrait Confidently
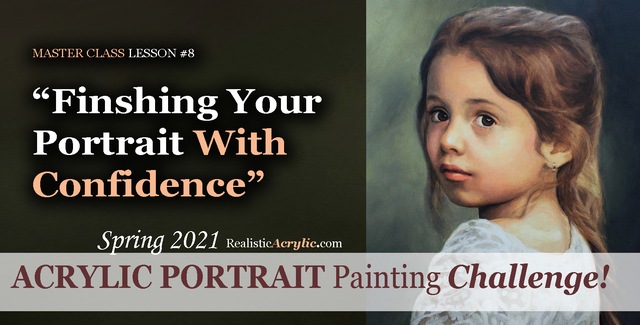
Professional artist and instructor Matt Philleo will teach you how to paint an acrylic portrait you can be proud of with this Portrait Painting Challenge!
Would like to paint this portrait with me and hundreds of other artists?
Take the 2021 Spring Portrait Painting Challenge!
You can register below and get started. It is completely FREE to join the challenge and participate. When you join, I’ll send you the “Welcome Kit” which includes:
- The Supplies List (so you know what you need to paint with us, your shopping list. 🙂 )
- The Reference Photo with and without the grid, high resolution, that you can download ready to print out or display on your tablet. You’ll be able to create an accurate portrait this way.
- The Palette Layout Guide showing you how to arrange your colors so they don’t get muddy on your palette
- The Master Class Lesson Schedule
- the Lessons emailed to you
- A private Facebook group to cheer you and help answer your questions
- And a few “bonuses” like opportunities to win my paid online classes
REGISTER TODAY. The challenge is ongoing, something you can do at your own pace. It’s not too late to enter!
Let me know if you have any questions and I look forward to teaching you more!
—Matt
Questions? Suggestions? Thoughts? Let me know, below in the comments. Please share your sketches in our Facebook group and share this post with your friends!

Spring 2021 Acrylic Portrait Painting Challenge: Painting Delicate Details and Nuances
After building the foundation with several layers of value, form, and color, we can then start to “dial in” the detail and nuances.
In this master class lesson (7 of 8), I’ll demonstrate how to add specific detail shapes to “Cora’s” hair. I’ll also add some additional shading to her forehead with a very translucent glaze. Next, I darken the left side of her face while smoothing out some of the rough application of previous glazes with a semi-opaque layer that’s cooler in tone. Finally, I add nuances to her eyes, lips and chin.
But even though we are well along in this portrait painting, it’s not too late to join in the fun!
YOU, too, can paint a portrait!
Take the Acrylic Portrait Painting Challenge (it’s FREE!) and paint along with us!
REGISTER TODAY. The challenge is ongoing, something you can do at your own pace. It’s not too late to enter! After you join, I’ll send you the supplies list and reference photos to paint from.
WATCH NOW…
Lesson #7: Painting Delicate Details and Nuances
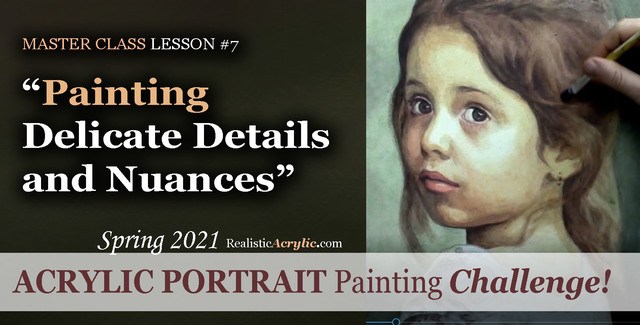
Learn how to do smooth shading, skin tones, details, and nuances in this FREE online portrait painting class by Matt Philleo at Realistic Acrylic Portrait School
Would like to paint this portrait with me and hundreds of other artists?
Take the 2021 Spring Portrait Painting Challenge!
You can register below and get started. It is completely FREE to join the challenge and participate. When you join, I’ll send you the “Welcome Kit” which includes:
- The Supplies List (so you know what you need to paint with us, your shopping list. 🙂 )
- The Reference Photo with and without the grid, high resolution, that you can download ready to print out or display on your tablet. You’ll be able to create an accurate portrait this way.
- The Palette Layout Guide showing you how to arrange your colors so they don’t get muddy on your palette
- The Master Class Lesson Schedule
- the Lessons emailed to you
- A private Facebook group to cheer you and help answer your questions
- And a few “bonuses” like opportunities to win my paid online classes
REGISTER TODAY. The challenge is ongoing, something you can do at your own pace. It’s not too late to enter!
Let me know if you have any questions and I look forward to teaching you more!
—Matt
Questions? Suggestions? Thoughts? Let me know, below in the comments. Please share your sketches in our Facebook group and share this post with your friends!
Spring 2021 Acrylic Portrait Painting Challenge: Building Up Richness, Depth and Luminosity
Acrylic is a fantastic medium for portrait painting, but it can be so challenging to use! That is why I am teaching you the glazing technique to open a lot of possibilities and ease your frustration.
Historically, the Old Masters used small amounts of pigment dispersed in larger amounts of linseed oil or mineral spirits to create a sense of volume and depth in their paintings. Light shines through and you can see a bit of each layer beneath the ones on top.
We can use that technique to our advantage with acrylic. By applying several translucent layers, there is an increased sense of depth, shading, contrast and color saturation and luminosity.
In this particular lesson, I’ll demonstrate how to add richness to the mid-tones of the girl’s face and hair. We will also add more contrast to the image with a couple of layers to the background, and turn the form of her figure with a precisely placed glaze on her clothing.
But even though we are well along in this portrait painting, it’s not too late to join in the fun!
Take the Acrylic Portrait Painting Challenge (it’s FREE!) and paint along with us!
REGISTER TODAY. The challenge is ongoing, something you can do at your own pace. It’s not too late to enter! After you join, I’ll send you the supplies list and reference photos to paint from.
WATCH NOW…
Lesson #6: Building Up Richness, Depth, and Luminosity
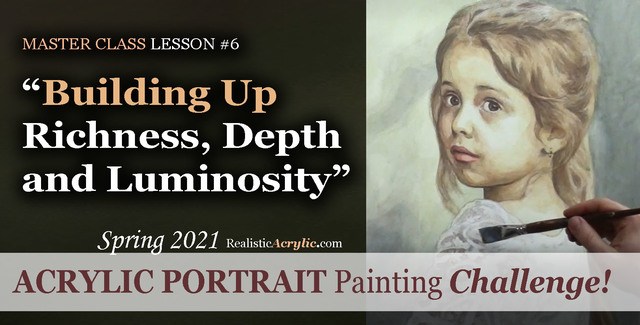
Learn how to create a vibrant acrylic portrait where the colors are not flat or muddy. In this FREE step by step master class, I’ll show you how!
Would like to paint this portrait with me and hundreds of other artists?
Take the 2021 Spring Portrait Painting Challenge!
You can register below and get started. It is completely FREE to join the challenge and participate. When you join, I’ll send you the “Welcome Kit” which includes:
- The Supplies List (so you know what you need to paint with us, your shopping list. 🙂 )
- The Reference Photo with and without the grid, high resolution, that you can download ready to print out or display on your tablet. You’ll be able to create an accurate portrait this way.
- The Palette Layout Guide showing you how to arrange your colors so they don’t get muddy on your palette
- The Master Class Lesson Schedule
- the Lessons emailed to you
- A private Facebook group to cheer you and help answer your questions
- And a few “bonuses” like opportunities to win my paid online classes
REGISTER TODAY. The challenge is ongoing, something you can do at your own pace. It’s not too late to enter!
Let me know if you have any questions and I look forward to teaching you more!
—Matt
Questions? Suggestions? Thoughts? Let me know, below in the comments. Please share your sketches in our Facebook group and share this post with your friends!

Spring 2021 Acrylic Portrait Painting Challenge: Sculpting Shading and Skin Tones in Your Acrylic Portrait
Acrylic portrait painting, in many ways, is like creating a sculpture. We want to truly make our faces look realistic and three-dimensional. In this master class video lesson, I show you how to do exactly that.
We’re breaking a fine art portrait painting down into bite-size steps that YOU can do.
Specifically, in this video lesson, I demonstrate how darkening your background can really make the face stand out in a lifelike way.
What colors should we use for the shadows? I’ll show you how to mix them, what brushes to use to apply them, and HOW to do it. Get the shadows right, and 80% of the battle is won, so to speak in your portrait.
What colors for the skin tones?
In this video, you’ll learn the correct color to mix, how to create glazes with matte medium and apply it to the face smoothly.
This is still very much the beginning. More lessons to come.
Take the Acrylic Portrait Painting Challenge (it’s FREE!) and paint along with us!
REGISTER TODAY. The challenge is ongoing, something you can do at your own pace. It’s not too late to enter! After you join, I’ll send you the supplies list and reference photos to paint from.
WATCH NOW…
Lesson #5: Sculpting Shading and Skin Tones in Your Acrylic Portrait
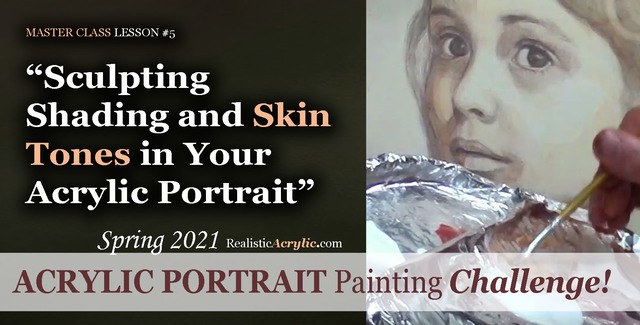
Acrylic Portrait Painting Challenge Lesson #5: Sculpting Shading and Skin Tones in Your Acrylic Portrait
Would like to paint this portrait with me and hundreds of other artists?
Take the 2021 Spring Portrait Painting Challenge!
You can register below and get started. It is completely FREE to join the challenge and participate. When you join, I’ll send you the “Welcome Kit” which includes:
- The Supplies List (so you know what you need to paint with us, your shopping list. 🙂 )
- The Reference Photo with and without the grid, high resolution, that you can download ready to print out or display on your tablet. You’ll be able to create an accurate portrait this way.
- The Palette Layout Guide showing you how to arrange your colors so they don’t get muddy on your palette
- The Master Class Lesson Schedule
- the Lessons emailed to you
- A private Facebook group to cheer you and help answer your questions
- And a few “bonuses” like opportunities to win my paid online classes
REGISTER TODAY. The challenge is ongoing, something you can do at your own pace. It’s not too late to enter!
What’s coming up in the next lesson? More shading, more skin tones, and the start of some detail work. Follow the lessons and you will be able to create a portrait you can be proud of…even if you’re a complete beginner!
Let me know if you have any questions and I look forward to teaching you more!
—Matt
Questions? Suggestions? Thoughts? Let me know, below in the comments. Please share your sketches in our Facebook group and share this post with your friends!