Category Archives for Skin Tones
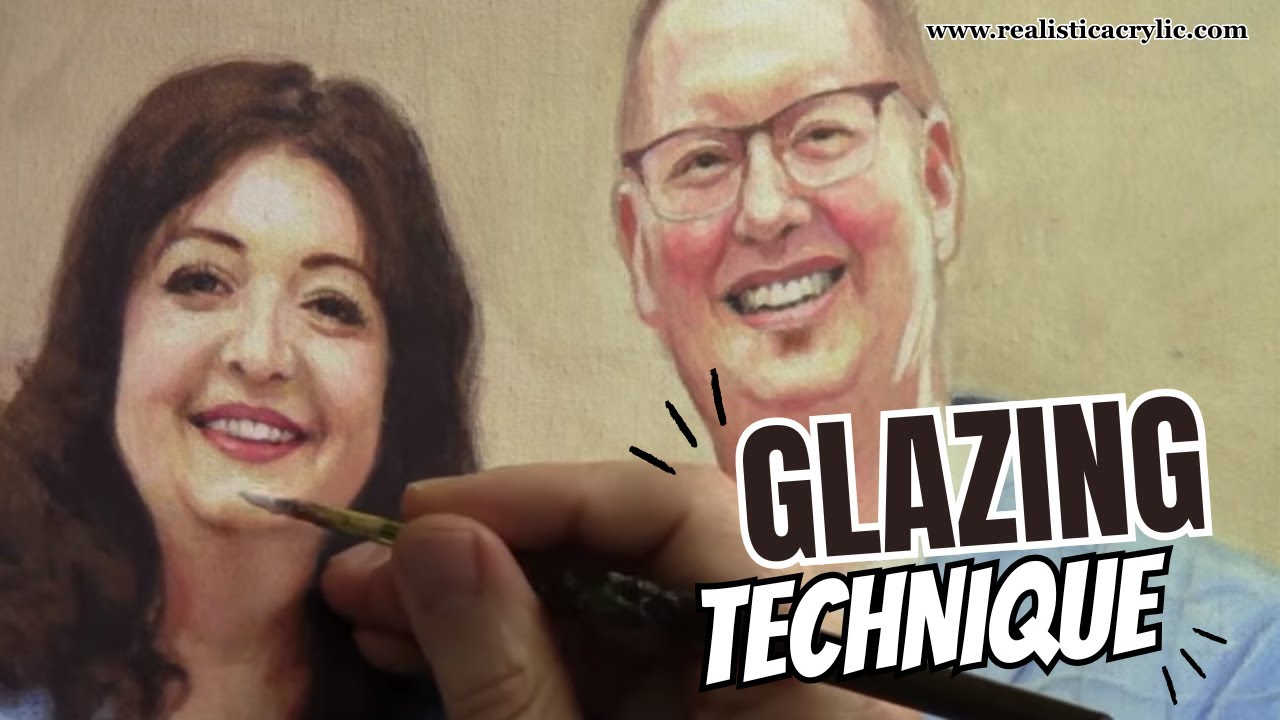
Learn How to Finish your Portrait with Glazing Technique
A step-by-step breakdown of subtle glazing, final adjustments, and professional finishing touches that bring an acrylic portrait to life.
Finishing an acrylic portrait is often where a painting either comes together or falls flat. At this stage, the drawing is already established, the values are mostly correct, and the likeness is present. However, realism is still refined through subtle decisions. This is where the glazing technique becomes essential.
In this lesson, the final stage of a 16 x 20 acrylic portrait of a couple is demonstrated. Rather than making major changes, the focus is placed on small adjustments. These adjustments include nuanced shading, softened transitions, and carefully placed highlights. Through glazing, depth is increased without overpowering the work that has already been done.
What follows is a detailed breakdown of how an acrylic portrait can be finished using controlled glazes, intentional color choices, and thoughtful final touches.
Understanding the Role of Glazing Technique in the Final Stage
Glazing is the process of applying thin, semi-transparent layers of paint over dry areas. In acrylic portrait painting, this method allows color and value to be adjusted gradually. Because the underlying layers remain visible, the portrait retains its structure while gaining richness and realism.
At the finishing stage, glazing is not used to repaint forms. Instead, it is used to enhance them. Shadows are deepened slightly. Warmth is added where skin meets hair. Highlights are refined so forms appear more dimensional. As a result, the portrait begins to feel cohesive rather than pieced together.
It should be noted that restraint is critical. Each glaze is applied lightly, then evaluated. Because acrylics dry quickly, changes can be made efficiently, but overworking must be avoided.
Palette Setup and Color Selection
Before any finishing work is done, the palette is prepared with a consistent set of colors. This consistency ensures harmony across the portrait.
The colors used include:
- Raw Umber Dark
- Burnt Sienna
- Raw Sienna
- Phthalo Blue
- Ultramarine Blue
- Alizarine Crimson
- Natural Red
- Organic Orange
- Indian Yellow
- Titanium White
These colors allow for a wide range of skin tones, warm shadows, and cool accents. Throughout the finishing process, small variations of these colors are mixed rather than introducing new pigments. Because of this, the portrait maintains visual unity.
Refining Forehead and Temple Shadows
One of the first areas addressed is the forehead and temple. At this stage, the values are already correct, but they can be strengthened subtly.
A semi-opaque glaze is mixed using raw umber dark, burnt sienna, and a touch of titanium white. This mixture is applied lightly near the temple and along the side of the forehead. The goal is not to darken dramatically, but to suggest form and depth.
Additionally, warmth is introduced beneath the hairline using organic orange, Indian yellow, and titanium white. This step is especially important. When hair meets skin, a shadow is naturally cast. Without this transition, the hair can appear pasted onto the head.
By glazing warm tones under the hairline, a believable shadow is created. As a result, the hair appears to sit naturally on the skull rather than float above it.
Creating Transitions Along the Jaw and Neck
Next, attention is given to the jawline, neck, and upper chest area. These transitions are often overlooked, yet they play a major role in realism.
A thin glaze is applied along the edge of the jaw to soften the transition between light and shadow. This helps define the structure of the face while keeping the edge from looking too sharp.
Similarly, light shading is added to the neck and upper chest. Because the head casts a shadow downward, this area benefits from a gentle darkening. The glaze is blended carefully so no harsh lines remain.
Through these adjustments, the head appears more convincingly connected to the body.
Subtle Shading on Hands and Fingers with Glazing Technique
The hands are treated with the same care as the face. Light shading is added to the fingers using thin glazes. Rather than outlining forms, shadows are suggested with gradual value shifts.
These glazes are blended softly, allowing the underlying paint to show through. As a result, the hands retain a natural look without appearing overworked.
Refining Facial Features on the Second Subject using Glazing Technique
For the second figure, attention is focused on blending skin tones and enhancing projection.
A small amount of shading is added beneath the lower lip. This creates the illusion that the chin projects forward. Without this shadow, the face can appear flat. Titanium white and raw sienna are primarily used, allowing for subtle control.
Once the shadows are adjusted, highlights are refined. Titanium white mixed with a touch of Indian yellow is applied sparingly to the nose, cheek, and chin. These highlights are kept small. Because of this, they enhance form rather than distract from it.
Each highlight is placed with intention, then blended gently at the edges.
Enhancing Highlights on the Male Portrait
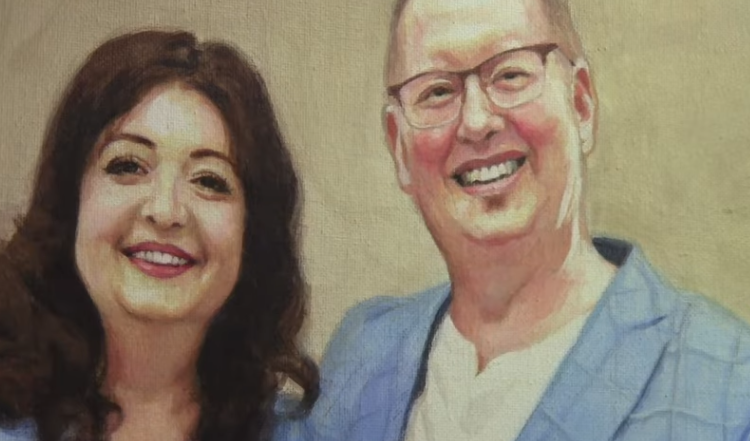
The male subject receives similar treatment. Highlights are added to the nose and forehead to increase dimensional. Again, restraint is emphasized. Only a small amount of paint is needed.
Additional warmth is introduced to the ear using organic orange mixed with titanium white. This combination creates a natural pink tone that works well for ears in many cases.
The ear is then refined with both highlights and shadows. Titanium white is added to the lower lobe, while darker tones are used sparingly to increase contrast. These adjustments help the ear sit naturally within the head.
Increasing Contrast Around Facial Details
As the portrait nears completion, contrast is selectively increased.
The glasses frame is darkened slightly using raw umber dark and alizarine crimson. Because, this helps separate the glasses from the face without overpowering the surrounding areas.
The small gap between the teeth and the mouth is filled in using a darker mixture of raw umber dark, ultramarine blue, and natural red. This area is intentionally kept dark. Because of this, the mouth appears more defined and realistic.
Additional contrast is added around the eyes and nostrils. These dark accents are blended outward so they transition smoothly into surrounding skin tones.
Adjusting Shadows Around the Nose and Glasses
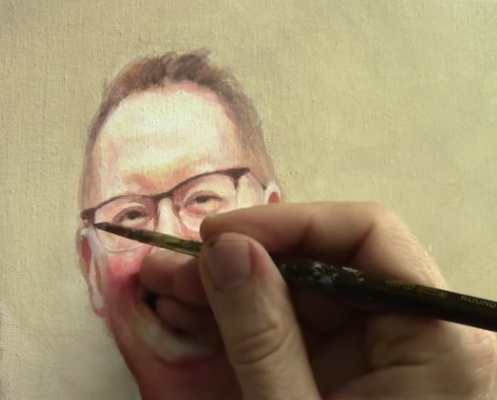
A thin glaze of burnt sienna is applied beneath the nostril and blended downward. Because, this subtle adjustment helps the nose feel more three-dimensional.
Shading is also added beneath the glasses frame where it meets the hair and ear. This small detail adds realism by suggesting contact and cast shadow. Even though it is a minor adjustment, it has a noticeable impact.
Final Clothing and Background Touch-Ups
Before signing the painting, small touch-ups are addressed. A missing area in the dress is filled using ultramarine blue, alizarine crimson, and a touch of phthalo blue. The value is adjusted carefully so it matches the surrounding fabric.
Titanium white is added gradually to lighten the area until it blends seamlessly. Any small splotches or inconsistencies are corrected at this stage.
Because these changes are minor, they are handled quickly and with confidence.
Signing the Acrylic Portrait
The final step is signing the painting. A color similar to the background is mixed using raw umber dark and a touch of titanium white. This ensures the signature is visible without drawing unnecessary attention.
A small round brush is used, and the signature is placed in the lower right corner. If visual weight had been present in that area, the signature would have been moved. In this case, the right corner provides balance.
The full name is signed clearly, completing the painting.
Tips and Techniques for Finishing Acrylic Portraits with Glazing
- Thin glazes should be used rather than thick paint
- Warm tones under hairlines create natural shadows
- Highlights should be small and intentional
- Contrast should be increased selectively
- Transitions matter more than sharp edges
- Final details should enhance, not distract
- The signature color should relate to the background
Final Thoughts
Finishing an acrylic portrait using the glazing technique is about refinement rather than reinvention. At this stage, the painting already works. What glazing allows is control. Control over warmth, depth, transitions, and focus.
Through thin, intentional layers, realism is increased without losing freshness. Shadows are softened. Highlights are clarified. Edges are unified. As a result, the portrait feels cohesive and resolved rather than overworked.
When restraint is practiced and each adjustment is evaluated before moving forward, glazing becomes one of the most powerful tools in acrylic portrait painting.
Frequently Asked Questions
What is the glazing technique in acrylic portrait painting?
The glazing technique is the process of applying thin, semi-transparent layers of acrylic paint over dry paint to refine color, depth, and realism without covering underlying details.
When should glazing be used in an acrylic portrait?
Glazing should be used during the final stages of an acrylic portrait, after the drawing, values, and base colors are already established.
Why do acrylic portraits still look flat after glazing?
A portrait can look flat when contrast is too even, highlights are too broad, or shadows are not selectively deepened around key features like the eyes, nose, and mouth.
How thin should an acrylic glaze be?
An acrylic glaze should be thin enough that the paint underneath is clearly visible, with the glaze adjusting tone rather than covering the surface.
Can glazing fix mistakes in an acrylic portrait?
Glazing can correct minor issues such as uneven skin tones or harsh transitions, but it cannot fix major drawing or proportion errors.
What colors are best for glazing skin tones?
Earth tones such as raw umber, burnt sienna, raw sienna, and alizarine crimson are ideal for glazing skin tones, with warm accents added sparingly.
How do you avoid overworking when glazing?
Overworking is avoided by applying one glaze at a time, letting it dry, and reassessing before making additional changes.
Should highlights be glazed or painted opaquely?
Highlights are usually applied more opaquely at the end of the process and should be kept small and intentional.
Where should you sign an acrylic portrait?
An acrylic portrait is usually signed in a low-visual-weight corner using a color that relates to the background.
Is the glazing technique good for beginners?
Yes, glazing is beginner-friendly because it allows gradual adjustments and builds realism without aggressive repainting.
If you want to go deeper into glazing, skin tones, and realistic portrait techniques, more step-by-step training is available.
On realisticacrylic.com, you will find:
- In-depth video tutorials
- Free acrylic portrait classes
- Structured lessons for all skill levels
- Proven techniques for realism and control
Also, these resources are designed to help you paint with confidence and finish your portraits with clarity and intention.
Explore the full library of tutorials and continue building your skills at realisticacrylic.com.
- How to Paint Foliage Using the Acrylic Glazing Technique
- How to Trace for an Accurate Portrait Sketch
- How to Paint Realistic Eyes in Your Acrylic Portrait
- How to Add Raw Umber Dark & Ultramarine Blue to Your Portrait
- How to Make Your Own Raw Umber Dark
- How to Paint Realistic Trees & Grass in Your Acrylic
- How to Block In Skin Tone Values Using Glazing Technique
- How to Paint Vibrant Reds in Your Acrylic Portrait
- How to Glaze Background Colors & More Acrylic Portrait
- How to Paint White Clothing in Your Acrylic Portrait
- How to Easily Transition from a Sketch to a Painting
- How to Block In Shading & Skin Tones in Your Acrylic
- How to Build Up Color on Acrylic Pet Portrait
- How to Build Up Form on Clothing with Acrylic
- How to Paint Dark Clothing Using Acrylic Glazing Technique
- How to Paint a 24 x 30 Acrylic With 30 People
- How to Do Smooth Shading with Acrylic
- How to Sketch an Acrylic Portrait with a Grid
Read more about how to paint a portrait that you can surely be proud of!
I’d love to hear your thoughts on this video. Please share it with your friends and family. Let me know if you have any further questions. I’ll greatly help you.
If you’d like to learn more, sign up for my free email tips and video class today.
Learn How to Paint Acrylic Portraits With My Free Mini-Video Course!Thank you so much for taking the time to read this tutorial and watch the video. That means a lot to me. I hope you find it very helpful in your portrait painting.
Yours for Better Portraits,

P.S. Did you find this post helpful or encouraging? If so, send it in ahead! Let others know with the share buttons below. I’d love to hear your comments. Thank you so much! Also, do you have a question on acrylic portrait painting you’d like answered? Let me know, and I’d be happy to help!
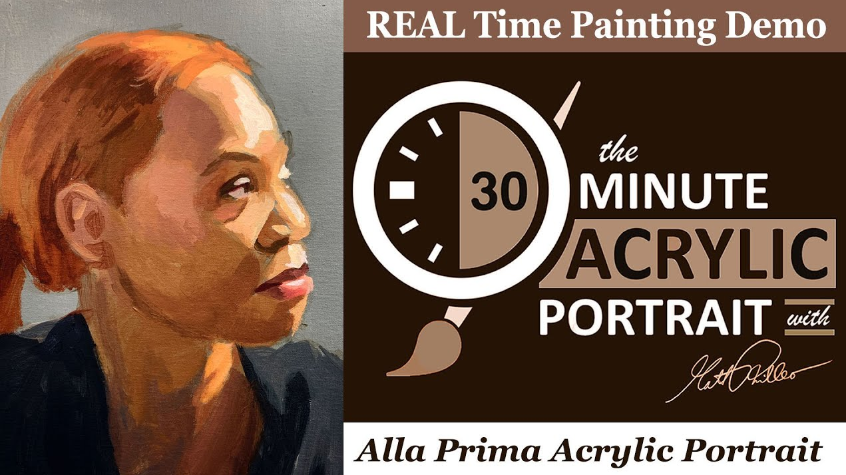
How To Paint Red Hair With Dark Skin Tones in 30 minutes
Learn how to paint red hair and dark skin tones in just 30 minutes
Welcome to my 30 minute acrylic portrait painting session! We’re diving into an exciting project: painting a side profile portrait of a woman with red hair and dark skin tones. This tutorial is perfect for artists looking to enhance their skills quickly and effectively. Let’s get started!
Materials and Setup
To begin, gather your materials:
- Canvas: 8×10, toned gray
- Palette: Ivory black, raw umber dark, burnt sienna, raw sienna, ultramarine blue, alizarin crimson, Napthol red, organic (pyro) orange, Indian yellow, titanium white
- Medium: Matte medium for translucency
- Brushes: Variety of flats and rounds (1/2 inch flat, 1/4 inch flat, and various rounds)
Step-by-Step Guide
1. Initial Composition
Start by blocking in the overall composition using a mixture of Ivory black, raw umber dark, and matte medium with a round brush. This step involves sketching the head’s shape, positioning the ear, and outlining major facial features and shadows.
2. Blocking in Shadows
Using a large flat brush, mix raw umber dark, titanium white, and burnt sienna to create a warm shadow color. Apply this to the shadow areas of the face, including the nose and lips. This helps establish the depth and structure of the portrait early on.
3. Adding Hair Color
For the hair, mix naphthol red, organic orange, and burnt sienna to achieve a rich, reddish color. Apply this to the hair, adding raw sienna for lighter areas. Blend these colors to create a natural transition and depth.
4. Highlighting the Skin
Use a round brush to apply highlights with a mixture of titanium white, Indian yellow, and raw sienna. Focus on the areas where light hits the face, such as the eyebrow ridge, nose, and chin. This step brings out the facial features and adds a three-dimensional effect.
5. Detailed Shadows and Features
Refine the shadows using a cooler tone mixed with raw umber dark, alizarine crimson, and ultramarine blue. Apply this to the eye sockets and other recessed areas. Darken the eye shape and add details to the lips and nose to enhance realism.
6. Hair Highlights
For the hair highlights, mix titanium white with Indian yellow and raw sienna. Apply this to the top of the hair, blending it into the darker shades to create a luminous effect. Use a fine brush for detailed highlights and flyaway hairs.
7. Clothing and Final Touches
Block in the clothing with a dark mixture of ivory black and ultramarine blue. Add lighter shades for the right side of the clothing. Refine the skin tones and add additional shading and highlights to enhance the volume and depth of the portrait.
Tips and Techniques
- Use Matte Medium: It helps in creating translucent layers, making it easier to build depth.
- Keep It Loose: During the initial stages, keep your brush strokes loose and fluid. This helps in adjusting proportions and composition easily.
- Prioritize Shadows: Establishing shadows early helps in defining the structure and form of the portrait.
- Blend Colors: Smooth transitions between different colors and tones are crucial for realism.
- Focus on Light: Highlights are essential in bringing out the features and adding a three-dimensional effect.
Painting a portrait in 30 minutes is a challenging yet rewarding exercise that sharpens your skills and helps you work efficiently. Remember, this is an excellent practice to enhance your speed and accuracy in portrait painting. If you encounter difficulties, don’t get discouraged. Keep practicing and get my free gift guide for you, “Fix Muddy Skin Tones in Your Acrylic Portrait.”
Watch the full video below!
Read more about my additional resources, tutorials, to learn more and check my free courses. Whether you’re a beginner or an experienced artist, there’s always something new to learn and apply to your paintings.
LEARN MORE
- Sketching Your Painting Accurately
- Beginning a Pet Portrait in Acrylic
- The Mystery of Realism in Painting
- Apply A Burnt Sienna Glaze to a Portrait
- Learn How to Sketch a Portrait Freehand in 45 Minutes
- Adding highlights to your acrylic painting
- 5 Excellent Reasons to Use Aluminum Foil
- Paint Realistic Wrinkles in Acrylic
- Painting Clothing in an Acrylic Portrait
- Paint a Cloudy Sky Acrylic
- How to add Semi-Opaque Highlights
- How to Enhance the Contrast in Your Acrylic
- How to Add Glaze to Your Acrylic Painting
- Paint Realistic Reflections on Eyeglasses in an Acrylic Portrait
- Build Up Depth on Your Acrylic Portrait Backgrounds
- How Do You Do Layers With the Glazing Technique?
- Learn How to Paint Wrinkles in Acrylic
Read more about how to paint a portrait that you can surely be proud of!
I’d love to hear your thoughts on this video. Please share it with your friends and family. Let me know if you have any further questions. I’ll greatly help you.
If you’d like to learn more, sign up for my free email tips and video class today.
Learn How to Paint Acrylic Portraits With My Free Mini-Video Course!Thank you so much for taking the time to read this tutorial and watch the video. That means a lot to me. I hope you find it very helpful in your portrait painting.
Yours for Better Portraits,
P.S. Did you find this post helpful or encouraging? If so, send it in ahead! Let others know with the share buttons below. I’d love to hear your comments. Thank you so much! Also, do you have a question on acrylic portrait painting you’d like answered? Let me know, and I’d be happy to help!
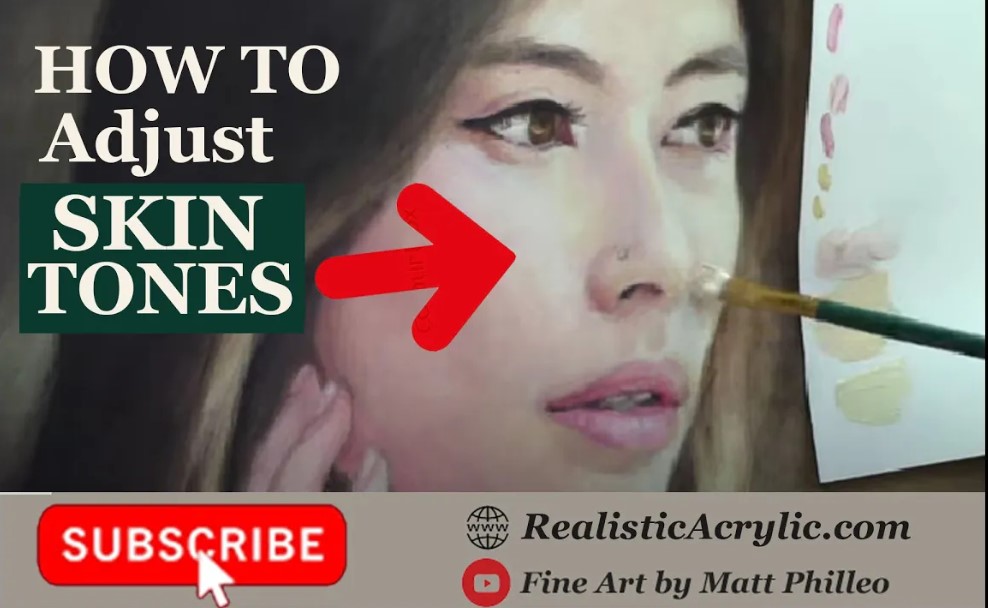
How to Adjust Skin Tones in Hardboard Portrait
Perfecting skin tones: A step-by-step guide for hardboard portraits
Introduction:
Achieving realistic skin tones is one of the most challenging aspects of portrait painting. Whether you’re working on a canvas or hardboard, the process requires a delicate balance of color, shading, and blending. In this tutorial, we’ll explore the techniques for adjusting skin tones in a hardboard portrait, focusing on the nuances that bring a portrait to life. This step-by-step guide will walk you through the process, from selecting the right colors to blending them seamlessly into your portrait.
The Importance of Skin Tone in Portrait Painting
Skin tones are not just about applying the right colors; they involve understanding the light source, the subject’s unique complexion, and how different layers interact. In a hardboard portrait, these factors become even more critical due to the smooth surface and how it reacts to paint. Mastering skin tone adjustment can elevate your work from good to exceptional, capturing the subject’s essence with vibrancy and realism.
Preparing Your Palette: The Right Colors
Before diving into the painting process, it’s essential to prepare your palette with the right colors. In this tutorial, we used a combination of titanium white, raw sienna, perylene red, and indian yellow to achieve a realistic skin tone.
- Titanium White: Used to lighten the skin tone, it must be balanced carefully to avoid muddiness.
- Raw Sienna: Adds a warm, earthy tone to the mix.
- Perylene Red: Introduces a subtle red undertone, essential for achieving a natural look.
- Indian Yellow: Provides a vibrant warmth that enhances the overall skin tone.
Step 1: Mixing the Base Skin Tone
Start by mixing your base skin tone. Combine titanium white with a touch of raw sienna and perylene red. The goal is to create a color that’s slightly lighter than the existing skin tone on your portrait. This will allow you to build layers without overwhelming the underlying tones.
Tip: Test the color on a white card before applying it to the portrait. This helps you see how it will appear on the hardboard surface and make adjustments as needed.
Step 2: Applying the Base Tone
Using a flat brush, apply the base tone to the areas of the face that need adjustment. Work in small sections, applying the paint with light, even strokes. The key here is to apply the color thinly, allowing the underpainting to show through and create depth.
Technique: Apply the paint in various directions to avoid harsh lines and ensure a smooth blend. Lightly feather the edges with your finger to soften the transition between tones.
Step 3: Layering and Glazing
Once the base tone is applied, it’s time to add depth with glazing. Mix a glaze using your base tone and a bit more perylene red and indian yellow. This glaze should be slightly darker than the base tone, adding warmth and richness to the skin.
Apply the glaze over areas that need more definition, such as the cheeks and around the eyes. Glazing allows you to build up color gradually, creating a realistic skin tone that has depth and dimension.
Tip: Allow each layer to dry before applying the next. This prevents the colors from blending too much and becoming muddy.
Step 4: Highlighting and Detailing
With the base tones and glazes in place, it’s time to add highlights. Mix titanium white with a small amount of indian yellow to create a vibrant highlight color. Apply this to the high points of the face, such as the bridge of the nose, the tops of the cheeks, and the forehead.
Technique: Use a small, round brush for precision when applying highlights. Blend the edges slightly to ensure they don’t appear too harsh.
Step 5: Adjusting the Shadows
To create a realistic portrait, the shadows must be adjusted to match the new skin tones. Mix a shadow color using raw sienna, perylene red, and a touch of titanium white. Apply this to areas that need deepening, such as under the cheekbones, around the jawline, and in the folds of the skin.
Tip: Be cautious with the shadows. It’s easy to overdo them, so start with a light application and build up gradually.
Step 6: Final Touches
After the main adjustments are complete, step back and assess the portrait. Are there areas where the skin tone needs more blending? Do the highlights and shadows look natural? Make any necessary adjustments, using the techniques discussed.
Technique: A soft, dry brush can be used to blend areas that appear too harsh. Lightly go over the transitions between colors to smooth them out and achieve a seamless look.
Common Challenges and How to Overcome Them
- Muddiness: If the skin tone appears muddy, it may be due to over-mixing or applying too many layers too quickly. To fix this, apply a glaze of pure color (like indian yellow or perylene red) to restore vibrancy.
- Harsh Transitions: If the transitions between colors are too harsh, blend them with a clean, dry brush or use a soft glaze to smooth out the edges.
Adjusting skin tones in a hardboard portrait requires patience and precision, but the results are worth the effort. By carefully selecting your colors, applying them in thin layers, and using glazing techniques, you can achieve a realistic and vibrant skin tone that brings your portrait to life. Whether you’re a seasoned artist or just starting, these techniques will help you master the art of portrait painting on hardboard.
Read more about my additional resources, tutorials, to learn more and check out my free courses here
- Sketching Your Painting Accurately
- Beginning a Pet Portrait in Acrylic
- The Mystery of Realism in Painting
- Apply A Burnt Sienna Glaze to a Portrait
- Learn How to Sketch a Portrait Freehand in 45 Minutes
- Adding highlights to your acrylic painting
- 5 Excellent Reasons to Use Aluminum Foil
- Paint Realistic Wrinkles in Acrylic
- Painting Clothing in an Acrylic Portrait
- Paint a Cloudy Sky Acrylic
- How to add Semi-Opaque Highlights
- How to Enhance the Contrast in Your Acrylic
- How to Add Glaze to Your Acrylic Painting
- Paint Realistic Reflections on Eyeglasses in an Acrylic Portrait
- Build Up Depth on Your Acrylic Portrait Backgrounds
- How Do You Do Layers With the Glazing Technique?
- Learn How to Paint Wrinkles in Acrylic
Read more about how to paint a portrait that you can surely be proud of!
I’d love to hear your thoughts on this video. Please share it with your friends and family. Let me know if you have any further questions. I’ll greatly help you.
If you’d like to learn more, sign up for my free email tips and video class today.
Learn How to Paint Acrylic Portraits With My Free Mini-Video Course!
Thank you so much for taking the time to read this tutorial and watch the video. That means a lot to me. I hope you find it very helpful in your portrait painting.
Yours for Better Portraits,

P.S. Did you find this post helpful or encouraging? If so, send it on ahead! Let others know with the share buttons below. I’d love to hear your comments. Thank you so much! Also, do you have a question on acrylic portrait painting you’d like answered? Let me know, and I’d be happy to help!
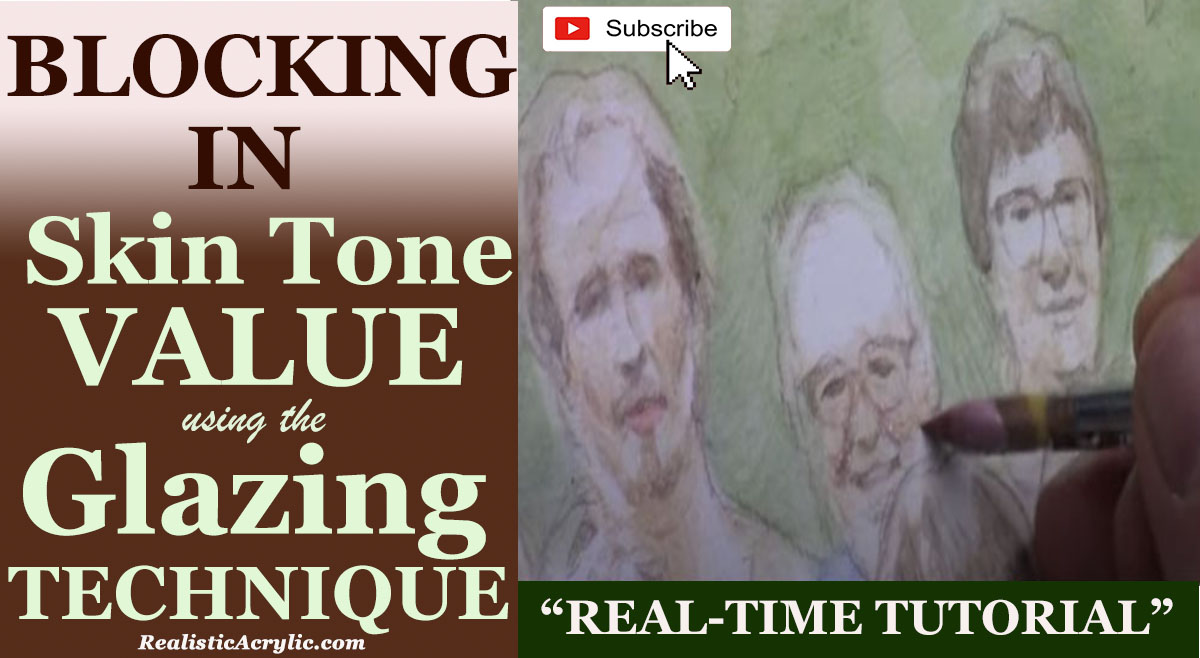
How to Block In Skin Tone Values Using Glazing Technique
A step-by-step guide to glazing technique in acrylic portraits
Achieving realistic skin tones in acrylic portraits requires a nuanced approach, combining color theory with technique. The glazing technique, a method involving the layering of transparent color, can be highly effective for this purpose. In this post, we will explore how to block in skin tone values using the glazing technique, drawing from a practical demonstration by artist Matt Philleo. Whether you’re aiming for lifelike detail or a more stylized finish, this guide will help you understand and implement the essential steps in your acrylic painting.
Understanding the Glazing Technique
The glazing technique in acrylic painting involves applying thin, transparent layers of paint over a dry underpainting. This method enhances depth and richness in colors without overwhelming the underlying details. When blocking in skin tones, glazing allows for subtle gradations and realistic shading, critical for achieving lifelike results.
Step-by-Step Guide to Blocking In Skin Tone Values
- Prepare Your Palette: Start by setting up your palette with essential colors. For skin tones, commonly used colors include raw umber dark, raw sienna, alizarine crimson, and occasionally ultramarine blue. But these colors will form the base of your glazes, which are mixed with a matte medium to achieve transparency.
- Block In Basic Shapes and Values: Begin by analyzing your reference photo to identify the key shapes and values on the subject’s face. Because, blocking in these shapes with a darker tone, such as raw umber dark mixed with matte medium, helps establish the foundational values. But, this step is crucial for building the structure of the portrait.
- Technique Tip: Use a round brush for precision. This allows you to carefully place glazes in specific areas, such as the darker regions of the face, while preserving the light areas.
- Layering Glazes: Apply your first glaze layer over the basic shapes. For example, mix raw umber dark with raw sienna and alizarine crimson to create a flesh tone, and apply it to the areas where shadows naturally occur. This layer should be thin and transparent, gradually building up the color intensity.
- Technique Tip: Patience is key. When glazing requires multiple layers to achieve depth. Because it allow each layer to dry before applying the next to avoid mixing colors unintentionally.
- Adjusting Skin Tones: As can be seen your progress, you may need to adjust skin tones to match different areas of your reference photo. For cooler skin tones, incorporate a touch of ultramarine blue into your glaze mix. For warmer tones, consider adding pyrrole orange or indian yellow. Adjusting these colors will help you match the diverse skin tones present in your portrait.
- Technique Tip: Monitor the transparency of your glazes. Adding more matte medium will help maintain the transparency necessary for effective glazing.
- Refining Details: Once the basic values are in place, focus on refining details. Use a smaller brush to add more precise glazes to areas such as shadows around the eyes or lips. This step helps in achieving a more nuanced and realistic appearance.
- Technique Tip: Apply glazes in thin, smooth layers to avoid creating harsh lines. Gradually build up the color to achieve the desired effect.
- Final Adjustments: After blocking in and refining your skin tones, assess the overall portrait. Make any necessary adjustments to ensure consistency and harmony in skin tones across the portrait. This may involve adding additional layers of glaze or adjusting existing ones.
- Technique Tip: Stepping back from your work periodically can help you see it from a different perspective and make more informed adjustments.
Blocking in skin tone values using the glazing technique is a powerful method for creating depth and realism in acrylic portraits. By layering transparent colors and carefully adjusting tones, you can achieve lifelike results that capture the essence of your subject. But remember, patience and practice are essential in mastering this technique. With time, you’ll find that glazing becomes an invaluable tool in your acrylic painting repertoire.
Tips and Techniques Recap:
- Use a round brush for precision in blocking in values.
- Mix colors with matte medium to create transparent glazes.
- Apply glazes in thin, smooth layers and allow each to dry before adding more.
- Adjust colors based on skin tone variations and monitor glaze transparency.
- Refine details with smaller brushes and assess the overall portrait for consistency.
By following these steps, you’ll be well on your way to mastering the art of blocking in skin tone values using the glazing technique.
Read more about my additional resources, tutorials, to learn more and check out my free courses here. . Whether you’re a beginner or an experienced artist, there’s always something new to learn and apply to your paintings. Happy painting!
- Adding highlights to your acrylic painting
- 5 Excellent Reasons to Use Aluminum Foil
- Paint Realistic Wrinkles in Acrylic
- Painting Clothing in an Acrylic Portrait
- Paint a Cloudy Sky Acrylic
- How to add Semi-Opaque Highlights
- How to Enhance the Contrast in Your Acrylic
- How to Add Glaze to Your Acrylic Painting
- Paint Realistic Reflections on Eyeglasses in an Acrylic Portrait
- Build Up Depth on Your Acrylic Portrait Backgrounds
- How Do You Do Layers With the Glazing Technique?
- Learn How to Paint Wrinkles in Acrylic
Read more about how to paint a portrait that you can surely be proud of!
I’d love to hear your thoughts on this video. Please share it with your friends and family. Let me know if you have any further questions. I’ll greatly help you.
If you’d like to learn more, sign up for my free email tips and video class today.
Learn How to Paint Acrylic Portraits With My Free Mini-Video Course!
Thank you so much for taking the time to read this tutorial and watch the video. That means a lot to me. I hope you find it very helpful in your portrait painting.
Yours for Better Portraits,

P.S. Did you find this post helpful or encouraging? If so, send it on ahead! Let others know with the share buttons below. I’d love to hear your comments. Thank you so much! Also, do you have a question on acrylic portrait painting you’d like answered? Let me know, and I’d be happy to help!

[PORTRAIT CHALLENGE] Masterclass Lesson #8: Finishing Your Portrait Well
The Acrylic Portrait Painting Challenge Masterclass, Lesson #8, is out!
This is our FINAL lesson together.
It’s kind of sad to see the challenge drawing to a close. As I write this, it’s been an entire month since I started this challenge on April 6, 2020.
My goal was to create a way for artists to overcome the challenges of being in COVID-19 lockdown, create something beautiful with their time, and grow their skills as artists.
Many, many have risen to the challenge and done exactly that. If you’re reading this, and you’ve taken the challenge; you’ve gone through steps 1-7, I’m so proud of you! It’s not easy to paint a realistic portrait in acrylic, let alone during a quarantine. But you did it! And you’ve encouraged many others along the way.
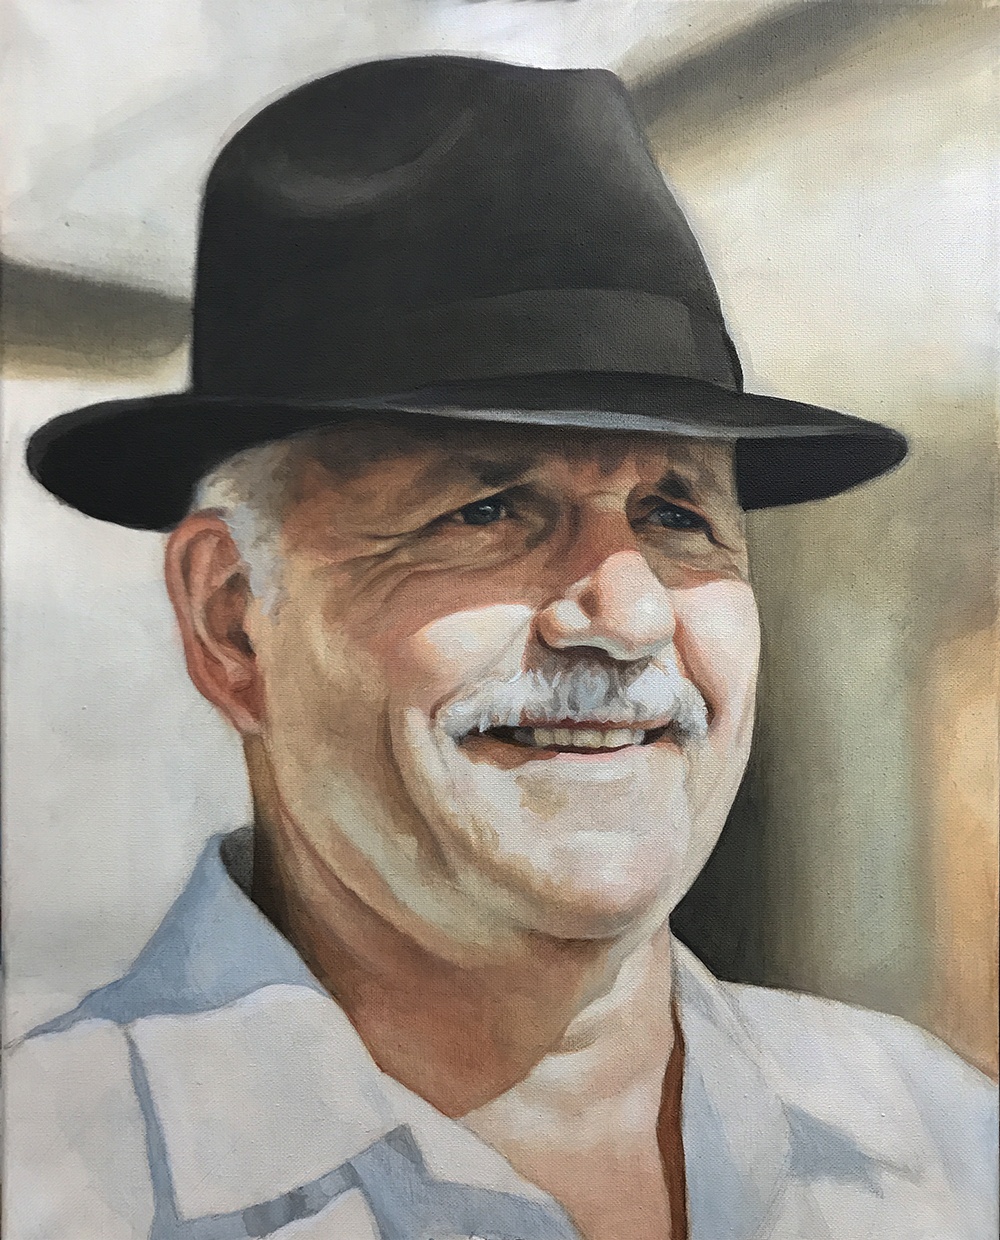
Acrylic Portrait Painting Challenge example portrait 16 x 20 acrylic on canvas, ©2020 by Matt Philleo
Because of that, you are a better artist, and have grown in character as a human being.
Your portrait —hopefully—is nearly done. What next? How do we “bring it home”, so to speak?
Let me show you, below!
Six Steps to Finishing Your Portrait Well
STEP ONE: Double-check the tonal values. Use my Value Checker tool for that.
STEP TWO: Double-check and add more detail to the eyes.
STEP THREE: Add vibrance to areas where certain shadows and highlights meet
STEP FOUR: Refine the shadows
STEP FIVE: Redefine the edges of your subject and objects
STEP SIX: Paint pin-point highlights on the face
When is the painting done?
Watch the video to find out…
[PORTRAIT CHALLENGE] Masterclass Lesson #8: Finishing Your Portrait Well
Is it too late to join the challenge? No, not at all. This challenge is meant to be ongoing—something you can do at your own pace. The lessons are free and they aren’t going anywhere.
If not, register below for FREE and I’ll send you:
- a downloadable/ printable”Welcome Kit” with a Supplies List and a Palette Color Layout Guide.
- high-resolution images of the photo we’ll be painting from for this challenge.
- each new lesson that comes out in this Masterclass series.
- a link to my private Facebook group, where you can do this challenge with other artists, get feedback and help on your portrait, and not feel alone.
REGISTER TODAY. It’s not too late to enter!
Where do we go from here?
I am so happy that you have done this challenge with me and hundreds of other artists. I give you a virtual high-five for the effort and dedication you have put in.
First, I give God the glory and thanks for entrusting all of us a talent to use. Next, I thank you and the other artists for taking your time and investing it into yourself as an artist and into others’ lives to encourage them.
You’ve left great comments for each other and your building skills to be able to paint a portrait you can take pleasure in and others can too.
This is what art is about. It transcends a piece of cotton canvas stretched on a wood frame, with plastic polymer resin on it. In the hands of a skilled painter, it becomes something beautiful that can last forever.
When we touch lives, bring hope and encouragement both in the creation and in the giving or selling of the art, we are doing something that has the potential to last for eternity!
So what we all have done in this group, by God’s grace, is amazing. And I believe it is just the start! 🙂
If you would like to work with me more closely, so I can personally help you become the portrait artist you’d like to be, be sure to watch my invitation at the end of the video. Whatever you decide, thank you so much for taking part in this challenge and may God richly bless your talent, and multiply it many times over!
Yours for Better Portraits,
![]()
If you found this post helpful or encouraging, would you send it on ahead? Let others know with the share buttons below. I’d love to hear your comments. Thank you so much!
Let me know if you have any questions about the challenge that I didn’t answer. Leave your question in the comments below and I’ll get back to you!
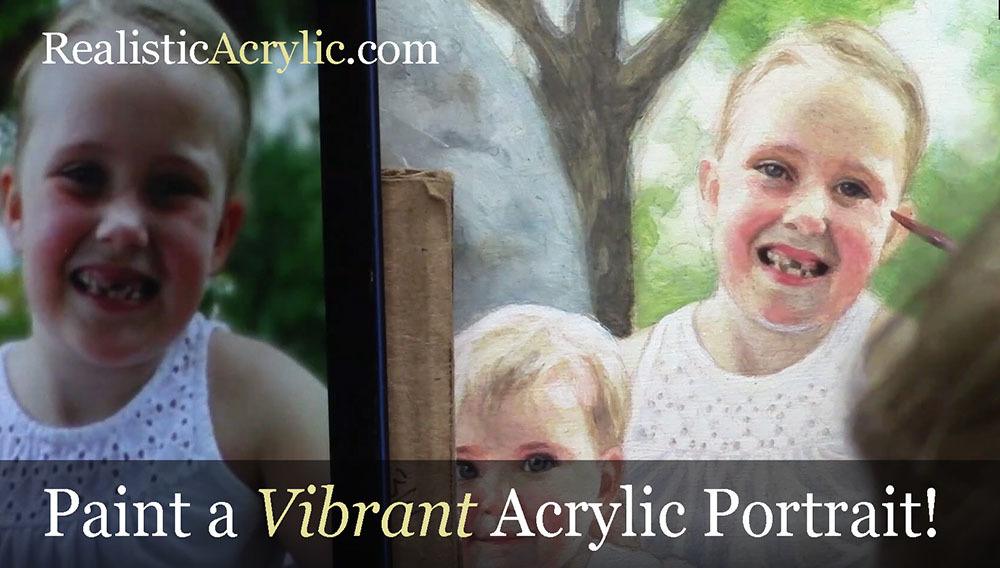
5 Steps on How to Paint a Vibrant Acrylic Portrait
Learn the classical glazing technique for depth and luminosity
Acrylic painting is an exciting medium known for its versatility, but achieving the depth and vibrancy often associated with oil paintings can seem challenging. However, by employing the classical glazing technique, a method favored by old masters like Rembrandt, Titian, and Vermeer then you can produce rich, luminous results with acrylics. This blog post will guide you through 5 essential steps to create a vibrant acrylic portrait using this time-tested method.
This tutorial shows the entire process of painting a portrait. Here are the steps I show in this tutorial:
- Start with a Detailed Sketch.
- Apply the Initial Glaze Layers
- Layer and Build Gradation
- Introduce Vibrant Colors
- Focus on Nuances and Details
1. Start with a Detailed Sketch
Every masterpiece begins with a solid foundation, and in portrait painting, that foundation is the sketch. Before you start adding color to your canvas, take time to create a detailed and accurate sketch of your subject. For this project, an 11×14 portrait of three girls in a park serves as an example.
By using a sepia-tone prismacolor colored pencil, you can establish proportions and likeness. Accuracy in this stage helps set the stage for a calm and confident painting process. Once your sketch is ready, seal it with a clear matte medium. This acts as a protective layer, ensuring that the pencil lines remain intact as you begin adding paint.
- Tip: Use a flat brush (¾ inch to 1 inch wide) to apply the matte medium. Make sure the application is smooth and even, allowing it to dry thoroughly before proceeding to the next step.
2. Apply the Initial Glaze Layers
The heart of this painting method lies in glazing, where thin, transparent layers of paint are applied over one another to build depth and richness. Unlike traditional opaque acrylic painting, the classical glazing technique requires a mixture of 95% matte medium to 5% paint. This creates a very light wash that enables you to gradually build colors without overwhelming the canvas.
Begin by mixing raw umber dark with ultramarine blue to create lifelike skin tones and shadow areas. These first layers will be almost imperceptible, but they provide a strong base for the layers that follow.
- Tip: The first layers of glaze should be incredibly light. This allows for adjustments in color or value without the need to paint over mistakes. The glazing method helps avoid the common frustration of muddy colors often encountered in acrylic painting.
3. Layer and Build Gradation
Once the initial glaze is applied, it’s time to focus on layering. As you build up more layers, you’ll notice how the painting starts to take on a more vibrant and realistic appearance. The goal here is to create a seamless transition between light and dark values, blending tones smoothly to replicate the natural shading found in your reference photo.
In this step, more raw umber dark and ultramarine blue are used to deepen the shadows on the forehead and hair. This layering process helps achieve the subtle gradation required for realistic portraits.
- Technique: As you layer, ensure that each glaze is thin and transparent. Too much paint in a single layer can cause the painting to look heavy and lose the delicate transparency that glazing provides.
4. Introduce Vibrant Colors
To make your portrait truly vibrant, it’s essential to introduce bold colors into the glazing process. In this example, a dash of Liquitex hot pink was added to the dress to intensify the color and give it a glowing effect. The key is to use these bright colors sparingly, applying them in thin layers so that they blend harmoniously with the existing hues.
When applying glazes to areas like the clothing, make sure to leave the white areas exposed. This technique, known as “preserving the luminosity,” ensures that highlights remain bright and eye-catching, adding to the overall vibrancy of the portrait.
- Tip: When adding vibrant glazes, thin the paint with medium and apply it cautiously. This helps prevent overpowering the existing layers while enhancing the color saturation.
5. Focus on Nuances and Details
The final step in this process involves refining the smaller details and nuances that bring a portrait to life. For example, the highlights in the hair, shadows in the creases of clothing, and the subtle changes in skin tone around the eyes require careful attention.
In the final layers, you can also experiment with a semi-opaque mixture, using titanium white, raw umber dark, and organic red-orange to add warmth and depth to the skin tones. With each new layer, the portrait takes on more life, depth, and realism. At this stage, it’s important to use more opaque layers sparingly, as glazing is best suited for large areas, while more detailed parts, such as fingernails or eyes, may benefit from a slightly thicker application of paint.
- Technique: If you notice that certain areas appear too flat or lack depth, consider adding a dark glaze to emphasize the shadows. Because mixing ultramarine blue with raw umber dark creates a rich, deep tone perfect for refining these darker areas without relying on black paint.
Conclusion: Patience Is Key
As you add each layer of glaze, then always remember that patience is vital. Because acrylic glazing requires multiple layers, sometimes ten or more to achieve the desired depth and luminosity. Each layer builds upon the last, contributing to the portrait’s final vibrancy. While it may take time, the results are well worth the effort.
By following these five steps, you can create a stunning acrylic portrait with vibrant colors and lifelike depth, all while employing the classical glazing technique favored by the old masters.
For further resources and guides, visit realisticacrylic.com and check out my free courses to enhance your acrylic painting journey.
- How to Paint Foliage Using the Acrylic Glazing Technique
- How to Trace for an Accurate Portrait Sketch
- How to Paint Realistic Eyes in Your Acrylic Portrait
- How to Add Raw Umber Dark & Ultramarine Blue to Your Portrait
- How to Make Your Own Raw Umber Dark
- How to Paint Realistic Trees & Grass in Your Acrylic
- How to Block In Skin Tone Values Using Glazing Technique
- How to Paint Vibrant Reds in Your Acrylic Portrait
- How to Glaze Background Colors & More Acrylic Portrait
- How to Paint White Clothing in Your Acrylic Portrait
- How to Easily Transition from a Sketch to a Painting
- How to Block In Shading & Skin Tones in Your Acrylic
- How to Build Up Color on Acrylic Pet Portrait
- How to Build Up Form on Clothing with Acrylic
- How to Paint Dark Clothing Using Acrylic Glazing Technique
- How to Paint a 24 x 30 Acrylic With 30 People
- How to Do Smooth Shading with Acrylic
- How to Sketch an Acrylic Portrait with a Grid
Read more about how to paint a portrait that you can surely be proud of!
I’d love to hear your thoughts about this video. Please share it with your friends and family. Let me know if you have any further questions. I’ll greatly help you.
If you’d like to learn more, sign up for my free email tips and video class today.
Learn How to Paint Acrylic Portraits With My Free Mini-Video Course!
Thank you so much for taking the time to read this tutorial and watch the video. That means a lot to me. I hope you find it very helpful in your portrait painting.
Yours for Better Portraits,

P.S. Did you find this post helpful or encouraging? If so, send it on ahead! Let others know with the share buttons below. I’d love to hear your comments. Thank you so much! Also, do you have a question on acrylic portrait painting you’d like answered? Let me know, and I’d be happy to help!
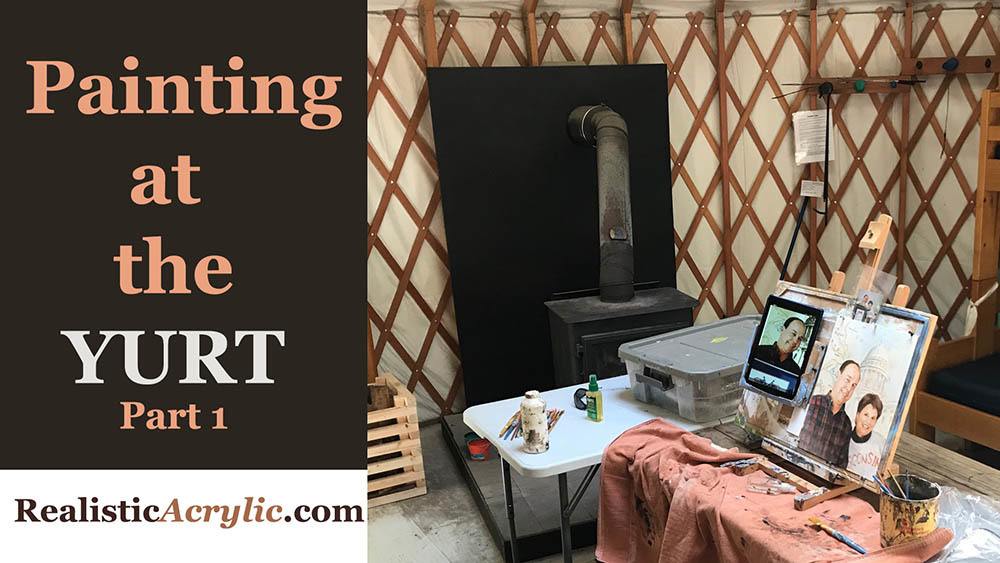
Portrait Painting of a Veteran at the Yurt
Is it possible to do portrait painting while you’re away from your home, your usual studio area?
This was something I’ve always wanted to do: create art while camping. And for all the years I’ve gone camping, I’ve never been able to successfully do it.
But finally, at the end of June, my brother and I decided to go camping at a rustic yurt up in Cable, WI. Where is that? Let’s just say, it’s “way up north.” 🙂 And what is a yurt? It’s a round tent-like house, a permanent structure made of lattice wood, bound together with steel cable, and covered with fabric. We rented it through Airbnb for two days.

Acrylic portrait artist Matt Philleo ready to paint at a yurt in Cable, Wisconsin
We parked at the bottom of the hill and carried our gear up about a mile. We realized how out of shape we were! I also had my painting supplies: easel, palette, and brushes with me. In the middle of hiking and cooking, we decided to both do a little work: my brother wrote (he’s an author) and I painted.
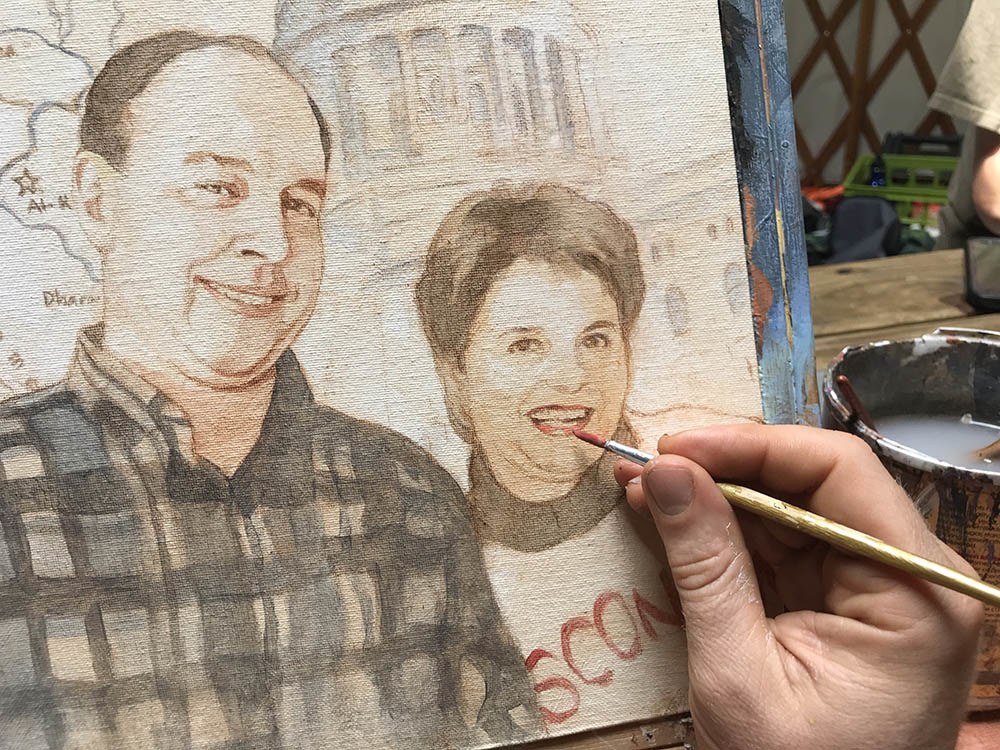
Painting an acrylic portrait from photo inside a yurt while camping, 11 x 14 acrylic on canvas ©2019 by Eau Claire area portrait artist Matt Philleo
I know. You’re probably thinking I should have painted the scenery up there, and yes, it was beautiful. But I had a commissioned portrait from a photo to get done: a painting of a veteran that served in the gulf war. And I love painting people, so it hardly seemed like work.
After bacon, eggs, and oatmeal for breakfast, it was time for painting.
Here is a video showing the beginning part of the process. In this video, I am basically blocking in the values with just raw umber dark and ultramarine blue. Of course, it’s all thinned out and made translucent with matte medium.
And then, here’s the next video in the process. Here I’m adding some color with burnt sienna, alizarine crimson and a few other colors. We’re starting to build up some skin tones. Also working on the flannel shirt. It takes a lot of layers to get it dark enough to look realistic!
After lunch, we hiked, and then came back and did more work: refining the shadows and making sure the likeness is accurate.
Sometimes your sketch just won’t cut it. It will get you about 80% of the way there, and you do the remaining 20% with paint. As you apply the paint, you can change the shape of the nose, the distance between the eyelids, lengthen the smile, etc., to adjust whatever might have been off during your sketch.
Of course, there is more to go on the painting. I’ll share the rest with you soon. I wasn’t able to finish it at the yurt, but I put in several hours. So, not only did I get to spend some great quality time with my brother, but I got to do some enjoyable work as well. After the big move, I finally feel like I’m getting into a regular groove of painting and posting tutorials. Thanks so much for your patience.
UPDATE: Here is the final video of this portrait, painted at my regular studio…
And a photo of it…

Custom realistic acrylic portrait of a veteran and his wife painted by Eau Claire area portrait artist Matt Philleo, 11 x 14, acrylic on canvas, ©2019 by Matt Philleo
I really enjoyed painting this for the client, putting all the elements–the map of Iraq, the capitol building, and the people together into one cohesive portrait that I hope will be a cherished keepsake for the family for years to come.
I hope this painting has encouraged you and given you some ideas to use in your own portrait painting. I would love to help you learn to paint portraits your very best. Let me know if I can be of more help to you in any way.
Yours for better portraits,

P.S. Did you find this post helpful or encouraging? If so, send it on ahead! Let others know with the share buttons below. I’d love to hear your comments. Thank you so much! Also, do you have a question on acrylic portrait painting you’d like answered? Let me know, and I’d be happy to help!
How to Paint Smiling Girl in Yellow: 30-Minute Acrylic Portrait
Create a stunning 30-minute acrylic portrait of a smiling girl in yellow with easy-to-follow techniques
Creating a captivating 30-Minute Acrylic Portrait of a smiling girl in yellow can be a fulfilling and enjoyable artistic endeavor. In just half an hour, you can capture the essence of joy and vibrancy, making this project perfect for artists of all skill levels. Whether you’re a seasoned painter looking for a quick challenge or a beginner eager to experiment with color and expression, this guide will provide you with step-by-step instructions to bring your vision to life on canvas. Let’s dive into the techniques and tips that will help you create a stunning portrait that radiates happiness!
For today’s portrait, I’ll be painting a picture of a young woman ( a still shot image from Ray Comfort’s video interviews ) with a beautiful dark complexion and attractive smile. I like the dark shadows and forms within her face and hair, and I thought it would make for a fantastic little portrait.
This will be an 8 x 10, acrylic on canvas board.
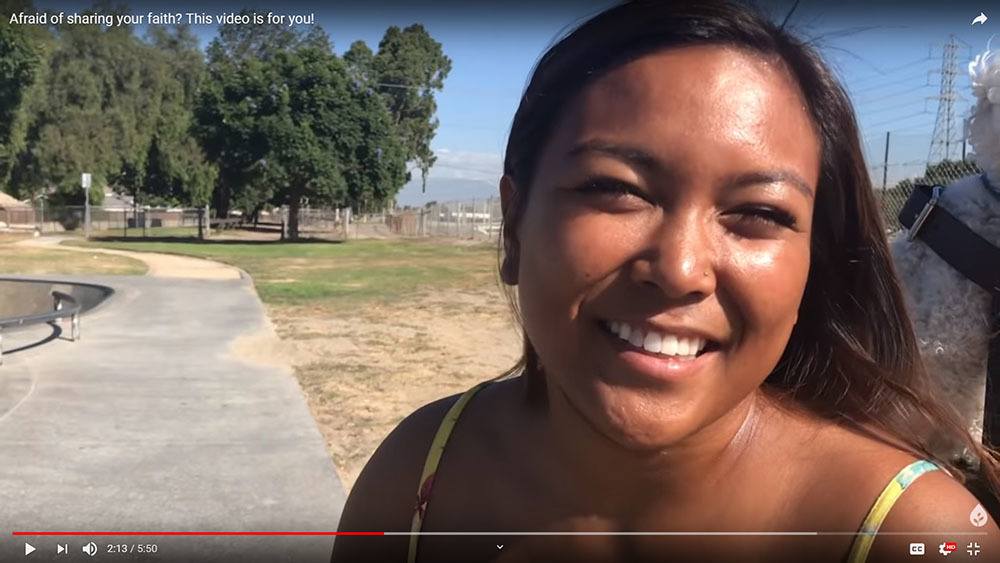
I’ll demonstrate how you can paint a quick portrait study with an aggressive opaque, alla prima technique. The idea is to see what you can accomplish within 30 minutes. It will force you to think quickly, and find out what the most important aspects are that will convey the subject’s likeness and just paint them without fuss.
At the same time, I encourage you to enjoy the process and don’t fret over whether the painting looks good or not. Of course it won’t look as good as a painting you’ve spent hours on! But it’s OK. Just enjoy the process.
Later on, you can always add more layers to the painting and give it a finished look.
Ready to dive in?
Season 1, Episode 3 of the 30-Minute Acrylic Portrait…
After watching it, leave me a comment here below. I really look forward to reading and answering your thoughts and questions. Let me know how I can help and have a blessed and productive day!
Yours for better portraits,

P.S. Did you find this post helpful or encouraging? If so, send it on ahead! Let others know with the share buttons below. I’d love to hear your comments. Thank you so much! Also, do you have a question on acrylic portrait painting you’d like answered? Let me know, and I’d be happy to help!
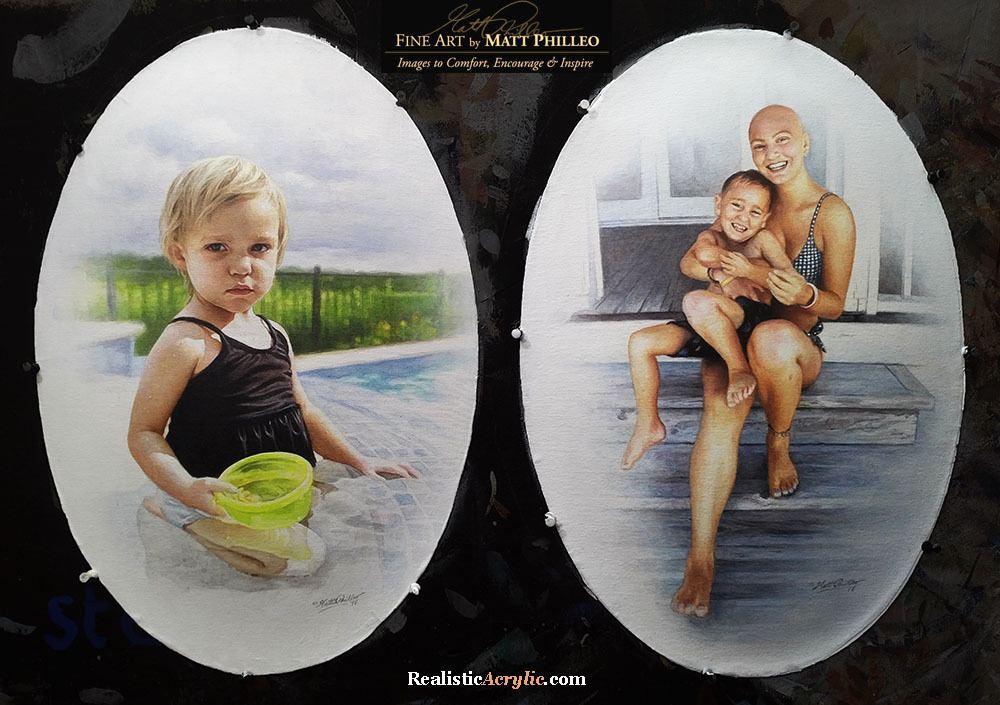
How to Paint Two Bubble Frame Oval Acrylic Portraits
Unlock the secrets to creating captivating two bubble frame oval acrylic portraits
Painting two bubble frame oval acrylic portraits offers a unique opportunity to explore creativity and technique while crafting eye-catching artwork. In this guide, you’ll discover the essential steps to create stunning portraits that showcase not only your artistic skills but also the charming oval frames that elevate your paintings. Whether you’re a beginner or an experienced artist, you’ll learn how to blend colors effectively, capture realistic features, and compose your portraits for maximum impact. Let’s dive into the world of acrylic painting and bring your two bubble frame oval acrylic portraits to life!
How is my portrait project coming along?
“Um, I haven’t even started it yet.”
“Oh. Could you do another one and get it done for me by Christmas?”
“Let me check. Sure.”
This is kind of how the conversation went when a client called me on a portrait project that I had scheduled out for a few months. I was backed up with commissions, and it was already well into December.
Do another portrait when I was already behind? Why not? I thrive on a little deadline pressure. I’ve got an extra reserve of midnight oil 🙂
So here are the portraits I created, two convex-oval 14″ x 20″ acrylic on canvas paintings. I decided to work on both at once. And I got them both done in time, too, by God’s grace!

And now I want to show you how I painted them. I’ll take you through the process from the colors I select for the palette, the first few layers, all the way to the completed painting.
How I Painted These Oval Vintage Acrylic Portraits
This tutorial is a work in progress, so I’ll be adding more videos in the future!
Keep in touch and I’ll let you know when I post the next one!
Let me know how this tutorial helps!
Have you ever painted on an oval canvas or unusual surface before? If so, leave a comment and tell me about it. Have a blessed day!
LEARN MORE
- How to Paint Foliage Using the Acrylic Glazing Technique
- How to Trace for an Accurate Portrait Sketch
- How to Paint Realistic Eyes in Your Acrylic Portrait
- How to Add Raw Umber Dark & Ultramarine Blue to Your Portrait
- How to Make Your Own Raw Umber Dark
- How to Paint Realistic Trees & Grass in Your Acrylic
- How to Block In Skin Tone Values Using Glazing Technique
- How to Paint Vibrant Reds in Your Acrylic Portrait
- How to Glaze Background Colors & More Acrylic Portrait
- How to Paint White Clothing in Your Acrylic Portrait
- How to Easily Transition from a Sketch to a Painting
- How to Block In Shading & Skin Tones in Your Acrylic
- How to Build Up Color on Acrylic Pet Portrait
- How to Build Up Form on Clothing with Acrylic
- How to Paint Dark Clothing Using Acrylic Glazing Technique
- How to Paint a 24 x 30 Acrylic With 30 People
- How to Do Smooth Shading with Acrylic
- How to Sketch an Acrylic Portrait with a Grid
Read more about how to paint a portrait that you can surely be proud of!
Yours for better portraits,

P.S. Did you find this post helpful or encouraging? If so, send it on ahead! Let others know with the share buttons below. I’d love to hear your comments. Thank you so much! Also, do you have a question on acrylic portrait painting you’d like answered? Let me know, and I’d be happy to help!

12 Steps on How to Paint Realistic Skin Tones in Your Acrylic Portrait
Learn the art of skin tones: A step-by-step guide for realistic acrylic portraits
What do you MOST want to learn?
This is a question I asked the artists in my Facebook group. The #1 answer was skin tones.
So I decided to put together a 5-week live video class, showing the whole process of painting an acrylic portrait, step-by-step, concentrating on flesh tones.
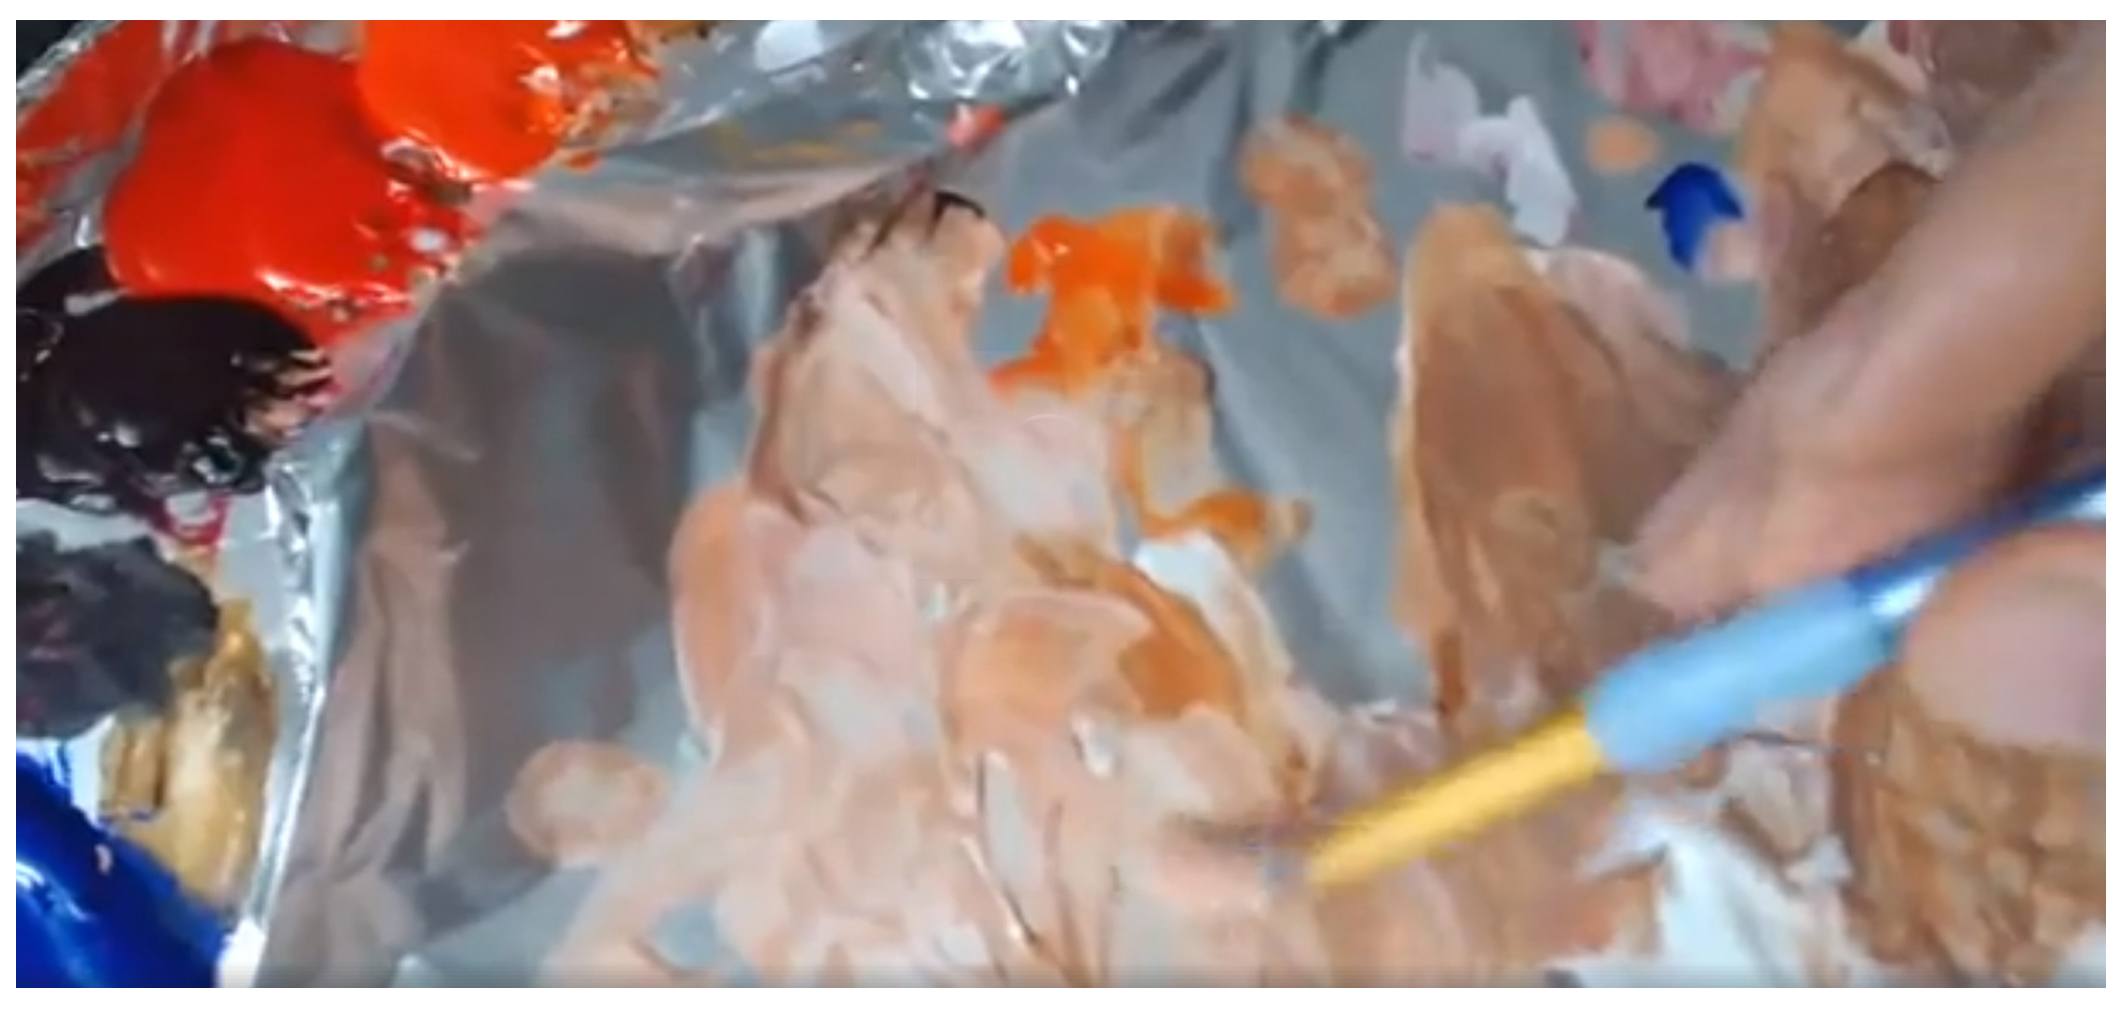
Most people know me as the guy that does slow, methodical glazes. But in this series, I wanted to meet artists where they’re at and do the portrait in more of an opaque technique. We had a great response to the class, with about eighty students on board right away during the first lesson!
I decided to create a printable guide that shows what we covered during the classes, although obviously not in as much depth as you’d get out of watching 5 hours of video! I think you’ll find this guide helpful. This online tutorial is an adaptation of the guide, showing a portrait from a photo I painted of my wife. If you take the video course (now open for enrollment) it will complement it well, and give you something to keep next to your easel as you paint. It can stand on its own, too. If you put the techniques to practice, you’ll see improvement in your portrait painting, for sure.
Either way, enjoy this tutorial, and I look forward to teaching you more!
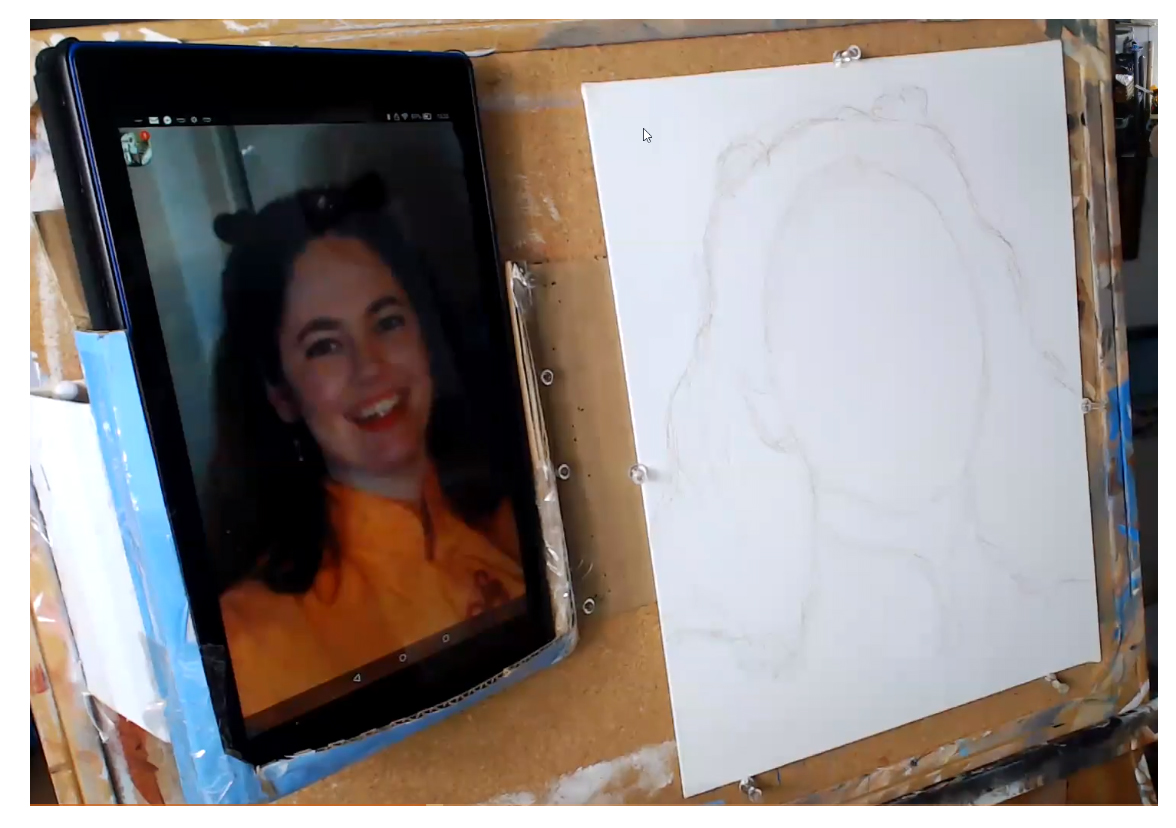
Step 1: Create a Basic Sketch
Step 2: Block in the Hair Color and Value
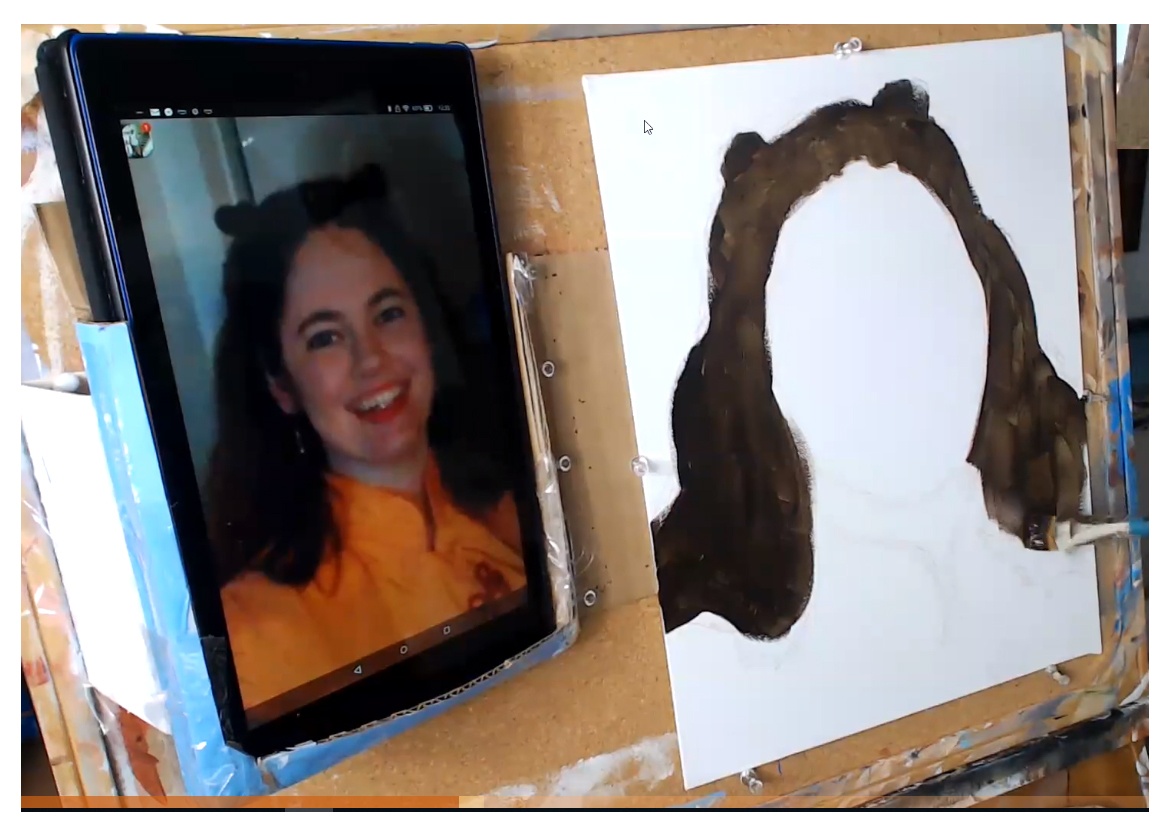
Although we are concentrating on skin tones, quickly blocking in the hair color and value frames the face. It will help us determine what colors to use for the skin tone, and make sure it is accurate. When you paint on top of plain white, you will think your skin tone is too dark, when in reality it’s not. We look for the predominant color in the hair. In this example, I’m using raw umber dark, and applying with a 3/4” -1” flat brush.
Step 3: Fill in the Skin Tone Base

In this step, I’m using a mixture of titanium white, burnt sienna, and organic red orange for the first, foundational skin tone layer. Make the paint as fluid as you can, by adding a little matte medium (10%) and brush quickly, just filling the whole area in.
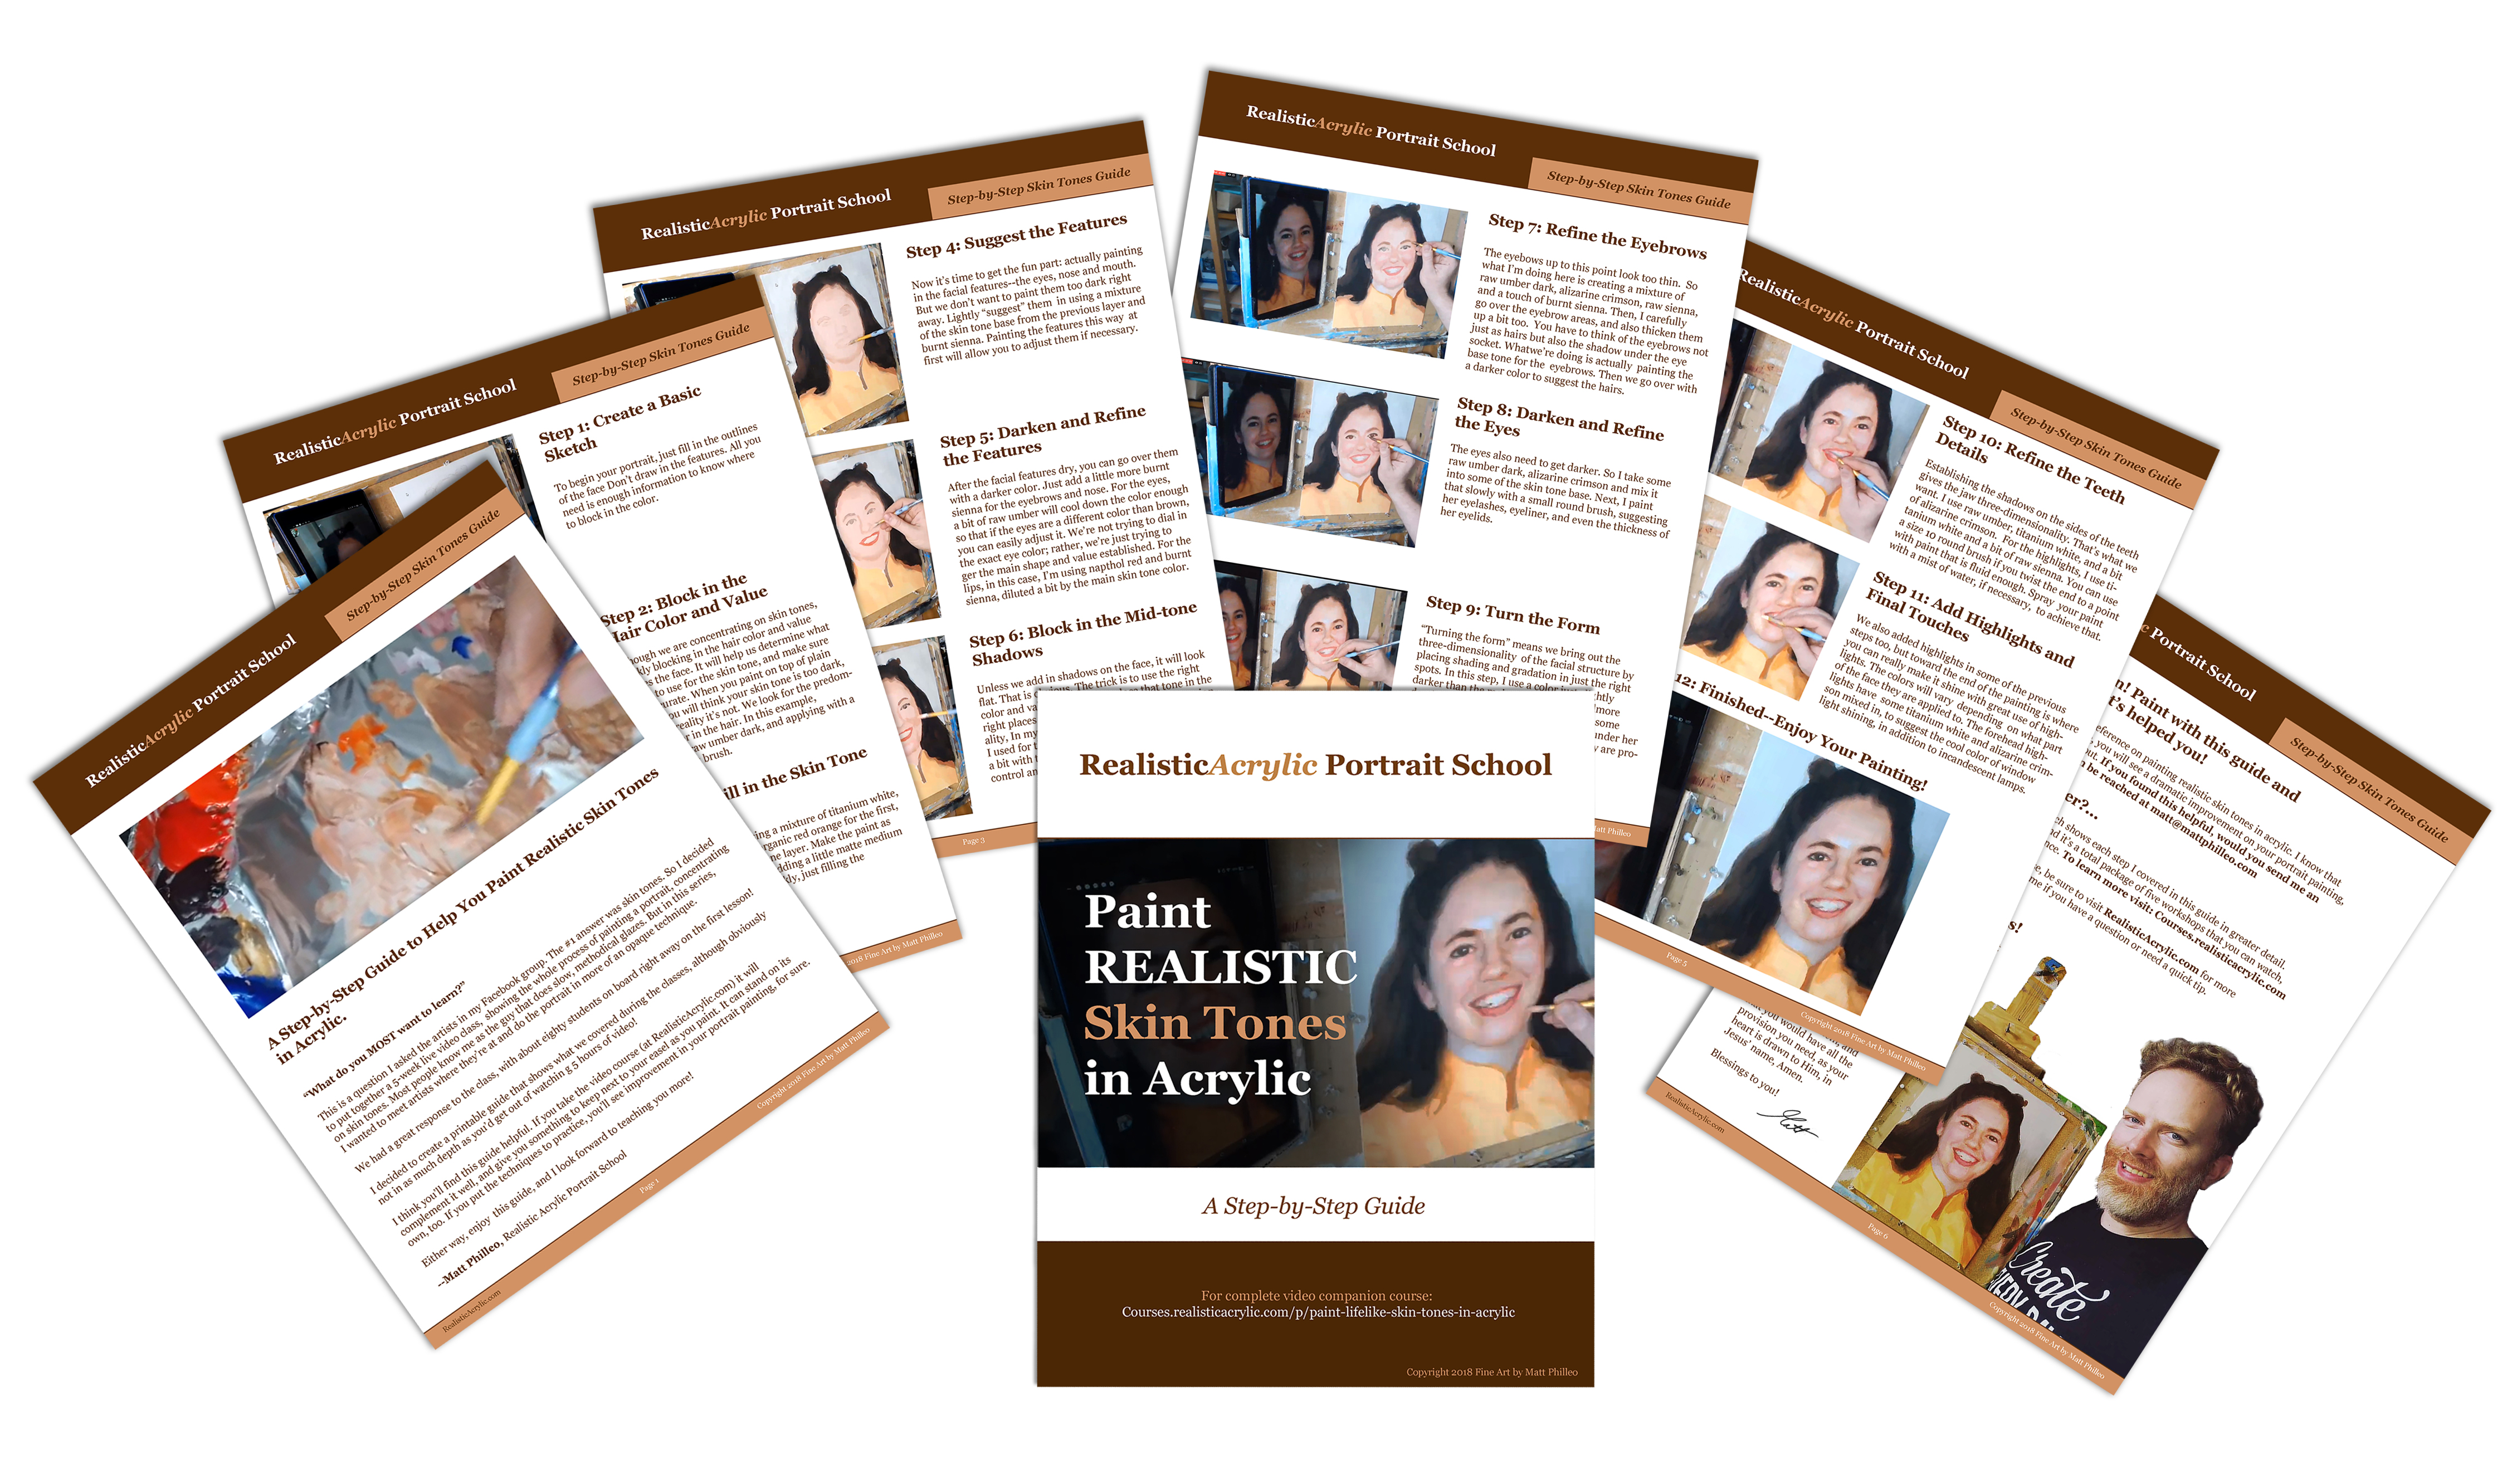
Print off Your Own Guide to Paint Realistic Skin Tones in Acrylic
I created a handy reference guide that covers all the steps in this article in a 7 page PDF. You can download it right now, print it, and set it next to your easel, so you know exactly what colors, what techniques and what steps to take when you paint skin tones on your portrait. Download it below…
Download and Print the Skin Tones Guide
Step 4: Suggest the Features
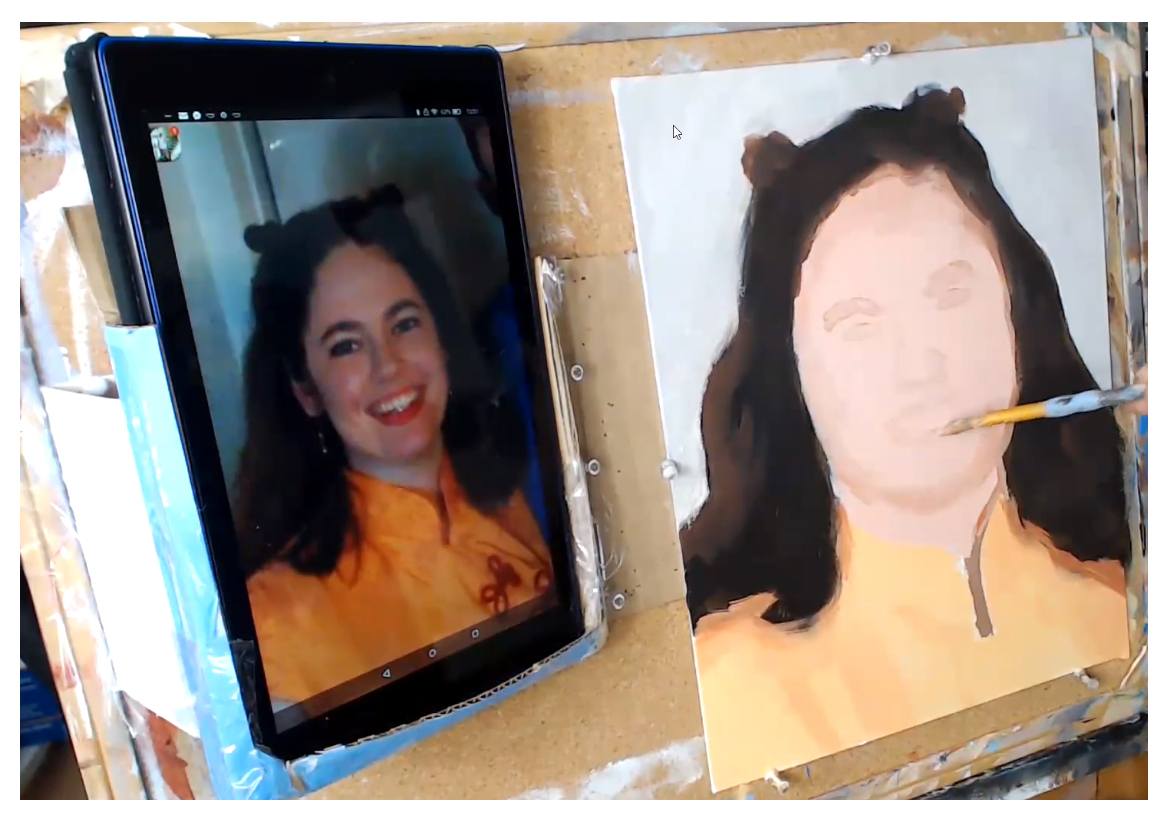
Now it’s time to get the fun part: actually painting in the facial features–the eyes, nose and mouth. But we don’t want to paint them too dark right away. Lightly “suggest” them in using a mixture of the skin tone base from the previous layer and burnt sienna. Painting the features this way at first will allow you to adjust them if necessary.
Step 5: Darken and Refine the Features
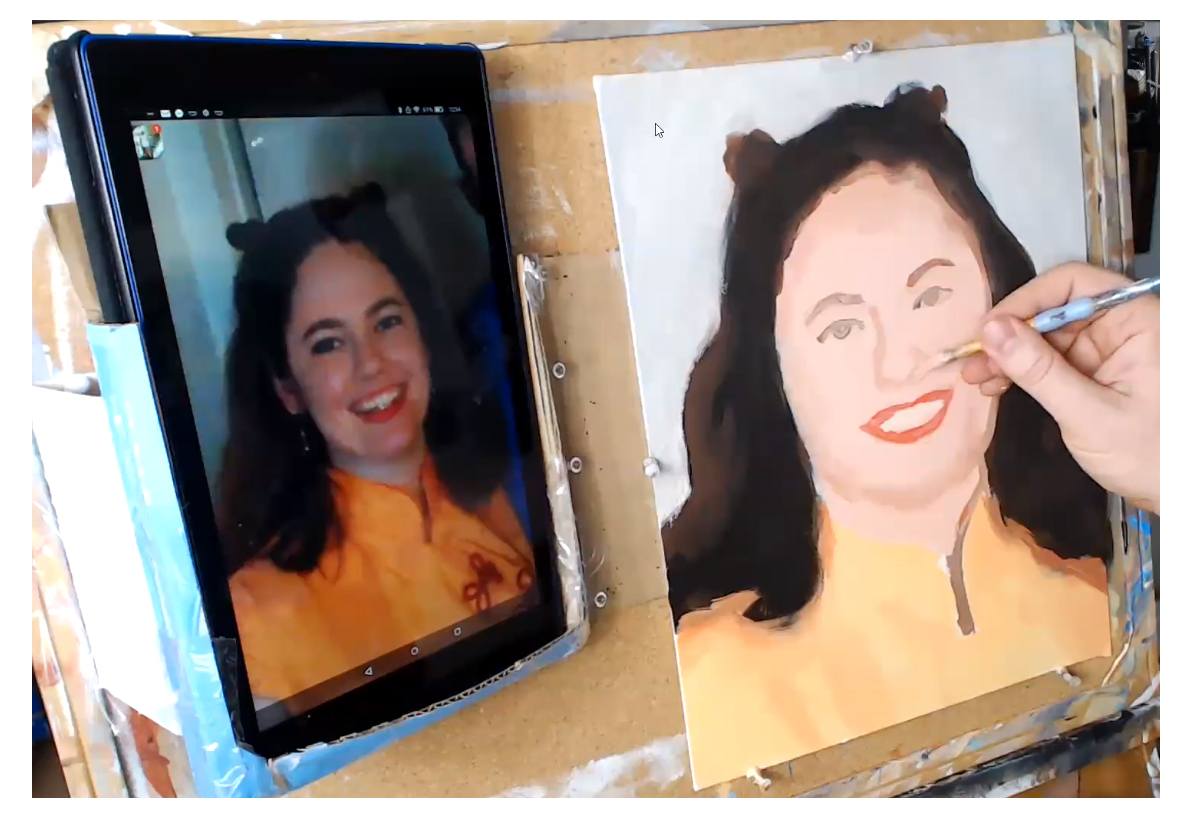
After the facial features dry, you can go over them with a darker color. Just add a little more burnt sienna for the eyebrows and nose. For the eyes, a bit of raw umber will cool down the color enough so that if the eyes are a different color than brown, you can easily adjust it. We’re not trying to dial in the exact eye color; rather, we’re just trying to ger the main shape and value established. For the lips, in this case, I’m using napthol red and burnt sienna, diluted a bit by the main flesh tone color.
Step 6: Block in the Mid-tone Shadows
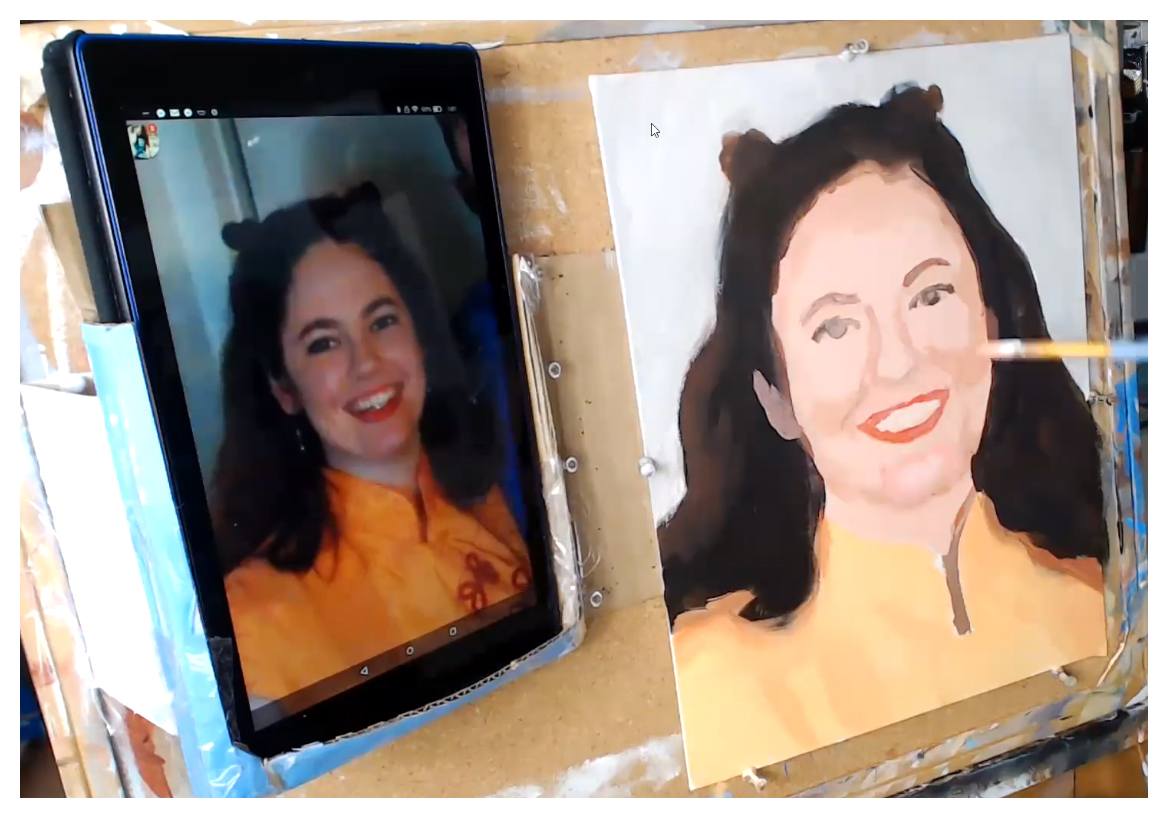
Unless we add in shadows on the face, it will look flat. That is obvious. The trick is to use the right color and value. And then to place that tone in the right places to give the illusion of three dimensionality, In my example, I use a similar color to what I used for the previous step, and lightened it up just a bit with the main skin tone color, so it’s easy to control and doesn’t get too dark.
Step 7: Refine the Eyebrows
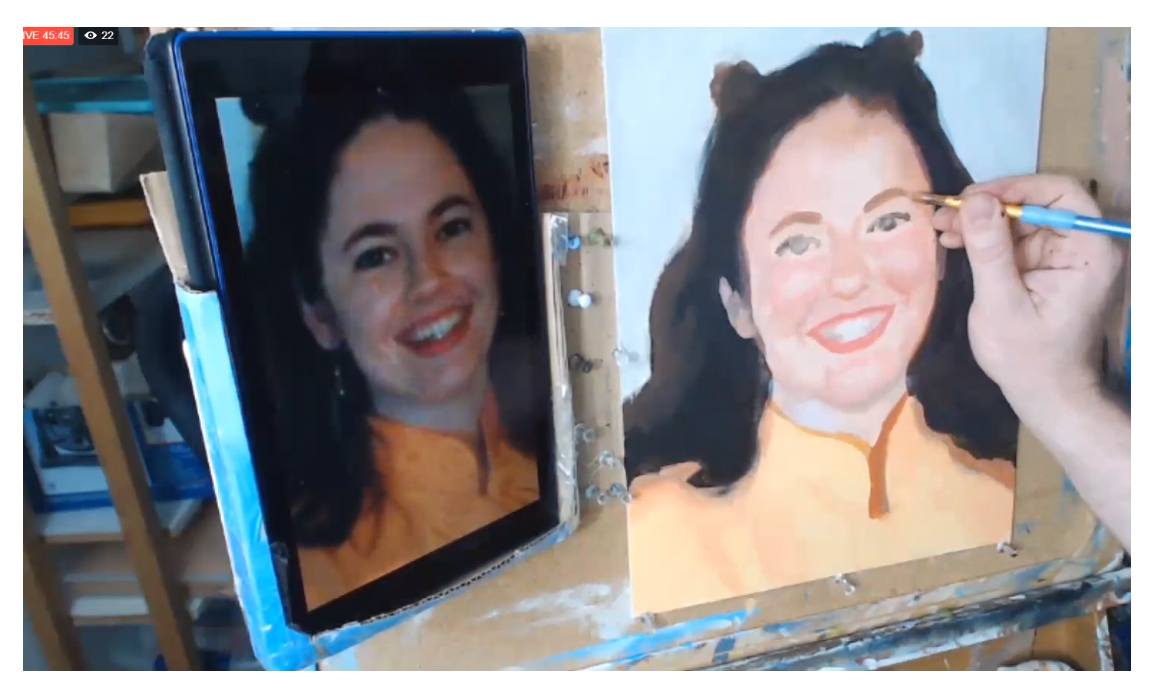
The eyebows up to this point look too thin. So what I’m doing here is creating a mixture of raw umber dark, alizarine crimson, raw sienna, and a touch of burnt sienna. Then, I carefully go over the eyebrow areas, and also thicken them up a bit too. You have to think of the eyebrows not just as hairs but also the shadow under the eye socket. What we’re doing is actually painting the base tone for the eyebrows. Then we go over with a darker color to suggest the hairs.
Tired of Muddy Colors?
Get my complete guide on painting skin tones, for free, and start mixing and blending realistic skin tones right away…
Download and Print the Skin Tones Guide
Step 8: Darken and Refine the Eyes
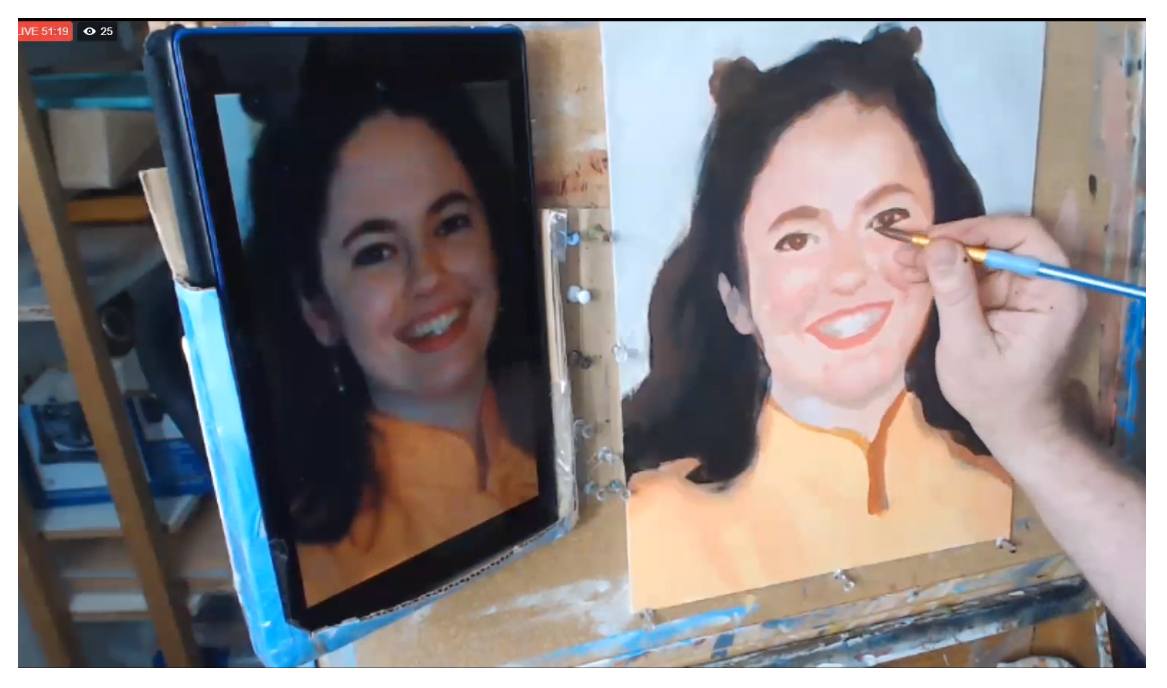
The eyes also need to get darker. So I take some raw umber dark, alizarine crimson and mix it into some of the skin tone base. Next, I paint that slowly with a small round brush, suggesting her eyelashes, eyeliner, and even the thickness of her eyelids.
Step 9: Turn the Form
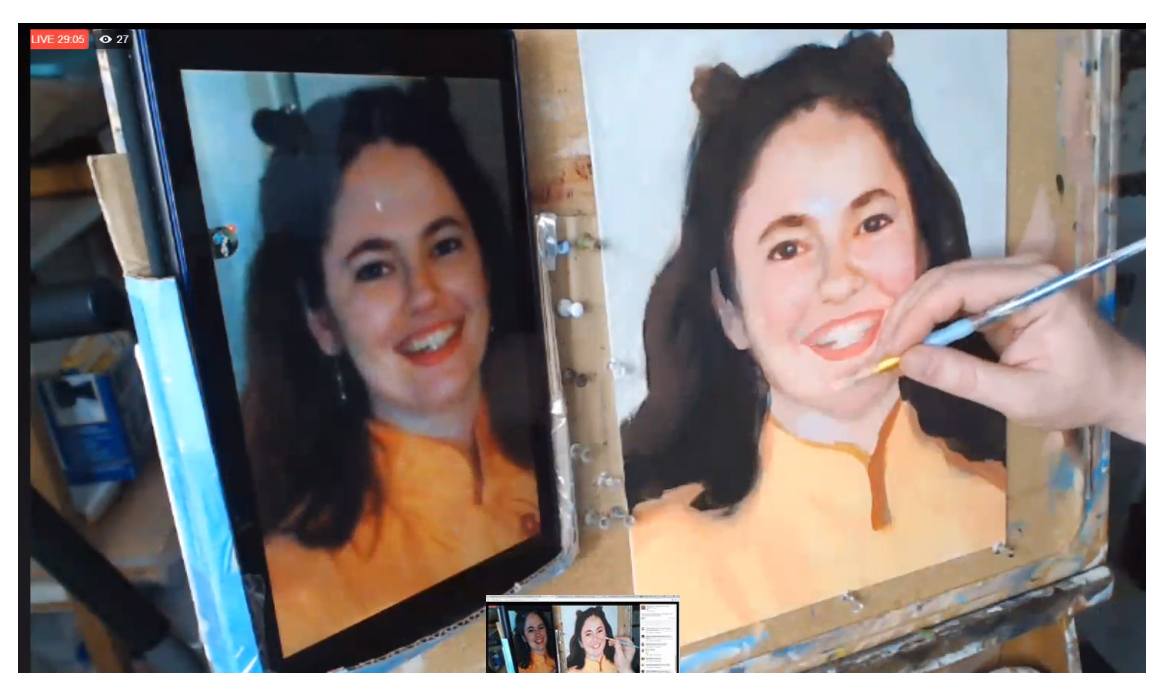
“Turning the form” means we bring out the three-dimensionality of the facial structure by placing shading and gradation in just the right spots. In this step, I use a color just slightly darker than the main skin tone and add more depth to her chin. In addition, I deepen some of the shadows alongside her nose, and under her eyes, to make the cheeks appear as if they are projecting forward in space a little bit.
Step 10: Refine the Teeth Details
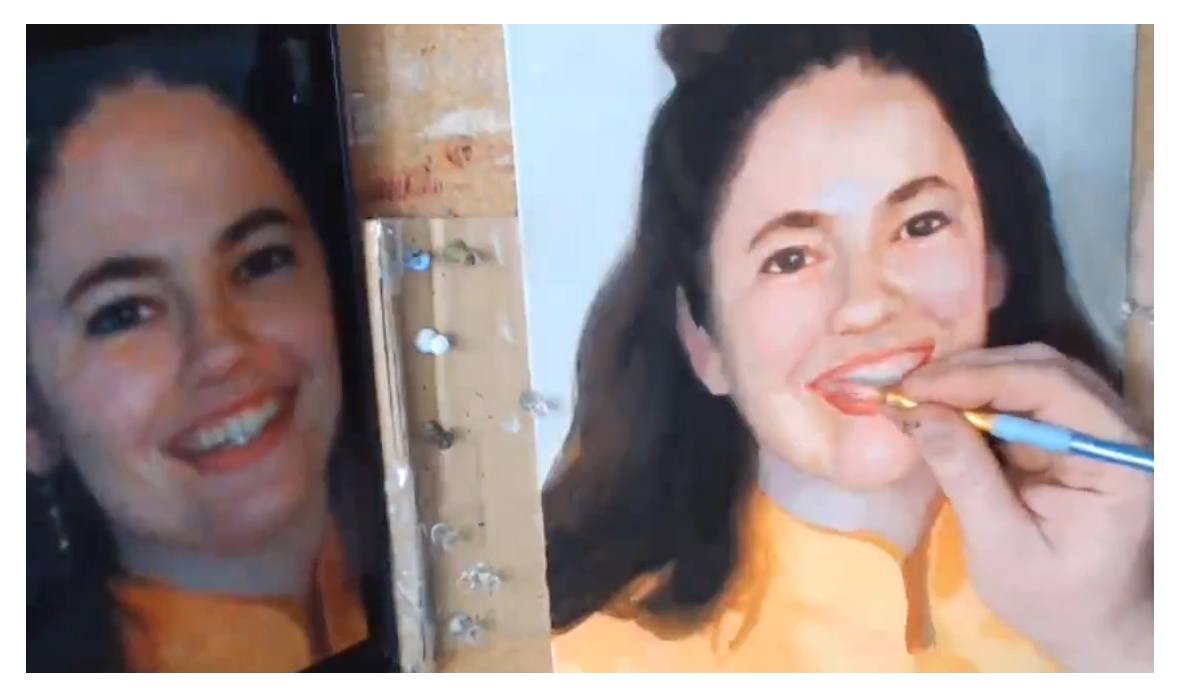
Establishing the shadows on the sides of the teeth gives the jaw three-dimensionality. That’s what we want. I use raw umber, titanium white, and a bit of alizarine crimson. For the highlights, I use titanium white and a bit of raw sienna. You can use a size 10 round brush if you twist the end to a point with paint that is fluid enough. Spray your paint with a mist of water, if necessary, to achieve that.
Step 11: Add Highlights and Final Touches
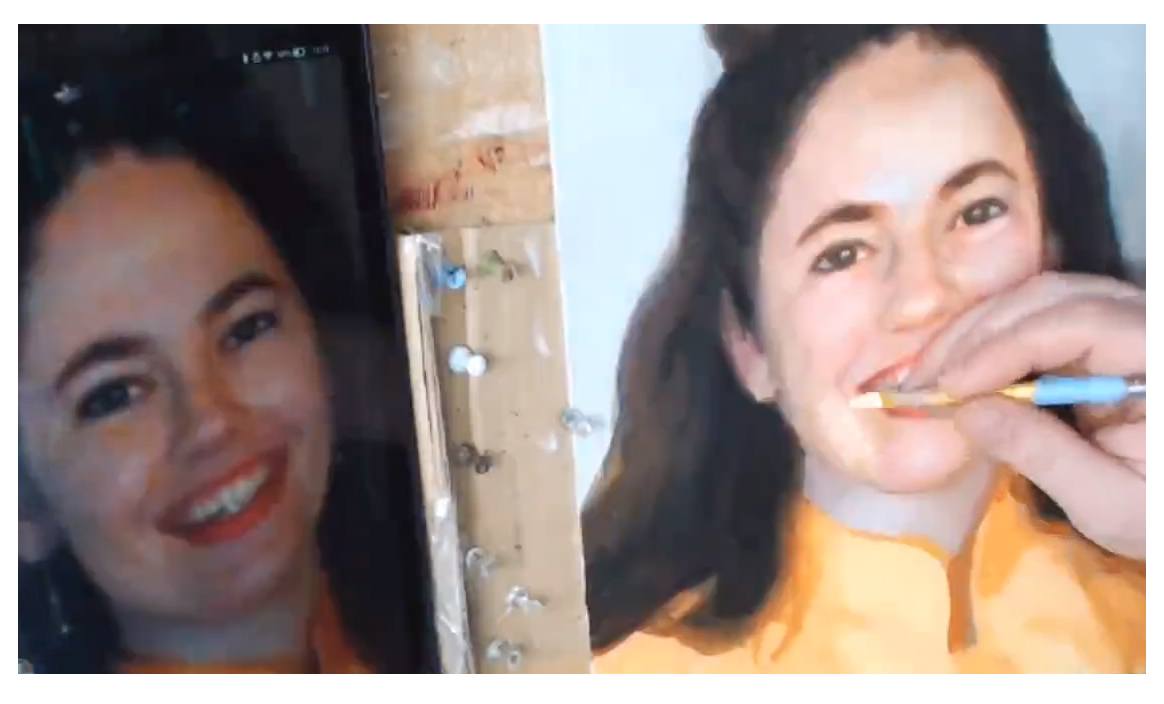
We also added highlights in some of the previous steps too, but toward the end of the painting is where you can really make it shine with great use of high- lights. The colors will vary depending on what part of the face they are applied to. The forehead high- lights have some titanium white and alizarine crimson mixed in, to suggest the cool color of window light shining, in addition to incandescent lamps.
Step 12: Finished–Enjoy Your Painting!
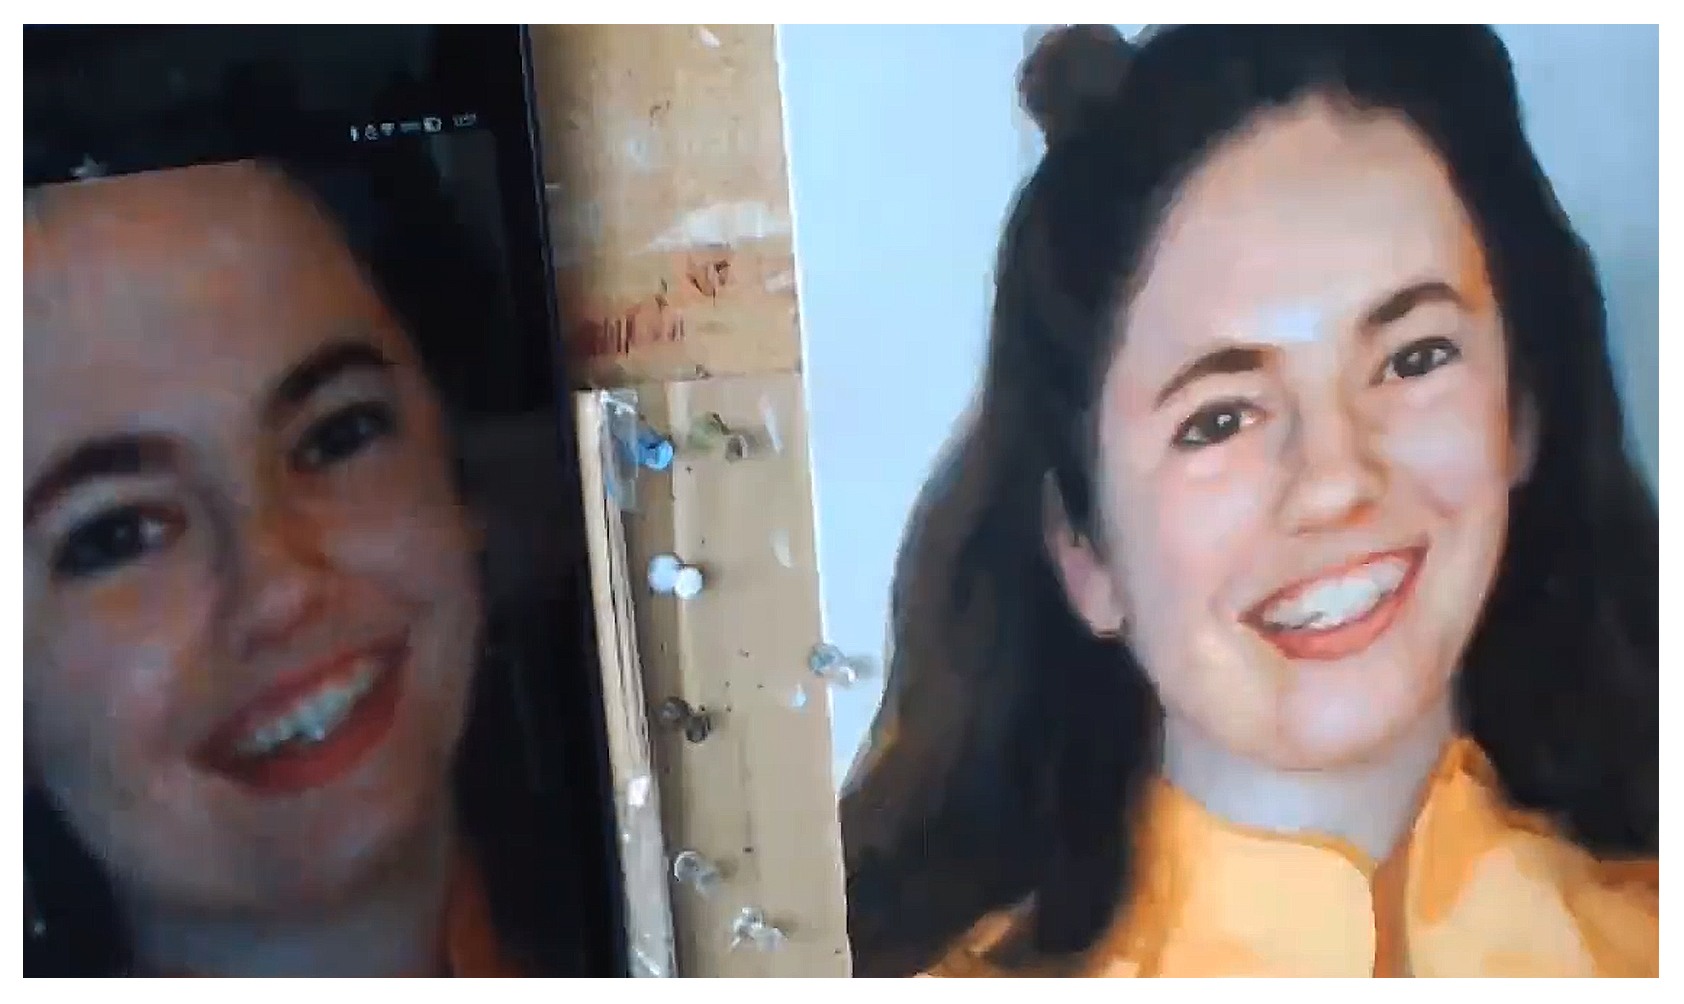
Now, it’s your turn! Paint with this guide and let me know how it’s helped you!
I enjoyed creating this helpful reference on painting realistic skin tones in acrylic. I know that if you put the steps into practice, you will see a dramatic improvement on your portrait painting, especially if you’re just starting out. If you found this helpful, would you send me an email and let me know? I can be reached at [email protected].
Make you print off the skin tones guide so you can paint a lifelike portrait you can be proud to show. Click the button below to download it.
Download and Print the Skin Tones Guide
Can I help you further?…
I have a video course available which shows each step I covered in this guide in greater detail. The course is about 5 hours long, and it’s a total package of five workshops that you can watch, step-by-step, at your own convenience. To learn more visit: Courses.realisticacrylic.com Even if you aren’t able take the course, be sure to get the free printable reference guide on painting skin tones in acrylic. Email me if you have a question or need a quick tip. I’ll be happy to help.

LEARN MORE
- How to Paint Foliage Using the Acrylic Glazing Technique
- How to Trace for an Accurate Portrait Sketch
- How to Paint Realistic Eyes in Your Acrylic Portrait
- How to Add Raw Umber Dark & Ultramarine Blue to Your Portrait
- How to Make Your Own Raw Umber Dark
- How to Paint Realistic Trees & Grass in Your Acrylic
- How to Block In Skin Tone Values Using Glazing Technique
- How to Paint Vibrant Reds in Your Acrylic Portrait
- How to Glaze Background Colors & More Acrylic Portrait
- How to Paint White Clothing in Your Acrylic Portrait
- How to Easily Transition from a Sketch to a Painting
- How to Block In Shading & Skin Tones in Your Acrylic
- How to Build Up Color on Acrylic Pet Portrait
- How to Build Up Form on Clothing with Acrylic
- How to Paint Dark Clothing Using Acrylic Glazing Technique
- How to Paint a 24 x 30 Acrylic With 30 People
- How to Do Smooth Shading with Acrylic
- How to Sketch an Acrylic Portrait with a Grid
Read more about how to paint a portrait that you can surely be proud of!
Share with your friends!
Let your fellow artists know about Realistic Acrylic Portrait School. My desire is to help artists learn how to paint an acrylic portrait they can be proud of. As I do for all my students, I pray that God would bless you with His peace in your painting process, direct your brush-strokes, that your paintings would encourage those who seem them, and that you would have all the provision you need, as your heart is drawn to Him, in Jesus’ name, Amen.
Blessings to you!

P.S. Did you find this post helpful or encouraging? If so, send it on ahead! Let others know with the share buttons below. I’d love to hear your comments. Thank you so much! Also, do you have a question on acrylic portrait painting you’d like answered? Let me know, and I’d be happy to help!
