Archive Monthly Archives: November 2023
How to Add Final Nuances to Signing Process
How do you finish your acrylic painting?
Introduction
As an artist, the final steps of completing a painting are both exciting and crucial. The finishing touches and the signing process not only conclude your artistic journey but also ensure your work stands out with a professional finish. This guide will walk you through how to add those final nuances to your painting and sign it with precision. Whether you’re an emerging artist or a seasoned professional, these techniques will help you achieve a refined and polished look for your artwork.
Understanding the Significance of Final Nuances
Final nuances are the subtle details that can significantly enhance the overall quality of your painting. These are the adjustments that fine-tune the depth, contrast, and visual impact of your work. By carefully addressing these details, you ensure that every aspect of your painting is harmonious and complete.
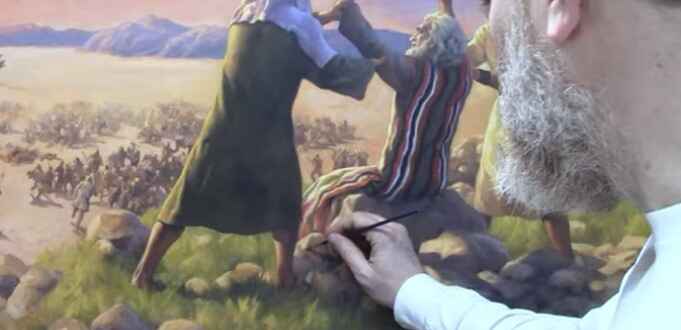
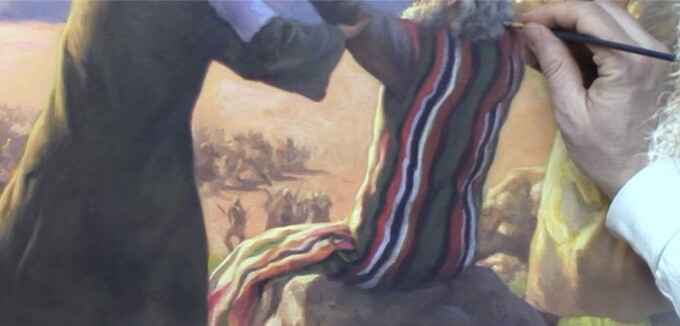
This tutorial highlights the process of refining a large-scale painting of the biblical Battle of Rephidim. This step involves evaluating the painting for any areas needing improvement, enhancing shadows and highlights, and smoothing out any inconsistencies.
Step-by-Step Guide to Adding Final Nuances
- Assess Your Painting: Start by stepping back and evaluating your painting from a distance. Look for areas that appear inconsistent or unfinished. This assessment will guide you in making necessary adjustments. In the video, the artist scrutinized the painting for any missed opportunities and areas needing more contrast.
- Enhance Shadows and Highlights: Deepening shadows and brightening highlights can add depth and dimension to your painting. Use a combination of darker and lighter shades to enhance these areas. The artist employed raw umber, burnt sienna, and other colors to improve shadow details and highlight areas.
- Refine Glazes: If your painting has areas with uneven or rough glazes, address them by applying a semi-opaque glaze. Mixing a bit of white with your existing glaze can help smooth out imperfections. This technique ensures a seamless and polished finish.
- Detail Work: Focus on intricate details that require refinement, such as facial expressions or textures in the background. Using a fine script liner brush, as demonstrated in the video, allows for precise and detailed work, enhancing the overall look of the painting.
- Warm Up Transitions: Smooth transitions between dark and light areas can make your painting appear more cohesive. Adding warmer tones to transition points can help achieve a more natural and appealing gradation.
The Signing Process
Signing your painting is a crucial step that signifies the completion of your artwork. Here’s how to ensure your signature is both effective and professional:
- Select the Ideal Color: Choose a color for your signature that contrasts with the background without overpowering the painting. I used a mix of burnt sienna and green to create a neutral color that blends well yet stands out.
- Use the Right Brush: A fine-tipped brush, such as a script liner brush, is essential for a clean and precise signature. This type of brush holds a lot of paint and offers fine control for a professional finish.
- Positioning Your Signature: Place your signature in a location that balances the composition of the painting. The artist chose the left side to avoid disrupting the visual weight of the right side, creating a balanced and harmonious appearance.
- Include the Date: Adding the date to your signature not only marks the completion of your work but also helps in maintaining a record of your artwork. This detail adds to the professional quality of your painting.
- Final Touches: After signing, review your painting one last time to ensure everything is in place. Make any final adjustments to the signature or painting as needed to achieve a flawless finish.
Adding final nuances and signing your painting are integral steps in achieving a professional-quality finish. By carefully refining your artwork and signing it with intention, you ensure that your painting not only reflects your artistic vision but also stands out with a polished and refined look.
For more tips on painting techniques and finishing touches, explore www.realisticacrylic.com. Our tutorials and free guides resources are designed to help you perfect your craft and elevate your artwork to new heights. Happy painting!
- Sketching Your Painting Accurately
- Beginning a Pet Portrait in Acrylic
- The Mystery of Realism in Painting
- Apply A Burnt Sienna Glaze to a Portrait
- Learn How to Sketch a Portrait Freehand in 45 Minutes
- Adding highlights to your acrylic painting
- 5 Excellent Reasons to Use Aluminum Foil
- Paint Realistic Wrinkles in Acrylic
- Painting Clothing in an Acrylic Portrait
- Paint a Cloudy Sky Acrylic
- How to add Semi-Opaque Highlights
- How to Enhance the Contrast in Your Acrylic
- How to Add Glaze to Your Acrylic Painting
- Paint Realistic Reflections on Eyeglasses in an Acrylic Portrait
- Build Up Depth on Your Acrylic Portrait Backgrounds
- How Do You Do Layers With the Glazing Technique?
- Learn How to Paint Wrinkles in Acrylic
Read more about how to paint a portrait that you can surely be proud of!
I’d love to hear your thoughts on this video. Please share it with your friends and family. Let me know if you have any further questions. I’ll greatly help you.
If you’d like to learn more, sign up for my free email tips and video class today.
Learn How to Paint Acrylic Portraits With My Free Mini-Video Course!
Thank you so much for taking the time to read this tutorial and watch the video. That means a lot to me. I hope you find it very helpful in your portrait painting.
Yours for Better Portraits,

P.S. Did you find this post helpful or encouraging? If so, send it in ahead! Let others know with the share buttons below. I’d love to hear your comments. Thank you so much! Also, do you have a question on acrylic portrait painting you’d like answered? Let me know, and I’d be happy to help!
How to Paint Mountains in the Distance with Acrylic
Transform your landscape paintings with these acrylic glazing tips for distant mountains
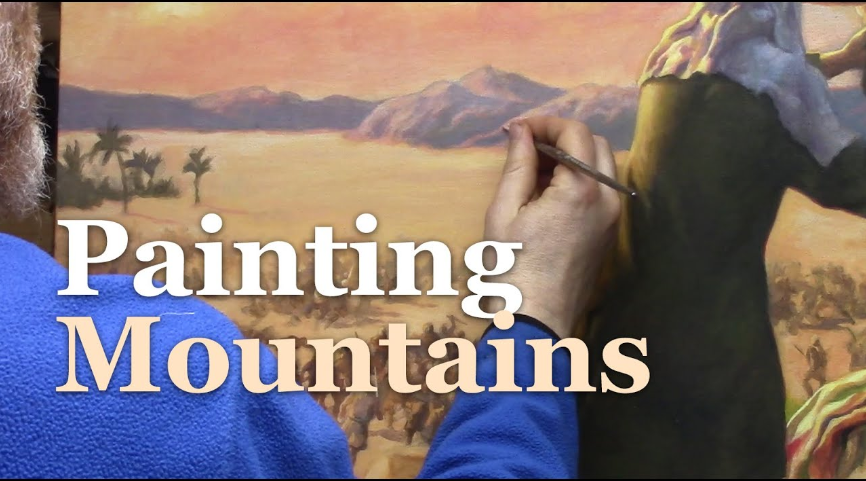
Painting distant mountains can add a breathtaking sense of depth and realism to your landscape artworks. Using acrylic glazing techniques allows you to achieve this effect with stunning results. In this guide, we’ll explore how to paint mountains in the distance, focusing on essential techniques and tips to enhance your artwork.
Understanding the Basics of Acrylic Glazing
Acrylic glazing involves applying thin, transparent layers of paint over dry layers to modify their color and tone. This technique is particularly effective for creating depth and atmospheric perspective in landscape paintings. To paint distant mountains, you’ll use glazing to create subtle color shifts and soften the edges, mimicking the natural effects of atmospheric conditions.
1. Preparing Your Canvas and Palette
Start by setting up your canvas and preparing your palette with the essential colors. For distant mountains, you’ll need:
- Titanium White: For highlights and mixing with other colors.
- Pyrrole Orange: To warm up certain areas and add vibrancy.
- Indian Yellow: For creating warm undertones.
- Naphthol Red: To introduce a reddish hue where needed.
- Ultramarine Blue: To create cool, distant tones.
- Raw Umber Dark: For deeper shadows and earthy tones.
Mix these colors to achieve a range of cool and warm tones suitable for distant mountains. Remember, cooler tones often recede into the background, while warmer tones advance.
2. Creating the Base Layers
Using a small, round brush, start by applying a base layer of color to your mountains. For distant mountains, use a mix of ultramarine blue and raw umber dark to create a soft, muted base. This will set the foundation for the distant appearance of the mountains.
Apply the paint in broad, sweeping strokes, mimicking the natural contours of mountain ranges. Focus on creating a gradient from darker tones at the base to lighter tones towards the top, simulating distance and elevation.
3. Adding Depth with Glazing
Once your base layer is dry, begin glazing to add depth and nuance. Mix a thin, transparent glaze using titanium white and a touch of pyrrole orange for highlights. Apply this glaze over the base layer to create the appearance of light hitting the mountain peaks.
Tip: Apply glazes in thin layers and build up gradually. This approach allows you to control the intensity and achieve a more natural look.
4. Creating Atmospheric Perspective
Atmospheric perspective is key to making mountains look distant. Use cooler tones, like a mix of ultramarine blue and naphthol red to add a hazy effect. Apply these colors lightly to areas that are farther away, softening the edges and blending them into the background.
Avoid using bright or saturated colors for distant mountains, as this can make them appear closer than they are. Instead, rely on muted, cool colors to maintain the illusion of depth.
5. Adding Highlights and Shadows
To enhance the three-dimensional quality of your mountains, add highlights and shadows. For highlights, use a mix of titanium white and indian yellow. Lightly apply this mixture to the mountain peaks and ridges where the light source is strongest.
For shadows, deepen the areas with raw umber dark mixed with a touch of ultramarine blue. Apply these shadows to areas that are obscured from the light, creating contrast and depth.
Tip: Ensure that your highlights and shadows follow the natural contours of the mountains. This adds realism and prevents your painting from looking flat.
6. Blending and Refining
Once you’ve added highlights and shadows, blend the colors to smooth transitions between different tones. Use a clean, dry brush or a blending brush to gently blend the edges where the colors meet. This technique helps to soften any harsh lines and creates a more seamless look.
Focus on areas where the light and shadow meet, ensuring that the transitions are smooth and natural.
7. Final Touches
Add any final details or touches to enhance the realism of your mountains. Check for any gaps or areas that need additional color adjustments. Use a fine brush to add small details or adjust highlights and shadows as needed.
Tip: Step back from your painting periodically to evaluate the overall effect. This perspective helps you see any areas that might need adjustment or refinement.
Painting mountains in the distance with acrylic glazing techniques can transform your landscape paintings, adding depth and realism. By using cool tones, creating atmospheric perspective, and carefully applying highlights and shadows, you can achieve a stunning portrayal of distant mountain ranges. Practice these techniques, and soon you’ll be able to create landscapes with breathtaking depth and dimension.
For more tips and tutorials on acrylic painting, visit https://realisticacrylic.com/tutorials/ to learn more and check out my free courses. Whether you’re a beginner or an experienced artist, there’s always something new to learn and apply to your paintings. Happy painting!
- Sketching Your Painting Accurately
- Beginning a Pet Portrait in Acrylic
- The Mystery of Realism in Painting
- Apply A Burnt Sienna Glaze to a Portrait
- Learn How to Sketch a Portrait Freehand in 45 Minutes
- Adding highlights to your acrylic painting
- 5 Excellent Reasons to Use Aluminum Foil
- Paint Realistic Wrinkles in Acrylic
- Painting Clothing in an Acrylic Portrait
- Paint a Cloudy Sky Acrylic
- How to add Semi-Opaque Highlights
- How to Enhance the Contrast in Your Acrylic
- How to Add Glaze to Your Acrylic Painting
- Paint Realistic Reflections on Eyeglasses in an Acrylic Portrait
- Build Up Depth on Your Acrylic Portrait Backgrounds
- How Do You Do Layers With the Glazing Technique?
- Learn How to Paint Wrinkles in Acrylic
Read more about how to paint a portrait that you can surely be proud of!
I’d love to hear your thoughts on this video. Please share it with your friends and family. Let me know if you have any further questions. I’ll greatly help you.
If you’d like to learn more, sign up for my free email tips and video class today.
Learn How to Paint Acrylic Portraits With My Free Mini-Video Course!
Thank you so much for taking the time to read this tutorial and watch the video. That means a lot to me. I hope you find it very helpful in your portrait painting.
Yours for Better Portraits,

P.S. Did you find this post helpful or encouraging? If so, send it in ahead! Let others know with the share buttons below. I’d love to hear your comments. Thank you so much! Also, do you have a question on acrylic portrait painting you’d like answered? Let me know, and I’d be happy to help!
How to Paint Golden Dog Fur with Glazes in Acrylic
Learn the art of painting realistic golden fur with layered glazing techniques
Introduction
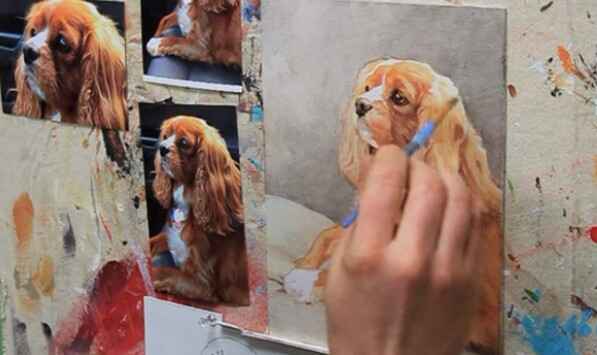
Painting fur, especially the luxurious golden tones of a dog’s coat, can be both challenging and rewarding. This guide will walk you through the process of how to paint golden dog fur using acrylic glazes to achieve a realistic fur texture. Capturing the softness and depth that make your pet portraits stand out. By layering colors and adding subtle details, you can create a painting that feels lifelike and rich in detail.
Step 1: Preparing Your Painting
Before diving into the glazing process, ensure your painting is at the mid-point of completion. You should have the basic colors, values, and contrasts laid out. For this demonstration, the subject is an 8×10 commission portrait of a dog, with the fur already sketched and the initial layers of paint applied.
Step 2: Choosing Your Colors and Medium
The key to painting realistic fur lies in the selection of colors and the medium. For golden fur, start with a clear glazing medium mixed with raw umber dark—a deep, rich brown that’s essential for adding depth. This color will serve as the base for building up the layers of fur.
Step 3: Applying the First Glaze
Dip your brush into the glazing medium and add a small amount of raw umber. The goal is to create a translucent layer that enhances the existing colors without overwhelming them. Gently brush this glaze over the fur, focusing on areas where you want to deepen the shadows and add warmth. Use your finger to softly blend the edges, ensuring a smooth transition between the glazed areas and the underlying paint.
Step 4: Building Depth with Additional Glazes
Continue adding layers of glaze to build depth in the fur. To enhance the natural tones, mix a touch of alizarine crimson with the raw umber, creating a warm, reddish-brown hue. Apply this mixture to areas like the ears and around the eyes, where the fur naturally darkens. Remember to work in thin layers, gradually building up the color intensity.
Step 5: Adjusting Tones and Highlights
As you layer your glazes, you might find some areas becoming too warm or dark. To balance this, mix in a small amount of white with your glazing medium. White has a cooling effect, which can help to tone down overly warm areas. Apply this cooler glaze to sections of the fur that need to recede or appear lighter. For instance, if the body of the dog appears too dark compared to the reference photo, this cool glaze can help bring it closer to the desired tone.
Step 6: Adding Fine Details
Once you’ve built up the depth and tone, it’s time to add the finer details that make the fur appear realistic. Use a small, pointed brush to carefully darken areas between individual strands of fur, particularly around the dog’s eyes, nose, and forehead. These darker details will give the fur its texture and make the painting pop.
Step 7: Balancing Opacity and Transparency
While glazes add beautiful translucency to your painting, it’s important to balance this with some areas of opacity. Opaque layers, when used sparingly, can enhance the richness and substance of the fur. Mix your paint with less medium to create these opaque layers, and apply them strategically where the fur appears thickest or where you want to emphasize highlights.
Step 8: Final Adjustments and Highlights
As you near the completion of the painting, step back and evaluate the overall composition. Are there areas that need more contrast? Do certain sections of fur need to be lightened or darkened? Make these adjustments with additional glazes or opaque layers as needed. Finally, add the brightest highlights to the fur, using a nearly opaque mix of white and your chosen colors. These highlights should be applied sparingly, focusing on the areas where the light naturally hits the fur.
Tips and Techniques:
- Work in Layers: Building up the fur with multiple thin glazes allows you to achieve a rich, realistic texture.
- Use a Soft Brush: For blending glazes, a soft brush works best to avoid harsh lines.
- Keep Your Palette Fresh: As the medium starts to dry, refresh your palette to maintain the fluidity of the paint.
- Experiment with Color: Don’t be afraid to adjust your glazes with different color mixes to match the fur’s tone.
Painting golden dog fur with acrylic glazes is a technique that requires patience and practice, but the results are well worth the effort. By layering colors and carefully balancing opacity with transparency, you can create a portrait that truly captures the essence of your furry subject. Whether you’re a beginner or an experienced artist, these techniques will help you elevate your pet portraits to new levels of realism.
Read more about my additional resources, tutorials, to learn more and check out my free courses here. Whether you’re a beginner or an experienced artist, there’s always something new to learn and apply to your paintings. Happy painting!
- Sketching Your Painting Accurately
- Beginning a Pet Portrait in Acrylic
- The Mystery of Realism in Painting
- Apply A Burnt Sienna Glaze to a Portrait
- Learn How to Sketch a Portrait Freehand in 45 Minutes
- Adding highlights to your acrylic painting
- 5 Excellent Reasons to Use Aluminum Foil
- Paint Realistic Wrinkles in Acrylic
- Painting Clothing in an Acrylic Portrait
- Paint a Cloudy Sky Acrylic
- How to add Semi-Opaque Highlights
- How to Enhance the Contrast in Your Acrylic
- How to Add Glaze to Your Acrylic Painting
- Paint Realistic Reflections on Eyeglasses in an Acrylic Portrait
- Build Up Depth on Your Acrylic Portrait Backgrounds
- How Do You Do Layers With the Glazing Technique?
- Learn How to Paint Wrinkles in Acrylic
Read more about how to paint a portrait that you can surely be proud of!
I’d love to hear your thoughts on this video. Please share it with your friends and family. Let me know if you have any further questions. I’ll greatly help you.
If you’d like to learn more, sign up for my free email tips and video class today.
Learn How to Paint Acrylic Portraits With My Free Mini-Video Course!
Thank you so much for taking the time to read this tutorial and watch the video. That means a lot to me. I hope you find it very helpful in your portrait painting.
Yours for Better Portraits,

P.S. Did you find this post helpful or encouraging? If so, send it in ahead! Let others know with the share buttons below. I’d love to hear your comments. Thank you so much! Also, do you have a question on acrylic portrait painting you’d like answered? Let me know, and I’d be happy to help!

New Portrait Painting Class Coming Very Soon!
I’m SO excited for the new painting class that I will be opening up tomorrow!
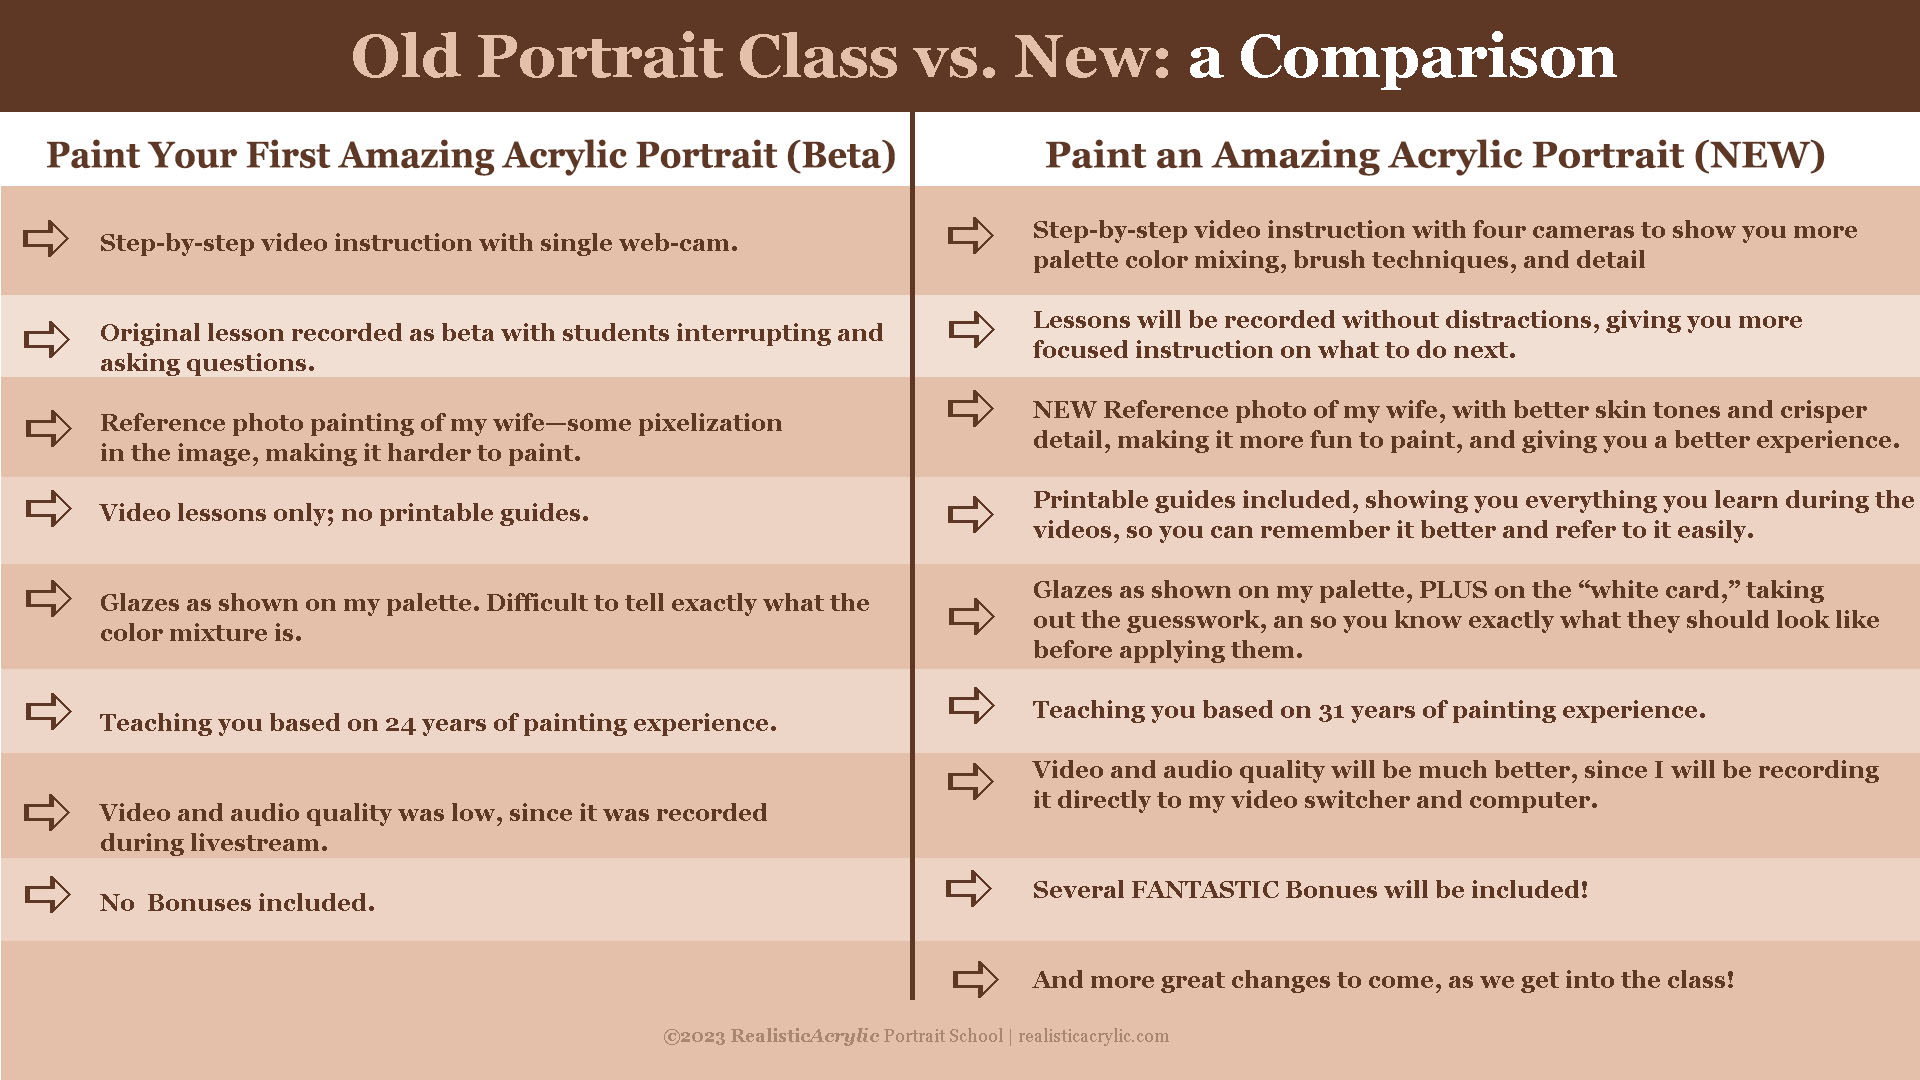
So what’s the difference between that one and the old one?
Well, the first one, “Paint Your First Amazing Acrylic Portrait,” was launched waaaay back in 2017. One of my online followers, Dorothy, asked and asked and asked me when I was going to teach a class. I had taught in-person classes for a while, but I wasn’t sure if it was possible to teach online.
Despite my uncertainty, a very eager Dorothy, who was in her 80’s, bought a webcam and I walked her through on how to set it up. Then she asked me, “IF you were to teach a class, how much would you charge?”
I researched online, and it seemed like $97 was a good price. So I told her, and she said, “I’ll mail you a check.”
So now, I HAD to do the class!
I let the people on my email list of 141 people know and 10 signed up! And that was my original class. I taught it all live. I bought an online class teaching me how to teach an online class. They said, “it’s better just to do it imperfectly than to be a perfectionist and not do it at all.”
I took that to heart and decided to take action.
From several conversations with artists, I learned what they wanted in a class, and what frustrations they were experiencing while trying to paint a portrait in acrylic. I created my lesson plan based on that.
Quickly, I suspended my webcam with some sticks and wire on the ceiling and started meeting with the students once a week, and recording the lessons.
That first class was good—for a beta class—and hundreds of students got great results from it. But I know it could be better. I’ve gotten tons of feedback. Like hundreds of comments from students to know what to improve.
So what will be the difference between the classes?
Let me show you.
As you can see, God willing, the new class will be TONS better! I am excited to offer it to you.
Tomorrow, I’ll give you more details and open it up for enrollment.
Sign up here on my email list to get the invite:
Learn How to Paint Acrylic Portraits
Blessings,
Matt
P.S. Do you have any questions about this class? Leave a comment below. I’m excited to teach you!
How to Paint Realistic Trees & Landscapes: Technique
I’ll show you what colors to use (and why), how to mix the paint with matte medium for the glazing technique
Introduction
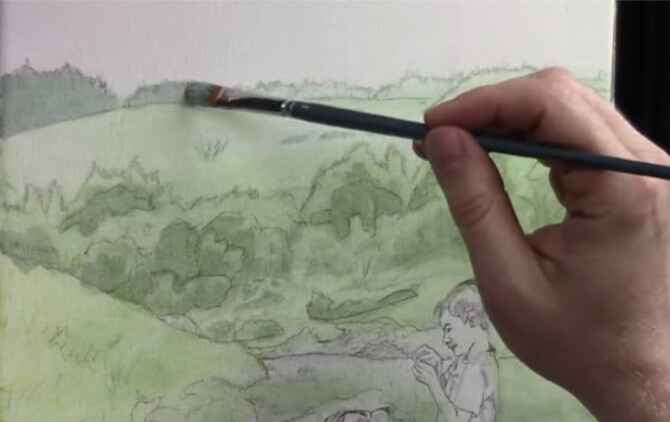
Creating realistic trees and landscapes in acrylic paintings can be a rewarding yet challenging task. The secret to mastering this lies in the glazing technique, which allows for depth, luminosity, and a natural appearance. In this guide, we’ll walk through a detailed process to help you bring your landscape elements to life. And I’ll show you how I paint realistic trees & landscapes using a technique and a step-by-step process.
Understanding the Glazing Technique
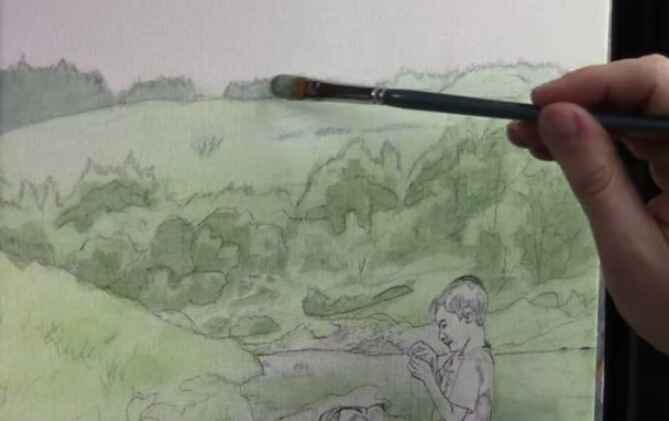
Glazing is a fundamental technique in acrylic painting, where you apply thin layers of translucent paint to build depth and vibrancy. This method is particularly useful when painting backgrounds, like trees in landscapes, as it preserves the underlying sketch while adding color and detail gradually.
Materials Needed:
- Acrylic paints (ultramarine blue, phthalo blue, titanium white, raw sienna, raw umber dark)
- Matte medium
- Brushes (quarter-inch flats, rounds, filberts)
- Palette for mixing colors
Step-by-Step Process:
- Mixing the Glaze: Start by creating your glaze mixture. Combine a small amount of paint with a generous amount of matte medium. The matte medium is a clear acrylic without pigment, allowing for translucent layers that maintain the integrity of your initial sketch.
- Choosing the Right Colors: Begin with subdued colors for the background, as these will give the illusion of distance. For instance, mix ultramarine blue with raw sienna to create a subdued green. To add variety, incorporate phthalo blue and titanium white, adjusting with raw umber dark to neutralize any intensity.
Painting Trees in the Distance
To create realistic trees in the background, focus on cooler, less intense colors. These colors recede visually, making the trees appear further away.
- Block in the Shapes: Use a mix of phthalo blue, ultramarine blue, and a touch of titanium white for the distant trees. Lightly apply this mix to establish the overall shape, not worrying too much about staying within the lines—overlapping can be adjusted later with background colors.
- Adjusting Tones: If your color is too vibrant, add raw umber dark, to tone it down, creating a more natural look. This step is crucial, as it ensures that your distant trees don’t overpower the foreground elements.
- Layering with Glazes: Continue layering glazes to build up the form of the trees. Use a dry-brush technique to add subtle transitions between light and shadow, which will give your trees a more three-dimensional appearance. Remember, the goal is to see the abstraction within realism—simplify complex shapes into manageable forms.
Bringing the Midground to Life
The midground trees and landscape elements should be more defined than those in the background but still less intense than the foreground.
- Creating Midground Colors: For the midground, slightly warm up your color palette by adding more raw sienna to the mix. This will create a gentle contrast between the cooler background trees and the warmer midground.
- Detailing with Brushwork: Use smaller brushes to add details like branches and foliage. Focus on capturing the shapes and shadows without getting too detailed, as this can detract from the overall realism. It’s about striking a balance between simplicity and complexity.
Final Touches: Adding Depth to the Foreground
The foreground is where you can introduce the most detail and contrast, drawing the viewer’s eye.
- Darkening the Shadows: To add depth, mix a darker shade by combining ultramarine blue, phthalo blue, and a bit of raw umber dark. Apply this to the base of the trees and other shadowed areas.
- Highlighting with Glazes: Use warm glazes to highlight areas where light would naturally hit. This will make the trees and landscape pop, giving the impression of sunlight filtering through.
- Maintaining Color Harmony: As you paint, continually ask yourself where else you can apply the current color mix. This promotes harmony across the painting and helps unify the different elements.
The glazing technique is a powerful tool for creating realistic trees and landscapes in acrylic paintings. By layering translucent colors and focusing on the subtle interplay of light and shadow, you can achieve a natural and immersive scene. Remember to be patient and allow the process to unfold gradually. With practice, you’ll find that your ability to capture the beauty of nature in your paintings will significantly improve.
Tips and Techniques Recap:
- Use matte medium to create translucent glazes.
- Start with cooler, subdued colors for distant trees.
- Layer glazes to build depth and form.
- Strike a balance between simplicity and detail.
- Apply color harmony by reusing mixtures across the painting.
By incorporating these techniques, you’ll elevate your landscape paintings, making them more lifelike and captivating.
Read more about my additional resources, tutorials, to learn more and check out my free courses here. Whether you’re a beginner or an experienced artist, there’s always something new to learn and apply to your paintings. Happy painting!
- Sketching Your Painting Accurately
- Beginning a Pet Portrait in Acrylic
- The Mystery of Realism in Painting
- Apply A Burnt Sienna Glaze to a Portrait
- Learn How to Sketch a Portrait Freehand in 45 Minutes
- Adding highlights to your acrylic painting
- 5 Excellent Reasons to Use Aluminum Foil
- Paint Realistic Wrinkles in Acrylic
- Painting Clothing in an Acrylic Portrait
- Paint a Cloudy Sky Acrylic
- How to add Semi-Opaque Highlights
- How to Enhance the Contrast in Your Acrylic
- How to Add Glaze to Your Acrylic Painting
- Paint Realistic Reflections on Eyeglasses in an Acrylic Portrait
- Build Up Depth on Your Acrylic Portrait Backgrounds
- How Do You Do Layers With the Glazing Technique?
- Learn How to Paint Wrinkles in Acrylic
Read more about how to paint a portrait that you can surely be proud of!
I’d love to hear your thoughts on this video. Please share it with your friends and family. Let me know if you have any further questions. I’ll greatly help you.
If you’d like to learn more, sign up for my free email tips and video class today.
Learn How to Paint Acrylic Portraits With My Free Mini-Video Course!
Thank you so much for taking the time to read this tutorial and watch the video. That means a lot to me. I hope you find it very helpful in your portrait painting.
Yours for Better Portraits,

P.S. Did you find this post helpful or encouraging? If so, send it in ahead! Let others know with the share buttons below. I’d love to hear your comments. Thank you so much! Also, do you have a question on acrylic portrait painting you’d like answered? Let me know, and I’d be happy to help!

