- You are here:
- Home »
- Blog »
- Video Tutorial »
- How to Refine a Traced Sketch Freehand

How to Refine a Traced Sketch Freehand
Learn the tips and techniques to enhance your traced sketch using freehand refinements for a more dynamic and detailed artwork.
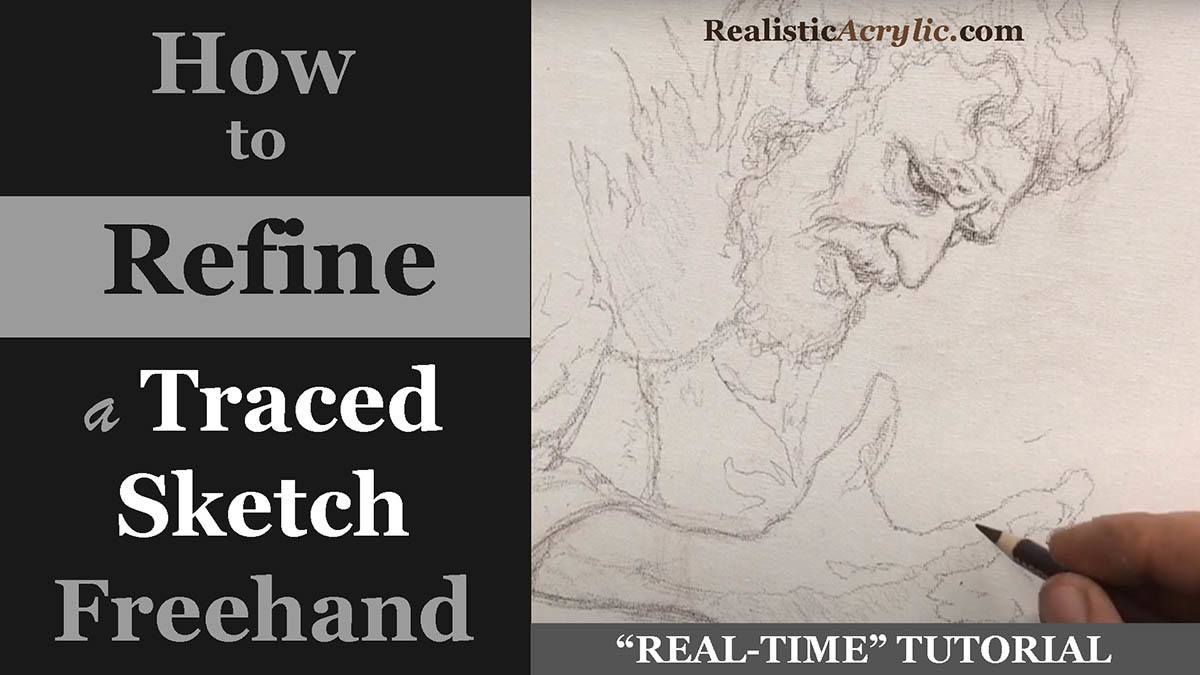
Now what? Begin painting? Not so fast! 🙂 In this video, I’ll show you how to refine a traced sketch freehand and to make it ready to paint upon.
This is for the book of Isaiah by Russell Stendal and it’s an illustration based off this image here of a man in intercessory prayer. And originally, I did a video showing the tracing process, asking whether it’s ok to trace. And I think I answered that question, that it is—as long as you do freehand sketching and work with grids. But especially as you work with freehand sketching, which will help you to improve as an artist.
Now, I’m going to work in this sketch to show you the process of tightening up a sketch done by tracing initally and the tracing process does leave you with a lot of work left to be done. So, I’m going to show you how I’m going to add additional shading in detail and then have a sketch that I can paint on top of.
The Power of Freehand Refinements
Traced sketches are often used by artists to quickly capture the proportions and major features of a subject. However, relying solely on tracing can result in a flat, lifeless image. In this guide we will explore how to refine a traced sketch freehand, enhancing the details, adding depth, and preparing the sketch for the painting stage. By the end of this tutorial, you’ll understand how to transform a traced sketch into a dynamic, polished artwork ready for the next step.

The Importance of Freehand Refinement
When an artist traces an image, they capture the basic outlines but often miss out on critical details like shadows, textures, and fine forms. This is where freehand refinement comes into play. It allows you to go beyond the rigid lines of a traced image and add life to the drawing.
In this tutorial, I’ll demonstrate how to refine a traced sketch freehand based on my work on a sketch of Isaiah or Hezekiah, which was originally traced. The traced lines were helpful to get the basic structure down quickly, but the freehand refinements were crucial for adding the depth, shading, and detail needed for an intercessory prayer-themed illustration.
Step 1: Shading and Detailing the Hands
Hands are complex and full of intricate details like tendons, veins, and shadows, which are often missed in a simple traced sketch. To refine the hands in this illustration, start by adding shading to differentiate the forms. Pay attention to areas where light hits the fingers and where shadows fall.
- Tip: Focus on the fingertips and the blood vessels to give a realistic, textured appearance to the hands.
- Technique: Use a light pencil to gently shade in the forms and increase pressure in areas where darker shadows fall, especially around the tendons and between the fingers.
Step 2: Refining Facial Features
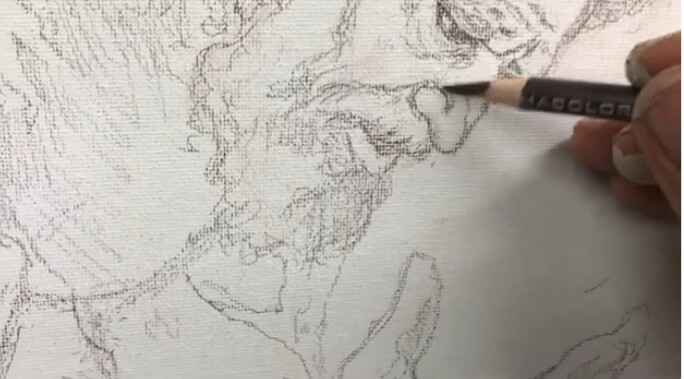
The face is another area that greatly benefits from freehand refinement. In this particular sketch, I had traced the basic lines of the face, but it still needed significant work to look convincing. I added texture to the beard and refined the nose’s shading to give it a more three-dimensional appearance.
- Tip: When refining facial features, focus on adding shadow to areas like the nose, cheekbones, and chin. This helps to convey depth and structure.
- Technique: Create subtle distinctions between the different parts of the nose (e.g., the wing and the ball) by gently shading around the contours. Don’t hesitate to erase and rework lines if they aren’t quite right. Precision is key in this step.
Step 3: Adjusting Proportions and Textures
One of the challenges with tracing is that it can sometimes lead to slightly distorted proportions. Freehand refinement allows you to adjust these proportions for greater accuracy. For instance, I changed the hairstyle in this sketch to make it look less like myself (since I modeled for it) and more like the character I intended to depict.
- Tip: Use freehand sketching to add texture to the hair and adjust any features that seem off.
- Technique: When drawing hair, follow the natural flow of the strands, adding texture by varying the direction of your pencil strokes. This adds realism to the hair, especially in areas where light and shadow interact.
Step 4: Refining Clothing and Drapery
Clothing, especially in historical or religious illustrations, requires careful attention to the way fabric drapes and folds. In the sketch of Isaiah/Hezekiah, I added shading to the clothing to give it volume and ensure it looked appropriate for the era being depicted.
- Tip: Study the way fabric falls on the body and add shadow in the deeper folds to create a sense of weight and movement.
- Technique: Use long, fluid strokes to indicate folds, and vary your shading to show where the light hits the fabric versus where it falls into shadow.
Step 5: Adding Final Touches to the Sketch
As you refine your traced sketch freehand, don’t be afraid to go back and rework certain areas that don’t feel quite right. For example, I added a scroll to the hands to illustrate a significant moment in the story of Hezekiah, when he spread a threatening letter before the Lord and prayed for deliverance.
- Tip: Small details, such as props or background elements, can enhance the narrative of your illustration.
- Technique: Incorporate these elements with care, ensuring that they integrate naturally into the composition without overshadowing the main subject.
Final Thoughts on Freehand Refinement
Refining a traced sketch freehand is an essential step for any artist who wants to create dynamic, realistic artwork. The tracing process can save time, but it’s the freehand refinement that brings the sketch to life. By focusing on shading, texture, and proportion, you can take a basic traced image and transform it into a detailed and accurate foundation for painting.
Just like building a house requires a solid foundation, a painting requires a well-executed sketch. The time and effort you put into refining your sketch freehand will set the stage for a more successful painting, allowing you to focus on color and brushwork rather than correcting mistakes.
Conclusion
Refining a traced sketch freehand involves improving proportions, adding textures, and sharpening details to ensure the sketch serves as a strong foundation for painting. This process is especially useful in achieving realistic, dynamic compositions. Remember that tracing is just the starting point; it’s the freehand refinement that makes the difference. Keep practicing your freehand sketching skills to improve your artistic abilities and bring more depth to your work.
If you’re looking for more instructional videos on how to improve your acrylic painting, visit www.realisticacrylic.com for more tutorials and check out my free courses here.
- How to Paint Foliage Using the Acrylic Glazing Technique
- How to Trace for an Accurate Portrait Sketch
- How to Paint Realistic Eyes in Your Acrylic Portrait
- How to Add Raw Umber Dark & Ultramarine Blue to Your Portrait
- How to Make Your Own Raw Umber Dark
- How to Paint Realistic Trees & Grass in Your Acrylic
- How to Block In Skin Tone Values Using Glazing Technique
- How to Paint Vibrant Reds in Your Acrylic Portrait
- How to Glaze Background Colors & More Acrylic Portrait
- How to Paint White Clothing in Your Acrylic Portrait
- How to Easily Transition from a Sketch to a Painting
- How to Block In Shading & Skin Tones in Your Acrylic
- How to Build Up Color on Acrylic Pet Portrait
- How to Build Up Form on Clothing with Acrylic
- How to Paint Dark Clothing Using Acrylic Glazing Technique
- How to Paint a 24 x 30 Acrylic With 30 People
- How to Do Smooth Shading with Acrylic
- How to Sketch an Acrylic Portrait with a Grid
Read more about how to paint a portrait that you can surely be proud of!
I’d love to hear your thoughts about this video. Please share it with your friends and family. Let me know if you have any further questions. I’ll greatly help you.
If you’d like to learn more, sign up for my free email tips and video class today.
Learn How to Paint Acrylic Portraits With My Free Mini-Video Course!
Thank you so much for taking the time to read this tutorial and watch the video. That means a lot to me. I hope you find it very helpful in your portrait painting.
Yours for Better Portraits,

P.S. Did you find this post helpful or encouraging? If so, send it on ahead! Let others know with the share buttons below. I’d love to hear your comments. Thank you so much! Also, do you have a question on acrylic portrait painting you’d like answered? Let me know, and I’d be happy to help!
