Category Archives for Uncategorized

How to Paint Dark Clothing Using Acrylic Glazing Technique
Understanding the basics of acrylic glazing and why It’s key for dark clothing
When painting a portrait, capturing the subtle details of clothing is crucial to creating a realistic piece. Dark clothing, in particular, poses challenges as it requires careful control of shading and depth. In this tutorial, we will explore how to use the acrylic glazing technique to paint dark clothing, ensuring smooth transitions and a natural, realistic appearance.
What is Acrylic Glazing?
The acrylic glazing technique involves layering thin, translucent layers of paint mixed with a medium to create depth and luminosity. By gradually building up the color through glazes, you can achieve a smooth, realistic effect while retaining the vibrancy of your colors. Glazing is especially effective when painting dark clothing, as it allows you to control the opacity and create the illusion of depth in the fabric.
Step-by-Step Guide to Painting Dark Clothing
1. Prepare Your Palette
Begin by preparing your palette with a range of dark colors suitable for the clothing in your reference image. I started with raw umber and ultramarine blue to create a grayish-black tone, because it is perfect for blocking in dark areas. These shades can easily be adjusted by adding more blue or brown, but depending on the desired look.
Tip: When mixing colors for dark clothing, avoid overly chromatic (saturated) colors. Then by adding a small amount of brown to your dark blue will keep the color muted and natural.
2. Apply the First Glaze
The first glaze should be about 80% translucent. I use to mix of 80% matte medium and 20% paint for his glazes. Using a flat edge brush, then lightly apply the glaze to areas of the clothing where you want to build shadows or enhance the darkness of the fabric. For example, if the subject is wearing black pants, this glaze helps you establish the foundational shadows.
The key is to apply the glaze lightly. You can always add more layers later but removing an overly dark glaze is difficult without disturbing the painting beneath it.
3. Work in Layers
One of the most important principles of glazing is patience. It’s important to work in layers, because building up the color gradually helps avoid overpowering the piece. After each layer dries, assess where more depth is needed and apply additional glazes.
4. Darken Areas as Needed
For darker clothing, such as black or navy blue, continue applying layers of glaze until you achieve the desired opacity. You can add a little more paint to your glaze mix as you progress, but always keep the medium-to-paint ratio higher to maintain translucency.
In this case, I use a glaze mixed with raw umber and ultramarine blue to paint the folds and creases of dark pants, gradually deepening the shadows. As I work on the darker sections of the fabric, then layering technique allows me to create realistic folds and depth without losing the base sketch.
5. Create Smooth Transitions
Dark clothing often requires smooth transitions between light and shadow, especially in areas like folds or wrinkles in the fabric. Then I use a combination of vertical and horizontal brushstrokes to blend the glazes seamlessly. Because this helps prevent harsh lines and ensures that the transitions appear natural.
Tip: Keep the edges of your brushstrokes wet while working to avoid uneven texture or dry edges. This is especially important when working on hard surfaces like hardboard, where brushstrokes tend to show more prominently.
Adjusting for Realism
1. Refining Details
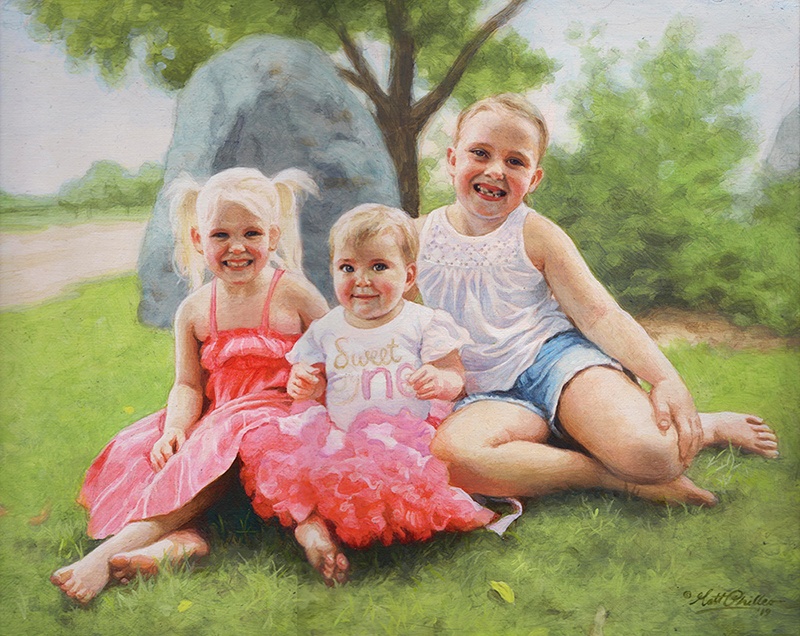
As you build up layers on the dark clothing, it’s essential to refine the smaller details like buttons, seams, or small highlights. Hence I emphasize the painting around the objects, leaving lighter areas like baby legs or shoes untouched to maintain the painting’s structure.
By painting around the lighter areas, the clothing appears more defined, and the overall composition stays balanced.
2. Capturing Light and Shadow
While the clothing may appear black in the reference photo, shadows and light reflections will alter its appearance in various areas. I highlight the importance of understanding value—the range of lightness and darkness when painting clothing. For instance, even khaki pants may appear black in shadows, so paying attention to how light interacts with fabric is key to achieving realism.
Troubleshooting Common Mistakes
- Overly Chromatic Shadows: If your shadows look too blue or intense, add a touch of brown to balance the color.
- Stiff Transitions: Use a mix of vertical and horizontal strokes to blend harsh lines.
- Overworking the Paint: Keep glazes thin and translucent to avoid muddying the details underneath.
Final Touches for Dark Clothing
Once the clothing has the right amount of depth, use a final, darker glaze to emphasize folds, creases, and any significant shadow areas. This will enhance the three-dimensionality of the fabric. Then the final step involves darkening specific areas like the folds of the pants and the shadows under the sleeves.
I also adjusts the values slightly with a thicker glaze for wrinkles in sweaters and shirts. Because this final adjustment adds realism and helps bring the clothing to life.
When using the acrylic glazing technique to paint dark clothing, it allows you to build rich, detailed layers that create depth and realism. As you work through the process, remember to start with thin layers, gradually adding more depth with each glaze. Then, by understanding value and how light interacts with fabric, you can achieve stunning results that enhance your portrait.
Read more about my additional resources, tutorials, to learn more and check out my free courses here. . Whether you’re a beginner or an experienced artist, there’s always something new to learn and apply to your paintings. Happy painting!
- Adding highlights to your acrylic painting
- 5 Excellent Reasons to Use Aluminum Foil
- Paint Realistic Wrinkles in Acrylic
- Painting Clothing in an Acrylic Portrait
- Paint a Cloudy Sky Acrylic
- How to add Semi-Opaque Highlights
- How to Enhance the Contrast in Your Acrylic
- How to Add Glaze to Your Acrylic Painting
- Paint Realistic Reflections on Eyeglasses in an Acrylic Portrait
- Build Up Depth on Your Acrylic Portrait Backgrounds
- How Do You Do Layers With the Glazing Technique?
- Learn How to Paint Wrinkles in Acrylic
Read more about how to paint a portrait that you can surely be proud of!
I’d love to hear your thoughts on this video. Please share it with your friends and family. Let me know if you have any further questions. I’ll greatly help you.
If you’d like to learn more, sign up for my free email tips and video class today.
Learn How to Paint Acrylic Portraits With My Free Mini-Video Course!
Thank you so much for taking the time to read this tutorial and watch the video. That means a lot to me. I hope you find it very helpful in your portrait painting.
Yours for Better Portraits,

P.S. Did you find this post helpful or encouraging? If so, send it on ahead! Let others know with the share buttons below. I’d love to hear your comments. Thank you so much! Also, do you have a question on acrylic portrait painting you’d like answered? Let me know, and I’d be happy to help!

How to Paint a 24 x 30 Acrylic With 30 People
How do I apply the first skin tone layer using acrylic glazing?
Introduction:
Creating a large acrylic portrait with 30 people can seem daunting, but with the right techniques and a methodical approach, it becomes a rewarding experience. In this guide, we’ll explore how to use the acrylic glazing technique to transition from a detailed sketch to a fully developed, realistic painting. You’ll discover how to paint a 24 x 30 acrylic portrait with 30 people in it. And then, block in the composition, build up layers, and maintain accuracy throughout the painting process.
Understanding the Acrylic Glazing Technique
Acrylic glazing involves mixing acrylic paint with a medium to create translucent layers. These layers are applied to gradually build up color and depth while allowing the underlying sketch to remain visible in the early stages. This technique is perfect for detailed portraits because it ensures that the sketch’s details are preserved until the final layers, helping to maintain likeness and composition throughout.
Step 1: Preparing the Sketch
Before painting, create a detailed sketch of your portrait on the canvas. Because this initial step is crucial for maintaining proportions and composition throughout the painting. Once the sketch is completed, seal it using a fixative spray or a thin layer of acrylic medium to prevent smudging.
Tip: A well-done sketch ensures accuracy in the final painting, and then helping to keep the likeness of each subject intact.
Step 2: Starting with Light Glazes
You can begin by mixing your acrylic paints with a generous amount of matte medium. Then the ratio should be about 90% matte medium to 10% paint. Because it creates a translucent layer that mimics the effect of watercolor.
To start, block in the largest areas of color. For this painting, the trees and sky in the background are crucial for setting the scene. Also, use a mixture of ultramarine blue and indian yellow to create a base green for the trees. Before you apply this glaze lightly use diagonal strokes to keep the edges smooth.
Technique Tip: Use overlapping strokes and keep a wet edge to avoid visible brush marks. It’s okay to slightly overlap the background onto the figures, as it’s easier to paint figures on top later than to leave halos around them.
Step 3: Building Up Layers Gradually
As you move forward, gradually increase the opacity of your paint by reducing the amount of matte medium. This allows for more depth and variation in tone. With each layer, the colors will become more vivid, and the details of the painting will start to emerge.
For the foreground, use raw sienna with a bit of burnt sienna to create earthy tones. Focus on shadows in this area, applying the glaze only where needed. Remember, the key is to work gradually—start light and build up to darker shades with each layer.
Pro Tip: Always observe your reference photo carefully. Notice the lighting, reflected light, and shadow areas. Let the reference guide your color and tonal decisions.
Step 4: Working Around the Figures
Painting 30 people in one scene requires careful attention to detail, especially when working around the figures. Use your flat brush to “cut around” the subjects with precision. A light hand is essential, so you don’t lose the crispness of your sketch.
In this step, patience is key. It may take several layers to achieve the desired effect for the background before moving on to the details of each figure.
Tip: If you accidentally paint over a subject, don’t worry. You can always refine those areas in subsequent layers.
Step 5: Detailing the Subjects
Once the background is sufficiently built up, shift your focus to the figures. For this commission with 30 people, it’s essential to keep the likeness of each subject intact. Begin by blocking in basic skin tones and clothing colors. Then, work gradually to add details like facial features and expressions.
Using smaller brushes, switch to more opaque paints mixed with a bit of medium for smoother transitions between shadows and highlights. Be mindful of each subject’s individuality, making sure to capture their unique characteristics.
Technique Tip: To keep the subjects realistic, pay attention to light sources. Ensure that the lighting on each figure matches the overall lighting of the scene.
Step 6: Final Adjustments
As the painting nears completion, start refining the details. Check your reference photo for any missed nuances, like subtle shadows or highlights. Use a thin glaze to soften transitions where needed and add contrast to areas that require more depth.
The acrylic glazing technique allows for flexibility, so you can always adjust the painting by adding another glaze. This helps to perfect the overall look and feel of the portrait.
Tip: Step back regularly to view the painting from a distance. This gives you a fresh perspective and helps spot areas that need more attention.
Painting a 24 x 30 acrylic portrait with 30 people may seem challenging, but with the acrylic glazing technique, the process becomes much more manageable. By building up layers gradually, you’ll maintain the detail of your sketch while adding depth and vibrancy to your painting. Remember to take your time, and don’t be afraid to go back and refine areas as needed.
Whether you’re a beginner or an experienced artist, this method will help you achieve stunning, realistic results. Give it a try and see how your portraits can come to life with a little patience and practice.
Portrait painters know that it’s not easy to paint realistic skin tones. In acrylic, this is especially true. But what if there was a way where you didn’t have to have a perfect recipe or make it all happen in one shot? What if you could slowly, but predictably build up skin tones one layer at a time? And what if you could do it without losing your likeness in the sketch? That’s what I am going to show you today.
Now, this is just the start. But it’s a very good start. I’ll demonstrate, in real-time, in this 24 x 30 acrylic portrait of 30 people, how I am putting in the FIRST layer of skin tone color, using the acrylic glazing technique. What is the acrylic glazing technique? Watch over my shoulder in this video tutorial, and I’ll show you.
Back to that 24 x 30 acrylic portrait again! This time, I’m showing you how to block in the color for the hair. We’re using the acrylic glazing technique, where we mix a little bit of paint into a large amount of clear acrylic matte medium, and create blending with many faint layers.
- Adding highlights to your acrylic painting
- 5 Excellent Reasons to Use Aluminum Foil
- Paint Realistic Wrinkles in Acrylic
- Painting Clothing in an Acrylic Portrait
- Paint a Cloudy Sky Acrylic
- How to add Semi-Opaque Highlights
- How to Enhance the Contrast in Your Acrylic
- How to Add Glaze to Your Acrylic Painting
- Paint Realistic Reflections on Eyeglasses in an Acrylic Portrait
- Build Up Depth on Your Acrylic Portrait Backgrounds
- How Do You Do Layers With the Glazing Technique?
- Learn How to Paint Wrinkles in Acrylic
Read more about how to paint a portrait that you can surely be proud of!
I’d love to hear your thoughts on this video. Please share it with your friends and family. Let me know if you have any further questions. I’ll greatly help you.
If you’d like to learn more, sign up for my free email tips and video class today.
Learn How to Paint Acrylic Portraits With My Free Mini-Video Course!
Thank you so much for taking the time to read this tutorial and watch the video. That means a lot to me. I hope you find it very helpful in your portrait painting.
Yours for Better Portraits,
P.S. Did you find this post helpful or encouraging? If so, send it on ahead! Let others know with the share buttons below. I’d love to hear your comments. Thank you so much! Also, do you have a question on acrylic portrait painting you’d like answered? Let me know, and I’d be happy to help!

How to Sketch an Acrylic Portrait with a Grid
The guide provides tips on using colored pencils, understanding proportions, and achieving realistic details.
Introduction
Creating a precise and compelling acrylic portrait begins with a solid sketch. While using a grid method can simplify this process by ensuring accurate proportions and positioning. This guide will walk you through the steps of sketching an acrylic portrait with a grid, because using tips and techniques can enhance your drawing skills.
Understanding the Grid Method
Hence, the grid method is a powerful technique for achieving accuracy in portraiture. It involves overlaying a grid on your reference photo and your canvas, which helps in translating the proportions from the photo to your artwork. This approach reduces guesswork and improves accuracy, making it an excellent tool for both beginners and seasoned artists.
Setting Up Your Workspace
- Prepare Your Canvas: Start by gridding out your canvas. You can use a light-colored pencil to draw a grid of equal squares. This grid should correspond to the grid on your reference photo.
- Select Your Tools: For this sketch, a colored pencil in a flesh-tone shade, such as terracotta, is recommended. This choice helps blend more naturally with acrylic paints and avoids the grayish hue of graphite pencils.
Creating the Grid Overlay
- Reference Photo Preparation: Open your reference photo on a computer or tablet. Apply a grid overlay in a photo editing program to match the grid size on your canvas.
- Adjust the Image: If needed, crop or resize the image to fit your canvas proportions. Ensure that the grid lines on the photo align with those on your canvas.
Sketching the Portrait
- Starting with the Grid: Begin sketching from the lower left corner of your canvas. Use the grid lines to guide the placement of facial features and other details.
- Drawing Proportions: Focus on sketching the major lines and shapes first. Pay attention to where lines fall within each grid square. This method helps in maintaining the correct proportions and alignment of facial features.
- Using Colored Pencils: A terracotta-colored pencil is used to outline the portrait. This color blends well with flesh tones and minimizes the need for excessive layers of paint to cover graphite lines.
- Fine-Tuning Details: As you progress, refine the sketch by adding more detailed features. For areas requiring correction, use an eraser to adjust the lines while ensuring the grid remains intact.
Tips for Accurate Sketching
- Double-Check Proportions: Regularly compare your sketch with the reference photo to ensure accuracy. Adjust lines and proportions as needed.
- Use Erasers Wisely: A good eraser is crucial for making corrections without disturbing the grid lines. Both wide and gum erasers can be effective.
- Keep the Pencil Sharp: A sharp colored pencil provides better control and precision when sketching fine details.
Achieving Realistic Results
- Work in Sections: Focus on one section of the portrait at a time to maintain accuracy and avoid overwhelming yourself.
- Capture Details: Pay close attention to specific features such as the hairline, eyes, and facial contours. Ensure these details align with the grid for a realistic representation.
- Evaluate and Adjust: Continuously evaluate your sketch against the reference photo. Make adjustments to maintain consistency and accuracy.
The grid method is a valuable technique for sketching acrylic portraits. By following these steps and tips, you can achieve a well-proportioned and detailed sketch that serves as a solid foundation for your acrylic painting. Practice regularly to enhance your skills and create stunning portrait art.
- Adding highlights to your acrylic painting
- 5 Excellent Reasons to Use Aluminum Foil
- Paint Realistic Wrinkles in Acrylic
- Painting Clothing in an Acrylic Portrait
- Paint a Cloudy Sky Acrylic
- How to add Semi-Opaque Highlights
- How to Enhance the Contrast in Your Acrylic
- How to Add Glaze to Your Acrylic Painting
- Paint Realistic Reflections on Eyeglasses in an Acrylic Portrait
- Build Up Depth on Your Acrylic Portrait Backgrounds
- How Do You Do Layers With the Glazing Technique?
- Learn How to Paint Wrinkles in Acrylic
Read more about how to paint a portrait that you can surely be proud of!
I’d love to hear your thoughts on this video. Please share it with your friends and family. Let me know if you have any further questions. I’ll greatly help you.
If you’d like to learn more, sign up for my free email tips and video class today.
Learn How to Paint Acrylic Portraits With My Free Mini-Video Course!
Thank you so much for taking the time to read this tutorial and watch the video. That means a lot to me. I hope you find it very helpful in your portrait painting.
Yours for Better Portraits,
P.S. Did you find this post helpful or encouraging? If so, send it on ahead! Let others know with the share buttons below. I’d love to hear your comments. Thank you so much! Also, do you have a question on acrylic portrait painting you’d like answered? Let me know, and I’d be happy to help!

How to Paint a Pet Portrait: Acrylic Glazing Technique
Transform your pet portraits with simple glazing methods step by step guide for you
Painting a pet portrait can be a rewarding way to capture the unique personality of a beloved animal. In this tutorial, we’ll explore how to paint a pet [dog] using the acrylic glazing technique, which adds depth and realism through thin layers of color. By the end, you’ll be able to apply this technique to create a lifelike portrait of your pet or any other animal subject.
Setting the Foundation for Your Pet Portrait
Before diving into the painting process, it’s crucial to start with a solid foundation. In this case, I’m using a 5×7-inch hardboard panel as the canvas. To ensure accurate proportions, I utilized the grid method, which helps maintain the right structure without the need for extensive freehand drawing.
- Sketching: Use a light-colored pencil to draw a grid and map out the basic outlines of your pet’s features. This will give you a good framework without overpowering your final painting.
- Sealing the Sketch: Once the sketch is complete, seal it using a mixture of matte medium and gesso. This helps protect the drawing and slightly mutes it to prepare the surface for glazing.
Creating Contrast Through Initial Layering
At this stage, I applied white paint to bring out the highlights in the sketch, which allows me to set up three different values—dark (from the pencil), medium (from the tinted surface), and light (from the white paint). This helps establish an excellent base before moving into the glazing process.
Step-by-Step Acrylic Glazing Technique
1. Preparing the Palette
The first step in the glazing technique is preparing a palette with the colors you’ll need. For this pet portrait, I’m working with natural tones like raw umber, burnt sienna, and a mixture of blues for areas like the background or any clothing.
- Raw Umber Dark: A versatile brown for creating shadows and depth in the fur.
- Burnt Sienna: Ideal for adding warmth and reddish tones, especially in areas like the ears or the snout.
- Ultramarine Blue and Phthalo Blue: Used sparingly to build up cool tones for the background or details like clothing.
2. Mixing the Glaze
To create a glaze, mix a small amount of paint with clear acrylic medium, such as matte medium. This dilutes the paint, allowing for translucent layers that build up color gradually. Glazing helps retain the underlying details while adding a soft glow and depth.
Tip: Make sure to keep your glaze mixture fluid but not too watery, as overly diluted glazes can become streaky and hard to control.
3. Applying the First Glaze
For the first layer, I mixed a sepia tone using raw umber and matte medium. Then apply this mixture lightly with a flat brush (around half an inch in width). Because you begin by covering the broader areas of the dog’s fur, creating a soft wash that introduces subtle shadows and color shifts.
- Technique: Use long, smooth brushstrokes to spread the glaze evenly. You want to build up the tone gradually, so don’t rush the process.
- Patience Pays Off: Each layer should dry completely before applying the next one. This ensures the glazes stay transparent and don’t muddy the underlying layers.
4. Adding Depth with Darker Glazes
As the painting progresses, increase the intensity of your colors. Then for areas like the dog’s ears and snout, I used burnt sienna mixed with a small amount of white to cover the sketch lines and establish the mid-tones.
- Tip: Apply the glaze in light, feathered strokes, especially around the edges of the dog’s features to maintain softness.
- Layering Up: To add depth, apply darker glazes in multiple passes, allowing each to dry before adding more.
5. Highlighting with Lighter Tones
Although the dog in this portrait is predominantly white, it’s essential to add subtle shifts in color to avoid a flat appearance. For areas like the highlights on the fur, I used a light mixture of white and raw umber. The glazing method ensures that the layers remain translucent, which gives the fur a soft, glowing effect.
Brushwork and Finishing Touches
Choosing the Right Brush
The type of brush you use plays a significant role in the outcome of the painting. So, for this portrait, I relied on a combination of:
- Flat brushes: For broader areas and glazing.
- Detail brushes: For finer work around the eyes, nose, and mouth.
When applying glazes, a flat brush works best because it helps you spread the paint evenly. And of course for fine details like the dog’s fur texture around the eyes or nose, switch to a smaller detail brush.
Toning the Background
While working on the dog’s portrait, I also glazed the background. When the mixture of ultramarine blue and phthalo blue created a cool, subdued backdrop that complements the warm tones of the dog. And then the background was applied using the same glazing technique light, transparent layers that gradually deepen in tone.
Final Glaze and Adjustments
After completing the main details of the dog, it’s time to step back and assess the overall painting. Basically, you will apply the final, a very thin glaze of burnt sienna or raw umber where needed to tie the painting together and unify the colors. Because this softens the transitions between the light and dark areas, giving the portrait a more cohesive look.
Painting a pet portrait using the acrylic glazing technique is a satisfying way to capture the intricate details and personality of a beloved animal. By layering thin glazes of color, you can achieve both depth and luminosity that bring the painting to life. Whether you’re working on a commissioned piece or a personal project, these steps will help guide you toward creating a beautiful, realistic acrylic pet portrait.
Tips and Techniques Recap:
- Grid Method: Use it to ensure accurate proportions when sketching.
- Matte Medium and Gesso: Seal your sketch for a solid foundation.
- Glazing: Mix paint with matte medium for translucent layers.
- Brushwork: Use flat brushes for glazing and detail brushes for finer work.
- Patience: Allow each layer to dry fully before applying the next glaze.
- Highlighting: Subtle, lighter tones enhance depth and realism.
Read more about my additional resources, tutorials, to learn more and check out my free courses here. . Whether you’re a beginner or an experienced artist, there’s always something new to learn and apply to your paintings. Happy painting!
I’ll show you how he gives his acrylic pet portrait depth as adds shading, nuances and differentiates the dog from the background by using the correct values in shadows.
- How to Paint Foliage Using the Acrylic Glazing Technique
- How to Trace for an Accurate Portrait Sketch
- How to Paint Realistic Eyes in Your Acrylic Portrait
- How to Add Raw Umber Dark & Ultramarine Blue to Your Portrait
- How to Make Your Own Raw Umber Dark
- How to Paint Realistic Trees & Grass in Your Acrylic
- How to Block In Skin Tone Values Using Glazing Technique
- How to Paint Vibrant Reds in Your Acrylic Portrait
- How to Glaze Background Colors & More Acrylic Portrait
- How to Paint White Clothing in Your Acrylic Portrait
- How to Easily Transition from a Sketch to a Painting
- How to Block In Shading & Skin Tones in Your Acrylic
- How to Build Up Color on Acrylic Pet Portrait
- How to Build Up Form on Clothing with Acrylic
- How to Paint Dark Clothing Using Acrylic Glazing Technique
- How to Paint a 24 x 30 Acrylic With 30 People
- How to Do Smooth Shading with Acrylic
- How to Sketch an Acrylic Portrait with a Grid
Read more about how to paint a portrait that you can surely be proud of!
I’d love to hear your thoughts on this video. Please share it with your friends and family. Let me know if you have any further questions. I’ll greatly help you.
If you’d like to learn more, sign up for my free email tips and video class today.
Learn How to Paint Acrylic Portraits With My Free Mini-Video Course!
Thank you so much for taking the time to read this tutorial and watch the video. That means a lot to me. I hope you find it very helpful in your portrait painting.
Yours for Better Portraits,
P.S. Did you find this post helpful or encouraging? If so, send it on ahead! Let others know with the share buttons below. I’d love to hear your comments. Thank you so much! Also, do you have a question on acrylic portrait painting you’d like answered? Let me know, and I’d be happy to help!

How to Sketch Your Painting Accurately
Every house has a foundation. A painting is no different.
Sketching is the foundational step for creating a compelling painting, whether it’s a portrait or a landscape. Because ensuring that your initial drawing is accurate will set the stage for a successful painting. So, let’s explore how you can refine your sketching techniques to produce a detailed, realistic sketch every time and learn how to sketch your painting accurately.
Understanding the Importance of Sketch Accuracy
One of the most critical aspects of a painting is the accuracy of the sketch. A well-executed sketch serves as a blueprint for your painting. If the proportions or features are off, it can affect the entire piece, making it harder to fix issues later on. Focusing on precision at the sketching stage will save time, reduce frustration, and elevate the final artwork.
In this tutorial, we’ll look at several key points to improve sketch accuracy, using examples from a portrait critique.
Tools and Techniques for Accurate Sketching
Accurate sketching requires the right tools and techniques. Below are some methods that will help ensure that your initial drawing is precise.
- Use a Grid Method
- The grid method is one of the most reliable ways to sketch your painting accurately. By dividing both your reference photo and your canvas into a grid of equal-sized squares, you can focus on one square at a time, drawing what you see in each section. This helps break down complex subjects into manageable portions, making it easier to capture fine details.
- Tip: Lightly draw the grid on your canvas with a pencil so that it can be easily erased later.
- Measure Proportions Carefully
- When sketching a portrait or any subject, it’s important to get the proportions right. Use a pencil to measure distances between facial features or elements of your painting. For instance, the distance between the eyes, nose, and mouth should be proportionate to the rest of the face.
- Technique: Hold your pencil at arm’s length and use it to compare the size of one part of the face with another.
- Check Your Angles
- Often, artists overlook the importance of angles. When sketching, observe the angles between key features, such as the tilt of a head or the angle of a jawline. A small discrepancy in an angle can change the entire expression of your subject.
- Tip: When drawing, use a straight edge or a reference line to guide the angles.
- Define Shape and Shadows
- Pay close attention to both the shape and shadow of the features you’re drawing. For example, the shape of a mouth is more than just the lips — it also includes the shadows cast by the lips and surrounding areas. This attention to detail will give your sketch depth and realism.
- Tip: Use faint lines at first to outline shadows, and darken them later as needed.
Key Areas to Focus on While Sketching
Some specific areas of a portrait or subject can be particularly tricky to sketch accurately. Here are some tips to help:
- Drawing the Mouth
- The mouth is an area where subtle differences can greatly affect likeness. Pay attention to the shape of the lips, the shadows they cast, and the angles at the corners of the mouth. Make sure to differentiate between the lips and the shadows below them.
- Technique: To make the mouth look realistic, avoid hard lines. Instead, use shading to define the lower lip and the soft shadow underneath it.
- Capturing Expressions
- A portrait’s success often hinges on capturing the subject’s expression accurately. Focus on small details like wrinkles and creases around the mouth and eyes. These features often emphasize expressions, such as smiles or frowns, and can add realism to your sketch.
- Tip: Observe how wrinkles and lines behave when someone smiles. They are essential to conveying emotion.
- Eyes and Their Importance
- The eyes are the focal point of many portraits. Getting the shape, angles, and light reflections in the eyes correct is crucial for capturing likeness and depth. Crow’s feet (wrinkles around the eyes) often enhance the realism of a smiling face.
- Technique: Use both horizontal and vertical lines to create a grid around the eye area. This helps maintain the proper distance between the eyes and makes them symmetrical.
Refining Your Sketch for Accuracy
Once the basic sketch is in place, the next step is to refine it. This includes erasing unnecessary lines and sharpening the ones that define key features.
Tip: Build up shadows gradually by layering light strokes rather than making heavy marks.
Erase Gently
Avoid heavy erasing, as it can damage the surface of your paper or canvas. Use a kneaded eraser, which is softer, to remove lines without leaving smudges.
Tip: Rather than rubbing, dab the eraser to lift the pencil marks gently.
Adjust Proportions if Needed
Even after you’ve completed your sketch, don’t be afraid to adjust proportions if something seems off. It’s much easier to make these corrections before you start painting.
Technique: Stand back from your sketch and look at it from a distance to check if the proportions still look accurate.
Use Sketchy Lines for Shadows
Instead of using solid lines, use light, sketchy strokes to define areas of shadow. This helps to give the drawing a more natural and softer look, which will enhance the realism when you start painting.
Watch my tutorial to learn more about sketching your painting accurately.
- How to Paint Foliage Using the Acrylic Glazing Technique
- How to Trace for an Accurate Portrait Sketch
- How to Paint Realistic Eyes in Your Acrylic Portrait
- How to Add Raw Umber Dark & Ultramarine Blue to Your Portrait
- How to Make Your Own Raw Umber Dark
- How to Paint Realistic Trees & Grass in Your Acrylic
- How to Block In Skin Tone Values Using Glazing Technique
- How to Paint Vibrant Reds in Your Acrylic Portrait
- How to Glaze Background Colors & More Acrylic Portrait
- How to Paint White Clothing in Your Acrylic Portrait
- How to Easily Transition from a Sketch to a Painting
- How to Block In Shading & Skin Tones in Your Acrylic
- How to Build Up Color on Acrylic Pet Portrait
- How to Build Up Form on Clothing with Acrylic
- How to Paint Dark Clothing Using Acrylic Glazing Technique
- How to Paint a 24 x 30 Acrylic With 30 People
- How to Do Smooth Shading with Acrylic
- How to Sketch an Acrylic Portrait with a Grid
Read more about how to paint a portrait that you can surely be proud of!
I’d love to hear your thoughts on this video. Please share it with your friends and family. Let me know if you have any further questions. I’ll greatly help you.
If you’d like to learn more, sign up for my free email tips and video class today.
Learn How to Paint Acrylic Portraits With My Free Mini-Video Course!
Thank you so much for taking the time to read this tutorial and watch the video. That means a lot to me. I hope you find it very helpful in your portrait painting.
Yours for Better Portraits,
P.S. Did you find this post helpful or encouraging? If so, send it on ahead! Let others know with the share buttons below. I’d love to hear your comments. Thank you so much! Also, do you have a question on acrylic portrait painting you’d like answered? Let me know, and I’d be happy to help!

Spring 2021 Acrylic Portrait Painting Challenge: Gridding Your Canvas for an Accurate Sketch
One of the biggest struggles portrait artists have is getting an accurate likeness. In this lesson, I will show you how to grid your canvas, so that you will be able to not only make a sketch with good proportions but also get a good likeness too.
I’ll show you exactly how to do it in this video…
How to grid your canvas to get an accurate sketch for your acrylic portrait
Gridding Your Portrait for an Accurate Sketch
Would like to paint this portrait with me and hundreds of other artists?
Take the 2021 Spring Portrait Painting Challenge!
You can register below and get started. It is completely FREE to join the challenge and participate. When you join, I’ll send you the “Welcome Kit” which includes:
- The Supplies List (so you know what you need to paint with us, your shopping list. 🙂 )
- The Reference Photo with and without the grid, high resolution, that you can download ready to print out or display on your tablet. You’ll be able to create an accurate portrait this way.
- The Palette Layout Guide showing you how to arrange your colors so they don’t get muddy on your palette
- The Master Class Lesson Schedule
- the Lessons emailed to you
- A private Facebook group to cheer you and help answer your questions
- And a few “bonuses” like opportunities to win my paid online classes
REGISTER TODAY. The challenge is ongoing, something you can do at your own pace. It’s not too late to enter!
Let me know if you have any questions and I look forward to teaching you more!
—Matt

Take the Fall Acrylic Portrait Painting Challenge!
Have you ever wondered if you could paint a portrait?
You can.
Take the Fall Acrylic Portrait Painting Challenge.
Last Spring, over 700 artists took the challenge and many painted an amazing portrait, their very first time. This jump-started some of the artists into doing commissioned portraits or painting beautiful pictures of their children and grandchildren.
In the challenge, we’ll all paint the same image together and I’ll teach you how to do it, step-by-step with demonstration videos.
Reference image for the Fall Acrylic Portrait Painting Challenge. Photograph by Jonah Greenman, used with permission
The Acrylic Portrait Painting Challenge is free to join and participate.
Register below to get the Welcome Kit, which includes the Supplies List, the Full Resolution Reference Image with a Grid, Palette Layout Guide, and the Masterclass Video Lesson Schedule.
I look forward to seeing you paint a portrait you can be proud of!
And now, here are the Masterclass Lessons:

Portrait Painting of a Veteran at the Yurt
Is it possible to do portrait painting while you’re away from your home, your usual studio area?
This was something I’ve always wanted to do: create art while camping. And for all the years I’ve gone camping, I’ve never been able to successfully do it.
But finally, at the end of June, my brother and I decided to go camping at a rustic yurt up in Cable, WI. Where is that? Let’s just say, it’s “way up north.” 🙂 And what is a yurt? It’s a round tent-like house, a permanent structure made of lattice wood, bound together with steel cable, and covered with fabric. We rented it through Airbnb for two days.
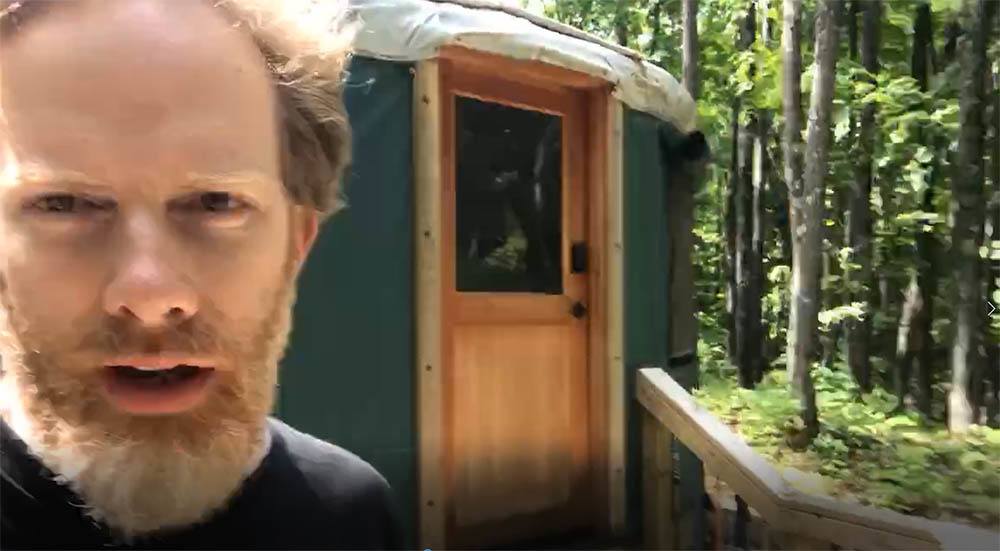
Acrylic portrait artist Matt Philleo ready to paint at a yurt in Cable, Wisconsin
We parked at the bottom of the hill and carried our gear up about a mile. We realized how out of shape we were! I also had my painting supplies: easel, palette, and brushes with me. In the middle of hiking and cooking, we decided to both do a little work: my brother wrote (he’s an author) and I painted.
Painting an acrylic portrait from photo inside a yurt while camping, 11 x 14 acrylic on canvas ©2019 by Eau Claire area portrait artist Matt Philleo
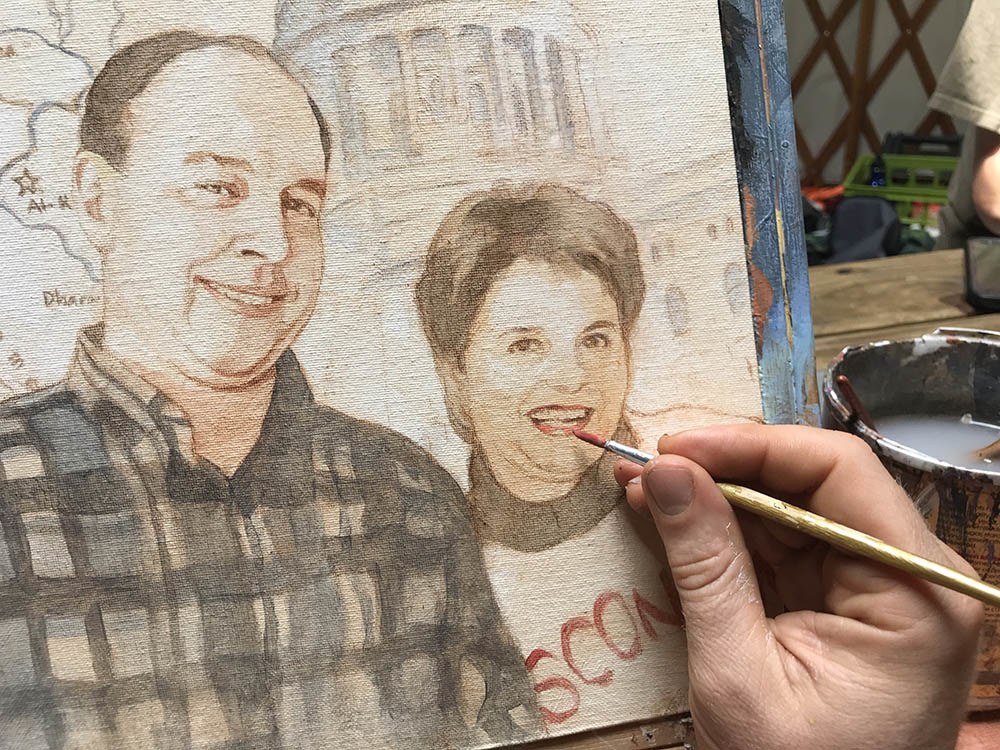
I know. You’re probably thinking I should have painted the scenery up there, and yes, it was beautiful. But I had a commissioned portrait from a photo to get done: a painting of a veteran that served in the gulf war. And I love painting people, so it hardly seemed like work.
After bacon, eggs, and oatmeal for breakfast, it was time for painting.
Here is a video showing the beginning part of the process. In this video, I am basically blocking in the values with just raw umber dark and ultramarine blue. Of course, it’s all thinned out and made translucent with matte medium.
And then, here’s the next video in the process. Here I’m adding some color with burnt sienna, alizarine crimson and a few other colors. We’re starting to build up some skin tones. Also working on the flannel shirt. It takes a lot of layers to get it dark enough to look realistic!
After lunch, we hiked, and then came back and did more work: refining the shadows and making sure the likeness is accurate.
Sometimes your sketch just won’t cut it. It will get you about 80% of the way there, and you do the remaining 20% with paint. As you apply the paint, you can change the shape of the nose, the distance between the eyelids, lengthen the smile, etc., to adjust whatever might have been off during your sketch.
Of course, there is more to go on the painting. I’ll share the rest with you soon. I wasn’t able to finish it at the yurt, but I put in several hours. So, not only did I get to spend some great quality time with my brother, but I got to do some enjoyable work as well. After the big move, I finally feel like I’m getting into a regular groove of painting and posting tutorials. Thanks so much for your patience.
UPDATE: Here is the final video of this portrait, painted at my regular studio…
And a photo of it…
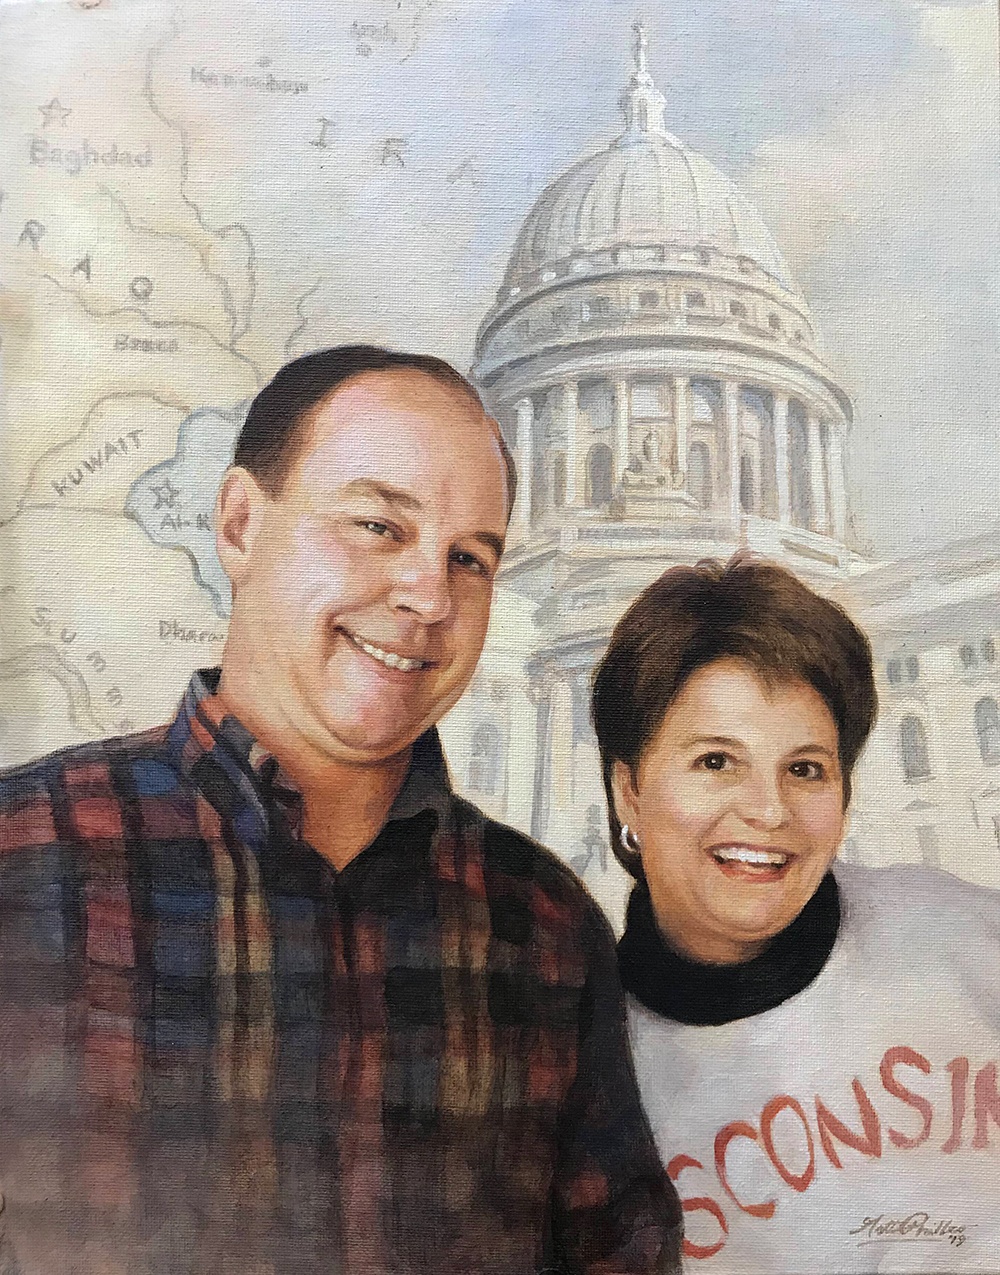
Custom realistic acrylic portrait of a veteran and his wife painted by Eau Claire area portrait artist Matt Philleo, 11 x 14, acrylic on canvas, ©2019 by Matt Philleo
I really enjoyed painting this for the client, putting all the elements–the map of Iraq, the capitol building, and the people together into one cohesive portrait that I hope will be a cherished keepsake for the family for years to come.
I hope this painting has encouraged you and given you some ideas to use in your own portrait painting. I would love to help you learn to paint portraits your very best. Let me know if I can be of more help to you in any way.
Yours for better portraits,
P.S. Did you find this post helpful or encouraging? If so, send it on ahead! Let others know with the share buttons below. I’d love to hear your comments. Thank you so much! Also, do you have a question on acrylic portrait painting you’d like answered? Let me know, and I’d be happy to help!

Quick Tip to Set Up a Canvas in Your Easel
Have you ever been frustrated trying to paint the edges of your canvas on an acrylic portrait, because the easel clamps are in the way?
You try to paint the background smoothly, with gestural strokes that flow off the edge of the painting but are inhibited by the easel itself. Let me show you a quick tip to overcome that problem.
How do YOU keep your paintings in place on your easel, and yet make it possible to paint all edges easily? Let me know. Always on the lookout for good ideas. 🙂
P.S. Did you find this post helpful or encouraging? If so, send it on ahead! Let others know with the share buttons below. I’d love to hear your comments. Thank you so much! Also, do you have a question on acrylic portrait painting you’d like answered? Let me know, and I’d be happy to help!

4 Questions About Acrylic Portrait Painting, Answered
Recently, I was asked some questions about acrylic portrait painting. I hope the answers I shared with this artist can be of help to you as well.
1. How do you prepare your canvas panel for painting with Acrylics?
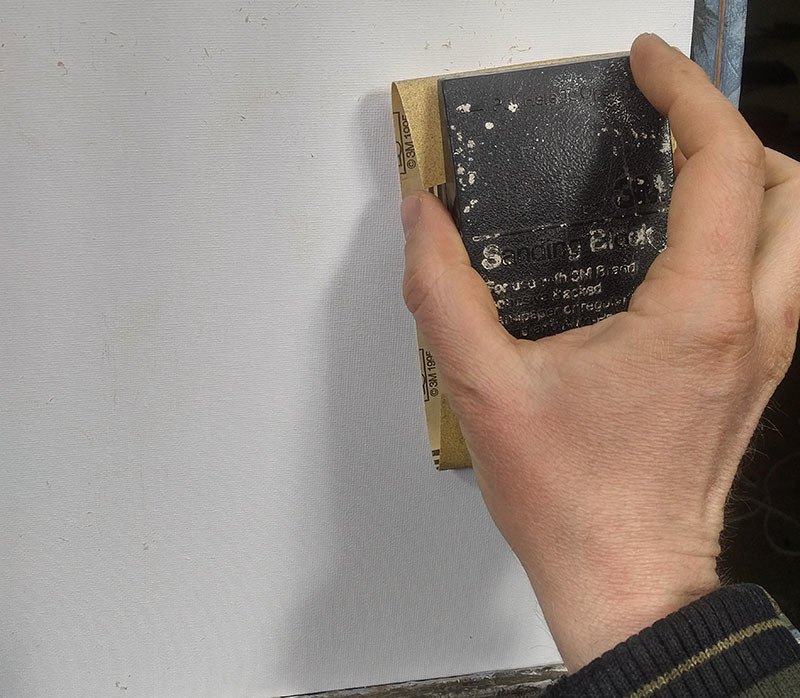
Sanding a canvas panel in preparation for painting an acrylic portrait
2. You spoke of layering your paint when composing a portrait. Please briefly explain.
I use the glazing technique to slowly bring the portrait from a white canvas to completion. The glazing technique is achieved by mixing your paint with clear acrylic medium (usually matte medium) to disperse the pigment, thus allowing light to pass through.
Although you could use water, it’s not recommended, because it breaks down the acrylic resin binder, causing a rough visual texture and possible poor adhesion. For a smoother look, you want to use clear acrylic medium.
Custom commissioned realistic acrylic portrait from a photo painted by Eau Claire area artist Matt Philleo, ©2019 Fine Art by Matt Philleo
3. You mentioned using a Prismacolor pencil for making your diagram. What color do you recommend?
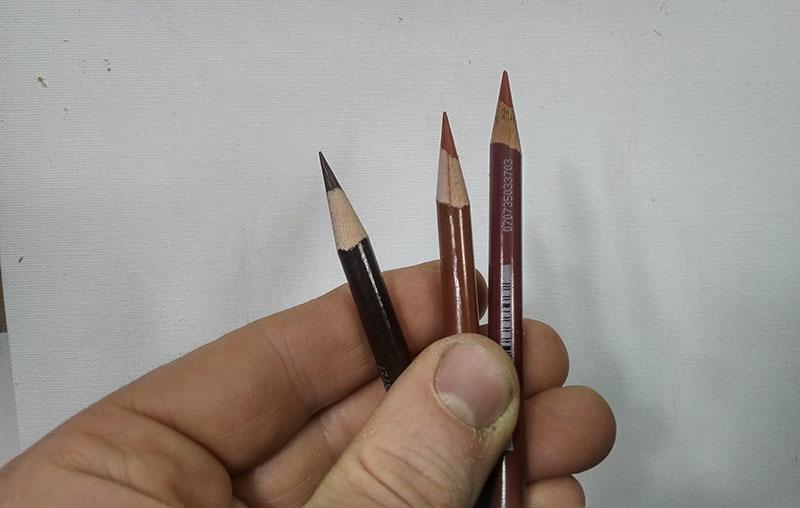
Using colored pencil for your acrylic portrait sketch makes things a lot easier. Technique discovered and developed by Matt Philleo.
4. Do you do the painting from start to finish in one setting?
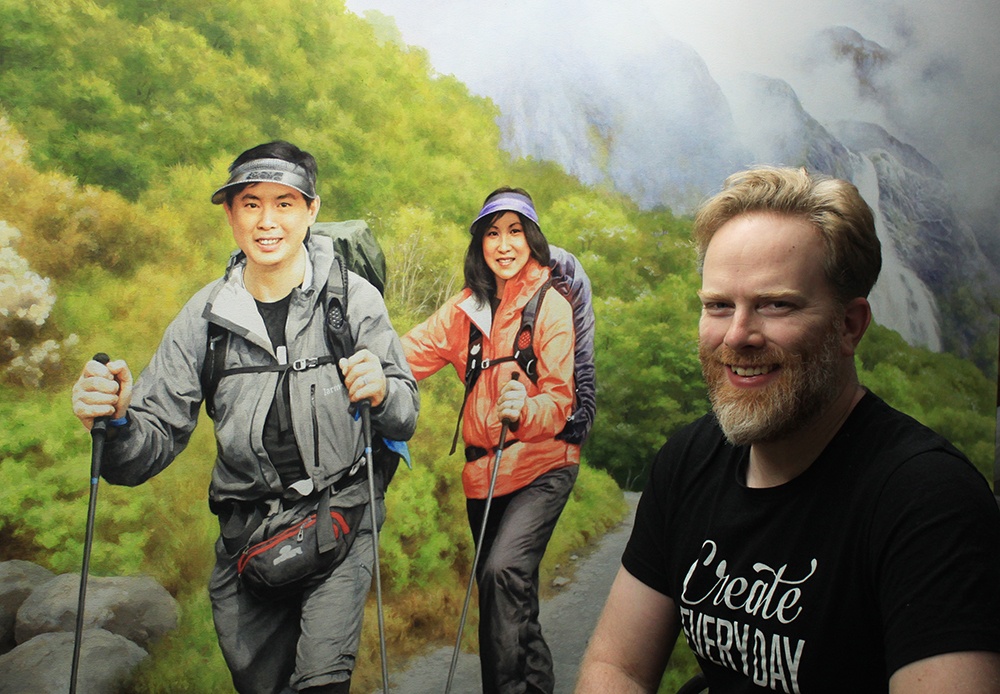
Acrylic portrait artist Matt Philleo posing in front of a 48″ x 72″ commission painting for a client in Brunei
I hope these questions and answers were helpful to you as well. I know some of this stuff seems pretty basic, but it’s good for all of us to pause and think about why we do what we do. It then makes the doing that much more significant.
Let me know if you have any questions of your own about acrylic portrait painting and I’ll do my best to help!
P.S. Did you find this post helpful or encouraging? If so, send it on ahead! Let others know with the share buttons below. I’d love to hear your comments. Thank you so much! Also, do you have a question on acrylic portrait painting you’d like answered? Let me know, and I’d be happy to help!