Category Archives for Tips and Techniques

Weird Way How to Apply Gesso to Your Canvas
Most store-bought canvases are not primed very well and can benefit from another layer or two of gesso.
Introduction:
When it comes to preparing a canvas for painting, most artists stick to traditional methods. However, there’s an unconventional technique that can give you a smoother surface and enhance the detail in your work. In this tutorial, we’ll explore a unique way to apply gesso to your canvas using a drywall taping knife. This method not only helps in creating a finer texture but also saves you from extensive sanding later on. Let’s dive into this step-by-step guide.
The Tools You’ll Need:
Before starting, gather the necessary tools and materials. You’ll need:
- Gesso: The base primer for your canvas.
- Matte Medium: Helps to smooth out the gesso and make it more fluid.
- Drywall Taping Knife (6-inch): The star of this method for spreading the gesso evenly.
- Flat Edge Paintbrush: For initial application.
- Yogurt Container: To mix the gesso and matte medium.
- Gloves and Apron: To protect your hands and clothing.
Preparing the Gesso Mixture:
- Mixing the Gesso: Begin by pouring a small amount of gesso into a container—an empty yogurt cup works perfectly. Fill it about a quarter of the way.
- Adding Matte Medium: To ensure a smoother application, add a few squirts of matte medium into the gesso. This addition will make the mixture more fluid, helping it spread more easily across the canvas.
- Stirring: Use a palette knife to thoroughly mix the gesso and matte medium. Ensure the consistency is even, with no lumps or dry spots.
Applying the Gesso:
- Initial Application with a Brush: Dip your flat edge paintbrush into the gesso mixture, and apply it to the top left corner of your canvas. Brush downwards, covering the entire surface. Aim for a generous, even coat.
- Smoothing with the Drywall Taping Knife: After applying the gesso, grab your drywall taping knife. Starting at the top, use even pressure to smooth the gesso down the canvas. Work in long, continuous strokes to avoid leaving streaks or ridges.
- Feathering the Edges: As you work, you may notice ridges forming on the surface. To remove these, lightly graze the surface with the taping knife, using minimal pressure. This technique will help blend the gesso evenly across the canvas.
Troubleshooting Common Issues:
- Dealing with Ridges: If ridges persist, continue feathering them out with the knife. Adjust your pressure as needed, moving from firm to light strokes to achieve a smooth finish.
- Applying Additional Layers: If the first coat is too thin, allow it to dry and then apply a second coat using the same method. This additional layer can further enhance the smoothness of your canvas.
Final Touches:
After the gesso has dried, it’s time to inspect the canvas. Look for any remaining ridges or imperfections. If you find any, lightly sand the surface using a 250 or 300-grit sandpaper. This step will ensure an ultra-smooth finish, ready for painting.
Tips for Success:
- Work Quickly: Gesso can dry fast, especially in a warm environment. To prevent streaks, work swiftly when applying and smoothing the gesso.
- Use the Right Tools: While a larger drywall trowel can be used, a 6-inch taping knife offers better control and precision, especially on smaller canvases.
- Practice Makes Perfect: This technique may take some getting used to, but with practice, you’ll find it easier to achieve a smooth, professional-quality canvas.
Using a drywall taping knife to apply gesso might seem unusual, but it’s a powerful technique for artists seeking a smoother canvas surface. By following these steps, you can minimize brush strokes, reduce the need for sanding, and create a better foundation for your paintings.
Read more about my additional resources, tutorials, to learn more and check out my free courses here. . Whether you’re a beginner or an experienced artist, there’s always something new to learn and apply to your paintings. Happy painting!
- Sketching Your Painting Accurately
- Beginning a Pet Portrait in Acrylic
- The Mystery of Realism in Painting
- Apply A Burnt Sienna Glaze to a Portrait
- Learn How to Sketch a Portrait Freehand in 45 Minutes
- Adding highlights to your acrylic painting
- 5 Excellent Reasons to Use Aluminum Foil
- Paint Realistic Wrinkles in Acrylic
- Painting Clothing in an Acrylic Portrait
- Paint a Cloudy Sky Acrylic
- How to add Semi-Opaque Highlights
- How to Enhance the Contrast in Your Acrylic
- How to Add Glaze to Your Acrylic Painting
- Paint Realistic Reflections on Eyeglasses in an Acrylic Portrait
- Build Up Depth on Your Acrylic Portrait Backgrounds
- How Do You Do Layers With the Glazing Technique?
- Learn How to Paint Wrinkles in Acrylic
Read more about how to paint a portrait that you can surely be proud of!
I’d love to hear your thoughts on this video. Please share it with your friends and family. Let me know if you have any further questions. I’ll greatly help you.
If you’d like to learn more, sign up for my free email tips and video class today.
Learn How to Paint Acrylic Portraits With My Free Mini-Video Course!
Thank you so much for taking the time to read this tutorial and watch the video. That means a lot to me. I hope you find it very helpful in your portrait painting.
Yours for Better Portraits,

P.S. Did you find this post helpful or encouraging? If so, send it on ahead! Let others know with the share buttons below. I’d love to hear your comments. Thank you so much! Also, do you have a question on acrylic portrait painting you’d like answered? Let me know, and I’d be happy to help!

Introducing the Shading and Skin Tones Super Bundle
I’ll share with you my introduction to the shading and skin tones super bundle.
If you struggle with shading and skin tones (many artists do), I put together a special bundle of three of my favorite courses to help you.
Get the bundle here: https://realistic-acrylic-portrait-sc…
Watch the video below to learn more about the introduction of the shading and skin tones super bundle.
- Sketching Your Painting Accurately
- Beginning a Pet Portrait in Acrylic
- The Mystery of Realism in Painting
- Apply A Burnt Sienna Glaze to a Portrait
- Learn How to Sketch a Portrait Freehand in 45 Minutes
- Adding highlights to your acrylic painting
- 5 Excellent Reasons to Use Aluminum Foil
- Paint Realistic Wrinkles in Acrylic
- Painting Clothing in an Acrylic Portrait
- Paint a Cloudy Sky Acrylic
- How to add Semi-Opaque Highlights
- How to Enhance the Contrast in Your Acrylic
- How to Add Glaze to Your Acrylic Painting
- Paint Realistic Reflections on Eyeglasses in an Acrylic Portrait
- Build Up Depth on Your Acrylic Portrait Backgrounds
- How Do You Do Layers With the Glazing Technique?
- Learn How to Paint Wrinkles in Acrylic
Read more about how to paint a portrait that you can surely be proud of!
I’d love to hear your thoughts on this video. Please share it with your friends and family. Let me know if you have any further questions. I’ll greatly help you.
If you’d like to learn more, sign up for my free email tips and video class today.
Learn How to Paint Acrylic Portraits With My Free Mini-Video Course!
Thank you so much for taking the time to read this tutorial and watch the video. That means a lot to me. I hope you find it very helpful in your portrait painting.
Yours for Better Portraits,
P.S. Did you find this post helpful or encouraging? If so, send it on ahead! Let others know with the share buttons below. I’d love to hear your comments. Thank you so much! Also, do you have a question on acrylic portrait painting you’d like answered? Let me know, and I’d be happy to help!

How to Shading & Skin Tones on Small Faces
Having trouble shading and toning small faces?
Introduction
When painting small faces in acrylic portraits, achieving the right balance of shading and skin tones can be tricky. The key lies in understanding light values and applying the glazing technique to create realistic tones and depth. In this post, I will guide you through a step-by-step process that will help you refine your acrylic portrait and improve your ability to paint smaller, more intricate details.
Step 1: Understanding Light Values
Before working with color, it’s essential to focus on values. Values refer to the lightness or darkness of an area, and they must be correctly identified and applied before considering color. For small faces, areas like the nose, chin, and cheeks are crucial for defining the facial structure. Often, light comes from above, casting subtle shadows and highlights that bring out the form.
- Tip: Use reference photos to study where light falls and shadows form on the subject’s face.
Step 2: Selecting Colors for Skin Tones
To achieve realistic skin tones, choose a mix of burnt sienna and titanium white as your base. Adding raw sienna or pyrrole orange can help create warmth and chromatic variation. Start with these hues and adjust the mix depending on the tone you want to achieve. For example, titanium white will cool the skin tone, making it lighter, while raw sienna adds warmth.
- Technique: Mix your colors with matte medium to create a transparent glaze that gives your painting more luminosity. Matte medium thins the paint while keeping it translucent, allowing for subtle layers of color that add depth without overwhelming the details.
Step 3: Applying Glazes for Smooth Shading
Glazing is crucial for achieving smooth transitions between light and shadow. When working on small faces, apply thin, semi-opaque glazes to slowly build up the skin tone. Make sure to adjust the transparency by adding more matte medium to control how much of the underlying paint shows through.
- Start with the lighter areas: Apply a semi-opaque layer to the nose and chin, which typically catch more light.
- Darken the cheeks: Using a slightly darker glaze, apply this color to the cheeks to create contrast with the highlighted areas.
- Tip: Wipe off excess paint to avoid streaks and ensure the glaze goes on smoothly. This prevents any harsh lines from forming, which could make the face appear less realistic.
Step 4: Enhancing Shadows for Depth
Once the basic skin tones are in place, it’s time to enhance the shadows, particularly around the eyes, jawline, and nose. Shadows are often underpainted, leading to faces that lack depth. When shading small faces, it’s vital to ensure that areas such as the eye sockets are sufficiently darkened to enhance realism.
- Tip: Don’t be afraid to go darker in these areas—shadows help ground the subject and bring the highlights into sharper focus.
Step 5: Adjusting Skin Tone with Chromatic Intensity
As you build up layers of glazes, add small amounts of pyrrole orange or Indian yellow to intensify the chroma. This helps achieve a more natural skin tone that has subtle color variations. Skin isn’t a flat color but rather a dynamic surface with slight shifts in hue.
- Technique: Add a little matte medium to each glaze to increase translucency, making the layers more vibrant and realistic. Apply the glaze lightly to areas like the neck or cheeks to enhance warmth, blending softly into the surrounding tones.
Step 6: Adding Final Shading and Highlights
To finish the shading process, concentrate on the jawline and neck area, particularly where light reflects off the subject’s clothing. For example, red clothing can reflect onto the neck, casting a warm glow. In such cases, mix pyrrole orange with matte medium and apply it sparingly to mimic this effect.
Finally, add a final layer of highlights using a lighter glaze of titanium white. These highlights should be carefully placed on areas like the tip of the nose or chin to emphasize light reflections and bring the painting to life.
Tips for Success:
- Keep your reference close: Position your reference photo close to your canvas or easel so you don’t lose focus on important details.
- Layer gradually: Acrylic painting is best done in layers. Don’t rush the process by applying too much paint at once.
- Use multiple glazes: Thin, multiple layers of glazes help achieve a smooth and realistic finish.
- Mix paints properly: Ensuring the correct mix of color and matte medium is crucial for achieving the right transparency.
- Adjust shadows properly: Eye sockets and other shadowed areas should be dark enough to provide contrast.
Shading and adjusting skin tones on small faces in an acrylic portrait can be accomplished through careful observation and the application of glazing techniques. Focus on values first, and build up skin tones through thin, transparent layers. By following these steps, you’ll improve the depth and realism in your portraits, making even the smallest details shine.
If you want to learn more about perfecting your acrylic portraits, download my free PDF guide, “Fix Muddy Skin Tones in Your Acrylic Portrait now.
- Sketching Your Painting Accurately
- Beginning a Pet Portrait in Acrylic
- The Mystery of Realism in Painting
- Apply A Burnt Sienna Glaze to a Portrait
- Learn How to Sketch a Portrait Freehand in 45 Minutes
- Adding highlights to your acrylic painting
- 5 Excellent Reasons to Use Aluminum Foil
- Paint Realistic Wrinkles in Acrylic
- Painting Clothing in an Acrylic Portrait
- Paint a Cloudy Sky Acrylic
- How to add Semi-Opaque Highlights
- How to Enhance the Contrast in Your Acrylic
- How to Add Glaze to Your Acrylic Painting
- Paint Realistic Reflections on Eyeglasses in an Acrylic Portrait
- Build Up Depth on Your Acrylic Portrait Backgrounds
- How Do You Do Layers With the Glazing Technique?
- Learn How to Paint Wrinkles in Acrylic
Read more about how to paint a portrait that you can surely be proud of!
I’d love to hear your thoughts on this video. Please share it with your friends and family. Let me know if you have any further questions. I’ll greatly help you.
If you’d like to learn more, sign up for my free email tips and video class today.
Learn How to Paint Acrylic Portraits With My Free Mini-Video Course!
Thank you so much for taking the time to read this tutorial and watch the video. That means a lot to me. I hope you find it very helpful in your portrait painting.
Yours for Better Portraits,
P.S. Did you find this post helpful or encouraging? If so, send it on ahead! Let others know with the share buttons below. I’d love to hear your comments. Thank you so much! Also, do you have a question on acrylic portrait painting you’d like answered? Let me know, and I’d be happy to help!

How To Add Highlights To Background Trees In Acrylic Painting
Creating a depth with layered highlights in background trees
Adding highlights to background trees can transform the overall look of your acrylic painting, bringing depth and realism to your artwork. In this tutorial, we will explore how to effectively apply highlights using a semi-opaque glaze to suggest the texture and lighting of background foliage. You’ll learn the nuances of mixing colors, selecting the right brushes, and how to use these techniques to add beautiful details to your painting.
Step 1: Prepare Your Colors and Materials
Before you begin, ensure you have your colors mixed and materials ready. For this tutorial, we will primarily use the following colors:
- Titanium White
- Indian Yellow
- Phthalo Blue
These colors will help create a vibrant greenish-yellow tone for your highlights. Begin by mixing a small amount of titanium white, Indian yellow, and a touch of phthalo blue. The result will be a soft, yellow-green that works well for depicting leaves hit by sunlight.
Tip: Balance the Chromatic Intensity
When mixing colors for the highlights, aim for a hue that’s slightly lighter and warmer than the mid-tones of your background trees. This will ensure your highlights blend smoothly without appearing too stark.
Step 2: Apply the Initial Highlights
Using a round brush, begin applying the semi-opaque glaze in areas where light naturally hits the leaves. A delicate touch is essential to achieve a soft, realistic effect. Allow your brush to dance lightly across the surface, adding small, irregular dabs of color. These represent leaves catching light through the foliage.
Technique: Layer the Highlights Gradually
- Start with a lighter glaze and build the highlights gradually.
- Avoid heavy strokes—let the leaves appear naturally.
- Apply the glaze sparingly, focusing on areas where the sun would naturally illuminate the leaves, such as the tops of trees or branches.
Step 3: Adjust the Color Mix for Shadows
As you move to darker areas of the background, adjust your color mix by adding more phthalo blue and Indian yellow. This will deepen the tone and create a more chromatic variation, essential for achieving a balanced look across the painting.
Tip: Keep the Highlights Balanced
If the glaze starts to appear too light or chalky over the darker areas, adjust by darkening the mixture. You can add a small amount of ultramarine blue and raw sienna to muddy the glaze slightly, helping it blend with the darker sections of your background.
Step 4: Use Different Brushes for Varying Effects
Switching brushes during the painting process can help create different textures and effects. For instance:
- The round brush is great for detailed highlights and small leaf shapes.
- A filbert brush can be used to create more painterly, out-of-focus leaves, giving the background a softer, blurred effect.
This transition between brush types will create a contrast between the crispness of the highlighted leaves and the soft appearance of the background trees.
Technique: Blending the Highlights
- Use the filbert brush to blend the edges of your highlights into the mid-tones and shadows.
- Focus on adding smaller leaf shapes at different angles to suggest movement and depth.
Step 5: Fine-Tune the Details
Once you’ve applied your initial highlights, it’s time to refine the details. You don’t want to over-detail every section—just a few carefully placed dabs of light color can enhance the effect. Aim for balance by leaving some areas less detailed while others are slightly more refined.
Tip: Create Variation in Highlight Intensity
Vary the intensity of your highlights by alternating between slightly lighter and slightly darker hues. This will make your background trees appear more dynamic and realistic.
Step 6: Blend and Add Warmth
As you work on the upper areas of the trees, ensure that the highlights are slightly warmer in tone compared to the surrounding colors. Mixing titanium white with Indian yellow can create a warmer highlight that mimics the effect of sunlight filtering through the leaves.
Technique: Use Warm and Cool Tones
When adding highlights to the trees, consider the lighting conditions in your painting. For areas where direct sunlight hits, opt for a warmer yellowish tint. In contrast, cooler highlights with more blue are suitable for areas in shadow or indirect light.
Step 7: Final Touches and Adding Depth
In the final stages, focus on fine-tuning the leaves and highlights. You can add depth by placing a few outliers—small spots of light—away from the main group of leaves. This will create a natural, unstructured look that enhances realism.
Tip: Avoid Overworking the Highlights
Overworking the highlights can make your painting look artificial. Instead, apply your brushstrokes with intention, leaving areas of contrast between light and dark to maintain a balanced composition.
Bring Your Background to Life with Highlights
By adding highlights to your background trees, you can bring an entirely new dimension to your acrylic painting. The glazing technique allows you to control the transparency of the paint, creating subtle yet impactful lighting effects that mimic real-life foliage. With practice and attention to detail, you’ll master this technique and enhance the overall realism of your landscape paintings.
Read more about my additional resources, tutorials, to learn more and check out my free courses here. . Whether you’re a beginner or an experienced artist, there’s always something new to learn and apply to your paintings. Happy painting!
- Adding highlights to your acrylic painting
- 5 Excellent Reasons to Use Aluminum Foil
- Paint Realistic Wrinkles in Acrylic
- Painting Clothing in an Acrylic Portrait
- Paint a Cloudy Sky Acrylic
- How to add Semi-Opaque Highlights
- How to Enhance the Contrast in Your Acrylic
- How to Add Glaze to Your Acrylic Painting
- Paint Realistic Reflections on Eyeglasses in an Acrylic Portrait
- Build Up Depth on Your Acrylic Portrait Backgrounds
- How Do You Do Layers With the Glazing Technique?
- Learn How to Paint Wrinkles in Acrylic
Read more about how to paint a portrait that you can surely be proud of!
I’d love to hear your thoughts on this video. Please share it with your friends and family. Let me know if you have any further questions. I’ll greatly help you.
If you’d like to learn more, sign up for my free email tips and video class today.
Learn How to Paint Acrylic Portraits With My Free Mini-Video Course!
Thank you so much for taking the time to read this tutorial and watch the video. That means a lot to me. I hope you find it very helpful in your portrait painting.
Yours for Better Portraits,
P.S. Did you find this post helpful or encouraging? If so, send it on ahead! Let others know with the share buttons below. I’d love to hear your comments. Thank you so much! Also, do you have a question on acrylic portrait painting you’d like answered? Let me know, and I’d be happy to help!

How to Paint Foliage Using the Acrylic Glazing Technique
How do you paint people standing in front of trees and other foliage?
When it comes to painting foliage in your acrylic portraits or landscapes, one of the best ways to capture depth and realism is through the acrylic glazing technique. In this guide, we’ll explore how to layer colors, create realistic shadows, and bring your foliage to life with step-by-step instructions and tips.
Understanding the Importance of Color in Foliage
One of the critical aspects of painting foliage is choosing the right colors, especially in shadows. You don’t want to use overly intense chromatic greens that can make your painting look flat or artificial. Instead, opt for grayish-green tones for the shadow areas, which add a natural depth and realism to your work.
For example, the foliage in your painting’s shadowed areas can be made more effective by blending raw umber dark, ultramarine blue, and raw sienna. This combination creates a desaturated, natural green that mimics how shadows in nature would appear—subtle yet impactful. The right use of cool colors like ultramarine blue helps define the cooler, darker regions of the foliage.
Tip: Avoid Bright Greens in Shadows
It’s essential to steer away from vibrant, saturated greens in the shadow areas. These should be saved for the sunlit portions of the trees to achieve a dynamic contrast.
Building Layers with the Glazing Technique
Acrylic glazing allows you to work in thin layers, which can be built up over time to create depth in your foliage. For this, you’ll want to mix a small amount of your chosen paint color with a clear matte medium. This mixture creates a translucent glaze that will enable you to see through to the underlying layers, preserving the details of your initial sketch or previous layers.
In the early stages, you will be blocking in the shadow colors, leaving lighter areas open for subsequent layers. Glazing ensures that each layer of paint adds depth without covering the finer details of your painting.
Technique: Thin Your Paint for Glazing
To thin down your paint, mix a small amount of acrylic medium with the color on your palette. This allows you to gradually build up color, controlling its opacity and intensity while preserving the underlying forms.
Focusing on Shapes Rather Than Details
One common mistake when painting foliage is trying to paint each leaf individually. However, it’s more effective to focus on larger shapes and the overall form of the trees and foliage. By looking at your reference photo closely, identify the primary shapes formed by the clusters of leaves rather than individual leaves themselves.
In your first layers, block in the general shapes with darker colors. For example, using a mix of raw umber dark and ultramarine blue can help you establish the darkest shadow areas of the trees. Once these shapes are in place, you can add highlights or refine the edges as you move forward.
Tip: Simplify the Process by Identifying Shapes
Instead of getting caught up in the small details, focus on simplifying the foliage by working with larger shapes and forms. This will help you achieve a cohesive look while maintaining the overall flow and balance of the piece.
Adding Depth with Layers of Darker Colors
After you’ve laid down your initial shapes and shadows, the next step is to add depth by applying darker tones. Mix in ultramarine blue, raw sienna, and a touch of Indian yellow to your palette to create a deep, cool shadow color. As you apply these layers, ensure that your strokes follow the natural form of the foliage to enhance the illusion of volume and depth.
Using a size 14 angled flat brush will give you control over the direction and width of your strokes, helping you define the darkest parts of the trees. For areas where the shadows are most intense, you can use more pressure and apply a slightly thicker layer of the glaze. Remember, each layer adds another dimension to your foliage, so take your time with this process.
Technique: Chisel Your Brush for Precision
By using a flat brush, you can achieve a sharp edge that helps define the boundaries of your dark shapes. This technique is particularly useful for creating crisp shadows that enhance the realism of your foliage.
Layering Highlights and Mid-Tones
Once your shadow areas are well established, it’s time to add mid-tones and highlights. These layers will give your foliage the brightness and vibrancy it needs to stand out. For sunlit areas, a mix of Indian yellow, raw sienna, and a small amount of titanium white will create the perfect highlight color.
Apply these lighter tones sparingly to avoid overpowering the shadowed areas. Use a dry brush technique to add subtle highlights, mimicking how sunlight would naturally catch on the edges of leaves.
Tip: Build Gradual Highlights
Adding highlights should be done in thin, gradual layers to avoid a stark contrast between your light and dark areas. Glazing with lighter colors will help you build up the highlights over time without overwhelming the painting.
Final Touches: Adding Nuances and Details
Once your layers are complete, it’s time to refine the nuances of your foliage. Use a small brush to add any branches or finer details that may be peeking through the leaves. However, be careful not to overdo it—often, less is more when it comes to these final touches.
If you’ve accidentally painted over an area that you intended to leave lighter, don’t worry. Since you’re working with glazes, it’s easy to go back and adjust your values. Simply apply another glaze layer to adjust the tone of the area.
Technique: Use Glazing to Correct Mistakes
If your highlights or shadows are too intense, apply another layer of glaze to either darken or lighten the area subtly without starting over.
Mastering Foliage with Acrylic Glazing
By following these steps, you’ll be able to create realistic and dynamic foliage using the acrylic glazing technique. Remember to build your layers slowly, focus on large shapes instead of tiny details, and use the right colors for shadows and highlights. With practice, your foliage will enhance the depth and realism of your acrylic paintings, bringing your landscapes and portraits to life.
Check out more tutorials and lessons on acrylic glazing and other techniques to continue improving your painting skills!
Watch my tutorial to learn more about how to paint foliage using the acrylic glazing technique.
- Adding highlights to your acrylic painting
- 5 Excellent Reasons to Use Aluminum Foil
- Paint Realistic Wrinkles in Acrylic
- Painting Clothing in an Acrylic Portrait
- Paint a Cloudy Sky Acrylic
- How to add Semi-Opaque Highlights
- How to Enhance the Contrast in Your Acrylic
- How to Add Glaze to Your Acrylic Painting
- Paint Realistic Reflections on Eyeglasses in an Acrylic Portrait
- Build Up Depth on Your Acrylic Portrait Backgrounds
- How Do You Do Layers With the Glazing Technique?
- Learn How to Paint Wrinkles in Acrylic
Read more about how to paint a portrait that you can surely be proud of!
I’d love to hear your thoughts on this video. Please share it with your friends and family. Let me know if you have any further questions. I’ll greatly help you.
If you’d like to learn more, sign up for my free email tips and video class today.
Learn How to Paint Acrylic Portraits With My Free Mini-Video Course!
Thank you so much for taking the time to read this tutorial and watch the video. That means a lot to me. I hope you find it very helpful in your portrait painting.
Yours for Better Portraits,
P.S. Did you find this post helpful or encouraging? If so, send it on ahead! Let others know with the share buttons below. I’d love to hear your comments. Thank you so much! Also, do you have a question on acrylic portrait painting you’d like answered? Let me know, and I’d be happy to help!

How to Paint Realistic Trees & Grass in Your Acrylic
It’s important to know how to paint greenery in your acrylic portrait.
In this tutorial, we’ll explore how to paint realistic trees and grass using the acrylic glazing technique. This approach allows for gradual layering of colors, which adds depth and vibrancy to your landscape. Acrylic glazing helps build up the scene, much like how an oil painting develops, while maintaining the versatility and quick-drying benefits of acrylics.
Whether you’re working on a portrait background or a full landscape, these methods will enhance your painting’s realism. So, grab your brushes and let’s dive in!
Materials You’ll Need
Before starting, make sure you have these essential tools:
- Acrylic paints (Raw umber, ultramarine blue, indian yellow, phthalo blue)
- Matte medium
- Flat brushes
- Palette
- Reference photo (optional)
Step-by-Step Guide to Painting Trees and Grass
1. Prepare Your Palette and Materials
Begin by setting up your palette with the necessary colors. In this painting, raw umber and ultramarine blue will serve as the foundation for shadows, while indian yellow and phthalo blue will add vibrancy to the lighter areas. Make sure to have a matte medium to thin out your paints for glazing.
Transitioning between vibrant and muted colors is key. As you work in darker areas, shift away from highly saturated colors like Indian Yellow to cooler tones like ultramarine blue.
2. Start with a Sketch
Begin with a light sketch on your canvas, which will act as a guide for placing trees and grass. Use thin layers of paint to avoid covering up your sketch too early. In the initial stages, the painting may resemble a watercolor, but as you apply more glazes, it will begin to take on the characteristics of a full-bodied acrylic painting.
3. Apply the First Layer of Glazes for the Grass
When painting grass, start by applying a base layer using vibrant colors like Indian yellow and phthalo blue. This combination gives the grass a rich, glowing appearance. As you move further away into the background or shadows, use cooler and less intense tones like raw umber.
For glazing, thin out your paint with matte medium to make it translucent. This will allow previous layers to show through, creating depth. Layering slowly is crucial—don’t rush the process.
4. Develop Shadows Within the Shadows
Once the initial glaze dries, begin adding darker tones to create depth. In this case, mix raw umber dark with ultramarine blue. The deeper shades of color should be applied sparingly to the areas that are farthest from the light source. This technique, known as adding “shadows within the shadows,” adds dimension and makes your painting more realistic.
In places where light barely reaches, such as underneath trees or in between clumps of grass, carefully brush in darker glazes. Thin these glazes with matte medium to ensure the darkness isn’t overpowering.
5. Blending Techniques for a Smooth Transition
To achieve a seamless blend between light and dark areas, use a dry brush technique. As the paint on your brush begins to run out, use the remaining paint to blend areas softly. Gently sweep the brush back and forth in different directions, blending the layers into each other.
Switching between horizontal and vertical brush strokes can smooth the transitions between glazes, ensuring a more natural look for both trees and grass.
Tips & Techniques for Realistic Trees and Grass
- Use Cooler Colors for Depth: Darker areas should have cooler, less intense colors. Avoid overly vibrant shades in the shadows to maintain realism.
- Layer Gradually: Build your painting slowly, one thin layer at a time. This helps the colors blend well and creates a smooth transition from light to dark.
- Reference Photos: Keep a reference photo nearby to help guide your light and shadow placement. Analyze where the darkest areas should be in relation to the light source.
- Be Patient: The glazing technique takes time. Allow each layer to dry completely before moving on to the next. This prevents muddying your colors and ensures each layer adds value to the final piece.
Read more about my additional resources, tutorials, to learn more and check out my free courses here. . Whether you’re a beginner or an experienced artist, there’s always something new to learn and apply to your paintings. Happy painting!
- Adding highlights to your acrylic painting
- 5 Excellent Reasons to Use Aluminum Foil
- Paint Realistic Wrinkles in Acrylic
- Painting Clothing in an Acrylic Portrait
- Paint a Cloudy Sky Acrylic
- How to add Semi-Opaque Highlights
- How to Enhance the Contrast in Your Acrylic
- How to Add Glaze to Your Acrylic Painting
- Paint Realistic Reflections on Eyeglasses in an Acrylic Portrait
- Build Up Depth on Your Acrylic Portrait Backgrounds
- How Do You Do Layers With the Glazing Technique?
- Learn How to Paint Wrinkles in Acrylic
Read more about how to paint a portrait that you can surely be proud of!
I’d love to hear your thoughts on this video. Please share it with your friends and family. Let me know if you have any further questions. I’ll greatly help you.
If you’d like to learn more, sign up for my free email tips and video class today.
Learn How to Paint Acrylic Portraits With My Free Mini-Video Course!
Thank you so much for taking the time to read this tutorial and watch the video. That means a lot to me. I hope you find it very helpful in your portrait painting.
Yours for Better Portraits,
P.S. Did you find this post helpful or encouraging? If so, send it on ahead! Let others know with the share buttons below. I’d love to hear your comments. Thank you so much! Also, do you have a question on acrylic portrait painting you’d like answered? Let me know, and I’d be happy to help!

Matte Medium vs. Gloss Medium for Acrylic Glazing
Students who are new to my glazing technique have a lot of questions. So many mediums to choose from. Which ones are best to use…and why?
That’s what I want to discuss today.
Here’s a portion of an email I got from one of my students:
As you know, I am currently working on your portrait course at the moment, however, I have a question that I hope you can clarify. All previous information I have looked up indicates that when applying glazes, acrylic matte medium dries cloudy and gloss medium dries clear and obviously glossy. Can you just explain it for me why we only use matte medium for glazing in your tutorial, as my initial thoughts would be that the cloudiness would just build up? Or am I just missing the l point in that this is how we build up the underpainting of the portrait? Many Thanks, R—
This is a good question.
So, what’s better for glazing? Matte medium or gloss medium?
Let me answer that with the reply I sent back to my student.
I use matte medium for three reasons:
1. It dries to a flat finish and so it doesn’t react with the lights in my studio, producing distracting glare.
2. Because it dries to a flat finish, it is closer to the sheen of paint, and so when you have areas that are more opaque and less opaque, they match up better. In other words, you can perceive the values more accurately. A glossy finish will make colors look more saturated and deepen values. When you put a varnish over the painting, it would present a problem, causing certain subtle nuances that seemed to look correct, suddenly become inaccurate. (Yes, this happened to me!)
3. Matte medium is usually less expensive than gloss medium. With the copious amounts of medium that I use, this adds up!
Now, I don’t find that matte medium builds up cloudiness, in the way that I teach. It will get cloudy, if you have areas of your painting that are quite dark or saturated, and you overlap those areas with a very transparent (high ratio of matte medium to paint) glaze.
But I don’t do it that way in my paintings. Rather, I start off very transparent, (95-5) then shift to more translucent (80-20), and finally end up with semi-opaque layers (50-50) over portions of the work.
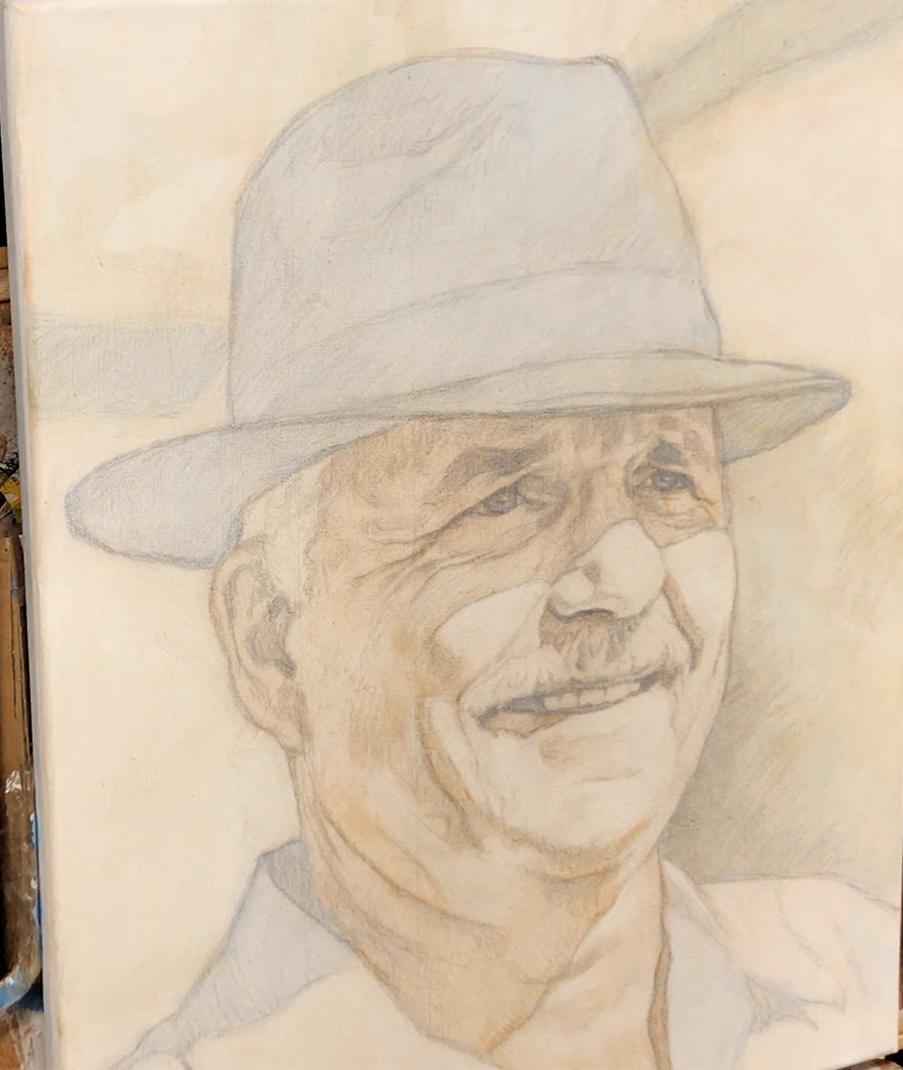
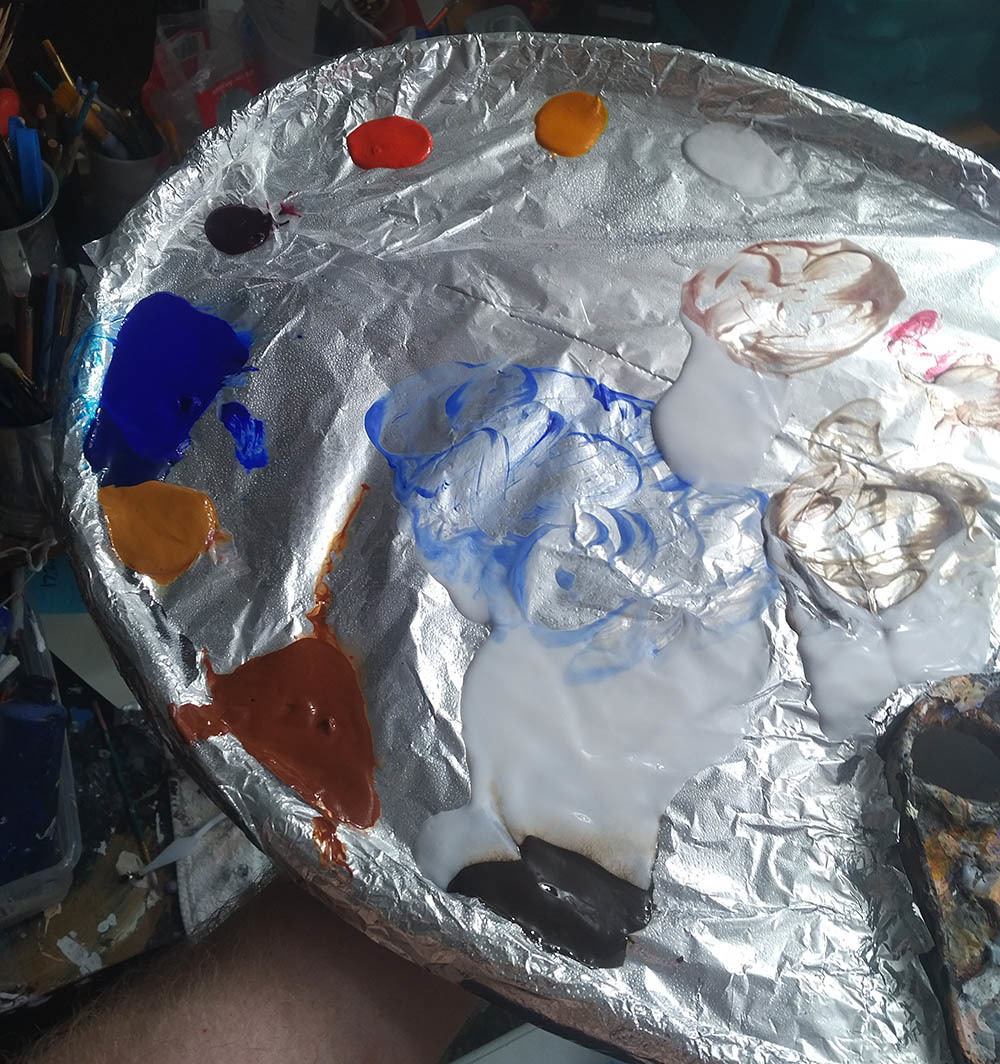
Acrylic portrait painting challenge example in progressm using the acrylic glazing technique, 16 x 20, acrylic on canvas by artist and instructor Matt Philleo
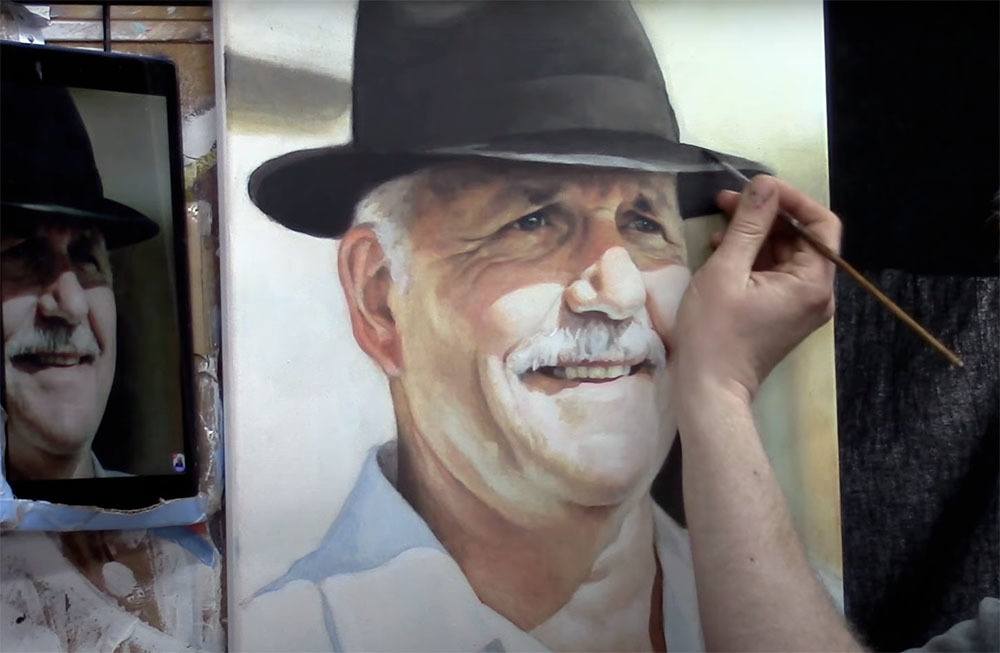
Matt Philleo painting an acrylic portrait from a photo for the Spring Portrait Painting Challenge ©2020 by Matt Philleo
This prevents that cloudiness from occurring and gives a rich saturation of color too. But we still retain the benefits of the smooth shading, vibrancy, and depth that glazing produces.
I finish my painting with a satin or semi-gloss varnish and that’s where we can add some extra saturation of value and vibrancy.
What is YOUR experience with acrylic mediums? Which do you prefer…and why? Let me know in the comments below.
Look forward to sharing more tips and tutorials with you.
Yours for Better Portraits,
![]()
If you found this post helpful or encouraging, would you send it on ahead? Let others know with the share buttons below. I’d love to hear your comments. Thank you so much!

How to Make Your Acrylic Portrait More Accurate
Improve accuracy in your acrylic portraits with simple adjustments
Acrylic portrait painting offers endless opportunities for creativity, but accuracy is key when capturing a subject’s likeness. Even experienced artists can sometimes struggle with proportions, features, or subtleties that can throw off the realism of a painting. In this post, we’ll explore techniques to fine-tune your portrait accuracy, including a step-by-step critique process. By addressing common mistakes and refining your approach, you’ll make your acrylic portraits more lifelike.
Start with Proportions: The Foundation of a Realistic Portrait
Proportions are the backbone of a realistic portrait. Even if your shading and colors are flawless, incorrect proportions can distort your subject’s likeness. When comparing your painting with your reference photo, examine the general shape of the head, the placement of facial features, and the overall size.
One technique to achieve accurate proportions is by using a grid system. This method breaks the reference photo into smaller sections, helping you place features correctly. If you choose to freehand, regularly measure distances between key facial elements like the eyes, nose, and mouth. Both methods work, but the grid system is more forgiving for beginners.
- Tip: Take time to sketch lightly at first, making adjustments as needed. Use a proportional divider or even a ruler to compare distances.
Refining the Eyes for a Lifelike Expression
Eyes are the focal point of most portraits. In this critique, we notice that one of the eyes appears slightly too large compared to the other. This is a common issue and can occur due to perspective or incorrect placement of the eyeball. To fix this, take note of the size and shape of both eyes. The eye seen at an angle, for example, should be thinner and slightly more oval.
Also, focus on the eyelid thickness. Often, the upper eyelid may be too thick or too distant from the lower eyelid, altering the expression. Adjust this to match your reference photo more closely, and ensure that the shadow from the eyebrow ridge is reflected in the way you paint the eyebrow.
- Tip: Zoom in on the eyes in your reference photo to better see details like the shape of the eyelids and eyelashes. Lightly blend around the eye to mimic the soft curves of the eyelid, rather than using hard lines.
Adjusting Eyebrows and Their Impact on Expression
Eyebrows contribute significantly to the expression of your portrait. In some cases, as highlighted in the critique, eyebrows might be painted too thin or flat. This can make the face look less dynamic or lively. Pay attention to the natural thickness of the brows and the shadow underneath them. Eyebrows aren’t just about individual hairs; the underlying structure, such as the brow ridge, also plays a role.
Make sure to capture the shape of the brows as they angle up or down according to the skull’s structure. Adding more thickness and dimension to the eyebrows can instantly change the character and realism of your portrait.
- Tip: Use a smaller brush for fine details in the eyebrows and shadows underneath. Create a gradient effect by using a glazing technique to build up depth gradually.
Balancing the Mouth and Facial Expression
One subtle yet crucial area to improve accuracy in a portrait is the angle and shape of the mouth. The critique points out that the mouth angle in the painting doesn’t fully match the reference photo. A slight change in angle can alter the expression, making the portrait appear off.
To adjust this, focus on where the corners of the mouth fall in relation to other features. The line between the lips should not be overly steep or shallow. Moreover, make sure that the mouth’s width is proportional to the eyes and nose, which will help achieve a more harmonious facial structure.
- Tip: Blend the area around the mouth softly to avoid harsh lines, giving the lips a more natural look. If needed, add highlights or shadows to the edges to create volume.
Enhancing Light and Shadows for Depth
Light and shadow create depth, making your portrait pop. In the critique, the lighting in the subject’s face was well-executed, but more luminosity was needed in certain areas, such as the forehead and chin, where light hits directly. The glazing technique is an excellent method to preserve luminosity in your painting.
Instead of painting mid-tones first, block in the shadows using thin glazes, leaving the light areas intact. This will allow the light to shine through, giving a more vibrant and realistic feel to your portrait. Apply this to other areas as well, such as the nose and cheeks, where subtle variations in lighting can bring your painting to life.
- Tip: Build layers slowly, adding more glazes of color to intensify shadows while keeping the highlights intact. This technique will give your portrait more depth and realism.
Working with Facial Structure: Correcting the Jawline and Chin
The jawline and chin define the overall shape of the face. In the critique, it was noted that the chin was slightly too short, and the jawline could have been extended. Small adjustments in these areas can have a big impact on the accuracy of your portrait.
When examining the reference photo, look at how the light interacts with the jawline. Extend or adjust the line accordingly, especially in angled portraits where perspective plays a role. The chin should not be cut off too early but should have a natural curve.
- Tip: To check if your facial structure is correct, turn your canvas upside down and compare it to the reference photo. This can help you see proportions in a new way and spot areas that need improvement.
General Tips for Improving Accuracy in Your Acrylic Portrait
- Zoom In: Use zoom features on your reference photo or get physically closer to capture finer details.
- Use Glazing: Build layers of color slowly to preserve luminosity and create depth.
- Take Breaks: Step away from your painting periodically to return with fresh eyes, allowing you to spot proportional issues more easily.
- Check in Black and White: Converting both your painting and reference photo to black and white can help you compare values more accurately.
- Measure Often: Constantly compare measurements between features to ensure proportional accuracy.
Achieving accuracy in acrylic portraits takes practice and patience, but by refining proportions, focusing on subtle details, and using techniques like glazing, you can drastically improve the realism of your work. Be mindful of common mistakes such as incorrect proportions, mismatched facial features, and lack of depth in lighting. With these tips, you’ll be well on your way to creating more accurate and lifelike portraits.
Read more about my additional resources, tutorials, to learn more and check out my free courses here. . Whether you’re a beginner or an experienced artist, there’s always something new to learn and apply to your paintings. Happy painting!
LEARN MORE
- How to Paint Foliage Using the Acrylic Glazing Technique
- How to Trace for an Accurate Portrait Sketch
- How to Paint Realistic Eyes in Your Acrylic Portrait
- How to Add Raw Umber Dark & Ultramarine Blue to Your Portrait
- How to Make Your Own Raw Umber Dark
- How to Paint Realistic Trees & Grass in Your Acrylic
- How to Block In Skin Tone Values Using Glazing Technique
- How to Paint Vibrant Reds in Your Acrylic Portrait
- How to Glaze Background Colors & More Acrylic Portrait
- How to Paint White Clothing in Your Acrylic Portrait
- How to Easily Transition from a Sketch to a Painting
- How to Block In Shading & Skin Tones in Your Acrylic
- How to Build Up Color on Acrylic Pet Portrait
- How to Build Up Form on Clothing with Acrylic
- How to Paint Dark Clothing Using Acrylic Glazing Technique
- How to Paint a 24 x 30 Acrylic With 30 People
- How to Do Smooth Shading with Acrylic
- How to Sketch an Acrylic Portrait with a Grid
- How to Paint Realistic Reflections on Eyes in Your Acrylic Portrait
Read more about how to paint a portrait that you can surely be proud of!
I’d love to hear your thoughts on this video. Please share it with your friends and family. Let me know if you have any further questions. I’ll greatly help you
If you’d like to learn more, sign up for my free email tips and video class today.
Learn How to Paint Acrylic Portraits With My Free Mini-Video Course!
Thank you so much for taking the time to read this tutorial and watch the video. That means a lot to me. I hope you find it very helpful in your portrait painting.
Yours for Better Portraits,
P.S. Did you find this post helpful or encouraging? If so, send it on ahead! Let others know with the share buttons below. I’d love to hear your comments. Thank you so much! Also, do you have a question on acrylic portrait painting you’d like answered? Let me know, and I’d be happy to help!

How to Blocking in Shadows for a LARGE Painting
Learn the art of blocking shadows with acrylic glazing for dramatic depth in large paintings
When creating a large acrylic painting, one of the key elements in bringing it to life is mastering the shadow work. Blocking in shadows helps define the structure and form of your subject, adding realism and depth. Using an acrylic glazing technique enhances the shadowing effect, keeping it translucent while still maintaining control over the darker areas of the painting.
In this blog post, we’ll explore a step-by-step approach on how to block in shadows for a large painting. We’ll cover the essential tools, glazing methods, and tips to help you create a more dynamic, realistic piece of art.
Setting the Stage: Preparing for Shadow Blocking
Before diving into the painting process, it’s important to prepare your materials and mindset. I begin this painting session with a moment of reflection and prayer, setting an intention to create a work that captures emotion and depth. Preparation also involves setting up the canvas, sketching the outline of the subject, and sealing the sketch with a light glaze.
For this demonstration, a mixture of raw umber dark and ultramarine blue was chosen for the shadow work. These colors, when blended, create a rich, cool tone that is perfect for shadows. Here’s how you can apply this to your own painting:
- Prepare Your Canvas: Start with a white canvas, sketch your subject, and seal the sketch with a light glaze using diluted acrylic matte medium.
- Choose Your Colors: For shadows, a mix of raw umber dark and ultramarine blue works beautifully to create a cool-toned effect. These colors blend well and offer the right balance between transparency and opacity.
Step-by-Step: Blocking in Shadows
- Creating the First Glaze Layer
Begin by applying a diluted glaze over the areas where shadows will be present. For large paintings, it’s important to keep a wet edge during the application process to avoid streaks or unwanted lines. Using long, sweeping brushstrokes, layer the glaze in areas where you want shadows to appear. - Maintaining Translucency
The beauty of acrylic glazes is their translucent nature. You can still see the sketch beneath the glaze, preserving the fine details as you work on the shadows. To achieve this effect, ensure that your glaze mixture has more medium than pigment, allowing light to pass through. - Building the Tonal Value Structure
Blocking in shadows is more than just applying darker tones. It’s about understanding the value structure of your reference image. In the demonstration, the artist frequently checks his reference photo to ensure that he’s accurately representing the light and shadow interplay. Study your reference carefully and build the shadows from light to dark.- Tip: Cooler tones work well for shadows. Add a small amount of ultramarine blue to your glaze to give the shadows a cooler, more natural effect.
Techniques for Shadow Blocking in Large Paintings
Blocking in shadows for a large painting requires a few specialized techniques. Here are some essential methods to use:
- Layering Glazes for Depth
Rather than applying one thick layer, build your shadows gradually by adding multiple thin layers of glaze. This will help you control the depth and darkness of the shadow, while still maintaining the luminosity of the overall painting. - Vary Your Brush Strokes
As you apply the glaze, it’s helpful to vary the direction of your brushstrokes. This creates a more natural and organic look, especially in areas with fabric or textures like rocks. For example, the artist worked on the figure’s clothing, carefully brushing in the shadows to maintain the folds and creases. - Use a Smaller Brush for Detail
Once the large areas are blocked in, switch to a smaller brush to refine the edges of the shadows. This technique allows you to add subtle details that make the shadowing more realistic.
Key Tips and Techniques for Effective Shadow Work
- Keep a Wet Edge: When applying a glaze, always maintain a wet edge to prevent harsh lines and streaks. This will ensure smooth transitions between the light and shadowed areas.
- Use Cooler Tones: Shadows should be cooler in tone compared to the lighter areas. Adding a hint of ultramarine blue to your glaze helps achieve this effect.
- Layer Glazes for Control: Don’t rush the shadowing process. Build up the intensity gradually by applying thin layers of glaze until you reach the desired depth.
- Pay Attention to Gradation: Shadows are rarely uniform in tone. They often fade or blend into lighter areas. Adjust your glaze to create smooth gradations between light and dark.
Applying Glazes to Specific Elements
In the video, I focused on several parts of the painting and then demonstrated the blocking in of shadows:
- The Figure’s Clothing: By using a combination of raw umber dark and ultramarine blue, the artist darkened the folds of the figure’s clothing, preserving the highlights and lighter areas.
- The Rocks: Shadows were added to the rocks behind the main figures, using a slightly bolder application of glaze. The cooler tones gave the rocks a natural shadowed effect, which contrasted well with the lighter areas.
- Background Elements: Blocking in shadows for the background elements, such as the sky and distant stones, helps create a sense of depth and distance. In this case, the artist allowed the shadows to blend naturally into the lighter tones, creating a balanced contrast.
Finishing Touches: Refining the Shadows
Once the shadow areas are blocked in, the final step involves refining the details. Then I used a smaller brush to control the finer aspects of the shadows, ensuring that they didn’t overpower the highlights. This delicate balance between light and shadow is what ultimately brings the painting to life.
- Pro Tip: If a glaze feels too bold, you can always lighten it by gently brushing over the area with a bit of water or clear medium to soften the edges.
Conclusion: Mastering the Art of Shadow Blocking
Blocking in shadows is a crucial skill for any artist, especially when working on large paintings. By using acrylic glazing techniques, you can add depth and realism while preserving the underlying details. Remember to take your time, build the shadows in layers, and constantly refer to your reference photo to ensure accuracy.
Master this technique, and you’ll find your large acrylic paintings gaining new levels of dimension and realism.
If you’re looking for more instructional videos on how to improve your acrylic painting, visit www.realisticacrylic.com for more tutorials and check out my free courses here. .
- Adding highlights to your acrylic painting
- 5 Excellent Reasons to Use Aluminum Foil
- Paint Realistic Wrinkles in Acrylic
- Painting Clothing in an Acrylic Portrait
- Paint a Cloudy Sky Acrylic
- How to add Semi-Opaque Highlights
- How to Enhance the Contrast in Your Acrylic
- How to Add Glaze to Your Acrylic Painting
- Paint Realistic Reflections on Eyeglasses in an Acrylic Portrait
- Build Up Depth on Your Acrylic Portrait Backgrounds
- How Do You Do Layers With the Glazing Technique?
- Learn How to Paint Wrinkles in Acrylic
Read more about how to paint a portrait that you can surely be proud of!
I’d love to hear your thoughts on this video. Please share it with your friends and family. Let me know if you have any further questions. I’ll greatly help you.
If you’d like to learn more, sign up for my free email tips and video class today.
Learn How to Paint Acrylic Portraits With My Free Mini-Video Course!
Thank you so much for taking the time to read this tutorial and watch the video. That means a lot to me. I hope you find it very helpful in your portrait painting.
Yours for Better Portraits,
P.S. Did you find this post helpful or encouraging? If so, send it on ahead! Let others know with the share buttons below. I’d love to hear your comments. Thank you so much! Also, do you have a question on acrylic portrait painting you’d like answered? Let me know, and I’d be happy to help!

How to Refine a Traced Sketch Freehand
Learn the tips and techniques to enhance your traced sketch using freehand refinements for a more dynamic and detailed artwork.
Now what? Begin painting? Not so fast! 🙂 In this video, I’ll show you how to refine a traced sketch freehand and to make it ready to paint upon.
This is for the book of Isaiah by Russell Stendal and it’s an illustration based off this image here of a man in intercessory prayer. And originally, I did a video showing the tracing process, asking whether it’s ok to trace. And I think I answered that question, that it is—as long as you do freehand sketching and work with grids. But especially as you work with freehand sketching, which will help you to improve as an artist.
Now, I’m going to work in this sketch to show you the process of tightening up a sketch done by tracing initally and the tracing process does leave you with a lot of work left to be done. So, I’m going to show you how I’m going to add additional shading in detail and then have a sketch that I can paint on top of.
The Power of Freehand Refinements
Traced sketches are often used by artists to quickly capture the proportions and major features of a subject. However, relying solely on tracing can result in a flat, lifeless image. In this guide we will explore how to refine a traced sketch freehand, enhancing the details, adding depth, and preparing the sketch for the painting stage. By the end of this tutorial, you’ll understand how to transform a traced sketch into a dynamic, polished artwork ready for the next step.

The Importance of Freehand Refinement
When an artist traces an image, they capture the basic outlines but often miss out on critical details like shadows, textures, and fine forms. This is where freehand refinement comes into play. It allows you to go beyond the rigid lines of a traced image and add life to the drawing.
In this tutorial, I’ll demonstrate how to refine a traced sketch freehand based on my work on a sketch of Isaiah or Hezekiah, which was originally traced. The traced lines were helpful to get the basic structure down quickly, but the freehand refinements were crucial for adding the depth, shading, and detail needed for an intercessory prayer-themed illustration.
Step 1: Shading and Detailing the Hands
Hands are complex and full of intricate details like tendons, veins, and shadows, which are often missed in a simple traced sketch. To refine the hands in this illustration, start by adding shading to differentiate the forms. Pay attention to areas where light hits the fingers and where shadows fall.
- Tip: Focus on the fingertips and the blood vessels to give a realistic, textured appearance to the hands.
- Technique: Use a light pencil to gently shade in the forms and increase pressure in areas where darker shadows fall, especially around the tendons and between the fingers.
Step 2: Refining Facial Features
The face is another area that greatly benefits from freehand refinement. In this particular sketch, I had traced the basic lines of the face, but it still needed significant work to look convincing. I added texture to the beard and refined the nose’s shading to give it a more three-dimensional appearance.
- Tip: When refining facial features, focus on adding shadow to areas like the nose, cheekbones, and chin. This helps to convey depth and structure.
- Technique: Create subtle distinctions between the different parts of the nose (e.g., the wing and the ball) by gently shading around the contours. Don’t hesitate to erase and rework lines if they aren’t quite right. Precision is key in this step.
Step 3: Adjusting Proportions and Textures
One of the challenges with tracing is that it can sometimes lead to slightly distorted proportions. Freehand refinement allows you to adjust these proportions for greater accuracy. For instance, I changed the hairstyle in this sketch to make it look less like myself (since I modeled for it) and more like the character I intended to depict.
- Tip: Use freehand sketching to add texture to the hair and adjust any features that seem off.
- Technique: When drawing hair, follow the natural flow of the strands, adding texture by varying the direction of your pencil strokes. This adds realism to the hair, especially in areas where light and shadow interact.
Step 4: Refining Clothing and Drapery
Clothing, especially in historical or religious illustrations, requires careful attention to the way fabric drapes and folds. In the sketch of Isaiah/Hezekiah, I added shading to the clothing to give it volume and ensure it looked appropriate for the era being depicted.
- Tip: Study the way fabric falls on the body and add shadow in the deeper folds to create a sense of weight and movement.
- Technique: Use long, fluid strokes to indicate folds, and vary your shading to show where the light hits the fabric versus where it falls into shadow.
Step 5: Adding Final Touches to the Sketch
As you refine your traced sketch freehand, don’t be afraid to go back and rework certain areas that don’t feel quite right. For example, I added a scroll to the hands to illustrate a significant moment in the story of Hezekiah, when he spread a threatening letter before the Lord and prayed for deliverance.
- Tip: Small details, such as props or background elements, can enhance the narrative of your illustration.
- Technique: Incorporate these elements with care, ensuring that they integrate naturally into the composition without overshadowing the main subject.
Final Thoughts on Freehand Refinement
Refining a traced sketch freehand is an essential step for any artist who wants to create dynamic, realistic artwork. The tracing process can save time, but it’s the freehand refinement that brings the sketch to life. By focusing on shading, texture, and proportion, you can take a basic traced image and transform it into a detailed and accurate foundation for painting.
Just like building a house requires a solid foundation, a painting requires a well-executed sketch. The time and effort you put into refining your sketch freehand will set the stage for a more successful painting, allowing you to focus on color and brushwork rather than correcting mistakes.
Conclusion
Refining a traced sketch freehand involves improving proportions, adding textures, and sharpening details to ensure the sketch serves as a strong foundation for painting. This process is especially useful in achieving realistic, dynamic compositions. Remember that tracing is just the starting point; it’s the freehand refinement that makes the difference. Keep practicing your freehand sketching skills to improve your artistic abilities and bring more depth to your work.
If you’re looking for more instructional videos on how to improve your acrylic painting, visit www.realisticacrylic.com for more tutorials and check out my free courses here.
- How to Paint Foliage Using the Acrylic Glazing Technique
- How to Trace for an Accurate Portrait Sketch
- How to Paint Realistic Eyes in Your Acrylic Portrait
- How to Add Raw Umber Dark & Ultramarine Blue to Your Portrait
- How to Make Your Own Raw Umber Dark
- How to Paint Realistic Trees & Grass in Your Acrylic
- How to Block In Skin Tone Values Using Glazing Technique
- How to Paint Vibrant Reds in Your Acrylic Portrait
- How to Glaze Background Colors & More Acrylic Portrait
- How to Paint White Clothing in Your Acrylic Portrait
- How to Easily Transition from a Sketch to a Painting
- How to Block In Shading & Skin Tones in Your Acrylic
- How to Build Up Color on Acrylic Pet Portrait
- How to Build Up Form on Clothing with Acrylic
- How to Paint Dark Clothing Using Acrylic Glazing Technique
- How to Paint a 24 x 30 Acrylic With 30 People
- How to Do Smooth Shading with Acrylic
- How to Sketch an Acrylic Portrait with a Grid
Read more about how to paint a portrait that you can surely be proud of!
I’d love to hear your thoughts about this video. Please share it with your friends and family. Let me know if you have any further questions. I’ll greatly help you.
If you’d like to learn more, sign up for my free email tips and video class today.
Learn How to Paint Acrylic Portraits With My Free Mini-Video Course!
Thank you so much for taking the time to read this tutorial and watch the video. That means a lot to me. I hope you find it very helpful in your portrait painting.
Yours for Better Portraits,
P.S. Did you find this post helpful or encouraging? If so, send it on ahead! Let others know with the share buttons below. I’d love to hear your comments. Thank you so much! Also, do you have a question on acrylic portrait painting you’d like answered? Let me know, and I’d be happy to help!