Archive Monthly Archives: February 2020

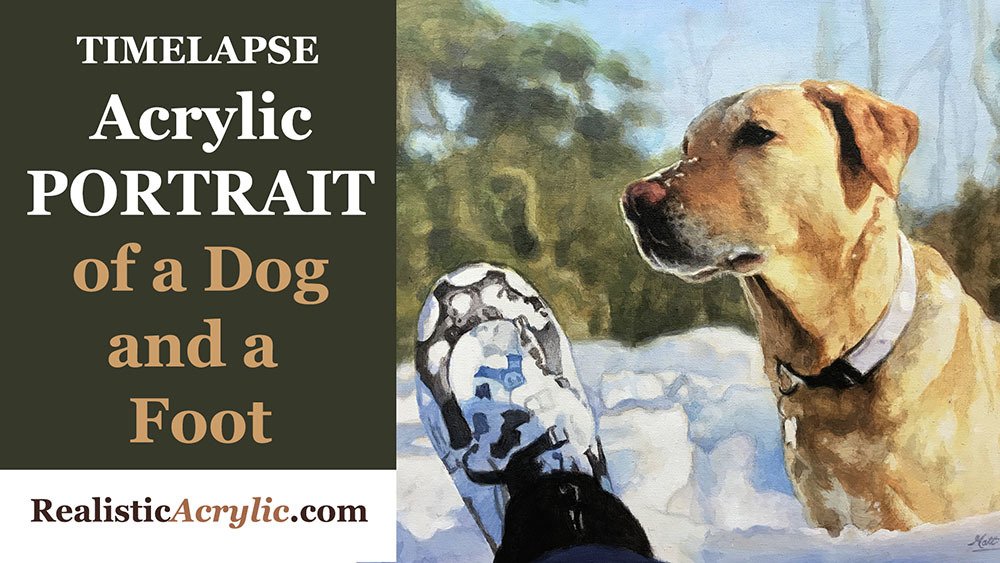
How to Paint Dog and the Foot: Time-Lapse Acrylic Portrait
Learn the acrylic glazing technique to capture realistic pet portraits
I’ll do that by sharing with you a recent acrylic portrait I did, capturing an experience of a woman who was hiking with her dog, and ended up laying down in the snow!
She wanted me to capture that moment of her dog and her foot shown as she snapped the photo from the ground.
This was an 11 x 14, acrylic on canvas, shown in a 5 minute- timelapse format. I painted it using the acrylic glazing technique, where we mix small amounts of paint into large amounts of clear acrylic medium to make the layers translucent, building up amazing depth and luminosity.
Creating a beautiful pet portrait is a fulfilling and meaningful way to immortalize a cherished companion. In this time-lapse tutorial, we explore the process of painting a dog alongside a boot in a snowy environment. This painting captures a special moment where the subject hiked with her dog and playfully fell into the snow. Using the acrylic glazing technique, this tutorial demonstrates how to gradually build up layers, create texture, and capture fine details with accuracy.
In this guide, you will learn about the specific techniques used, from glazing to color mixing, that help achieve a realistic result in acrylic painting. Let’s break down this tutorial, showing you how to paint your dog and foot with depth and detail.
Understanding the Acrylic Glazing Technique
Acrylic glazing is a key technique in this portrait. Because it involves mixing layers of pure acrylic pigment with a medium like matte medium to create translucent layers. So these layers allow you to build up depth and gradually develop the painting without overwhelming the canvas with opaque paint.
When painting a complex scene like this one, it’s essential to apply very light, translucent layers. This enables you to bring every part of the canvas together gradually rather than focusing on one section at a time. The layers should be so thin that the initial strokes remain visible, contributing to the painting’s overall texture.
The glazing technique is ideal for pet portraits and snowy scenes because it lets you replicate the soft transitions of light and shadow that define both fur and reflective snow.
Step-by-Step Painting Process
Start with a Light Base Layer The painting begins with a light wash across the entire canvas. The goal here is not to paint the dog and boot in detail right away but to cover the white canvas and establish the overall value and color structure. By applying a diluted base layer, you avoid stark, distracting areas of blank space. The focus during this step is to work simultaneously on the background and foreground, ensuring that the elements come together harmoniously. Using matte medium thins the paint, allowing the first layer to be transparent and soft.
Layering for Depth Once the light base layer is in place, you can begin layering darker tones. In this tutorial, I use various earth tones such as burnt sienna, raw umber, and raw sienna to add depth to the dog’s fur and the boot. Ultramarine blue is also introduced to darken the areas that need shadow and contrast. When mixing black for the darker areas, the artist combines brown and blue instead of using black directly from the tube. This creates a more nuanced black that maintains richness, avoiding the flatness that comes with premixed black paint.
Building Fur Texture As the layers progress, more details are added to the dog’s muzzle and fur. Instead of trying to paint each strand of fur, I look at the light and dark patterns within his reference image. By carefully observing these patterns, he replicates them with thin brushstrokes, building up the texture without overwhelming the painting with too many details at once. As with many realistic pet portraits, fur should look natural and soft. Glazing helps create that smoothness by allowing you to gradually adjust light and shadow.
Painting the Boot The foot in the painting is treated with the same method as the dog. By beginning with large, simple shapes and then layering on details, the boot emerges naturally within the scene. When painting objects like a boot, it’s important to consider how light interacts with them. Here, the boot is partially illuminated by sunlight and partially in shadow, giving it dimension and form. I carefully adjust these areas with each new glaze, slowly refining the foot’s shape.
Capturing the Snow
The background in this painting consists of trees and a snow-covered ground. To portray the soft, reflective quality of snow, the artist uses lighter tones of white and light blue, creating the texture with round and flat brushes. The glazing technique is particularly useful in this context because it allows for delicate adjustments of shading, replicating the subtle shifts in color that occur in snowy environments.
Adding the final touches, small flecks of snow are painted onto the dog’s muzzle using a round brush. This detail brings the painting to life and helps ground the dog within the environment.
The Importance of a Cohesive Process
Throughout the painting process, it’s important to remember that the goal is to work evenly across the entire canvas. By developing the background and foreground together, you ensure that the painting looks cohesive. Just like a Polaroid photo slowly developing, you want the painting to evolve at a steady pace without leaving any glaring unfinished areas.
As you paint, constantly compare different areas to ensure they are progressing at the same rate. This will also help you catch any issues early, allowing for easy adjustments without needing to rework large sections of the painting.
Adding the Finishing Touches
Once the foundational work is done, the final steps are where the painting truly comes to life. This is the “icing on the cake” phase, where you add the smallest details, such as light reflections in the dog’s eyes or highlights on the snow. These finishing touches bring the painting to its full potential.
I use a round brush at this stage to achieve precision in the small details. This ensures that each part of the painting is crisp and well-defined.
Tips and Techniques for Your Acrylic Portrait
- Start Light, Build Gradually: Use thin layers of translucent paint to build depth without losing the underlying structure of your painting.
- Observe Light and Shadow: When painting fur or clothing, focus on the patterns of light and shadow rather than individual details.
- Mix Your Own Black: Create a richer, more dynamic black by mixing ultramarine blue with burnt umber rather than using black straight from the tube.
- Work the Whole Canvas Simultaneously: Develop your background and foreground together to ensure a cohesive, balanced painting.
- Use Reference Photos: Always have a reference photo on hand to guide your colors, light, and shadow accuracy.
- Stay Patient: Building a painting with layers takes time. Don’t rush the process, and enjoy watching the image slowly develop.
By following these techniques and maintaining a steady pace, you can create a realistic pet portrait like the one in this tutorial. Whether you’re painting a dog, a foot, or another subject, remember to start light, build gradually, and enjoy the process of bringing your canvas to life.
Conclusion: Painting a dog and foot in an acrylic portrait requires patience, attention to detail, and a mastery of techniques like glazing. By layering translucent colors and focusing on the overall structure, you can create a realistic and beautiful portrait. If you’d like to see more painting tutorials, be sure to visit Realistic Acrylic for tips, lessons, and guidance on your painting journey.
I hope that this will inspire you in your own painting.
You can take it slow and easy, working the entire canvas in stages. You don’t have to get it right in the first layer. Rather, you can slowly “steer the ship” to the right destination. You adjust for any mistakes and build on your successes in each additional layer.
Enjoy!
- How to Paint Foliage Using the Acrylic Glazing Technique
- How to Trace for an Accurate Portrait Sketch
- How to Paint Realistic Eyes in Your Acrylic Portrait
- How to Add Raw Umber Dark & Ultramarine Blue to Your Portrait
- How to Make Your Own Raw Umber Dark
- How to Paint Realistic Trees & Grass in Your Acrylic
- How to Block In Skin Tone Values Using Glazing Technique
- How to Paint Vibrant Reds in Your Acrylic Portrait
- How to Glaze Background Colors & More Acrylic Portrait
- How to Paint White Clothing in Your Acrylic Portrait
- How to Easily Transition from a Sketch to a Painting
- How to Block In Shading & Skin Tones in Your Acrylic
- How to Build Up Color on Acrylic Pet Portrait
- How to Build Up Form on Clothing with Acrylic
- How to Paint Dark Clothing Using Acrylic Glazing Technique
- How to Paint a 24 x 30 Acrylic With 30 People
- How to Do Smooth Shading with Acrylic
- How to Sketch an Acrylic Portrait with a Grid
Read more about how to paint a portrait that you can surely be proud of!
I’d love to hear your thoughts about this video. Please share it with your friends and family. Let me know if you have any further questions. I’ll greatly help you.
If you’d like to learn more, sign up for my free email tips and video class today.
Learn How to Paint Acrylic Portraits With My Free Mini-Video Course!
Thank you so much for taking the time to read this tutorial and watch the video. That means a lot to me. I hope you find it very helpful in your portrait painting.
Yours for Better Portraits,

P.S. Did you find this post helpful or encouraging? If so, send it on ahead! Let others know with the share buttons below. I’d love to hear your comments. Thank you so much! Also, do you have a question on acrylic portrait painting you’d like answered? Let me know, and I’d be happy to help!

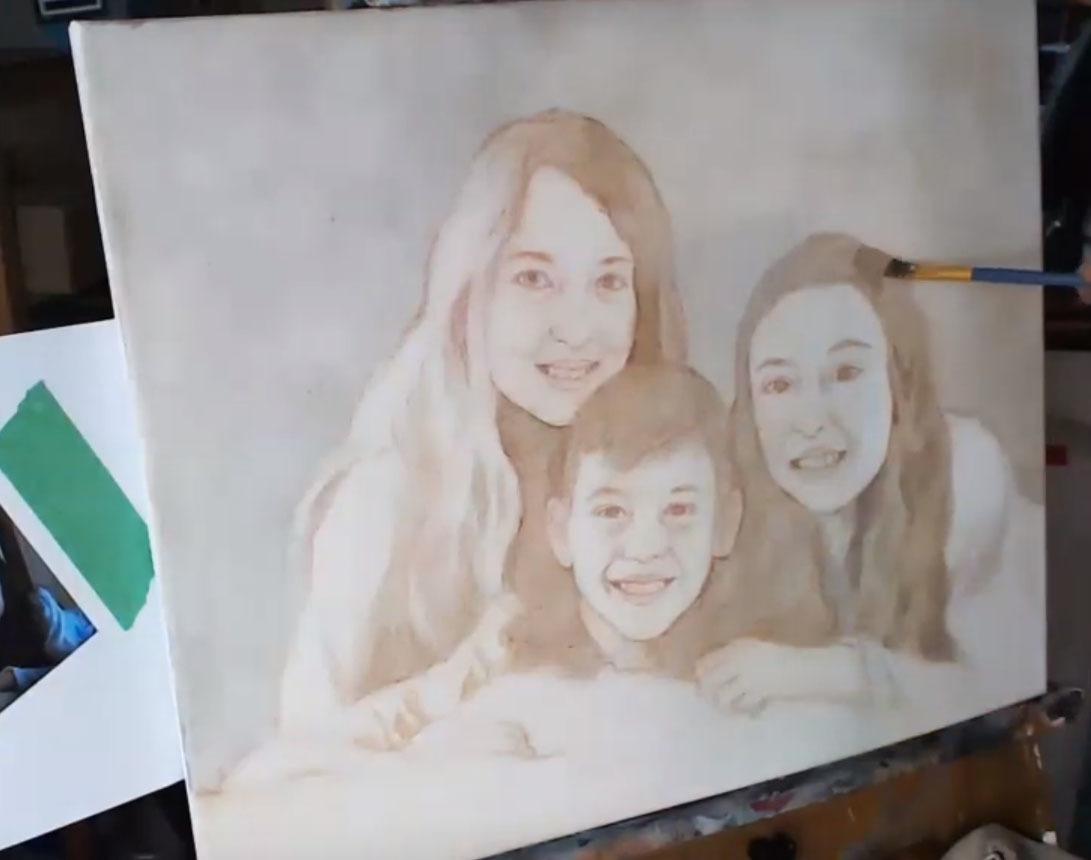
How to Block-in Hair on Your Acrylic Portrait
The steps to block-in hair, adding depth and realism with layered glazing techniques.
When creating a realistic portrait, the process of blocking-in hair plays a crucial role in establishing depth and capturing lifelike textures. In this tutorial, you will learn step-by-step how to block in hair on an acrylic portrait . By following these essential techniques, you’ll discover how to mix tones, apply glazes, and build up layers to make your portrait more three-dimensional.
Understanding the Block-in Process for Hair
Before diving into the specifics, it’s essential to understand the “block-in” technique. Blocking-in refers to the initial stage where you establish basic shapes, values, and shadows before adding detailed layers. This foundational stage is critical for creating a structured framework for your portrait, ensuring that as you add more layers, the hair appears realistic, cohesive, and well-blended.
Step 1: Establishing the Background and Hair Boundaries
The first step in blocking-in hair is defining the broader sections of the portrait. In the video, I start by setting up a muted, cloudy background. Using colors like ultramarine blue and raw umber dark, blends these shades to create a smooth transition from cooler to warmer tones. Because this method can also apply to your portrait’s background, ensuring the hair and face blend seamlessly into the backdrop without looking disconnected.
Once your background is set, begin focusing on the hair. Start by identifying the boundaries and large sections of hair. At this stage, do not worry about small details like individual strands; instead, focus on the bigger shapes and how the hair flows around the face and neck.
Step 2: Darkening the Hair with Cool Tones
To create depth, it is essential to start with darker tones. I recommend that using a mixture of raw umber dark and ultramarine blue for the base layer. By adding the blue, you cool down the mix, which is vital when working with shadows. The darker, cooler tones help create the illusion of depth, mimicking the way light interacts with the hair in dimly lit areas.
As I explain, the cooler tones mimic the appearance of shadows when light is scarce. The mixture of ultramarine blue and raw umber dark serves as the ideal “Payne’s gray” substitute, but with more versatility since you can customize the shade based on your needs. Apply this mixture lightly over the larger sections of hair, focusing on the areas that will remain in shadow.
Step 3: Defining Local Values and Shapes
Once the darker base coat is applied, it’s time to define the local values. Local values refer to smaller, nuanced changes in light and shadow. Instead of focusing on the entire area, look for pockets of darker tones that indicate hair bends, waves, or areas where light is blocked.
For example, the hair under the chin or near the ear will often feature shadows. I use precise brushstrokes to form the shadowed sections, while leaving lighter areas untouched to create contrast. This helps in defining the unique shapes that hair takes on.
Use a fine-tipped brush to enhance the details and smaller sections. At this stage, you don’t need to be exact, but try to match the general direction and flow of the hair. Your initial layers are meant to be flexible, allowing you to adjust later.
Step 4: Gradation and Layering for Hair Striations
Acrylic portraiture thrives on the glazing technique, which involves building layers of translucent paint to achieve a gradual change in value. In this step, focus on blending your dark tones into lighter ones by applying thin layers of glaze. I use clear medium to thin his paint and slowly introduces gradation into the hair.
To add natural-looking striations (the small, subtle streaks of hair), use the tip of your brush and apply long, delicate strokes. These strokes should be thin and follow the natural grain of the hair. Remember to vary the pressure on your brush. For darker areas, apply more pressure, while lighter sections need less to avoid over-darkening.
Step 5: Highlighting Key Areas and Adding Definition
After laying down the foundational layers and working on the shadows, the next step involves highlighting. In the reference image, I notices that there’s a distinct highlight at the top of the hair. Using a slightly lighter mixture of raw umber dark, he begins to emphasize these sections.
To create highlights, focus on the areas where light naturally hits the hair such as the crown, or where the hair parts. A light touch with a fine brush can enhance these areas, bringing dimension and texture. Be careful not to overdo the highlights; subtlety is key.
For instance, adding a soft glaze using the clear medium allows you to leave some areas lighter. Later, you can apply a reddish glaze, which, as I take notes, will provide a ton of luminosity and help the hair “pop” out of the portrait with vibrant, warm tones.
Tips and Techniques for Effective Hair Block-in
- Use a Cool Base for Dark Hair: When blocking in darker hair, use cool tones mixed with raw umber and ultramarine blue. This ensures the shadowed areas appear more realistic and avoid a flat, monotone appearance.
- Vary Brush Strokes: For a natural hair texture, use different brush strokes long strokes for defining edges and shorter, dabbing strokes for blending. This combination will give your painting more depth and a smoother transition between light and shadow.
- Gradation is Key: Gradually build layers using the glazing technique. Thin out your paint with clear medium and apply transparent layers. This technique will allow you to adjust tones without overpowering the base layer.
- Pay Attention to the Reference Photo: Use the reference photo to determine where the highlights and shadows fall. Aligning shadows with landmarks like the lips, nose, or chin ensures proportional and accurate placement.
- Don’t Overdo Highlights: Highlights should be subtle. Too much highlighting can make the hair look unrealistic and take away from the depth created by the shadows.
Conclusion: Building Up for Realism
Blocking-in hair is all about establishing the basic framework before moving on to finer details. By using cool tones, creating gradation, and employing glazing techniques, you can achieve a realistic and lifelike portrayal of hair. Remember, the key is patience building up layers slowly ensures that the final result will have depth, texture, and vibrancy.
Whether you are a beginner or an experienced painter, mastering the block-in process is crucial for creating beautiful acrylic portraits that stand out. Start with the shadows, define the mid-tones, and finish with highlights for hair that looks three-dimensional and natural.
For more tutorials and painting tips, visit RealisticAcrylic.com and take your portrait painting skills to the next level!
Did you enjoy this video?
Share it with your artist friends if you think they will find it helpful! Also, if you need more help, hop onto courses.realisticacrylic.com where we concentrate on just acrylic portraits, and how to make yours the best it can be.
My goal is to make your life as acrylic portrait artist easier by giving you tips, lessons, and tutorials.
Yours for Better Portraits,

If you found this post helpful or encouraging, would you send it on ahead? Let others know with the share buttons below. I’d love to hear your comments. Thank you so much!

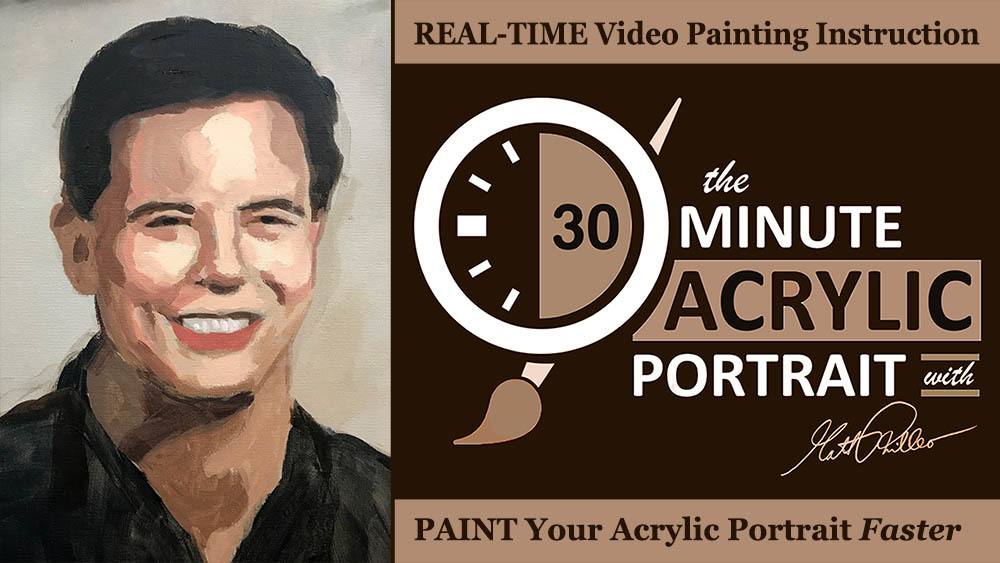
The 30-Minute Acrylic Portrait: “Happy Man in Black”
Transform your painting skills: Create a striking 30-minute acrylic portrait with ease!
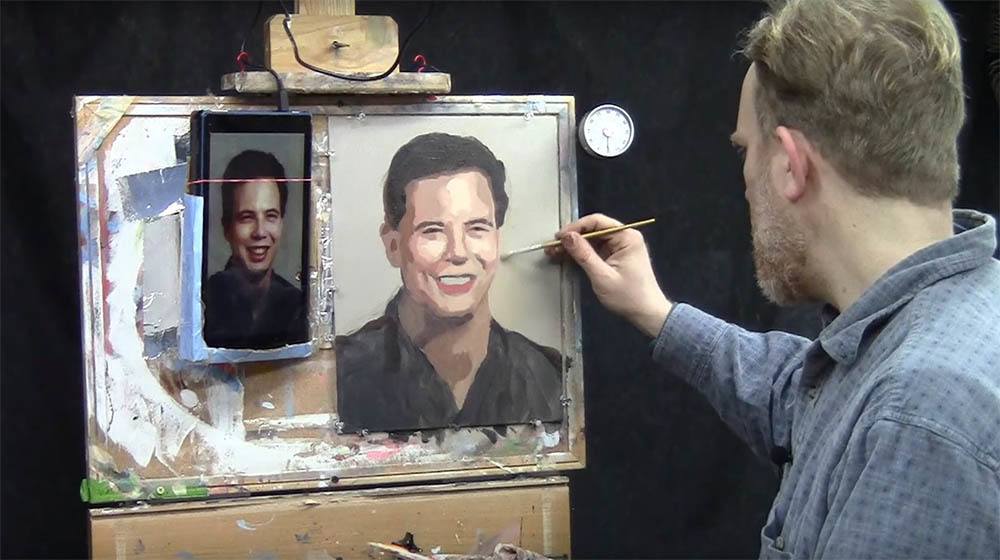
Let me show you how in the latest episode of the 30-Minute Acrylic Portrait. I’ll demonstrate on an 11″ x 14″ commissioned portrait of a pastor (“the happy man in black”) painting quickly with no sketch underneath.

Although this more opaque, painterly style is not as precise as the glazing technique that most people know me for, it’s fun to loosen up and push yourself to see what you can accomplish in a half an hour.
By the way, I will be adding more to this portrait after the show is done (maybe an hour or two of video), and I plan on including it here as bonus videos in the classes section, here at Realistic Acrylic Portrait School.
You will learn how to:
- refine any proportions that were off
- adjust the original blocked-in values
- smooth out your shading.
- enhance contrast between the subject and background
- add detail
Interested? Sign up here and I’ll let you know when I post those lessons…
Learn How to Paint Acrylic Portraits With My Free Mini-Video Course!Okay, without further ado…here is Season 2, Episode 1 of the “30-Minute Acrylic Portrait.”
Let me know what your thoughts—have you ever tried doing a portrait like this and would it help you paint faster?
Also, I’m thinking of doing a 30-minute acrylic portrait show with my usual glazing technique, complete with a sketch underneath, rather than this more aggressive opaque style. I’m curious what we could accomplish in a half an hour with that technique, though we certainly wouldn’t be able to complete a painting. But the 30-minute challenge may push us to create the foundation a little faster, hopefully without sacrificing quality.
Is that something you would be interested in seeing?
Yours for Better Portraits,

If you found this post helpful or encouraging, would you send it on ahead? Let others know with the share buttons below. I’d love to hear your comments. Thank you so much!
