- You are here:
- Home »
- Blog »
- Uncategorized »
- Weird Way How to Apply Gesso to Your Canvas

Weird Way How to Apply Gesso to Your Canvas
Most store-bought canvases are not primed very well and can benefit from another layer or two of gesso.
Introduction:
When it comes to preparing a canvas for painting, most artists stick to traditional methods. However, there’s an unconventional technique that can give you a smoother surface and enhance the detail in your work. In this tutorial, we’ll explore a unique way to apply gesso to your canvas using a drywall taping knife. This method not only helps in creating a finer texture but also saves you from extensive sanding later on. Let’s dive into this step-by-step guide.
The Tools You’ll Need:
Before starting, gather the necessary tools and materials. You’ll need:
- Gesso: The base primer for your canvas.
- Matte Medium: Helps to smooth out the gesso and make it more fluid.
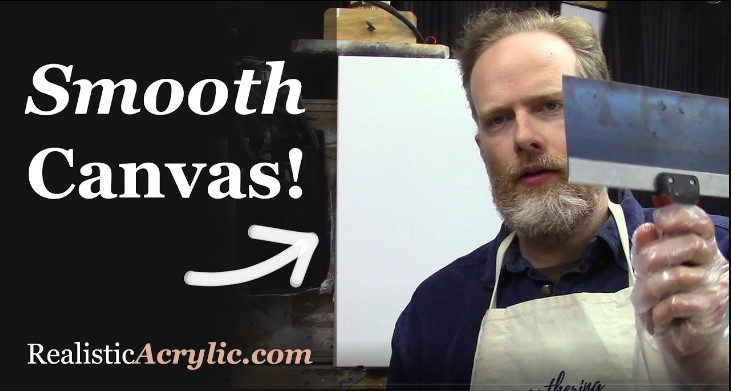
- Drywall Taping Knife (6-inch): The star of this method for spreading the gesso evenly.
- Flat Edge Paintbrush: For initial application.
- Yogurt Container: To mix the gesso and matte medium.
- Gloves and Apron: To protect your hands and clothing.
Preparing the Gesso Mixture:
- Mixing the Gesso: Begin by pouring a small amount of gesso into a container—an empty yogurt cup works perfectly. Fill it about a quarter of the way.
- Adding Matte Medium: To ensure a smoother application, add a few squirts of matte medium into the gesso. This addition will make the mixture more fluid, helping it spread more easily across the canvas.
- Stirring: Use a palette knife to thoroughly mix the gesso and matte medium. Ensure the consistency is even, with no lumps or dry spots.
Applying the Gesso:
- Initial Application with a Brush: Dip your flat edge paintbrush into the gesso mixture, and apply it to the top left corner of your canvas. Brush downwards, covering the entire surface. Aim for a generous, even coat.
- Smoothing with the Drywall Taping Knife: After applying the gesso, grab your drywall taping knife. Starting at the top, use even pressure to smooth the gesso down the canvas. Work in long, continuous strokes to avoid leaving streaks or ridges.
- Feathering the Edges: As you work, you may notice ridges forming on the surface. To remove these, lightly graze the surface with the taping knife, using minimal pressure. This technique will help blend the gesso evenly across the canvas.
Troubleshooting Common Issues:
- Dealing with Ridges: If ridges persist, continue feathering them out with the knife. Adjust your pressure as needed, moving from firm to light strokes to achieve a smooth finish.
- Applying Additional Layers: If the first coat is too thin, allow it to dry and then apply a second coat using the same method. This additional layer can further enhance the smoothness of your canvas.
Final Touches:
After the gesso has dried, it’s time to inspect the canvas. Look for any remaining ridges or imperfections. If you find any, lightly sand the surface using a 250 or 300-grit sandpaper. This step will ensure an ultra-smooth finish, ready for painting.
Tips for Success:
- Work Quickly: Gesso can dry fast, especially in a warm environment. To prevent streaks, work swiftly when applying and smoothing the gesso.
- Use the Right Tools: While a larger drywall trowel can be used, a 6-inch taping knife offers better control and precision, especially on smaller canvases.
- Practice Makes Perfect: This technique may take some getting used to, but with practice, you’ll find it easier to achieve a smooth, professional-quality canvas.
Using a drywall taping knife to apply gesso might seem unusual, but it’s a powerful technique for artists seeking a smoother canvas surface. By following these steps, you can minimize brush strokes, reduce the need for sanding, and create a better foundation for your paintings.
Read more about my additional resources, tutorials, to learn more and check out my free courses here. . Whether you’re a beginner or an experienced artist, there’s always something new to learn and apply to your paintings. Happy painting!
- Sketching Your Painting Accurately
- Beginning a Pet Portrait in Acrylic
- The Mystery of Realism in Painting
- Apply A Burnt Sienna Glaze to a Portrait
- Learn How to Sketch a Portrait Freehand in 45 Minutes
- Adding highlights to your acrylic painting
- 5 Excellent Reasons to Use Aluminum Foil
- Paint Realistic Wrinkles in Acrylic
- Painting Clothing in an Acrylic Portrait
- Paint a Cloudy Sky Acrylic
- How to add Semi-Opaque Highlights
- How to Enhance the Contrast in Your Acrylic
- How to Add Glaze to Your Acrylic Painting
- Paint Realistic Reflections on Eyeglasses in an Acrylic Portrait
- Build Up Depth on Your Acrylic Portrait Backgrounds
- How Do You Do Layers With the Glazing Technique?
- Learn How to Paint Wrinkles in Acrylic
Read more about how to paint a portrait that you can surely be proud of!
I’d love to hear your thoughts on this video. Please share it with your friends and family. Let me know if you have any further questions. I’ll greatly help you.
If you’d like to learn more, sign up for my free email tips and video class today.
Learn How to Paint Acrylic Portraits With My Free Mini-Video Course!
Thank you so much for taking the time to read this tutorial and watch the video. That means a lot to me. I hope you find it very helpful in your portrait painting.
Yours for Better Portraits,

P.S. Did you find this post helpful or encouraging? If so, send it on ahead! Let others know with the share buttons below. I’d love to hear your comments. Thank you so much! Also, do you have a question on acrylic portrait painting you’d like answered? Let me know, and I’d be happy to help!
