- You are here:
- Home »
- Blog »
- Video Tutorial »
- Easier Way to Paint a Cloudy Sky with Acrylic

Easier Way to Paint a Cloudy Sky with Acrylic
Creating luminous skies: unlock simple techniques for stunning cloudy landscapes with acrylics”
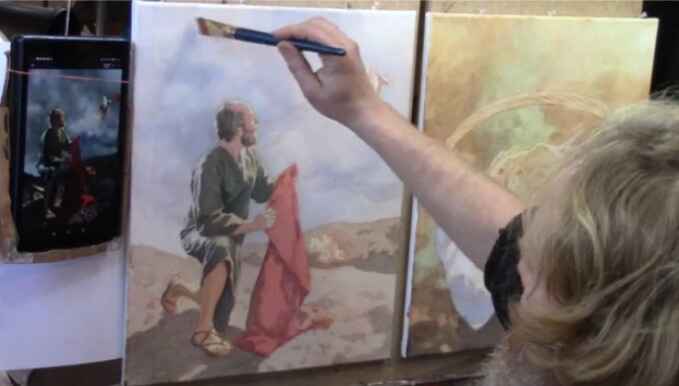
In the realm of acrylic painting, capturing the beauty of a cloudy sky can be a rewarding yet challenging endeavor. Because the play of light, the depth of shadows, and the nuances of color all contribute to the sky’s dynamic character. However, many artists struggle with creating lifelike skies, often ending up with flat or muddy colors. So in this blog post, an easier way to paint a cloudy sky using the acrylic glazing technique will be explored, enabling artists to achieve stunning, luminous results.

Understanding Acrylic Glazing
The acrylic glazing technique involves applying thin layers of translucent paint to create depth and luminosity. Unlike traditional methods that rely on opaque colors, glazing allows for a more vibrant appearance by letting the underlayers show through. This technique not only enhances the richness of colors but also enables seamless blending, resulting in skies that appear to glow.
Preparing Your Workspace
Before diving into painting, it is crucial to prepare your workspace effectively. The following tools and materials are essential:
- Acrylic paints: Ultramarine blue, raw umber dark, alizarine crimson, and any other preferred colors.
- Brushes: A variety of brushes, including flat and round brushes for different techniques.
- Palette: For mixing colors.
- Clear acrylic matte medium: To create the glazing effect.
- Canvas: A white canvas is recommended to start the layering process.
Setting up a clean, well-lit workspace will enhance the painting experience and provide better visibility of color mixing.
Step-by-Step Process to Paint a Cloudy Sky
Layering the Base Color
So start with a white canvas as your base. because this white background serves as a foundation for the layers of color that will be built upon it. And then to achieve the desired sky color, mix ultramarine blue with clear acrylic matte medium. Given that the medium adds transparency, allowing the underlying white canvas to enhance the vibrancy of the blue.
Building Layers for Depth
In this case the base color established, gradually add layers of color. Where the glazing technique thrives on transparency; thus, each layer should be thin. So this process allows the colors to build upon one another without becoming overly opaque. By the time you finish, the final sky should appear rich and luminous, akin to a Polaroid photograph developing over time.
Creating Cloud Shapes and Shadows
Next, is to focus on forming the clouds. While using a mixture of raw umber dark and your blue glaze, create a neutral gray tone that will be used for shading. As you apply this mixture, remember to maintain a light touch. Instead employ short, choppy diagonal strokes to create texture, simulating the soft, fluffy appearance of clouds.
Final Touches
To enhance luminosity, use alizarine crimson sparingly to add warmth to the clouds. And then apply this color strategically to areas where a reddish tone is desired, thereby achieving a more dynamic color balance. It is important not to cover previously painted areas entirely, as this can disrupt the layering effect achieved through glazing.
Tips and Techniques for Successful Skies
- Color Mixing: Pay attention to the colors being mixed. Using lighter, opaque reds can detract from the desired translucency.
- Working with Light and Shadow: Establishing strong contrasts between light and shadow will give depth to your clouds.
- Using a Light Touch: Glazing works best when a gentle touch is maintained. Overworking the paint can lead to a muddy appearance.
Common Mistakes to Avoid
Artists often fall into the trap of overworking the paint, which can lead to loss of vibrancy and flatness. Another common mistake is neglecting color balance. Always step back and assess your work to ensure that colors harmonize and contribute to the overall composition.
While acrylic glazing technique offers an easier and more enjoyable way to paint a cloudy sky. You can also embrace the layering process and understanding the nuances of color mixing, and achieve stunning, luminous skies that bring their paintings to life. So feel free to experiment with this technique and share your results. Happy painting!
If you’re looking for more instructional videos on how to improve your acrylic painting, visit www.realisticacrylic.com for more tutorials and check out my free courses here.
Easier Way to Paint a Cloudy Sky with Acrylic
LEARN MORE
- Adding highlights to your acrylic painting
- 5 Excellent Reasons to Use Aluminum Foil
- How Photoshop alter your Photo
- Painting Clothing in an Acrylic Portrait
- Paint a Cloudy Sky Acrylic
- How to add Semi-Opaque Highlights
- How to Enhance the Contrast in Your Acrylic
- How to Add Glaze to Your Acrylic Painting
- Paint Realistic Reflections on Eyeglasses in an Acrylic Portrait
- Build Up Depth on Your Acrylic Portrait Backgrounds
- How Do You Do Layers With the Glazing Technique?

