- You are here:
- Home »
- Blog »
- Video Tutorial »
- How to Varnish an Acrylic Portrait in ONE STEP

How to Varnish an Acrylic Portrait in ONE STEP
Learn the simple, foolproof method to varnish your acrylic portraits in one step, ensuring protection, enhanced color, and a professional finish.
When you’ve completed an acrylic portrait, you want to make sure it stands the test of time. Varnishing your artwork is the final touch that not only protects it but also enhances its appearance. Because in this tutorial, we’ll walk you through how to varnish an acrylic portrait in the one-step process, ensuring a professional, smooth finish every time.
Whether you’re new to varnishing or a seasoned artist, this simple technique will leave your acrylic portraits looking polished and ready to shine for years to come.
Why Varnishing Is Essential
Varnishing is often overlooked but is one of the most important steps in preserving your acrylic portraits. Here’s why you should varnish:
- Protection from Dust and Dirt: Varnish acts as a shield, protecting your painting from dirt, dust, and other environmental factors that could damage it over time.
- Prevents Scratches: It adds a layer of defense against accidental scuffs or scratches.
- Enhances Color and Depth: Varnish can bring out the depth and vibrancy in your colors, making your painting look more saturated and alive.
- Even Sheen for a Professional Finish: A good varnish gives your painting a consistent sheen, making it look more professional.

Preparing Your Workspace
Before you begin the varnishing process, it’s important to set up a clean, flat workspace. Unlike painting, where working vertically on an easel is common, varnishing must be done on a horizontal surface. If your painting is at an angle, the varnish can drip and dry unevenly, ruining the finish.
Step 1: Lay Your Painting Flat
Then place your painting on a flat table. To avoid picking up dust or dirt from the surface, elevate the canvas slightly. You can use items like jar lids or small wooden blocks to lift it off the table.
Step 2: Gather Your Materials
Here’s what you’ll need:
- Matte Varnish: For this tutorial, we recommend Nova Color Matte Varnish. Although labeled as matte, it dries to a satin finish, giving your painting a subtle sheen.
- Gloss Medium (Optional): Adding a bit of gloss medium (around 15%) can increase the shine of the varnish, giving it more vibrancy.
- Wide Flat Brush: A 10-inch flat brush works best for larger portraits (16×20 inches). For smaller portraits, use a 2-inch flat brush.
- Towel: Keep a towel nearby to wipe excess varnish from the brush.
Mixing and Preparing the Varnish
Step 1: Stir, Don’t Shake
Pour your varnish into a container, such as a clean yogurt container. Add about 15% gloss medium if you want a shinier finish. Use a whisk or a paint stir stick to thoroughly mix the varnish. Avoid shaking the container, as this can create bubbles that may affect the smoothness of the finish.
Step 2: Prepare Your Brush
Before dipping your brush into the varnish, lightly mist the bristles with water. This helps the varnish spread more evenly across the canvas.
Applying the Varnish
Step 1: Start in Sections
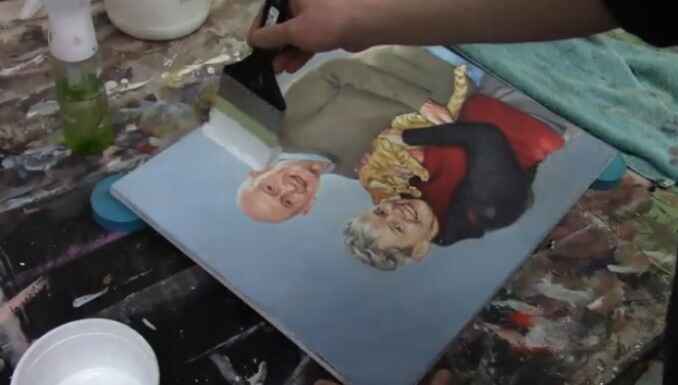
Dip your brush into the varnish, ensuring it’s evenly coated but not overloaded. When you start by applying the varnish about one-third of the way down the canvas. Brush in even strokes from top to bottom, making sure to overlap each section slightly.
Step 2: Use Long, Even Strokes
In this case, as you varnish, use long, smooth strokes to spread the varnish across the painting. Flip your brush over occasionally to ensure an even distribution. Avoid pressing too hard, as this can create streaks.
Step 3: Avoid Over-Brushing
One of the most common mistakes when varnishing is over-brushing. After applying the varnish in a few strokes, resist the urge to keep going over the same areas. Even if the varnish appears streaky or cloudy at first, it will dry clear. Over-brushing can cause the varnish to become uneven and may introduce unwanted bubbles.
If you’re looking for more instructional videos on how to improve your acrylic painting, visit www.realisticacrylic.com for more tutorials and check out my free courses here. .
- Adding highlights to your acrylic painting
- 5 Excellent Reasons to Use Aluminum Foil
- Paint Realistic Wrinkles in Acrylic
- Painting Clothing in an Acrylic Portrait
- Paint a Cloudy Sky Acrylic
- How to add Semi-Opaque Highlights
- How to Enhance the Contrast in Your Acrylic
- How to Add Glaze to Your Acrylic Painting
- Paint Realistic Reflections on Eyeglasses in an Acrylic Portrait
- Build Up Depth on Your Acrylic Portrait Backgrounds
- How Do You Do Layers With the Glazing Technique?
- Learn How to Paint Wrinkles in Acrylic
Read more about how to paint a portrait that you can surely be proud of!
I’d love to hear your thoughts on this video. Please share it with your friends and family. Let me know if you have any further questions. I’ll greatly help you.
If you’d like to learn more, sign up for my free email tips and video class today.
Learn How to Paint Acrylic Portraits With My Free Mini-Video Course!
Thank you so much for taking the time to read this tutorial and watch the video. That means a lot to me. I hope you find it very helpful in your portrait painting.
Yours for Better Portraits,

P.S. Did you find this post helpful or encouraging? If so, send it on ahead! Let others know with the share buttons below. I’d love to hear your comments. Thank you so much! Also, do you have a question on acrylic portrait painting you’d like answered? Let me know, and I’d be happy to help!
