- You are here:
- Home »
- Blog »
- Video Tutorial »
- How to Transition Slowly out your Sketch to Portrait

How to Transition Slowly out your Sketch to Portrait
Master the art of realism: A step-by-step guide to transitioning from sketch to portrait
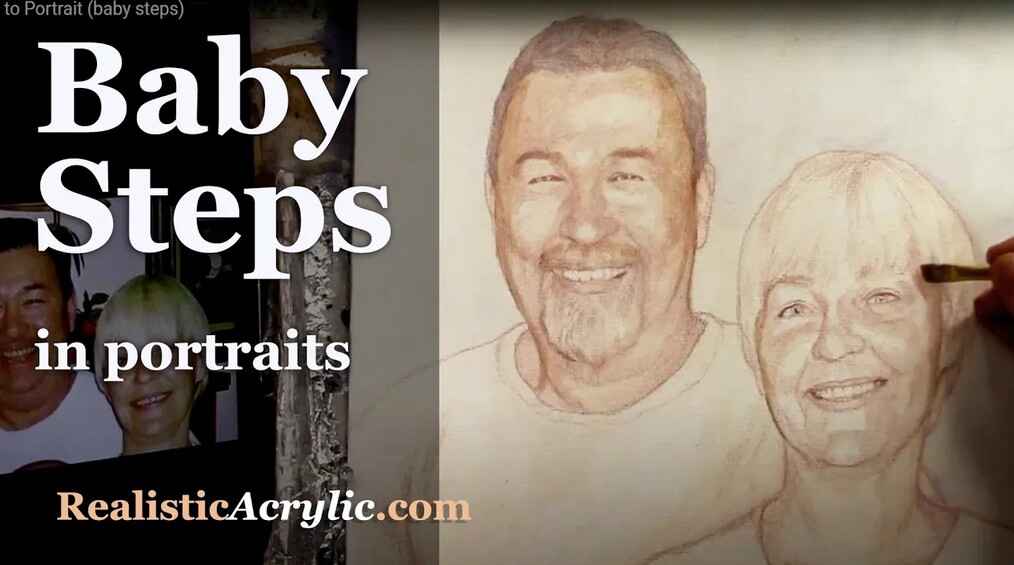
Creating a realistic portrait from a simple sketch requires patience, layering, and precise color adjustments. If you have ever struggled with making a smooth transition from sketch to portrait, this guide will help you step by step. By focusing on brush techniques, glazing methods, and color mixing, you will gradually build depth and realism in your artwork.
Why Transitioning Smoothly Matters
The transition from a sketch to a fully developed portrait is crucial for achieving lifelike results. Rushing through this process can lead to a flat, unbalanced painting. Instead, taking slow and deliberate steps allows for smoother shading, natural skin tones, and a polished finish.
Key Elements of a Smooth Transition:
- Building gradual layers
- Adjusting colors for depth and dimension
- Blending tones for soft, realistic effects
- Refining details without overworking
Step-by-Step Process: From Sketch to Portrait
1. Establishing the Base Layers
Start with a light wash of color to define major shadows and highlights. This will act as an under painting to guide future layers.
- Use thin, transparent layers rather than heavy application.
- Mix colors using a glazing technique to maintain subtle shifts in tone.
- Apply short, choppy strokes with a soft flat brush for smooth blending.
2. Adjusting Skin Tones and Values
To create realistic flesh tones, focus on temperature and saturation.
- For warm, tanned skin: Use Burnt Sienna and Raw Sienna in thin layers.
- For cooler, pale skin: Use Raw Umber Dark with matte medium to create subtle undertones.
- Always start with a faint application and gradually build intensity.
3. Refining Features with Glazing
Glazing allows for controlled adjustments without losing previous layers.
- Apply a thin glaze over darker areas to deepen shadows.
- Use a light, transparent mix to highlight prominent features.
- Work slowly to ensure colors remain balanced and natural.
4. Blending and Final Touches
To unify the portrait and eliminate harsh transitions:
- Pivot between the pointed and flat edge of your brush for smooth blending.
- Introduce subtle highlights on the forehead, nose, and cheekbones.
- Step back frequently to assess the overall composition before making final adjustments.
Tips and Techniques for a Seamless Transition
✔ Use Transparent Layers – Avoid thick, opaque paint layers too early in the process.
✔ Work with the Right Brushes – Flat and round brushes offer better control for blending.
✔ Glaze for Smoothness – Multiple layers of thin paint create realistic depth.
✔ Adjust Colors as Needed – Pale vs. warm skin tones require different pigment ratios.
✔ Take Your Time – Rushing will result in harsh lines and unnatural shading.
Transitioning from sketch to portrait requires patience, layering, and a deep understanding of colors and values. By following these techniques, you can develop a realistic and polished portrait with depth and subtlety.
Are you ready to refine your skills further? Keep practicing, experiment with glazing, and enjoy the process of bringing your sketches to life! 🎨
FAQ: Transitioning from Sketch to Portrait
1. What is the best way to avoid harsh transitions?
Use thin glazes and work in layers. Blending with a soft brush also helps create seamless shading.
2. How do I choose the right colors for skin tones?
Warm skin tones benefit from Burnt Sienna and Raw Sienna, while cooler tones need more Raw Umber Dark with added medium.
3. Should I use slow-drying mediums for blending?
It is not necessary, but you can experiment with retarders if you struggle with acrylic drying times.
4. How do I prevent overworking the painting?
Step back frequently and evaluate your work. If an area looks overworked, use a thin glaze to correct the tone.
LEARN MORE
- Sketching Your Painting Accurately
- Beginning a Pet Portrait in Acrylic
- The Mystery of Realism in Painting
- Apply A Burnt Sienna Glaze to a Portrait
- Learn How to Sketch a Portrait Freehand in 45 Minutes
- Adding highlights to your acrylic painting
- 5 Excellent Reasons to Use Aluminum Foil
- Paint Realistic Wrinkles in Acrylic
- Painting Clothing in an Acrylic Portrait
- Paint a Cloudy Sky Acrylic
- How to add Semi-Opaque Highlights
- How to Enhance the Contrast in Your Acrylic
- How to Add Glaze to Your Acrylic Painting
- Paint Realistic Reflections on Eyeglasses in an Acrylic Portrait
- Build Up Depth on Your Acrylic Portrait Backgrounds
- How Do You Do Layers With the Glazing Technique?
- Learn How to Paint Wrinkles in Acrylic
Read more about how to paint a portrait that you can surely be proud of!
I’d love to hear your thoughts on this video. Please share it with your friends and family. Let me know if you have any further questions. I’ll greatly help you.
If you’d like to learn more, sign up for my free email tips and video class today.
Learn How to Paint Acrylic Portraits With My Free Mini-Video Course!Thank you so much for taking the time to read this tutorial and watch the video. That means a lot to me. I hope you find it very helpful in your portrait painting.
Yours for Better Portraits,

P.S. Did you find this post helpful or encouraging? If so, send it in ahead! Let others know with the share buttons below. I’d love to hear your comments. Thank you so much! Also, do you have a question on acrylic portrait painting you’d like answered? Let me know, and I’d be happy to help!
