- You are here:
- Home »
- Blog »
- Video Tutorial »
- How to Paint Realistic Wrinkles on Jeans in Acrylic

How to Paint Realistic Wrinkles on Jeans in Acrylic
Bring fabric to life: step-by-step guide to painting wrinkles on denim in acrylic portraits
Introduction
In portrait painting, every detail matters, especially when it comes to rendering fabric. The way fabric wrinkles and folds can add a level of realism that brings a portrait to life. In this tutorial, we’ll explore how to paint realistic wrinkles on jeans using acrylics, a technique that will add depth and texture to your work.
Step 1: Understanding Fabric Dynamics
Before diving into the painting process, it’s crucial to understand how fabric behaves. Jeans, being made of denim, have a sturdy yet flexible structure. When painting wrinkles, pay attention to the direction of the light, the fabric’s tension, and where the jeans naturally crease. Study reference photos to get a good grasp of how light interacts with the folds and how shadows are cast.
Step 2: Preparing Your Canvas
Start with a well-prepared canvas or hardboard. Ensure that the surface is smooth, as this will allow for finer details when painting the wrinkles. If your canvas has a rough texture, consider sanding it lightly to achieve a smoother finish. Apply a base coat that reflects the overall color of the jeans, typically a mid-tone blue or gray.
Step 3: Blocking in the Main Colors
Using a flat brush, block in the main colors of the jeans. Begin with the mid-tones, covering the entire area where the jeans will be. Use a mix of ultramarine blue and a touch of black for a typical denim color. Once the base is dry, start adding the lighter tones where the fabric catches the light and darker tones where the shadows are deepest.
Step 4: Adding the Wrinkles
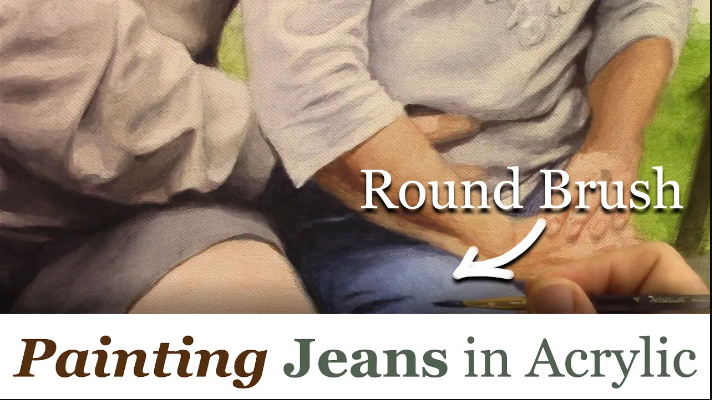
With the base colors in place, it’s time to add the wrinkles. Use a fine detail brush to paint the lines of the wrinkles. Start with the darkest shadows within the folds using a mix of ultramarine blue and burnt umber. Follow the natural flow of the fabric as it folds and creases, keeping your brushstrokes smooth and fluid.
Step 5: Creating Depth with Highlights and Shadows
To create depth, alternate between adding shadows and highlights. For shadows, use a darker tone of your base color mixed with a small amount of black. Apply this in the deepest parts of the wrinkles. For highlights, mix your base color with white or a light gray. Apply the highlights to the peaks of the wrinkles where the light hits. This contrast between light and shadow is what will make the wrinkles appear three-dimensional.
Step 6: Refining the Wrinkles
Once you’ve established the basic wrinkles, refine them by softening the transitions between light and shadow. Use a dry brush technique to blend the edges of the shadows and highlights. This will give the wrinkles a more natural and less harsh appearance. If necessary, go back and add more shadows or highlights to enhance the depth further.
Step 7: Detailing the Fabric Texture
To make the denim texture more realistic, you can add fine details that mimic the weave of the fabric. Use a small brush to create tiny lines and dots that follow the direction of the fabric. This step is subtle but can add a lot of realism to the overall painting.
Step 8: Final Touches
Take a step back and examine your painting. Are the wrinkles convincing? Do they follow the natural flow of the fabric? Make any necessary adjustments, adding more highlights or deepening the shadows where needed. Finally, seal your painting with a gloss or matte varnish to protect it and bring out the vibrancy of the colors.
Conclusion
Painting wrinkles on jeans in an acrylic portrait requires attention to detail and a good understanding of how fabric behaves. By following these steps and practicing, you’ll be able to create lifelike fabric textures that add realism and depth to your portraits. Remember, the key is in the contrast between light and shadow, so take your time to build these elements gradually. Happy painting!
To learn more watch my free tutorial about how to paint wrinkles on your jeans acrylic portrait painting.
LEARN MORE
- Sketching Your Painting Accurately
- Beginning a Pet Portrait in Acrylic
- The Mystery of Realism in Painting
- Apply A Burnt Sienna Glaze to a Portrait
- Learn How to Sketch a Portrait Freehand in 45 Minutes
- Adding highlights to your acrylic painting
- 5 Excellent Reasons to Use Aluminum Foil
- Paint Realistic Wrinkles in Acrylic
- Painting Clothing in an Acrylic Portrait
- Paint a Cloudy Sky Acrylic
- How to add Semi-Opaque Highlights
- How to Enhance the Contrast in Your Acrylic
- How to Add Glaze to Your Acrylic Painting
- Paint Realistic Reflections on Eyeglasses in an Acrylic Portrait
- Build Up Depth on Your Acrylic Portrait Backgrounds
- How Do You Do Layers With the Glazing Technique?
- Learn How to Paint Wrinkles in Acrylic
Read more about how to paint a portrait that you can surely be proud of!
I’d love to hear your thoughts on this video. Please share it with your friends and family. Let me know if you have any further questions. I’ll greatly help you.
If you’d like to learn more, sign up for my free email tips and video class today.
Learn How to Paint Acrylic Portraits With My Free Mini-Video Course!
Thank you so much for taking the time to read this tutorial and watch the video. That means a lot to me. I hope you find it very helpful in your portrait painting.
Yours for Better Portraits,

