- You are here:
- Home »
- Blog »
- Video Tutorial »
- How To Paint Red Hair With Dark Skin Tones in 30 minutes

How To Paint Red Hair With Dark Skin Tones in 30 minutes
Learn how to paint red hair and dark skin tones in just 30 minutes
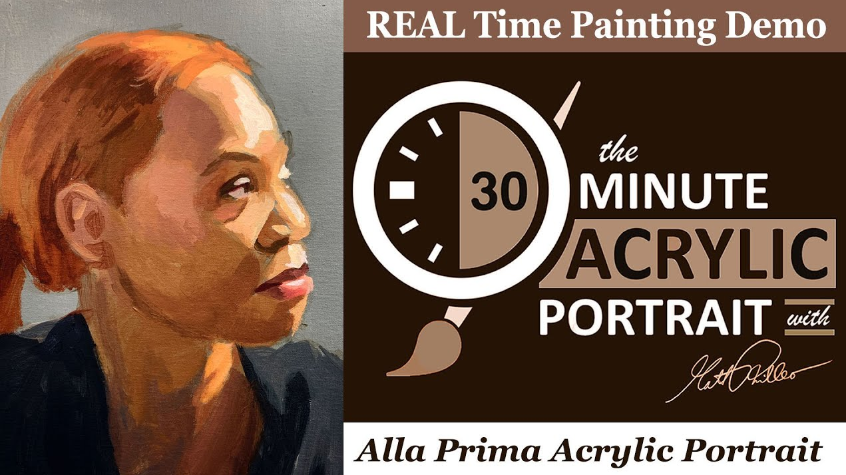
Welcome to my 30 minute acrylic portrait painting session! We’re diving into an exciting project: painting a side profile portrait of a woman with red hair and dark skin tones. This tutorial is perfect for artists looking to enhance their skills quickly and effectively. Let’s get started!
Materials and Setup
To begin, gather your materials:
- Canvas: 8×10, toned gray
- Palette: Ivory black, raw umber dark, burnt sienna, raw sienna, ultramarine blue, alizarin crimson, Napthol red, organic (pyro) orange, Indian yellow, titanium white
- Medium: Matte medium for translucency
- Brushes: Variety of flats and rounds (1/2 inch flat, 1/4 inch flat, and various rounds)
Step-by-Step Guide
1. Initial Composition
Start by blocking in the overall composition using a mixture of Ivory black, raw umber dark, and matte medium with a round brush. This step involves sketching the head’s shape, positioning the ear, and outlining major facial features and shadows.
2. Blocking in Shadows
Using a large flat brush, mix raw umber dark, titanium white, and burnt sienna to create a warm shadow color. Apply this to the shadow areas of the face, including the nose and lips. This helps establish the depth and structure of the portrait early on.
3. Adding Hair Color
For the hair, mix naphthol red, organic orange, and burnt sienna to achieve a rich, reddish color. Apply this to the hair, adding raw sienna for lighter areas. Blend these colors to create a natural transition and depth.
4. Highlighting the Skin
Use a round brush to apply highlights with a mixture of titanium white, Indian yellow, and raw sienna. Focus on the areas where light hits the face, such as the eyebrow ridge, nose, and chin. This step brings out the facial features and adds a three-dimensional effect.
5. Detailed Shadows and Features
Refine the shadows using a cooler tone mixed with raw umber dark, alizarine crimson, and ultramarine blue. Apply this to the eye sockets and other recessed areas. Darken the eye shape and add details to the lips and nose to enhance realism.
6. Hair Highlights
For the hair highlights, mix titanium white with Indian yellow and raw sienna. Apply this to the top of the hair, blending it into the darker shades to create a luminous effect. Use a fine brush for detailed highlights and flyaway hairs.
7. Clothing and Final Touches
Block in the clothing with a dark mixture of ivory black and ultramarine blue. Add lighter shades for the right side of the clothing. Refine the skin tones and add additional shading and highlights to enhance the volume and depth of the portrait.
Tips and Techniques
- Use Matte Medium: It helps in creating translucent layers, making it easier to build depth.
- Keep It Loose: During the initial stages, keep your brush strokes loose and fluid. This helps in adjusting proportions and composition easily.
- Prioritize Shadows: Establishing shadows early helps in defining the structure and form of the portrait.
- Blend Colors: Smooth transitions between different colors and tones are crucial for realism.
- Focus on Light: Highlights are essential in bringing out the features and adding a three-dimensional effect.
Painting a portrait in 30 minutes is a challenging yet rewarding exercise that sharpens your skills and helps you work efficiently. Remember, this is an excellent practice to enhance your speed and accuracy in portrait painting. If you encounter difficulties, don’t get discouraged. Keep practicing and get my free gift guide for you, “Fix Muddy Skin Tones in Your Acrylic Portrait.”
Watch the full video below!
Read more about my additional resources, tutorials, to learn more and check my free courses. Whether you’re a beginner or an experienced artist, there’s always something new to learn and apply to your paintings.
LEARN MORE
- Sketching Your Painting Accurately
- Beginning a Pet Portrait in Acrylic
- The Mystery of Realism in Painting
- Apply A Burnt Sienna Glaze to a Portrait
- Learn How to Sketch a Portrait Freehand in 45 Minutes
- Adding highlights to your acrylic painting
- 5 Excellent Reasons to Use Aluminum Foil
- Paint Realistic Wrinkles in Acrylic
- Painting Clothing in an Acrylic Portrait
- Paint a Cloudy Sky Acrylic
- How to add Semi-Opaque Highlights
- How to Enhance the Contrast in Your Acrylic
- How to Add Glaze to Your Acrylic Painting
- Paint Realistic Reflections on Eyeglasses in an Acrylic Portrait
- Build Up Depth on Your Acrylic Portrait Backgrounds
- How Do You Do Layers With the Glazing Technique?
- Learn How to Paint Wrinkles in Acrylic
Read more about how to paint a portrait that you can surely be proud of!
I’d love to hear your thoughts on this video. Please share it with your friends and family. Let me know if you have any further questions. I’ll greatly help you.
If you’d like to learn more, sign up for my free email tips and video class today.
Learn How to Paint Acrylic Portraits With My Free Mini-Video Course!Thank you so much for taking the time to read this tutorial and watch the video. That means a lot to me. I hope you find it very helpful in your portrait painting.
Yours for Better Portraits,
P.S. Did you find this post helpful or encouraging? If so, send it in ahead! Let others know with the share buttons below. I’d love to hear your comments. Thank you so much! Also, do you have a question on acrylic portrait painting you’d like answered? Let me know, and I’d be happy to help!
