- You are here:
- Home »
- Blog »
- Written Tutorial »
- How to Make Your Acrylic Portrait Realistic With Vibrant

How to Make Your Acrylic Portrait Realistic With Vibrant
From initial sketch to final Glaze: A comprehensive guide to acrylic portrait painting techniques
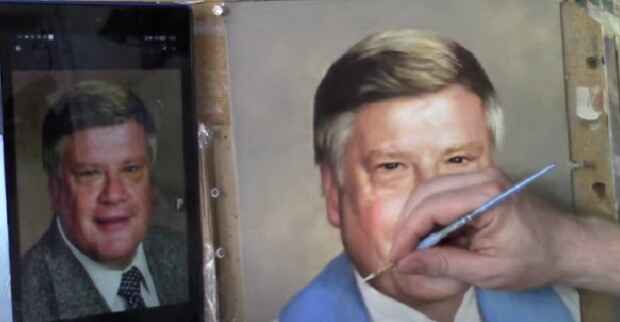
The process of making a realistic acrylic portrait painting involves mastering various techniques, with shadows being one of the most crucial. In this comprehensive guide, I’ll show you through my process of painting an 11×14 acrylic portrait of a late pastor.
Highlighting the importance of shadows and finishing touches. At the end of this video tutorial, you’ll have a deeper understanding of how to bring your portraits to life with realistic depth and dimension.
The Importance of Shadows in Portrait Painting
Shadows add depth and dimension to a portrait, making it look realistic. They help define the line of the face and other elements, giving the painting a three-dimensional appearance. Here’s how you can make the shadow of your acrylic portrait painting realistic.
- Choosing the Right Colors: Start by selecting a shadow color that complements your base tones. For this portrait, I used a mix of raw umber dark, titanium white, and ultramarine blue. Adjust the mix to avoid overly harsh or light shadows.
- Applying Shadows to the Chin and Jawline: To create a shadow under the chin, I applied the shadow mix to darken the clerical collar, enhancing the depth and realism. Extend the shadows outward from the jawline to create a natural gradient.
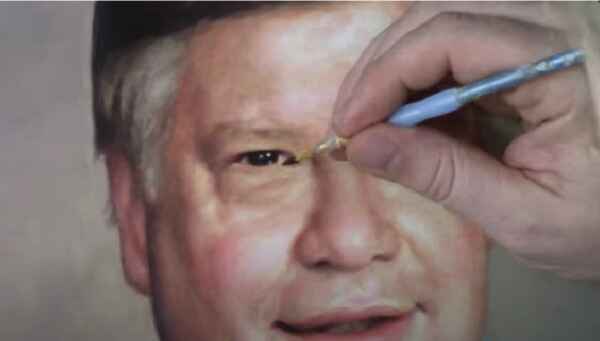
- Detailing the Eyes: Adjust the reflections near the eyelids by darkening specific areas to highlight subtle details. This step is crucial for capturing the subject’s expression and character.
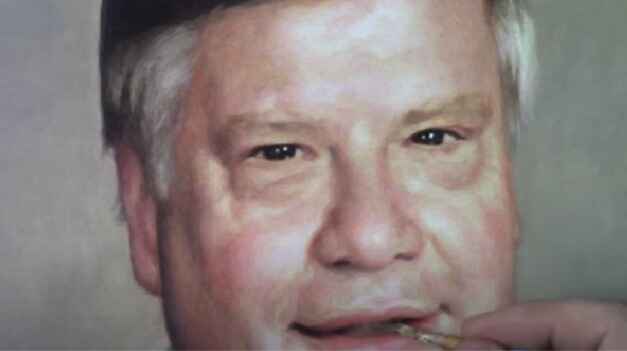
- Refining Teeth and Lips: Add fine details to the teeth and lips without overdoing them. Too much detail can make the painting look artificial. Aim for subtlety to maintain a natural look.
- Enhancing Cloths and Accessories: Softly outline the chains and zippers in the subject’s vestment. Use sketch lines as a guide, then soften them to create a realistic appearance.
Step-by-Step Process of Adding Shadows
Step 1: Mixing Shadow Colors
- Mix raw umber dark, titanium white, and ultramarine blue to create a balanced shadow color.
- Adjust the mix if it appears too blue by adding more raw umber.
Step 2: Applying Shadows Under the Chin
- Apply the shadow mix under the chin and along the jawline.
- Darken the clerical collar to emphasize the shadow cast by the chin.
Step 3: Extending Shadows from the Shoulder and Arm
- Gradually extend the shadows from the shoulder and arm area, creating a smooth gradient.
- Use a light touch to blend the shadows seamlessly into the surrounding areas.
Step 4: Adjusting Eye Reflections
- Darken the reflection near the eyelids by adding a small amount of brown at the top.
- Ensure the reflection is subtle to enhance the realism of the eyes.
Step 5: Detailing Teeth and Lips
- Add minimal details to the teeth to suggest their presence without making them too prominent.
- Enhance the highlights on the lips to give them a glossy appearance.
Step 6: Softening Sketch Lines on Cloth.
- Use a mix of white and blue to soften the sketch lines on chains and zippers.
- Break up the lines into small segments to mimic the appearance of chains.
Final Touches
As you near the completion of your portrait, it’s essential to review your work with fresh eyes. Here are some final touches to consider:
First, Emphasizing Highlights: Use titanium white mixed with a touch of red to enhance the highlights on the lips and other reflective areas.
Secondly, Cloth Details: Ensure the chains and zippers are well-defined but not overly harsh. Subtlety is key to achieving a realistic portrait.
Lastly, Balancing Shadows and Highlights: Revisit the shadowed areas and adjust as needed to ensure a balanced contrast with the highlights.
Final Review: Take a break and revisit your painting the next day. A fresh perspective can help identify areas that need improvement.
Watch the Process
For a detailed guide, watch the complete video tutorial here.
Creating a realistic acrylic portrait painting involves patience, practice, and attention to detail. Especially in learning shadow techniques and applying subtle touches. And you can bring your portraits to life with depth and realism. Remember, the key is to balance shadows and highlights, ensuring a natural and lifelike portrait.
Happy painting! Get your free acrylic portrait painting techniques and don’t forget to share your progress and finished works. If you found this tutorial helpful, please give it a thumbs up and subscribe to my YouTube channel for more painting tips and tutorials.
LEARN MORE
- Sketching Your Painting Accurately
- Beginning a Pet Portrait in Acrylic
- The Mystery of Realism in Painting
- Apply A Burnt Sienna Glaze to a Portrait
- Learn How to Sketch a Portrait Freehand in 45 Minutes
- Adding highlights to your acrylic painting
- 5 Excellent Reasons to Use Aluminum Foil
- Paint Realistic Wrinkles in Acrylic
- Painting Clothing in an Acrylic Portrait
- Paint a Cloudy Sky Acrylic
- How to add Semi-Opaque Highlights
- How to Enhance the Contrast in Your Acrylic
- How to Add Glaze to Your Acrylic Painting
- Paint Realistic Reflections on Eyeglasses in an Acrylic Portrait
- Build Up Depth on Your Acrylic Portrait Backgrounds
- How Do You Do Layers With the Glazing Technique?
- Learn How to Paint Wrinkles in Acrylic
Read more about how to paint a portrait that you can surely be proud of!
I’d love to hear your thoughts on this video. Please share it with your friends and family. Let me know if you have any further questions. I’ll greatly help you.
If you’d like to learn more, sign up for my free email tips and video class today.
Learn How to Paint Acrylic Portraits With My Free Mini-Video Course!Thank you so much for taking the time to read this tutorial and watch the video. That means a lot to me. I hope you find it very helpful in your portrait painting.
Yours for Better Portraits,

P.S. Did you find this post helpful or encouraging? If so, send it in ahead! Let others know with the share buttons below. I’d love to hear your comments. Thank you so much! Also, do you have a question on acrylic portrait painting you’d like answered? Let me know, and I’d be happy to help!