- You are here:
- Home »
- Blog »
- Video Tutorial »
- How to Add Realistic Shadows in Your Acrylic Painting

How to Add Realistic Shadows in Your Acrylic Painting
Unlock the Power of Shadows to Transform Your Acrylic Paintings
Introduction
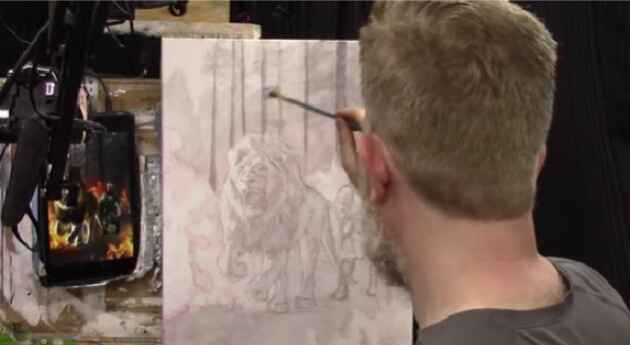
Adding shadows to your acrylic paintings is one of the most effective ways to create depth, realism, and drama. Shadows help to anchor objects within your composition, give form and dimension, and can even guide the viewer’s eye across your artwork. In this tutorial, we’ll explore the techniques and tools you need to master the art of shadowing in acrylics. And you well learn how to how to add realistic shadows in your acrylic painting. Whether you’re painting a landscape, portrait, or still life, understanding how to effectively use shadows will elevate your work to a new level.
Tools and Materials
Before diving into the painting process, ensure you have the following materials ready:
- Filbert Brush: A versatile brush that can create broad strokes and fine lines.
- Acrylic Paints: Raw umber, dark burnt sienna, raw sienna, phthalo blue, ultramarine blue, alizarine crimson, naphthol red, organic orange, Indian yellow, titanium white.
- Matte Medium: To make your paint translucent and create glazes.
- Palette: For mixing colors.
- Canvas or Painting Surface: Prepared and ready for painting.
- Reference Photo: To guide your shadow placement.
Creating the Perfect Shadow Color
Shadows are not just a darker version of the object’s color—they are nuanced and require careful mixing. To begin:
- Mix Your Base Color: Start with a 50/50 mix of ultramarine blue and raw umber dark. This combination creates a deep, rich black that forms the foundation of your shadow color.
- Customize Your Shadow: Add a touch of alizarine crimson to warm the shadow or phthalo blue to cool it down. Adjust the balance according to the lighting and mood of your painting.
- Control the Transparency: Add matte medium to your mix. The more medium you add, the more translucent the shadow becomes. This is key for creating realistic, layered shadows.
Applying Shadows: Step-by-Step
1. Start with the Darkest Areas
Begin by applying your mixed shadow color to the darkest areas of your painting. Use a filbert brush to create broad strokes, ensuring you apply the paint in the direction of the light source.
- Tip: Start with larger shadow areas and then gradually work into the finer details. This method prevents your brush from carrying too much paint when working on smaller, more intricate parts.
2. Layering with Glazes
Once the initial layer is dry, add glazes to build up the shadow depth. Glazing involves applying thin, translucent layers of paint over a dry layer. This technique is perfect for creating soft transitions and a sense of volume in your shadows.
- Technique: Use a light hand with your brush to avoid overpowering the underpainting. This allows the lower layers to shine through, adding complexity and realism to your shadows.
3. Fade and Blend
Shadows naturally fade as they move away from the object casting them. To achieve this effect:
- Dry Brushing: Use the dry brushing technique, where you use minimal paint and gently brush over the canvas, allowing the texture to create a natural fade.
- Brush Pressure: Apply less pressure as you move away from the object to soften the shadow. The less paint you have on your brush, the lighter the shadow will appear.
- Tip: Avoid adding white to lighten the shadows, as this can make them appear chalky. Instead, rely on the natural transparency of the glaze and your brush control.
Fine-Tuning and Details
As you refine your painting, pay attention to the subtleties in your shadows:
- Reference Photo: Continually refer back to your reference photo to capture the exact shapes and tones of the shadows. Look at the abstract shapes created by the shadows rather than thinking of them as literal parts of the object.
- Varying Brush Strokes: Use short, choppy strokes for areas like tree branches or fur, where the texture plays a significant role in how the shadow behaves.
- Shadow Direction: The direction and length of your brush strokes should mimic the actual light source and the texture of the object, like the mane of a lion or the bark of a tree.
Adding shadows to your acrylic paintings is a powerful way to bring your artwork to life. By understanding the interplay of light and dark, and using techniques like glazing and dry brushing, you can create realistic and captivating images. Remember, the key is in the subtlety—less is often more when it comes to shadows. Practice these techniques, and you’ll see a remarkable difference in the depth and realism of your paintings.
If you enjoyed this tutorial and want to delve deeper into the world of acrylic painting, download my free guides on skin tones and correct tonal values that make your portrait more realistic than perfect skin tones. These resources are designed to help you achieve even more precision and realism in your artwork.
LEARN MORE
- Sketching Your Painting Accurately
- Beginning a Pet Portrait in Acrylic
- The Mystery of Realism in Painting
- Apply A Burnt Sienna Glaze to a Portrait
- Learn How to Sketch a Portrait Freehand in 45 Minutes
- Adding highlights to your acrylic painting
- 5 Excellent Reasons to Use Aluminum Foil
- Paint Realistic Wrinkles in Acrylic
- Painting Clothing in an Acrylic Portrait
- Paint a Cloudy Sky Acrylic
- How to add Semi-Opaque Highlights
- How to Enhance the Contrast in Your Acrylic
- How to Add Glaze to Your Acrylic Painting
- Paint Realistic Reflections on Eyeglasses in an Acrylic Portrait
- Build Up Depth on Your Acrylic Portrait Backgrounds
- How Do You Do Layers With the Glazing Technique?
- Learn How to Paint Wrinkles in Acrylic
Read more about how to paint a portrait that you can surely be proud of!
I’d love to hear your thoughts on this video. Please share it with your friends and family. Let me know if you have any further questions. I’ll greatly help you.
If you’d like to learn more, sign up for my free email tips and video class today.
Learn How to Paint Acrylic Portraits With My Free Mini-Video Course!Thank you so much for taking the time to read this tutorial and watch the video. That means a lot to me. I hope you find it very helpful in your portrait painting.
Yours for Better Portraits,

P.S. Did you find this post helpful or encouraging? If so, send it in ahead! Let others know with the share buttons below. I’d love to hear your comments. Thank you so much! Also, do you have a