- You are here:
- Home »
- Blog »
- Video Tutorial »
- How to Add Color & Value Textures : Landscape Background

How to Add Color & Value Textures : Landscape Background
Enhance your landscape paintings with expert techniques for adding color and value to mid-ground and foreground textures
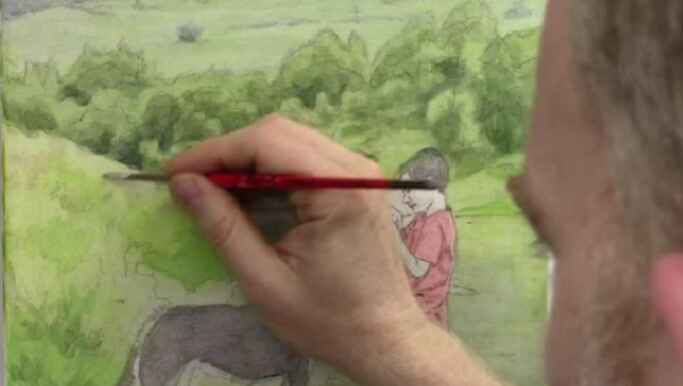
Creating a compelling landscape painting involves more than just replicating what you see. It’s about adding depth, texture, and the right balance of colors to make the scene come alive. In this tutorial, we’ll explore how to enhance your landscape paintings by adding color and value textures to the mid-ground and foreground. These techniques will help you create more realistic and vibrant scenes that captivate viewers.
Whether you’re painting a serene lake, a lush forest, or a rugged mountain range, mastering the art of color and value textures is crucial for achieving a convincing landscape. Let’s dive into the process with some expert tips and techniques that will guide you in your painting journey.
Step 1: Setting Up Your Colors and Brushes
Tip 1: Use a Small Round Brush for Precision
- Begin by selecting a small round brush, which offers precision when working on detailed areas like the foreground. This brush type is perfect for adding fine textures and small patches of color.
Tip 2: Mix a Mid-tone Color
- Start by mixing a mid-tone color using raw sienna, phthalo blue, and titanium white. The exact proportions depend on the specific area you’re working on, but generally, raw sienna will serve as the base, with phthalo blue added for coolness and titanium white for opacity.
Technique: Adjusting Color Balance
- If the color mix appears too intense or leans too heavily towards one hue (e.g., too blue), adjust by adding more raw sienna or titanium white. This step ensures that the colors blend seamlessly into the landscape.
Step 2: Applying Color to the Foreground
Tip 3: Work Vertically for Natural Grass Textures
- When adding color to the foreground, particularly in grassy areas, use vertical brush strokes. This technique mimics the natural growth of grass, adding authenticity to your painting.
Tip 4: Keep Brush Strokes Tight and Controlled
- Avoid broad, sweeping motions. Instead, keep your strokes tight to maintain texture without overwhelming the scene. This is particularly important when painting smaller patches of grass or undergrowth.
Technique: Layering for Depth
- Start with a mid-tone color to establish the base layer. Gradually add layers of lighter or darker tones to create depth and variation in the texture. This layering technique helps to differentiate between different elements within the landscape.
Step 3: Adjusting Mid-ground Colors
Tip 5: Subtle Color Changes for Mid-ground Interest
- For the mid-ground, slightly adjust your color mix by adding more titanium white and a small amount of raw umber dark. This desaturates the color, allowing it to recede into the background naturally.
Tip 6: Introduce Complementary Colors
- To avoid a flat appearance, introduce complementary colors, such as a hint of alizarine crimson. This counteracts excessive green hues and adds visual interest.
Technique: Glazing for Smooth Transitions
- Apply thin glazes of color to create smooth transitions between different areas of the mid-ground. Glazing helps achieve a more cohesive look while subtly altering the color and value.
Step 4: Enhancing Foreground Details
Tip 7: Vary Brush Sizes for Different Textures
- Switch between small round brushes and larger flat brushes depending on the area you’re working on. For example, use a quarter-inch flat brush to darken water areas or add broad strokes of color.
Tip 8: Focus on Value Structure
- Pay attention to the value structure of your painting. Darken areas where necessary to create contrast, especially in water reflections or shadowed regions. This step is crucial for making your landscape appear more three-dimensional.
Technique: Blending for Realism
- Blend the edges of different value areas to create a smooth transition. This technique is particularly useful in areas like water reflections, where a gradual change in value is needed to mimic natural light effects.
Step 5: Refining the Overall Landscape
Tip 9: Add Final Touches with Highlights and Shadows
- Use a lighter mix of your base colors to add highlights to the grass, rocks, and water. Similarly, deepen shadows where needed to enhance the sense of depth.
Tip 10: Step Back and Evaluate
- Take a step back from your painting to evaluate the overall composition. Look for areas that might need additional texture or color adjustments to balance the scene.
Technique: Balancing Detail with Overall Composition
- While details are important, ensure that they don’t overwhelm the overall composition. The goal is to maintain a harmonious balance between different elements of the landscape.
By learning the techniques of adding color and value textures, you can take your landscape paintings to the next level. These methods will help you create more dynamic and realistic scenes that engage viewers and convey a true sense of place.
As you continue to practice and refine your skills, remember that the key to a successful landscape painting lies in the careful balance of color, value, and texture. With these tips in hand, you’re well on your way to creating stunning landscapes that capture the beauty of the natural world.
Read more about my additional resources, tutorials, to learn more and check out my free courses. Whether you’re a beginner or an experienced artist, there’s always something new to learn and apply to your paintings. Happy painting!
LEARN MORE
- Sketching Your Painting Accurately
- Beginning a Pet Portrait in Acrylic
- The Mystery of Realism in Painting
- Apply A Burnt Sienna Glaze to a Portrait
- Learn How to Sketch a Portrait Freehand in 45 Minutes
- Adding highlights to your acrylic painting
- 5 Excellent Reasons to Use Aluminum Foil
- Paint Realistic Wrinkles in Acrylic
- Painting Clothing in an Acrylic Portrait
- Paint a Cloudy Sky Acrylic
- How to add Semi-Opaque Highlights
- How to Enhance the Contrast in Your Acrylic
- How to Add Glaze to Your Acrylic Painting
- Paint Realistic Reflections on Eyeglasses in an Acrylic Portrait
- Build Up Depth on Your Acrylic Portrait Backgrounds
- How Do You Do Layers With the Glazing Technique?
- Learn How to Paint Wrinkles in Acrylic
Read more about how to paint a portrait that you can surely be proud of!
I’d love to hear your thoughts on this video. Please share it with your friends and family. Let me know if you have any further questions. I’ll greatly help you.
If you’d like to learn more, sign up for my free email tips and video class today.
Learn How to Paint Acrylic Portraits With My Free Mini-Video Course!Thank you so much for taking the time to read this tutorial and watch the video. That means a lot to me. I hope you find it very helpful in your portrait painting.
Yours for Better Portraits,

P.S. Did you find this post helpful or encouraging? If so, send it in ahead! Let others know with the share buttons below. I’d love to hear your comments. Thank you so much! Also, do you have a question on acrylic portrait painting you’d like answered? Let me know, and I’d be happy to help!