- You are here:
- Home »
- Blog »
- Written Tutorial »
- 7 Best Ways To Ship Your Acrylic Paintings Secure!

7 Best Ways To Ship Your Acrylic Paintings Secure!
Securely package your portrait for safe delivery with these step-by-step guide
Here are the 7 best ways to ship your large acrylic paintings securely!
Shipping large paintings, especially delicate acrylic paintings, requires careful attention to detail to ensure they arrive safely. As a professional artist, I’ve developed an effective method for packaging large paintings that minimizes the risk of damage during transit. Whether you’re shipping acrylic or oil paintings, follow these step-by-step instructions to protect your artwork and ensure it reaches its destination in perfect condition.
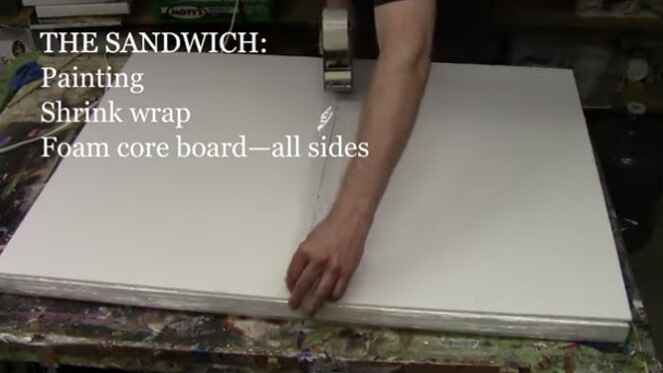
Step 1: Shrink Wrap the Painting
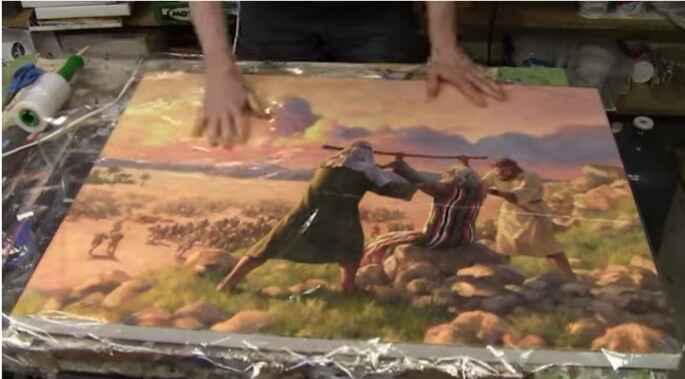
Start by wrapping your painting in shrink wrap to create a protective barrier. Place the painting face down and cover it completely with shrink wrap. This initial layer shields the surface of the artwork from scratches and scuffs. Fold the shrink wrap over and secure it with packaging tape. There’s no need to use a heat gun; the wrap should be tight enough to protect the painting.
Step 2: Add Foam Core
Lay the shrink-wrapped painting on top of two pieces of foam core. These will serve as the first protective layer. Fold the shrink wrap over the foam core and tape it in place. The foam core provides cushioning and prevents the painting from moving inside the package.
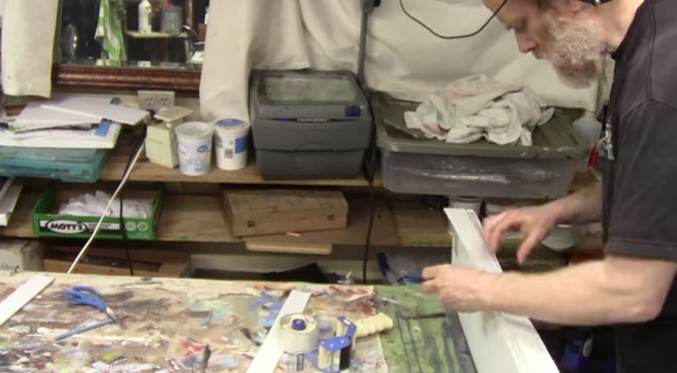
Step 3: Protect the Edges
Cut strips of foam core to match the thickness of your canvas (typically around one inch). Tape these strips along the edges of the painting to create a protective buffer. This step ensures that the edges of the canvas are well protected and reduces the risk of dents or damage during shipping.
Step 4: Add Hardboard and Styrofoam
Sandwich the painting between two pieces of hardboard. The hardboard provides a sturdy protective layer that reinforces the package. Next, add two pieces of Styrofoam insulation board (3/4 inch to 1 inch thick) on either side of the hardboard. The Styrofoam offers additional cushioning and shock absorption.
Step 5: Encase in Cardboard
Wrap the entire package in a large piece of cardboard. If you don’t have a single piece large enough, you can piece together several smaller pieces. Use a utility knife to cut and crease the cardboard, ensuring it fits snugly around the package. Secure the cardboard with packaging tape, making sure all sides and corners are well protected.
Step 6: Secure with Additional Tape
Once the cardboard is in place, reinforce all edges and corners with extra layers of packaging tape. Pay special attention to the corners, as they are more susceptible to damage. Ensure the tape is applied smoothly and firmly to prevent the package from coming apart during transit.
Step 7: Label and Ship
Finally, attach the shipping label to the package. It’s a good idea to add “Fragile” and “Handle with Care” stickers to alert the shipping company that the contents are delicate. Choose a reliable shipping service that offers tracking and insurance to safeguard your artwork.
Additional Tips for Safe Shipping
- Insurance: Always insure your painting for its full value. In case of any damage or loss, insurance will provide coverage for your artwork.
- Documentation: Include a packing list and documentation inside the package with details of the painting, your contact information, and the recipient’s information.
- Weather Considerations: If you’re shipping during extreme weather conditions, be mindful of temperature fluctuations and humidity, as they can affect the painting.
- Communication: Inform the recipient about the delivery date and provide them with the tracking number. This helps ensure that someone is available to receive the package promptly.
- Test the Packaging: Before shipping, gently shake the package to check if there’s any movement inside. If you hear or feel movement, add more padding to secure the painting further.
By following these steps and tips, you can ship your large acrylic paintings with confidence, knowing they are well-protected against potential damage. This packaging step-by-step guide has been tested and proven effective, ensuring your artwork arrives safely at its destination.
DISCLAIMER: I cannot be held responsible for damages incurred while using this method of shipping. It is just what has worked well for me. Also, purchasing insurance is advisable any time you ship an expensive painting.
I hope this guide has been helpful. If you have any questions or need further assistance, feel free to reach out. Safe shipping!
Watch my video below for the process on how I did it.
LEARN MORE
- Sketching Your Painting Accurately
- Beginning a Pet Portrait in Acrylic
- The Mystery of Realism in Painting
- Apply A Burnt Sienna Glaze to a Portrait
- Learn How to Sketch a Portrait Freehand in 45 Minutes
- Adding highlights to your acrylic painting
- 5 Excellent Reasons to Use Aluminum Foil
- Paint Realistic Wrinkles in Acrylic
- Painting Clothing in an Acrylic Portrait
- Paint a Cloudy Sky Acrylic
- How to add Semi-Opaque Highlights
- How to Enhance the Contrast in Your Acrylic
- How to Add Glaze to Your Acrylic Painting
- Paint Realistic Reflections on Eyeglasses in an Acrylic Portrait
- Build Up Depth on Your Acrylic Portrait Backgrounds
- How Do You Do Layers With the Glazing Technique?
- Learn How to Paint Wrinkles in Acrylic
Read more about how to paint a portrait that you can surely be proud of!
I’d love to hear your thoughts on this video. Please share it with your friends and family. Let me know if you have any further questions. I’ll greatly help you.
If you’d like to learn more, sign up for my free email tips and video class today.
Learn How to Paint Acrylic Portraits With My Free Mini-Video Course!Thank you so much for taking the time to read this tutorial and watch the video. That means a lot to me. I hope you find it very helpful in your portrait painting.
Yours for Better Portraits,

P.S. Did you find this post helpful or encouraging? If so, send it in ahead! Let others know with the share buttons below. I’d love to hear your comments. Thank you so much! Also, do you have a question on acrylic portrait painting you’d like answered? Let me know, and I’d be happy to help!