Archive Monthly Archives: January 2025

2025 Winter Acrylic Painting Challenge,Bonus Video: Increasing Contrast
Master the art of increasing contrast in your acrylic portraits with simple glazing techniques
In this bonus session of the 2025 Winter Acrylic Painting Challenge, we focus on an essential stepincreasing contrast to create more depth and realism. By building up layers and refining shadows, we can bring out key elements in the portrait before moving into the next lesson.
Why Contrast Matters in Acrylic Painting
Contrast is one of the fundamental principles that makes a painting stand out. It helps define the subject, create a sense of depth, and guide the viewer’s eye. Without proper contrast, an image may appear flat or lifeless.
In this lesson, the focus is on:
- Strengthening shadows and highlights
- Refining shapes with precise brushwork
- Using glazing techniques for smooth transitions
Materials Used
- Raw Umber Dark
- Ultramarine Blue
- Alizarine Crimson
- Titanium White
- Raw Sienna
- Matte Medium
- Round Detail Brush (Size 2)
- Flat Brush (1/4 inch)
Step-by-Step Process for Increasing Contrast
1. Adding Definition to Clothing and Accessories
The first area of focus is the clothing, particularly the buttons and fabric folds. To prevent losing the details, a light mixture of titanium white and raw sienna is applied to the buttons. This ensures they remain visible even after additional layers of paint are added.
- Mix titanium white with raw sienna for an opaque highlight.
- Apply it in thin, controlled strokes to emphasize the button edges.
- Allow the layer to dry before applying additional glazes.
2. Applying a Glaze for Deeper Shadows
To create a darker value for the clothing shadows, a glaze is prepared using raw umber dark, ultramarine blue, and a touch of alizarine crimson mixed with matte medium.
- This mixture is semi-translucent, allowing previous layers to remain visible.
- It is applied to the edges of the clothing and negative spaces between elements.
- A smooth gradient is achieved by feathering out the edges with a dry brush.
3. Refining Shadows in Facial Features
To make the face more three-dimensional, subtle shadows are introduced under the hat brim, around the eyes, and along the mustache and beard.
- A smaller detail brush is used for precision.
- A glaze mixture similar to the clothing shadows is applied in thin layers.
- The darkest areas are carefully deepened while still allowing for soft transitions.
4. Enhancing the Background and Rope Details
The negative space behind the subject is darkened to make the foreground stand out. Additionally, the ropes and scarf details are defined by using precise brush strokes.
- A darker glaze is applied to the background while maintaining soft edges.
- The spaces between the ropes are carefully shaded to enhance contrast.
- Layering shadows on the scarf creates a sense of texture and folds.
Tips for Mastering Contrast in Acrylic Painting
✔ Use a Limited Palette for Shadows: Mixing complementary colors rather than using straight black results in more natural-looking shadows.
✔ Work from General to Specific: Begin with broad shadow areas before refining small details.
✔ Layer Gradually: Instead of applying dark paint all at once, build it up in thin layers to control the intensity.
✔ Utilize Soft and Hard Edges: Hard edges emphasize details, while soft edges create depth and natural transitions.
✔ Check Your Painting in Black and White: Viewing your work in grayscale helps assess contrast levels effectively.
By following these steps and gradually increasing contrast, your painting will gain a greater sense of realism. Whether you are working on clothing, facial features, or background elements, strategic contrast adjustments can make all the difference.
Keep practicing, and don’t be afraid to layer and refine your shadows! What part of contrast enhancement do you find most challenging? Let’s discuss in the comments below.
🚀 Stay tuned for the next lesson in the 2025 Winter Acrylic Painting Challenge! Don’t forget to join my Facebook group, where I post update for the next lessons.
Frequently Asked Questions: Increasing Contrast in Acrylic Painting
Q: Why does my painting still look flat even after adding shadows?
A: The issue might be the lack of balance between shadows and highlights. Try increasing contrast in both areas by brightening highlights and deepening shadows gradually.
Q: How many layers should I use for proper contrast?
A: This depends on the opacity of your paint. Glazing techniques require multiple thin layers, while more opaque applications may need fewer.
Q: How can I blend shadows smoothly in acrylic painting?
A: Using matte medium or water can help create smoother transitions. Also, working while the paint is still wet allows for better blending.
2025 Winter Acrylic Portrait Painting Challenge Series
2025 Winter Acrylic Portrait Painting Challenge: Steps to Get Started
2025 Winter Acrylic Portrait Challenge Pre-Lesson: Gathering Your Supplies
2025 Winter Acrylic Portrait Challenge, Lesson 1: Prepping Your Canvas for the Portrait
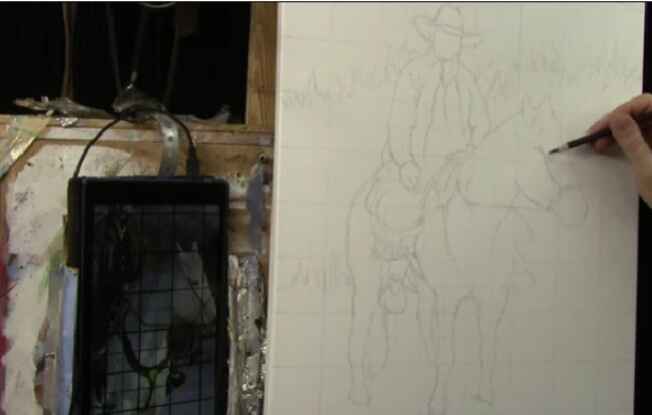
2025 Winter Acrylic Painting Challenge, Lesson 2: Sketching Your Portrait Accurately
2025 Winter Acrylic Painting Challenge, Lesson 3: Sealing in Your Sketch
2025 Winter Acrylic Painting Challenge, Lesson 4: Beginning Your Portrait with Glazes
2025 Winter Acrylic Painting Challenge, Lesson 5: Building Up Color and Contrast
")
2025 Winter Acrylic Painting Challenge, Lesson 5: Building Up Color and Contrast
Master the art of acrylic glazing to enhance depth and realism in your paintings
Welcome to Lesson 5 of the 2025 Winter Acrylic Painting Challenge! In this session, you will refine your acrylic painting skills by learning to build up color and contrast. This technique not only adds vibrancy but also brings your portrait to life with depth and realism. Whether you are a beginner or an advanced artist, this step-by-step guide will help you achieve stunning results.
Why Focus on Building Up Color and Contrast?
Building up color and contrast is essential for creating dynamic and realistic portraits. By layering glazes, you can achieve smooth transitions, enhance the richness of tones, and bring attention to key elements of your artwork. This method also allows for subtle adjustments and corrections as you progress.
Materials You’ll Need
- Acrylic Paints: Raw Umber Dark, Burnt Sienna, Raw Sienna, Phthalo Blue, Ultramarine Blue, Alizarine Crimson, Titanium White, Organic Orange, Indian Yellow.
- Brushes: 1″ Flat, 3/4″ Flat, Size 5 or 6 Round, 3/8″ Angled Flat.
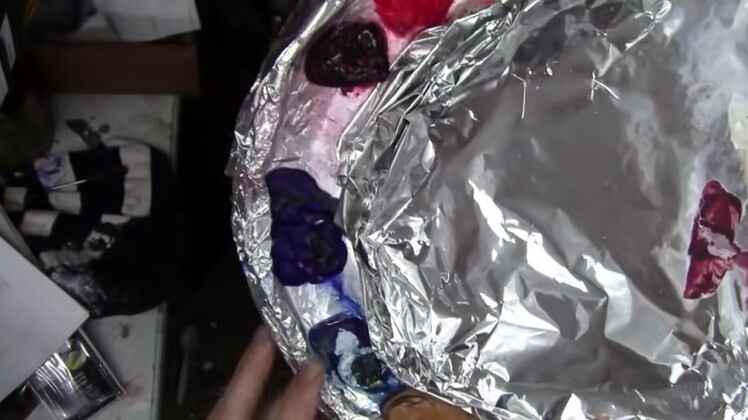
- Palette: Covered with aluminum foil for easy cleanup.
- Matte Medium: For mixing glazes.
- White Card: To test glaze colors.
- Spray Bottle: To keep your palette moist.
Step-by-Step Guide to Building Up Color and Contrast
1. Prepare Your Palette and Brushes
Start with a fresh piece of aluminum foil on your palette. Arrange your paints for easy access. Spray the palette lightly to keep the paints moist throughout the session.
2. Mixing Your First Glaze
Combine raw umber dark and burnt sienna with matte medium to create a semi-transparent glaze. Adjust the tone by adding organic orange and raw sienna for a warmer, richer hue. Test your glaze on a white card to ensure it has the desired transparency and tone.
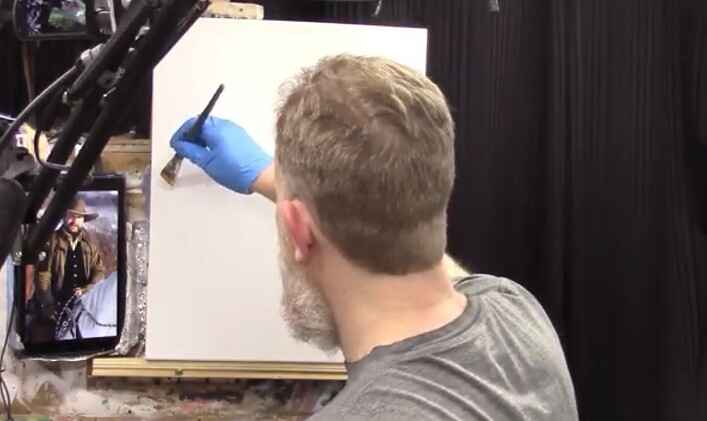
3. Apply the Base Glaze
Using a 1″ flat brush, apply the glaze in broad, even strokes. Start from the background and work towards the foreground, ensuring smooth transitions. Use diagonal strokes to create movement and avoid harsh lines.
4. Enhance the Subject with Color Harmony
To maintain color harmony, apply the glaze across various parts of the painting. For areas requiring differentiation, adjust the glaze with slight color variations, such as adding more organic orange for vibrancy.
5. Add Detail and Depth
Switch to smaller brushes for intricate areas, like facial features or objects. Feather the glaze into specific zones to highlight contrast and bring out dimensionality. Remember to let each layer dry completely before adding the next.
6. Refine and Smooth
If streaks appear, remove excess glaze from your brush or blend it out across the canvas. Use firm yet controlled strokes to achieve a polished finish.
Tips and Techniques
- Maintain Moisture: Keep your palette moist by misting it with water. This prevents the glaze from drying too quickly.
- Use a Test Card: Always test your glaze on a white card to ensure the desired opacity and tone before applying it to the canvas.
- Layer Gradually: Build up color and contrast in thin layers to avoid overpowering the painting.
- Check Dryness: Before applying a new glaze, ensure the previous layer is completely dry. Touch the surface gently to confirm.
- Feather Edges: For seamless transitions, feather the glaze at the edges using a light touch.
Frequently Asked Questions
Q: What is the best medium for glazing in acrylic painting?
A: Matte medium works best as it allows for smooth application and dries with a consistent finish.
Q: How do I fix streaks in my glaze?
A: Streaks can be resolved by removing excess glaze from your brush and blending it out across the canvas.
Q: Can I use this technique on any subject?
A: Yes! Building up color and contrast is a versatile technique that can enhance any subject, from portraits to landscapes.
Building up color and contrast is a game-changing technique that transforms flat images into vibrant, lifelike paintings. By layering glazes and adjusting tones, you can achieve professional-level depth and realism. Join the 2025 Winter Acrylic Painting Challenge to further enhance your skills and create a masterpiece you can be proud of
Ready to take your painting skills to the next level? Sign up for the 2025 Winter Acrylic Painting Challenge today and join a community of over 500 artists! Visit realisticacrylic.com for your free welcome kit and start creating stunning portraits.
2025 Winter Acrylic Portrait Painting Challenge Series
2025 Winter Acrylic Portrait Painting Challenge: Steps to Get Started
2025 Winter Acrylic Portrait Challenge Pre-Lesson: Gathering Your Supplies
2025 Winter Acrylic Portrait Challenge, Lesson 1: Prepping Your Canvas for the Portrait
2025 Winter Acrylic Painting Challenge, Lesson 2: Sketching Your Portrait Accurately
2025 Winter Acrylic Painting Challenge, Lesson 3: Sealing in Your Sketch
2025 Winter Acrylic Painting Challenge, Lesson 4: Beginning Your Portrait with Glazes

2025 Winter Acrylic Painting Challenge, Lesson 4: Beginning Your Portrait with Glazes
How to create depth and vibrancy with translucent layers
Welcome to Lesson 4 of the 2025 Winter Acrylic Painting Challenge! Despite the frosty weather outside, we’re turning up the creative heat in the studio. This lesson, focuses on beginning your portrait with glazes, a transformative technique that brings depth and vibrancy to your artwork.
If you haven’t joined the challenge yet. Sign up at realisticacrylic.com to access a free welcome kit that includes a supply list, palette layout guide, and reference photos. Let’s dive in!
What Are Acrylic Glazes?
Acrylic glazing is a technique where translucent layers of paint are applied over a sealed base to create depth, vibrancy, and subtle color variations. The secret lies in using matte medium to thin the paint, allowing light to pass through the layers, enhancing the richness of the colors.
Materials You’ll Need:
- Paint Colors: Raw Umber Dark, Burnt Sienna, Raw Sienna, Phthalo Blue, Ultramarine Blue, Alizarine Crimson, Napthol Red, Organic Orange, Indian Yellow, Titanium White.
- Brushes: 1-inch flat, 3/8-inch flat, and a round brush (size 12 recommended).
- Other Supplies: Matte medium, palette, spray bottle, paper towel, and a reference photo.
Steps to Begin Your Portrait with Glazes:
1. Prepare Your Canvas
Start with a sealed sketch. Use a mix of matte medium, titanium white, and a hint of ultramarine blue to create a muted base layer. This step ensures your sketch remains intact while providing a smooth surface for glazing.
2. Mix Your Glazes
- Use a ratio of 90% matte medium to 10% paint.
- Test your glaze on a white card or scrap paper to ensure it’s translucent.
- Remember: It’s better to go lighter than you think, as glazes can always be layered for more depth.
3. Block in the Large Areas
Focus on creating contrasts between:
- Warm and Cool Tones: Identify warm areas (reds, oranges) and cool areas (blues, greens) in your reference photo.
- Lights and Darks: Use a scale from white to black to determine the value contrasts.
4. Apply the First Glaze
- Use the 1-inch flat brush to lay down your initial color.
- Begin with the darkest warm areas, such as clothing or background reeds.
- Work in sections, keeping a wet edge to ensure smooth transitions.
5. Build Gradually
Layer additional glazes to develop the richness and subtle tonal shifts. Use thin, even strokes and avoid overworking the paint.
Tips for Success:
- Keep Your Paint Moist: Use a spray bottle to lightly mist your palette as you work.
- Posture Matters: Hold your brush at an angle for better control, especially when cutting around detailed areas.
- Engage with Others: Share your progress in the Realistic Acrylic Portraits Facebook Group for encouragement and feedback.
Frequently Asked Questions
Q: Why use matte medium instead of water?
A: Matte medium maintains the integrity of the paint while creating a translucent effect. Water can weaken the paint film and reduce vibrancy.
Q: How many layers should I apply?
A: There’s no set number. Apply as many layers as needed to achieve the desired depth and richness, allowing each layer to dry thoroughly.
Q: Can I use gloss medium instead?
A: It’s possible but not recommended for this technique. Matte medium provides better control and reduces unwanted shine during the glazing process.
Glazing is a game-changer in portrait painting, allowing you to add depth and realism with ease. By starting with thin, translucent layers, you can build up your painting gradually, achieving vibrant and lifelike results.
Don’t forget to post your work in the Realistic Acrylic Portraits Facebook Group and connect with fellow artists. Whether it’s your first portrait or your tenth, this challenge is designed to help you create a masterpiece you’ll be proud of.
2025 Winter Acrylic Portrait Painting Challenge Series
2025 Winter Acrylic Portrait Painting Challenge: Steps to Get Started
2025 Winter Acrylic Portrait Challenge Pre-Lesson: Gathering Your Supplies
2025 Winter Acrylic Portrait Challenge, Lesson 1: Prepping Your Canvas for the Portrait
2025 Winter Acrylic Painting Challenge, Lesson 2: Sketching Your Portrait Accurately
2025 Winter Acrylic Painting Challenge, Lesson 3: Sealing in Your Sketch

2025 Winter Acrylic Painting Challenge, Lesson 3: Sealing in Your Sketch
Preserving your sketch: A step-by-step guide to starting your acrylic painting with confidence
When embarking on an acrylic painting journey, especially for a portrait or complex composition, a strong foundation is critical. That’s where sealing in your sketch comes into play. In this lesson from the 2025 Winter Acrylic Portrait Painting Challenge, we’ll cover a detailed, beginner-friendly guide on how to preserve your sketch while setting the stage for vibrant and confident painting.
The keyword? Confidence. When your sketch is securely sealed, you’ll paint with ease and precision. Let’s dive into the four-step process that ensures your hard work is protected and ready for layers of color and depth.
Why Sealing in Your Sketch Matters
Your sketch serves as the blueprint of your painting. Without proper sealing, colored pencil marks can smudge or bleed into subsequent layers, disrupting the clarity of your design. Sealing provides a protective barrier, ensuring the sketch remains intact and your painting proceeds without setbacks.
Step-by-Step Guide to Sealing in Your Sketch
Step 1: White Out the Grid
Start by addressing the grid lines. These guide initial proportions but should not remain visible in the final painting.
- Why Use Titanium White Instead of Gesso?
Titanium white paint provides opacity without translucence, unlike gesso. It effectively covers grid lines while maintaining a smooth finish. - What You’ll Need:
- Titanium white paint
- Three brushes: a medium-sized flat brush, a small flat brush, and a small round brush
- Disposable mini cups or a small container for the paint
Process:
- Dip your larger flat brush into titanium white paint.
- Apply it over the grid lines, smoothing the brushstrokes for an even finish.
- Switch to smaller brushes for tighter areas, such as the details near edges and inside lighter value zones.
- Cover grid lines within illuminated areas and transitions like snow tracks or delicate highlights.
Pro Tip: Use firm pressure to cut around intricate details while avoiding overlap with the sketch.
Step 2: Spray Seal the Canvas
Once the grid lines are covered and the titanium white layer has dried completely (allow a few hours for thorough drying):
- Use a clear acrylic spray sealant to lock in the sketch.
- Hold the spray can about 12 inches away from the canvas for an even application.
This step prevents smudging while adding a layer of protection.
Step 3: Brush Seal the Canvas
For added durability, brush seal the canvas after the spray sealant has dried.
- Use a soft, wide brush and a thin coat of matte medium or glazing medium.
- Gently apply in smooth, even strokes, avoiding bubbles or uneven texture.
Allow the canvas to dry fully before proceeding to the next step.
Step 4: Begin Layer One of Painting
With the sketch sealed, it’s time to add your first layer of color. This layer will establish the foundational tones and values, setting the stage for depth and detail in subsequent layers.
- Focus on broad, general areas first, keeping the colors light and translucent.
- Use glazing techniques to gradually build intensity without losing the clarity of your sketch.
Tips for a Smooth Sealing Sketch
- Patience Is Key: Ensure each layer dries thoroughly before moving to the next. This prevents smearing and uneven finishes.
- Use Quality Materials: High-quality titanium white and sealants make a significant difference in coverage and durability.
- Practice Makes Perfect: If you’re new to sealing techniques, practice on a small test canvas before working on your main piece.
Sealing in your sketch is an indispensable step in acrylic painting. By following this four-step process, you’ll create a robust foundation for your artwork, ensuring your sketch remains intact and ready to support vibrant layers of paint.
For more guidance, including reference materials, supply lists, and exclusive painting challenges, watch the video tutorial below and join the 2025 Winter Acrylic Portrait Painting Challenge at www.realisticacrylic.com. It’s free and packed with resources to elevate your painting skills.
Now it’s your turn! Get your brushes, titanium white, and sealants ready, and seal in your sketch with confidence. Don’t forget to join my Facebook community that a lot of artist support each other. Happy painting!
2025 Winter Acrylic Portrait Painting Challenge Series
2025 Winter Acrylic Portrait Painting Challenge: Steps to Get Started
2025 Winter Acrylic Portrait Challenge Pre-Lesson: Gathering Your Supplies
2025 Winter Acrylic Portrait Challenge, Lesson 1: Prepping Your Canvas for the Portrait
2025 Winter Acrylic Painting Challenge, Lesson 2: Sketching Your Portrait Accurately

2025 Winter Acrylic Painting Challenge, Lesson 2: Sketching Your Portrait Accurately
Master the art of sketching your portrait accurately: techniques for precision and detail
Creating a stunning acrylic portrait begins with one fundamental skill: sketching your portrait accurately. Whether you’re a beginner or an experienced artist, mastering this foundational step ensures that your final painting shines with realism and precision.
In this blog post, we’ll dive into the process of accurate sketching, covering essential tools, techniques, and tips to help you bring your artistic vision to life.
Why Accurate Sketching is Key
Accurate sketching lays the groundwork for a successful painting. Without it, even the most vibrant colors and refined brushstrokes can’t save a portrait from looking unbalanced or disproportionate.
Sketching ensures:
- Proper proportions and anatomy.
- Consistent composition.
- A clear guide for painting details.
Tools You Need for Sketching
Before starting your sketch, gather the right tools to make the process smoother:
- Canvas: Prepare your canvas with a layer of matte medium and gesso for a smooth base.
- Colored Pencils: Use a dark brown Prismacolor pencil for precise marks. Colored pencils are easier to erase and smear less than graphite.
- Erasers: White erasers or battery-operated erasers help make clean corrections.
- Grid Reference Photo: Print a photo with a grid overlay to maintain accuracy.
Step-by-Step Guide to Sketching Your Portrait
1. Prepare Your Canvas and Grid
- Start with a clean canvas that has been sanded and coated with gesso and matte medium.
- Apply a grid using light-colored pencils. Ensure the grid matches the one on your reference photo for easy alignment.
2. Mark Key Outlines
Begin by marking the rough outlines of the subject:
- Focus on large shapes first, such as the head, torso, and background elements.
- Use your grid to locate where features intersect horizontal and vertical lines.
3. Measure Proportions with Fractions
Observe how features align within the grid:
- For example, if a leg or arm intersects halfway through a square, mark it accordingly.
- Visualize proportions instead of rigidly plotting points to maintain fluidity in your sketch.
4. Add Fine Details
Once the main outlines are in place:
- Begin adding finer details such as facial features, clothing folds, and accessory edges.
- Stay consistent with the grid to avoid distortions.
5. Adjust and Refine
Make adjustments as needed:
- Erase and redraw areas that seem off.
- Use your eraser to clean smudges and maintain sharp lines.
Tips for Sketching Success
- Stay Loose: Avoid rigid lines early on. Keep your sketch fluid and adaptable.
- Use References: Double-check proportions and angles with your reference photo.
- Take Breaks: Step away from your sketch periodically to view it with fresh eyes.
- Pray for Focus: If you’re a faith-driven artist, a moment of prayer or meditation can provide clarity and inspiration.
Filling in Features Loosely
After outlining the portrait, the next step is to fill in the interior features loosely. This stage is all about blocking in shapes and establishing the basic elements of the composition. Here’s how to proceed:
- Sharpen Your Pencil
Use a sharpened pencil for better control and detail as you work on filling in the interior parts. - Start With Large Shapes
Begin sketching the major features, such as the shape of the head, edges of clothing, or other significant elements. For example:- Sketch the edges of hats, saddles, and other accessories if your subject involves detailed attire.
- Use short, choppy strokes to add features like arms or folds in fabric.
- Erase as Needed
Keep a light hand while sketching so that any adjustments can be made easily. Wax-based colored pencils, such as Prismacolor, are ideal because they erase cleanly and don’t smear when sealed. - Avoid Over-Detailing
At this stage, resist the temptation to focus on intricate details. Instead, concentrate on the overall shapes and their placement. For instance:- Block in the basic contours of the face and torso.
- Mark the positions of hands and fingers, but keep them rough.
Tools for Success
- Choose the Right Materials: Always use wax-based colored pencils for sketching. Avoid watercolor pencils, as they can smear during sealing.
- Leverage the Grid Method: Utilizing a grid helps maintain accurate proportions. Match your lines and shapes with the corresponding grid sections for precise placement.
Using Negative Space for Accuracy
One of the most powerful techniques in “Sketching Your Portrait Accurately” is analyzing negative space. Negative space refers to the areas around and between the subject of your sketch. Here’s how to use it effectively:
- Look for small shapes created by the intersections of your grid lines and subject.
- Compare these shapes to the reference image to ensure accuracy.
- Use these shapes as a guide to correct the positioning of features like eyes, hands, or accessories.
For example, if you’re drawing a strap or a buckle, observe how its placement aligns with the grid lines and creates unique negative shapes. Adjust your sketch as needed to match these shapes.
Common Mistakes to Avoid
- Ignoring Proportions: Ensure your subject’s proportions are correct, such as the width of arms or the placement of facial features.
- Overthinking Shapes: Focus on drawing what you see rather than what you think something should look like. Break complex elements into simple geometric shapes for better accuracy.
- Rushing to Details: Prioritize accurate blocking before refining.
Refining and Adding Detail
Once your loose sketch is complete, the next phase is refinement. Tighten the lines, enhance the details, and bring your subject to life. This includes:
- Adding intricate features like facial expressions, folds in clothing, or textures.
- Refining shapes based on feedback from the negative space analysis.
- Layering details to create depth and realism.
Why Accuracy Matters in Sketching
Accuracy in sketching sets the tone for the entire painting process. A well-proportioned sketch allows you to focus on colors, tonal values, and textures during painting. By mastering “Sketching Your Portrait Accurately,” you ensure your artwork resonates with realism and precision.
FAQ About Sketching Your Portrait Accurately
1. Can I use graphite pencils instead of colored pencils?
Yes, but colored pencils are recommended. They erase more cleanly and smear less, especially on a prepared canvas.
2. How do I align my grid correctly?
Ensure your grid matches your reference photo precisely. Double-check measurements and offsets before sketching.
3. How detailed should my sketch be?
Focus on capturing key proportions and outlines. Save intricate details for later stages of painting.
4. What if I make a mistake?
Use a good-quality eraser to make corrections. If your canvas preparation is solid, you can easily adjust your sketch without damaging the surface.
Take the first step today, and don’t forget to check out our Acrylic Portrait Painting Challenge and sign up here. It’s free to join, and you’ll get everything you need to create a masterpiece!
2025 Winter Acrylic Portrait Painting Challenge Series
2025 Winter Acrylic Portrait Painting Challenge: Steps to Get Started
2025 Winter Acrylic Portrait Challenge Pre-Lesson: Gathering Your Supplies
2025 Winter Acrylic Portrait Challenge, Lesson 1: Prepping Your Canvas for the Portrait
")
2025 Winter Acrylic Portrait Challenge, Lesson 1: Prepping Your Canvas for the Portrait
Master the art of prepping your canvas for a smooth and successful portrait painting
In this first lesson of our Winter Acrylic Portrait Challenge Masterclass, we will dive into the crucial process of prepping your canvas for the portrait. Whether you are a seasoned artist or a beginner, taking the time to properly prepare your canvas for the portrait that will ensure that your painting has a solid foundation for detailed and lifelike results.
Step 1: Setting Up Your Canvas
Before diving into the painting process, it is important to ensure that your canvas is in good shape. Start by setting up your canvas firmly on the easel. In our challenge, we are using a 16×20 canvas, which is a great size for portraits. When setting up your canvas, always check the square corners with a square tool or simply by eye. You should also inspect the canvas from the side to make sure it’s not bowed or distorted.
If you notice any bumps or dents, don’t worry this is a common issue, especially if your canvas has been stored for a while. These minor imperfections can be easily corrected.
Step 2: Fixing Wrinkles and Dents
Sometimes, after a canvas is unwrapped from its packaging, wrinkles or dents can appear. A simple solution for this is to lightly mist the back of your canvas with water. Use a spray bottle or mister to ensure that the entire back is saturated, especially in the corners. After spraying, let the canvas dry completely either by hanging it up or allowing it to air dry. This step is crucial because it tightens the fabric and eliminates any imperfections, leaving you with a taut and smooth canvas that will be perfect for painting.
Step 3: Applying Gesso for a Smooth Surface
Now, let’s move on to the critical step of applying gesso. Even though most canvases come pre-primed, the primer they use is often too thin to create a smooth and rigid surface. By applying gesso, you add a thicker coat that not only improves the rigidity of your canvas but also provides a smoother texture ideal for detailed painting.
Gesso also makes your canvas more archival, ensuring that your artwork will stand the test of time. For this lesson, we will be applying a custom mix of gesso and matte medium. To start, pour the gesso into a small container. You will need a condiment container or small disposable cup for this task. Add about 50% gesso and 50% matte medium. The matte medium will help to thin the gesso, allowing it to be applied more smoothly while also ensuring that the surface is perfect for sketching.
Step 4: Stirring the Mixture
Once you have your gesso and matte medium in your container, stir the mixture thoroughly with an old brush or a stirring stick. The goal is to ensure that the two components blend together to form a smooth and consistent mixture. A 50/50 ratio works well, but feel free to adjust depending on the desired consistency. The matte medium will not only improve the application of the gesso but also create an ideal surface for sketching, allowing your colored pencils to adhere better.
Step 5: Applying the Gesso Mixture
Now it’s time to apply the gesso mixture to your canvas. Using a brush, evenly coat the surface with the gesso. Work in smooth, gentle strokes to cover the entire canvas. You should aim for an even layer that is not too thick or thin. Be sure to cover the edges of the canvas as well. Once applied, allow the gesso to dry completely before proceeding to the next steps of your painting process.
Properly prepping your canvas is a fundamental step in achieving a high-quality portrait painting. With the right techniques, such as checking for squareness, fixing wrinkles, and applying a smooth gesso layer, you are setting yourself up for success. By following these steps, you can ensure that your painting will have a strong foundation for detailed and accurate portrait work.
In this first lesson, we have set the stage for an exciting and rewarding painting experience. As you progress through this Winter Acrylic Portrait Challenge, continue to refer back to these preparation steps for each new portrait you tackle. With every layer and brushstroke, your painting will come to life, and you’ll be proud of the portrait you’ve created. Keep practicing, and don’t hesitate to ask for support from the community together, we can achieve beautiful portraits!
By prepping your canvas properly, you are taking the first step toward a successful portrait painting. Join us for the full Winter Acrylic Portrait Challenge and start creating the portrait of your dreams today! Pre-Lesson: Gathering Supplies
To know more watch my video tutorial below.
")
2025 Winter Acrylic Portrait Challenge Pre-Lesson: Gathering Your Supplies
Master the art of acrylic portraits: Start with the right supplies for the winter challenge
Welcome to the Challenge
The Winter Acrylic Portrait Challenge Masterclass is here, and this pre-lesson sets the stage for a transformative artistic journey. Whether you’re a seasoned painter or new to acrylics, this challenge will help you develop your skills and create a stunning winter portrait. Let’s dive into the essential supplies and steps to ensure your success.
What Makes This Challenge Special?
This is the first-ever Winter Acrylic Portrait Challenge, a unique opportunity to explore the beauty of acrylic portraiture in a winter theme. Past challenges have inspired thousands of artists to push their boundaries, with many creating portraits for the first time. This challenge builds on that success, offering you a step-by-step guide and a supportive community.
Why Should You Join?
If you haven’t signed up yet, now is the time! Joining the challenge grants you access to:
- A Welcome Kit: A detailed guide with everything you need to participate.
- Step-by-Step Lessons: Video tutorials that simplify complex techniques.
- Supportive Community: Engage with fellow artists, share progress, and seek guidance.
Sign up today ➡️ https://realisticacrylic.com/acrylic-portrait-painting-challenge/
Supplies You’ll Need
Gathering the right materials is the first step. Here’s a checklist to get you started:
- Acrylic Paints: A basic set including primary colors, white, black, and earth tones.
- Brushes: A variety of sizes, including round, flat, and detail brushes.
- Canvas or Hardboard: A primed surface for your artwork.
- Palette: Preferably with wells to keep colors clean and organized.
- Reference Photo: Included in the welcome kit – a horse and rider in the snow.
- Other Essentials: A water container, paper towels, and a palette knife.
The welcome kit also provides a palette layout guide, ensuring your colors stay vibrant and unmuddied during mixing.
The Power of Community
Participating in this challenge means joining a community of like-minded artists. Share your progress on social media or the exclusive Facebook group, where you’ll receive feedback, encouragement, and tips to overcome challenges.
The Importance of Faith in Art
Throughout the challenge, you’ll be reminded that creativity is a gift. Trust in your abilities and the guidance provided. With persistence, support, and faith, you can create a portrait to be proud of.
Step-by-Step Guidance for Success
The masterclass lessons will guide you through:
- Sketching your portrait using grids for accuracy.
- Layering and blending techniques for depth and realism.
- Overcoming common struggles with acrylics.
If you feel stuck, reach out to the community or re-watch the tutorials for clarity.
A Final Word of Encouragement
The Winter Acrylic Portrait Challenge is more than a painting class; it’s an opportunity to grow, connect, and inspire others with your art. Whether this is your first portrait or your tenth, you’ll finish the challenge with newfound confidence and skills.
Take the First Step
Don’t let hesitation hold you back. Gather your supplies, sign up, and embark on this incredible artistic journey. You’ll be amazed at what you can achieve.
Let’s paint something extraordinary together

2025 Winter Acrylic Portrait Painting Challenge: Steps to Get Started
Learn to paint a winter scene with a rider and horse using acrylics: Free masterclass for all skill levels!
The new year brings a fresh opportunity to elevate your artistic journey with the 2025 Acrylic Portrait Painting Challenge. Running from January 6th to January 31st, this free challenge invites artists of all skill levels to explore the world of acrylic portraiture. Whether you’re a seasoned painter or just starting out, this masterclass series provides step-by-step guidance to help you craft a breathtaking winter scene featuring a rider on a horse in the snow.
The 2025 Acrylic Portrait Painting Challenge is here to help you grow as an artist while connecting with a community of like-minded creators. This free challenge offers everything you need to create a stunning acrylic portrait . And also you will discover how to sign up, receive your free welcome kit, and begin your artistic journey with me. Let’s dive into the details!
What Is the 2025 Acrylic Portrait Painting Challenge?
The challenge is a free opportunity for artists to learn acrylic portrait painting through structured lessons and community support. Participants will gain access to a detailed welcome kit and exclusive tutorials that guide them step by step.
By signing up, you will paint along with other artists worldwide and improve your skills in creating realistic portraits.
What’s Included in the Welcome Kit?
When you sign up, you’ll receive a comprehensive welcome kit that contains:
- Overview Guide: A document outlining the challenge’s structure and objectives.
- Supplies List: A detailed list of materials, including brushes, paints, and canvas sizes.
- Palette Layout Guide: Instructions for arranging your paints to ensure optimal color mixing.
- Reference Photo: An 8×10 reference image, along with a gridded version for precise sketching.
- Master Class Schedule: A lesson schedule detailing the topics covered throughout the challenge.
This kit ensures that you are fully prepared to paint alongside the lessons.
How to Sign Up for the Challenge
Signing up for the 2025 Acrylic Portrait Painting Challenge is simple and completely free. Follow these steps:
- Visit the official sign-up page: realisticacrylic.com/acrylic-portrait-painting-challenge.
- Fill out your first and last name, as well as your email address.
- Click the “Send Me the Welcome Kit” button.
- Check your email for the registration confirmation and further instructions.
Once registered, you will receive a downloadable PDF welcome kit. It is recommended to save or print it for easy access during the challenge.
Benefits of Joining the Challenge
- Learn at Your Own Pace: Access seven to eight lessons, covering every step of creating a realistic acrylic portrait.
- Community Support: Join a private Facebook group to connect with other participants, share progress, and seek feedback.
- Step-by-Step Guidance: Follow structured tutorials that simplify complex techniques.
Frequently Asked Questions
Q: Is the challenge free to join?
A: Yes, the challenge is completely free, and you can sign up at any time.
Q: Do I need prior painting experience?
A: No prior experience is required. The lessons cater to artists of all skill levels.
Q: What supplies will I need?
A: A supplies list is included in the welcome kit, detailing brushes, paints, and canvas sizes.
Q: Can I download the welcome kit to my phone?
A: Yes, the PDF file can be downloaded to your phone, tablet, or computer.
Q: Can I access the lessons later if I miss the live session?
A: Yes, the lessons will be available to view on demand.
Q: How can I connect with the artist community?
A: You’ll gain access to an exclusive online group where you can share progress, ask questions, and receive feedback. Join my Facebook Group now: Realistic Acrylic Portraits
Tips for a Successful Challenge Experience
- Save the welcome kit to your device for easy access.
- Print the materials to keep them organized and within reach.
- Participate in the Facebook group for support and motivation.
- Star or mark challenge-related emails as important to avoid missing updates.
- Share the challenge with artist friends to enjoy the experience together.
The 2025 Acrylic Portrait Painting Challenge is your chance to develop your portrait painting skills while enjoying the camaraderie of a supportive artistic community. Signing up is easy, and the welcome kit ensures you are fully prepared to participate.
Join us today and take the first step toward creating a masterpiece. Don’t wait, sign up now and grab the opportunity to transform a blank canvas into a masterpiece. Whether you’re painting to create a heartfelt gift, sharpen your skills, or express yourself. This Free Portrait Painting Challenge is the perfect place to start with.

How to Adjust Highlights in Acrylic Portrait
Master the art of adjusting highlights to bring your acrylic portrait to life
Creating a realistic and detailed acrylic portrait requires more than just mastering the basic painting techniques; it involves careful adjustments of highlights in acrylic to bring depth, dimension, and life to your artwork. If you’re looking to refine your acrylic portrait and enhance the highlights, this guide will help you navigate the process step-by-step.
Adjusting highlights in an acrylic portrait is crucial for achieving the realistic effect you’re aiming for. Whether you are painting a portrait of a loved one or a character, understanding how to refine the highlights can make all the difference. In this guide, you will learn essential techniques that can elevate your acrylic portrait to the next level. With a little patience and practice, you will soon master the art of manipulating light and shadow to create depth and realism.
Step-by-Step Guide to Adjusting Highlights in Your Acrylic Portrait
1. Start with a Smooth Base
To ensure your highlights blend seamlessly into the rest of the portrait, start with a smooth, even base layer. Apply a thin coat of paint over the areas you plan to highlight. This creates a uniform surface that will allow the highlights to settle properly without looking too harsh or out of place.
2. Mix Your Highlight Color
Mixing the right shade for your highlights is key. The transcript shared how titanium white is commonly used for a semi-opaque smoothing layer to adjust highlights, especially when working with delicate features such as the forehead or cheekbones. Mix in small amounts of colors like raw sienna or organic orange to match the natural tones of the skin. Testing the highlight mixture on a white card, as demonstrated, is a smart way to check if the color matches the reference photo or your intended light source.
3. Apply the Highlight Gradually
Rather than applying a thick layer of paint all at once, build the highlight gradually. You can start from the top of the portrait and work your way down, making sure the highlights are softly blended into the shadowed areas. Use a dry brush or a lightly dampened brush to smooth out the paint and ensure a soft transition. As seen in the video, the blending process can significantly improve the gradient between the highlight and surrounding areas.
4. Adjust the Tone and Temperature of the Highlight
Sometimes, your first attempt at adjusting highlights might not match the natural tones of the portrait. Adjusting the temperature of the highlight mixture can create a more realistic effect. I adjusted the highlight by mixing in raw umber and titanium white to create a balance between light and shadow.
5. Blend Highlights into Shadows
After applying the highlights, it is important to blend them with the shadows around them. The blending process will give your portrait a more seamless and three dimensional feel. Use a soft brush to lightly blend the edge of the highlights into the shadow areas to avoid sharp lines, which can make the portrait look unnatural.
6. Enhance and Fine-Tune the Details
Once the highlights have been adjusted, go over them with a light glaze of the base colors to create a more nuanced effect. This method can help tone down any overexposed areas and enhance the subtle lighting effects. Fine-tuning the chin, nose, and other facial features with warm tones and small adjustments will give your portrait a more lifelike appearance.
Tips & Techniques for Adjusting Highlights
- Test Your Mixtures: Always test your paint mixture on a white card to ensure the color is accurate before applying it to your portrait.
- Use Multiple Layers: Don’t rush the process. Multiple thin layers will allow for better control over how the highlights blend with the underlying tones.
- Blend, Blend, Blend: Blending is essential for creating realistic transitions between light and shadow. Use a soft, dry brush to smooth the edges of your highlights into the skin tones.
- Keep Your Palette Moist: Acrylic paint dries quickly, so ensure that your palette is misted with water to prevent it from drying out before you can use it.
Adjusting the highlights in an acrylic portrait is an essential step in creating depth and realism. Through the careful application of highlights and blending techniques, you can enhance your portrait, bringing it closer to life. By following the steps outlined in this guide and using the tips provided, you’ll be able to master the technique of adjusting highlights and make your acrylic portraits truly stand out.
Remember, practice makes perfect, so keep refining your skills and experimenting with different methods. Soon, you’ll have the confidence to apply highlights with ease, creating stunning portraits that capture both light and emotion.
Frequently Asked Questions (FAQ)
Q: What is the best color to use for highlights in an acrylic portrait?
A: Titanium white is the most common color used for highlights, but you can adjust the color by mixing in a small amount of raw sienna, organic orange, or other warm tones to match the subject’s skin tone.
Q: How do I avoid making the highlights too harsh?
A: The key is to apply the highlights gradually and blend them carefully into the surrounding tones. Using a soft brush or a dry brush for blending will help ensure that the highlights appear natural and smooth.
Q: How do I adjust the highlights on the face without losing contrast?
A: Make small adjustments by adding layers of glaze to the highlights. You can darken some areas with raw umber to keep the contrast intact, especially in areas like the chin, cheekbones, and around the eyes.
Q: Can I use highlights to adjust the overall tone of the portrait?
A: Yes! Highlights can be used not only to accentuate the features but also to adjust the overall tone of the portrait. By carefully layering and blending, you can modify the light and shadow dynamics to create more depth and contrast.
LEARN MORE
- Sketching Your Painting Accurately
- Beginning a Pet Portrait in Acrylic
- The Mystery of Realism in Painting
- Apply A Burnt Sienna Glaze to a Portrait
- Learn How to Sketch a Portrait Freehand in 45 Minutes
- Adding highlights to your acrylic painting
- 5 Excellent Reasons to Use Aluminum Foil
- Paint Realistic Wrinkles in Acrylic
- Painting Clothing in an Acrylic Portrait
- Paint a Cloudy Sky Acrylic
- How to add Semi-Opaque Highlights
- How to Enhance the Contrast in Your Acrylic
- How to Add Glaze to Your Acrylic Painting
- Paint Realistic Reflections on Eyeglasses in an Acrylic Portrait
- Build Up Depth on Your Acrylic Portrait Backgrounds
- How Do You Do Layers With the Glazing Technique?
- Learn How to Paint Wrinkles in Acrylic
Read more about how to paint a portrait that you can surely be proud of!
I’d love to hear your thoughts on this video. Please share it with your friends and family. Let me know if you have any further questions. I’ll greatly help you.
If you’d like to learn more, sign up for my free email tips and video class today.
Learn How to Paint Acrylic Portraits With My Free Mini-Video Course!Thank you so much for taking the time to read this tutorial and watch the video. That means a lot to me. I hope you find it very helpful in your portrait painting.
Yours for Better Portraits,

P.S. Did you find this post helpful or encouraging? If so, send it in ahead! Let others know with the share buttons below. I’d love to hear your comments. Thank you so much! Also, do you have a question on acrylic portrait painting you’d like answered? Let me know, and I’d be happy to help!