- You are here:
- Home »
- Blog »
- Video Tutorial »
- How to paint a couple with flowers? Glazing Technique

How to paint a couple with flowers? Glazing Technique

Learn acrylic glazing and paint a stunning couple with floral accents
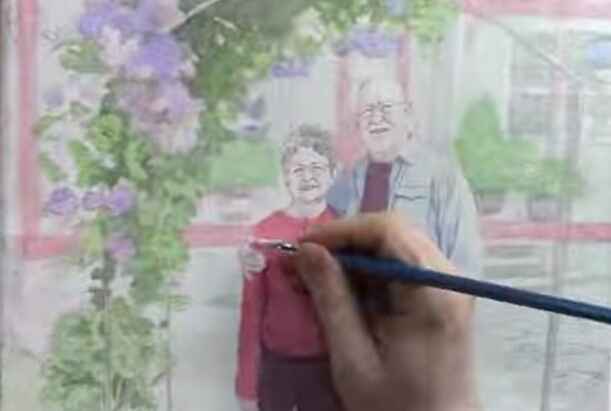
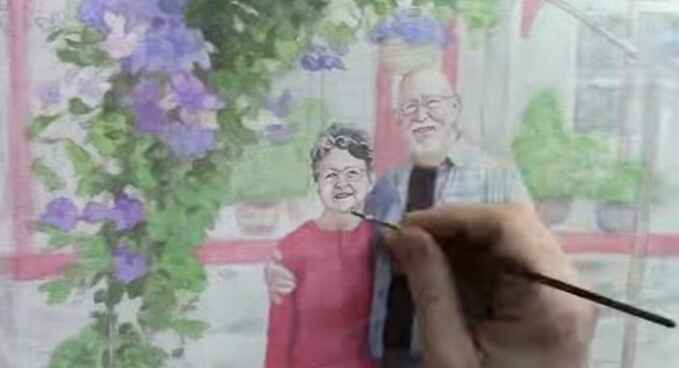
The glazing technique in acrylic painting offers a fantastic way to achieve depth, richness, and subtle transitions in color. In this step-by-step guide, we’ll explore how to paint a couple with flowers using this glazing technique, allowing the details of your sketch to shine through while building up layers of translucent color.
This technique, reminiscent of the Old Masters, is perfect for artists aiming to create lifelike and detailed portraits. Let’s dive into the process and discover how you can elevate your portrait painting skills.
Tips and Techniques
-
Start with a Detailed Sketch: Begin your painting with a highly detailed sketch of the couple and the surrounding flowers. This will serve as the foundation for your glazing layers, ensuring that the fine details remain intact throughout the process.
-
Mixing Your Glazes: For the glazing technique, mix a small amount of acrylic paint with a large amount of matte medium. This will create a translucent layer that allows the underlying sketch to remain visible while gradually building up color and depth.
-
Layering for Depth: Focus on applying multiple thin layers of glaze rather than trying to achieve full coverage in one go. Each layer should add a subtle shift in color, helping to create depth and realism, especially in the shadows and highlights.
-
Color Harmony: Pay attention to the overall color harmony in your painting. You can intensify certain colors by omitting hues that don’t match and enhancing those that do. For example, when painting flowers, use colors that complement the couple’s clothing and the background.
-
Preserve the Highlights: As you work on the shadows and mid-tones, be careful to preserve the highlights. These areas should remain lighter, creating contrast and bringing the portrait to life.
-
Work in Sections: To keep the process fluid and avoid waiting for paint to dry, rotate between different areas of the painting. This way, you can continuously build up the layers without interruption.
-
Final Touches: As you near the completion of the painting, increase the opacity of your glazes slightly. This will allow you to add finer details and enhance the highlights, bringing the portrait to a finished state.
Step-by-Step Process
-
Sketching the Portrait: Begin by sketching the couple and the flowers with as much detail as possible. The more precise your sketch, the easier it will be to apply the glazes while maintaining the integrity of the details.
-
Applying the First Glazes: Start with the facial features and hair, focusing on the darkest areas of contrast. Use a mix of raw umber, ultramarine blue, and alizarine crimson to establish the shadows. Keep the glaze thin and translucent.
-
Building Up the Shadows: Move on to the shadows within the clothing and foliage. For the foliage, mix ultramarine blue, phthalo blue, raw umber, and raw sienna to achieve the desired depth. Continue layering to develop contrast while keeping the mid-tones and highlights intact.
-
Enhancing the Background: As you work on the background, consider the overall color harmony. Introduce reds and darker values that complement the couple’s clothing. This will help to unify the painting and create a cohesive look.
-
Detailing the Flowers: Use hot pink, dioxazine purple, ultramarine blue, and phthalo blue to paint the flowers. Ensure that the colors harmonize with the rest of the portrait, particularly with the clothing and background.
-
Adding Final Details: As you approach the end of the painting, increase the paint-to-medium ratio for more opacity. Focus on refining the shadows, highlights, and fine details, such as the couple’s facial features and the intricate patterns on their clothing.
-
Final Touches: Use a small round brush to add the final highlights and nuances, particularly in the couple’s faces and the flowers. These last layers will bring the portrait to life, adding depth and realism to the overall composition.
This glazing technique is a powerful tool for artists looking to create detailed and vibrant portraits. By carefully layering translucent colors, you can achieve a level of depth and realism that is both striking and unique. Whether you’re painting a commissioned portrait or working on a personal project, this method will help you elevate your acrylic painting skills to new heights. Happy painting!
- Sketching Your Painting Accurately
- Beginning a Pet Portrait in Acrylic
- The Mystery of Realism in Painting
- Apply A Burnt Sienna Glaze to a Portrait
- Learn How to Sketch a Portrait Freehand in 45 Minutes
- Adding highlights to your acrylic painting
- 5 Excellent Reasons to Use Aluminum Foil
- Paint Realistic Wrinkles in Acrylic
- Painting Clothing in an Acrylic Portrait
- Paint a Cloudy Sky Acrylic
- How to add Semi-Opaque Highlights
- How to Enhance the Contrast in Your Acrylic
- How to Add Glaze to Your Acrylic Painting
- Paint Realistic Reflections on Eyeglasses in an Acrylic Portrait
- Build Up Depth on Your Acrylic Portrait Backgrounds
- How Do You Do Layers With the Glazing Technique?
- Learn How to Paint Wrinkles in Acrylic
Read more about how to paint a portrait that you can surely be proud of!
I’d love to hear your thoughts on this video. Please share it with your friends and family. Let me know if you have any further questions. I’ll greatly help you.
If you’d like to learn more, sign up for my free email tips and video class today.
Learn How to Paint Acrylic Portraits With My Free Mini-Video Course!
Thank you so much for taking the time to read this tutorial and watch the video. That means a lot to me. I hope you find it very helpful in your portrait painting.
Yours for Better Portraits,

P.S. Did you find this post helpful or encouraging? If so, send it in ahead! Let others know with the share buttons below. I’d love to hear your comments. Thank you so much! Also, do you have a question on acrylic portrait painting you’d like answered? Let me know, and I’d be happy to help!
